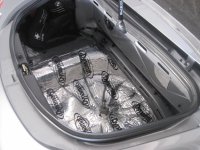
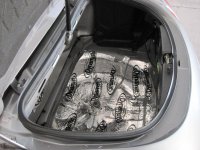
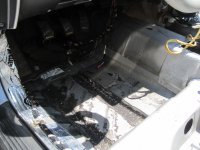
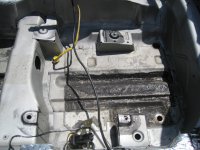
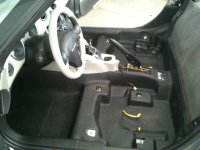
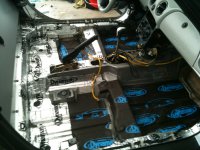
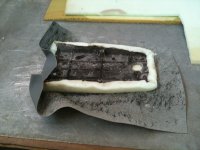
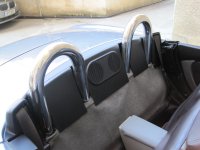
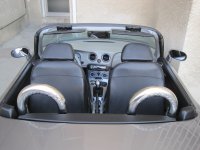
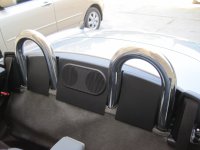
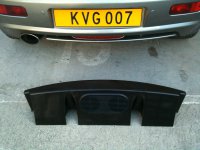
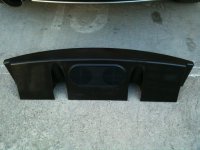
Styling KC3 Project Silver

Currently reading:
Styling KC3 Project Silver

Some info from another thread.
The 1.8 16V Hitachi ECU mounted on Intake manifold can be also tuned.

You should have proper tooling of course to connect to that ecu. My experiences are that may companies claims that they can, but in reality they cannot due to the tooling.

I did some research and foud, that this Hitachi ECU is based on Renesas SH7055 microcomputer.
If you do some further reserch you can find, that many Japanese car have similar ECU, so the Specialist on japanese ECU/cars is the way to go (if he had drivers for fiat ECU)

However italian company Alientech offers tool J-Tag wich can communicate with this ECU and via it the ECU can be reprogrammed http://www.alientechtuningtools.com/...enesas-sh705x/

Only thing wich I don´t like on J-Tag ist the fact that companies wich probably own it works only with ECM 2001 or newer version wich is total scrappy tuning tool for proper remap...
 
hey KC, that is impressive!!!!! with my ecu(mk2) had the same problem with the bmc!!! didnt work at all.
I hope after the reprogramming you will see the results you expected.
Also i have to add tha the torque curve is not so good before 4000rpm...and that is BMC's fault.......

Next time I go on the Dyno I will take the GSR kit and compare. (y)
 
Your car's looking great KC3 and some of your mods sound great. I've always fancied a 200hp naturally aspirated engine in my b.

A couple of observations:

From what I can see in the pictures I think your 'ram air' induction will not work well and will actually reduce power and 'strangle' the engine in 90% of real-world driving situations by actually reducing the amount of air available. Am I missing something?

Since Horsepower = Torque x RPM/5252, all dyno graph torque and HP curves should cross at 5252rpm. As yours don't there is some doubt about the accuracy of the graphs.

There are huge differences between dynos so ultimately figures from different dynos, possibly different makes, on different days with different operators and without enough information to see if they are run in the correct mode are fairly worthless.

I suggest you use the same RR for all before/after comparisons and ignore the numbers to a large degree.
 
Last edited:
Hiya!
I,m not to versed in the Technical side of the map measurements but now I,m living in Cyprus there are only a few select Dyno's and the one I visit is a Mustang Dyno road, Said to be one of the best and most accurate, although the measurements taken here in Cyprus are whp (Wheel Horse Power) where as my other dyno runs in the UK were calculated Flywheel measures.

My last run was 127whp.
I,m going in for a remap next week so hope the map will be improved further.
I,m still on the same map I had while in UK but have lots of changes since then.

Does anyone know the correct formula for converting whp to engine hp or vise versa.
I.ve been told different values, here in Cy I,ve been told to times whp by 1.14 to give engine hp, others 1.2 and My UK engine builder calculates it by engine Hp with approx average 18% loss to wheels.
Somehow he worked out my engine hp to be 150.6hp

ANYONE!
 
Last edited:
That's just the thing Kiry, and backs up what I said. There is no 'correct' formula. There are too many variables and you'll get different answers from different people.

Your dyno operator should do a 'coast down' on the rolling road to work out the most reliable flywheel figure but it's still just a figure, it doesn't matter what it is.

Dyno curves tell you a lot more than that, and allow you to map for driveability and optimum performance… if the curves are drawn accurately. As I say, your graph tells you nothing particularly useful as the rpm axis can't be correct. This may be because parameters are different for torque and hp (as shown in the power/torque axis) but unless you can reliably see from the graph what is happening at various points of the rev range it tells you very little.

As I say, if the curves don't cross at 5250rpm the tuner will struggle to map the engine accurately as he can't tell where the peaks and troughs of power and torque fall in the rev range.

Don't fall into the trap of chasing a pub-bragging number on an inaccurate dyno. Build a smooth, strong and driveable engine and ignore the numbers. A well built and set up 150hp motor will be quicker from point to point and more pleasant to drive than a badly set up 170hp one!
 
OK! Yes! Thanks for your input,
I do want the best results and between my engine builder and the dyno tuner, I,m sure we'l get it right.

I Know he tunes some of the best performance cars in Cyprus so I am in good hands. :)

The head is being prepped and flow tested in the UK and then my nephew will put it together over here.
 
Over the last few days I have been adding some sound proofing to the B's rear boot area and its made such a difference to eliminating road noise and vibrations that I decided to relay the complete floor area.

Its been quite a task, with having to remove all the interior again,
then deciding it would be best to remove the old sound deadening sheets that have aged and not working as best.

There is a choice of different dynamat materials dependent on which areas are to be covered although all are designed to eliminate sound/vibrations unwanted road and engine noise.

The new Dynamat (ORIGINAL) is a 3/4mm thick tar type material and fantastic sound/vibration absorber and much like the original pads laid although now I have covered the whole area will do a much better job.
I had to clean back the areas back to metal to gain a good bond, and then the new dynamat is laid, The material needs to be heated with a hair dryer to allow it to soften and mold to the floors shape and then it sticks and gradually hardens to it .
The dynamat (EXTREME) is much easier to lay as its a soft pliable sticky material that can mould around the cars curves and shape. You just cut roughly the shape required, remove the backing and stick it down using a small rubber roller or any other soft backed tool.
This helps to eliminate any air bubbles and create a good bond.

The Dynaliner is a grey/ sticky foam material which is used in area's like the bonnet/ boot and speaker enclosures. Its helps with heat soak and reduces noise/vibrations. I have used this on my bonnet and the rear boot and also laid this in the area where the space is by the fuel tank, in preparation for a subwoofer.
Here's some pictures of the progress so far.
 

Attachments

  • IMG_3264.JPG
    IMG_3264.JPG
    582.1 KB · Views: 49
  • IMG_3266.JPG
    IMG_3266.JPG
    569.9 KB · Views: 48
  • IMG_3276.JPG
    IMG_3276.JPG
    453.1 KB · Views: 48
  • IMG_3277.JPG
    IMG_3277.JPG
    549.8 KB · Views: 43
  • IMG_3284.JPG
    IMG_3284.JPG
    585.3 KB · Views: 49
  • IMG_3291.JPG
    IMG_3291.JPG
    481.1 KB · Views: 55
  • IMG_3289.JPG
    IMG_3289.JPG
    553.2 KB · Views: 59
  • IMG_3288.JPG
    IMG_3288.JPG
    593.7 KB · Views: 45
  • IMG_3286.JPG
    IMG_3286.JPG
    612.3 KB · Views: 46
  • IMG_3285.JPG
    IMG_3285.JPG
    535.2 KB · Views: 56
Last edited:
Some more progress and pictures.
After speaking and receiving help with a friend who does sound installations. He told me leaving the Dynamat original out in the sun helps it to soften and become sticky and then easier to lay.
So now covered the entire floor area and sides and also installed the extreme in any small cavities of the rear wings and wheel arches, now tapping on these areas all around the vehicle feels so dense and more like solid wood than a tinny metal sound. :D
 

Attachments

  • IMG_3292.JPG
    IMG_3292.JPG
    537.5 KB · Views: 46
  • IMG_3282.JPG
    IMG_3282.JPG
    493.8 KB · Views: 36
  • IMG_3280.JPG
    IMG_3280.JPG
    511.4 KB · Views: 42
  • IMG_3281.JPG
    IMG_3281.JPG
    571.9 KB · Views: 45
  • IMG_3300.JPG
    IMG_3300.JPG
    635.6 KB · Views: 46
  • IMG_3297.JPG
    IMG_3297.JPG
    546 KB · Views: 48
  • IMG_3296.JPG
    IMG_3296.JPG
    595.4 KB · Views: 41
  • IMG_3287.JPG
    IMG_3287.JPG
    472.7 KB · Views: 35
  • IMG_3283.JPG
    IMG_3283.JPG
    561 KB · Views: 46
  • IMG_3304.JPG
    IMG_3304.JPG
    630.7 KB · Views: 48
  • IMG_3305.JPG
    IMG_3305.JPG
    657.8 KB · Views: 47
Put the B back together today and WOW! what a difference. :D
The ride feels so more solid and quiet. Even over rough terrain any previous noises/vibrations have vanished, even my fuel pump winning has gone.
The front stereo sound has improved further and now looking forward to fitting my new custom built system with rear speakers and subwoofer.

Pictures to follow as and when I do the work.. (y)
 
For those that wonder where the Barchetta drain holes are for the floor area, I took some photos to show.
 

Attachments

  • IMG_1721.JPG
    IMG_1721.JPG
    1.1 MB · Views: 49
  • IMG_1718.JPG
    IMG_1718.JPG
    1.1 MB · Views: 48
  • IMG_1717.JPG
    IMG_1717.JPG
    1.2 MB · Views: 47
  • IMG_1716.JPG
    IMG_1716.JPG
    1.1 MB · Views: 45
  • IMG_1714.JPG
    IMG_1714.JPG
    1.4 MB · Views: 69
  • IMG_1722.JPG
    IMG_1722.JPG
    1.1 MB · Views: 54
Looking great KC.

I've taken the interiour so much times now I actually are getting the hang of it.
It's a lot of work, but heck I suppose you, just like me love the working on her as much as driving her :)
 
  • Thanks
Reactions: KC3
I now know every inch of the Barchetta and could strip it down any time. :D
and at least its a much better vehicle than first manufactured.

I've started working on the rear sound, and decided to cut into the original subwoofer, it still a working prototype but hear is progress so far.

And also had an idea to pad the armrest to make it more comfortable to lean on and dress it with leather.
IMG_1731.JPG

IMG_1734.JPG

IMG_1735.JPG

IMG_1740.JPG

IMG_1743.JPG
 

Attachments

  • IMG_1751.JPG
    IMG_1751.JPG
    1.3 MB · Views: 31
  • IMG_0916.JPG
    IMG_0916.JPG
    1.1 MB · Views: 37
  • IMG_1728.JPG
    IMG_1728.JPG
    1.1 MB · Views: 33
  • IMG_1729.JPG
    IMG_1729.JPG
    1.2 MB · Views: 39
Some more progress to the rear speaker system.

I've just managed to squeeze the subbox in between the rollbars by just cutting into the front section where the bars lye and I will tidy the whole thing up and seal the open ends with fibreglass.

When finished should look like the original manufactured part. :D
 

Attachments

  • IMG_3331.JPG
    IMG_3331.JPG
    412.6 KB · Views: 27
  • IMG_3330.JPG
    IMG_3330.JPG
    411.4 KB · Views: 28
  • IMG_3329.JPG
    IMG_3329.JPG
    366 KB · Views: 30
  • IMG_3316.JPG
    IMG_3316.JPG
    500.8 KB · Views: 36
  • IMG_3314.JPG
    IMG_3314.JPG
    503.2 KB · Views: 26
  • IMG_3340.JPG
    IMG_3340.JPG
    409.4 KB · Views: 35
  • IMG_3338.JPG
    IMG_3338.JPG
    310.3 KB · Views: 25
  • IMG_3336.JPG
    IMG_3336.JPG
    467.1 KB · Views: 30
Last edited:
Looking great KC.

I've taken the interiour so much times now I actually are getting the hang of it.
It's a lot of work, but heck I suppose you, just like me love the working on her as much as driving her :)

Oli,

I have just one question, where does the yellow wire plug into up by the dash, its still the only wire I have not been able to detect. I had another look the other day and still could not find it.

Its for the airbags and must be the other end of the wires that come from under the seats.
 

Attachments

  • dash wires.jpg
    dash wires.jpg
    1.5 MB · Views: 43
If i'm not mistaken on the left side of the cabin you have 2 wires from airbag (yellow)

-one for the airbag (on top of steering stalk)
-one on the floor pan for the left seat.

Other ones are passenger airbag (if you don't have one it has a resistor on it)
passenger seat
airbag cable to connect with a computer
they all should go to the airbag ecu

And there should be one that is connected to the wiring harness to show up the airbag light in your speedo.
I think it is that one, but don't know exacly where it goes out of the blue

edit: if you have a late model with passenger airbag one is going to the glove box in between te seats (to disarm the passenger airbag)
 
Last edited:
Some more progress with the roll bar speaker box.:)
I found some matching pipe to create some channels around the bars which were then cut to size.
I then glued them in place with the box in fitted so as to get the correct shape.
Once set I removed the box and went to work on filling the gaps with fiberglass resin, this will give more structural strength and give the unit the new roll bar fit look.
The final touch will to be spray a plastic coat primer and then some black spray for the finished project. :D
 

Attachments

  • IMG_3357.JPG
    IMG_3357.JPG
    506.5 KB · Views: 33
  • IMG_3354.JPG
    IMG_3354.JPG
    385 KB · Views: 31
  • IMG_3352.JPG
    IMG_3352.JPG
    520.1 KB · Views: 33
  • IMG_3349.JPG
    IMG_3349.JPG
    418.4 KB · Views: 29
  • IMG_3346.JPG
    IMG_3346.JPG
    326.8 KB · Views: 24
  • IMG_3358.JPG
    IMG_3358.JPG
    403 KB · Views: 27
  • IMG_3361.JPG
    IMG_3361.JPG
    416.8 KB · Views: 25
  • IMG_3362.JPG
    IMG_3362.JPG
    350.5 KB · Views: 26
Back
Top