Technical Fiat 500 buying advice - twinair

Currently reading:
Technical Fiat 500 buying advice - twinair

I've been looking at that new bumper but not sure what to do about the lack of the black section at the bottom. I took a close look at mine today and it's actually all the same piece of plastic as far as I can tell. I'll get a photo tomorrow - hoping the weather will hold so I can get that slam panel off and get a better look at the upper rails. The subframe is definitely perfect, the damage to the lower crash bar was absolutely minimal - the tubular section squashed and moved up a bit, but it still sits perfectly flat on the ground.

I do have a rivet gun but I think it might only suit smaller rivets - do you know how many mm they are? I'll need to buy locator pins unless I get a used panel with them on, at least one of mine is broken.


I’ll take a picture and measure the rivets I use tomorrow but they’re not massive ones. If you have trouble finding a replacement locator pin message Club500italia on eBay, they’ll sort you some out. I did have a pile of ones I’ve salvaged from front panels but my supply has depleted recently.
 
IMG_0513.JPG
55mm total length. Diameter of round bit is 13mm
 
I bought a twinair slam panel / crash bars / radiator pack on ebay, got dad to help me pick it up as I don't own anything it would have fit in the boot of. When I got back I unfortunately noticed some damage - one of the brackets the intercooler fits in with rubber bungs has broken free from the slam panel - I assume this is supposed to be welded on? Trying to find someone who could maybe weld it without me having to remove the intercooler. Option 2 is drilling through the box section and using nut & bolt to secure it. It's all from an older car and seems to have 2 horns - did some of these have a 2-tone at some point? Also noticed the middle lug on the crash bar polystyrene has broken, I'll probably cable tie it for stability. I did get it for £20 less but it's a shame about that bracket. The intercooler was also full of oil just like mine, so this seems a common thing.

Also had time today to repair the headlamps - I've created a set of pictures for each lug in case anyone is a bit lost like I was at first. When doing the second one I found one of the screw holes hadn't been pre drilled, of course the one you can't get at easily with a drill. I ended up going to a local tool shop and buying a 15mm long 3mm bit so it could be drilled straight. Used a dremel with a standard cutting wheel to remove the excess plastic, not the prettiest but it did the job.

Added a photo of the bumper too - the black and red parts are the same piece of plastic as far as I can tell from the back, confused.
 

Attachments

  • fiat_day2_1.jpg
    fiat_day2_1.jpg
    456.5 KB · Views: 70
  • fiat_day2_2.jpg
    fiat_day2_2.jpg
    304.9 KB · Views: 59
  • fiat_day2_3.jpg
    fiat_day2_3.jpg
    341.6 KB · Views: 78
  • fiat_day2_4.jpg
    fiat_day2_4.jpg
    383.5 KB · Views: 76
  • fiat_day2_5.jpg
    fiat_day2_5.jpg
    364.7 KB · Views: 64
  • fiat_day2_10.jpg
    fiat_day2_10.jpg
    315.4 KB · Views: 71
  • fiat_day2_9.jpg
    fiat_day2_9.jpg
    295.5 KB · Views: 70
  • fiat_day2_8.jpg
    fiat_day2_8.jpg
    335.8 KB · Views: 50
  • fiat_day2_7.jpg
    fiat_day2_7.jpg
    335.5 KB · Views: 73
  • fiat_day2_6.jpg
    fiat_day2_6.jpg
    403.3 KB · Views: 145
  • bumperblack.jpg
    bumperblack.jpg
    680.6 KB · Views: 61
  • fiat_day2_11.jpg
    fiat_day2_11.jpg
    445.4 KB · Views: 77
Yeah that's what I was thinking - but the new bumpers on ebay are all seem to be painted a single colour so I might have to hold out for an original one. The texture is slightly different too. I'll ask one of the sellers and see if they can mask that off when doing one.
 
Didn't get too much done today, but:

- Fixed the air cleaner mounting nut which had stripped from the hole - now fixed in place with Araldite, that won't be going anywhere.
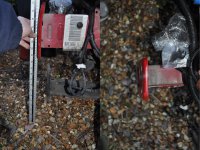
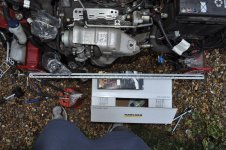
- Measured all the hoses where clips need replacing to make a shopping list
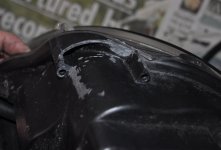
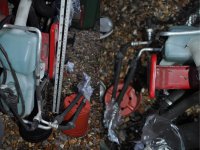
- Removed the bent slam panel, stripped it of parts, happy to find the brackets bolt on which means I probably don't need to get the new one with the unattached bracket on the intercooler welded - the bolt is probably missing or sheared.

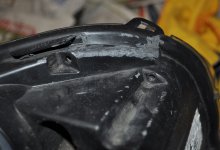
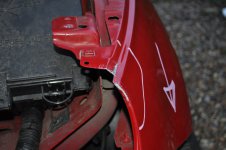
- Straightened up the passenger wing which appeared to have very minor bending to the inner edge.
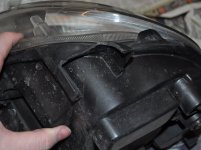
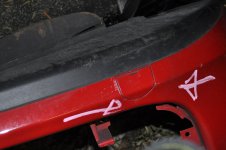
- Removed the riveted in bumper clips from the wings & painted the hole edges.


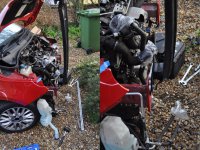
I am starting to wonder if the wings are both bent outwards a bit from the correct curve where the headlamps shunted upwards into them - the bonnet doesn't like up properly at all width ways, but then the bonnet is crumpled and sits back by at least 5mm anyway and not a great guide. If you look at the picture of the straightened one you can see it's been yanked outwards a bit from where it was when painted - see the clip location. I think all I can do here is fix the bonnet hinges, get an unbent bonnet and see where things sit and how much adjustment is available just loosening bolts and 'encouraging' it a little.

Could someone help with a close up photo of the wing with the bonnet open where it sits next to the headlight please so I can check what I've done so far?

Some good news on the upper rails as hinted at above - I've got a spot on measurement across the outer holes width ways and it's the welded on flanges which are bent rather than the box sections - plan is to remove the battery tray (which needs straightening anyway) and the washer bottle and having a go at them with a big hammer until they're 'close enough'. A very small amount out of place doesn't look like it will make much difference to bumper fitting accuracy as there's loads of room to adjust with the bumper bolts etc. Weld may be damaged on one edge of driver side flange - some paint had cracked away where it bent, need to take a better look at this and potentially get the weld ground back and redone.


New undertray arrived - wish they'd mentioned it still has a crack but it's definitely much better than what I have and I'll be resolving the crack with a plastic stapler. New driving lamps, bumper clips, hinges all here too.

Should I replace the hoses all those clamps came off or leave them? The outer rubber surface isn't broken but still bears the marks of the overly tight clamping. Going to shop for clips and an air filter tommorrow, and a BIG can of paraffin or similar as I've read it's good stuff to clean out intercoolers with.
 

Attachments

  • fiat_day3_1.jpg
    fiat_day3_1.jpg
    1.2 MB · Views: 66
  • fiat_day3_2.jpg
    fiat_day3_2.jpg
    705.7 KB · Views: 52
  • fiat_day3_3.jpg
    fiat_day3_3.jpg
    889.8 KB · Views: 76
  • fiat_day3_4.jpg
    fiat_day3_4.jpg
    1.5 MB · Views: 76
  • fiat_day3_5.jpg
    fiat_day3_5.jpg
    1.7 MB · Views: 72
I’ve never, ever got a bonnet perfect. I try and avoid replacing hinges as even if they are slightly bent you need to get the bolts in the exact place on the car. A bit of manipulating of the springy bonnet ends once the bonnet is on will help.

Once you have the bonnet on and closed you can adjust the in and out of the wings by loosening the 10mm nut under the tip where the front panel bolts down and the first bolt half way along. That gives you a few mm each way for adjustment. It’s easier if you do that with the headlights out.
 
Last edited:
My hinges are bent enough that the bonnet damages the windscreen pillar, when closed it sits about 5mm too high and too far back, worst on driver side. I don't think I have any option other than replacing it, plan was to line up the new ones using the paint as a guide.

Still not found bumper/bonnet, that's proving difficult as painting is expensive and so are new painted ones - it'd be £400 for the pair that way.
 
Another day where I got up too late and didn't do as much as planned.

* Removed & straightened out the battery tray.
* Straightened the rail flanges.

The flanges are not perfect. I tried the hammer method and it took ages to achieve anything and I ended up with a lot of glancing hammer blows leaving marks here and there on the frame paint, and it started to round the edges of the flange. There's a slight convex curve in both of them on the left side which would need some kind of massive clamp bar to force out.

However - I did find a solution! Took the old upper crash bar and used it as a giant bolted on lever - it did bend just as much as the flanges did but it lasted long enough to do the job. I've uploaded photos of the current state, while the curve can't be completely removed I do have straight bolt holes from left to right on the lower and upper hole sets, so I think I'm good to go with attaching the slam panel.

I'm going to strip the panel so I can clean it and the various parts up, it should be interesting to see how well it lines up.
 

Attachments

  • fiat_day4_1.jpg
    fiat_day4_1.jpg
    1.9 MB · Views: 84
  • fiat_day4_2.jpg
    fiat_day4_2.jpg
    621.4 KB · Views: 79
  • fiat_day4_3.jpg
    fiat_day4_3.jpg
    695.4 KB · Views: 59
  • fiat_day4_4.jpg
    fiat_day4_4.jpg
    753.6 KB · Views: 83
  • fiat_day4_5.jpg
    fiat_day4_5.jpg
    711 KB · Views: 69
  • fiat_day4_6.jpg
    fiat_day4_6.jpg
    1,015.1 KB · Views: 55
  • fiat_day4_7.jpg
    fiat_day4_7.jpg
    995 KB · Views: 35
Looks good to me. It’s more getting the holes lined up on both sides so it’s perfectly straight. If it’s not you get an uneven gap when the bonnet is closed. Use a trolley jack in the middle of the front panel and look through the holes in the panel to make sure they are equally lined up.
 
Do you mean vertically or depth? I'm pretty sure L/R are spot on as I still have the 945mm at the holes. I'll see if I can find the time to strip the new slam panel tomorrow for a quick test fit.

Next weekend weather permitting is going to be the bonnet hinges, doesn't look fun - I'm guessing the wipers have to come off to get that plastic scuttle panel out of the way? Front two bolts look easy but one is buried at the back.

Edit - nvm I worked out what you mean. I'll see if I can do it with the scissor jack, my trolley is a giant 3 tonne thing I keep at a storage depot with my American car.
 
Last edited:
Do you mean vertically or depth? I'm pretty sure L/R are spot on as I still have the 945mm at the holes. I'll see if I can find the time to strip the new slam panel tomorrow for a quick test fit.

Next weekend weather permitting is going to be the bonnet hinges, doesn't look fun - I'm guessing the wipers have to come off to get that plastic scuttle panel out of the way? Front two bolts look easy but one is buried at the back.

Edit - nvm I worked out what you mean. I'll see if I can do it with the scissor jack, my trolley is a giant 3 tonne thing I keep at a storage depot with my American car.


Yes, vertically. Also if it’s too low you won’t be able to close the bonnet.

You don’t need to take anything off to do the hinges. You will just have to use a spanner on the nut at the back as you can’t get a socket in there. As you suggested spray some paint to make a mask where the new hinges go.

Personally I hardly ever change hinges. They can be manipulated enough to adjust the bonnet. Top tip is put a block of wood between where the hinge closes then push and bounce it gently a bit and it will adjust it for you. Professional showed me that trick. Where it’s pushed back, that will adjust it forwards and up and down.
 
This post contains affiliate links which may earn a commission at no additional cost to you.
Do you know if the stuff from carpanels.com is any good? It's proving harder than expected to find a red bonnet despite Fiat making about 300000 of them. I'm tempted to try to do one myself with rattle cans.

I found these:
https://www.carpanels.com/parts/fiat/500/hatchback/961/?category=BONNETS
https://www.ebay.co.uk/itm/FIAT-500...INSURANCE-QUALITY-ready-to-paint/321988144156


I’m not familiar with that company but I’ve had no problem with Prasco wings or bonnets. There are places around that will supply them painted to code. Not ideal especially with red but I certainly wouldn’t attempt spraying one with cans. I leave painting like that to the pros.

One will turn up, I nearly always find what I’m after eventually. I had a 94 mile trip to Bedford to get a white one last week as there were none locally. Sometimes you just have to travel.

Incidentally those ads that say they are primed are misleading. They are not primed. You would be better off getting a different colour original and having it painted.
 
Last edited:
This post contains affiliate links which may earn a commission at no additional cost to you.
Unfortunately a 350 mile round trip so a good £50+ in fuel and a very long day on the road, I don't really like spending money on temporary parts - not sure that one is fixable. I'll ask him for more photos. Surprised they're all telling fibs about bonnets being primed! I wonder if it's worth investing in a cheap HVLP spray gun.

Just stripped the new slam panel over lunch - nothing broken, the brackets and fitting screws are all corroded quite badly but the ones that came off my bent panel are in great shape. Test fit after work :)
 
The black coating is just a protective coating not primer.

I did don’t realise Manchester was so far from you. It would definately be cheaper and better to buy a good original bonnet in another colour and taking it to a bodyshop to paint to code. I pay £120 for that.
 
Back
Top