Technical Thermostat video?

Currently reading:
Technical Thermostat video?

jayartibee

Member
Joined
Oct 18, 2019
Messages
26
Points
61
Hi - is there a video or instructable anywhere to help with replacing the 'Stat on a 1.1 Active?

Ours is stuck open/leaking - top hose warms up way too early. And we had the coolant temp circuit code.

Job seems like a bugger as it is under the coil block
 

You can leave the coils connect and undo the plate and move them out of the way

It can be done without. Being a 1.1 I would advise you not to move the wiring as much as possible and struggle without moving them out of the way


Just use a phone camera or similar to check the mating surface is clean


You will probably need some hose clamps as well if it’s not been off before

Make sure you order the correct part. There’s two types depending on year and engine. The look completely different though.
 
I don't think the later thermostat was ever fitted to the 1.1? So it's likely to be this one: https://www.shop4parts.co.uk/?name=store&op=Product&ProdID=470 It actually fits the 60Hp 1.2 as well (ours is a 2010 60Hp 1.2 and that's the one which fits it) In fact I bought the Original Birth branded item from S4p - as part of a larger order so I could take advantage of the forum discount - I think the item with the sensor and heater takeoff pipe came in with the 69Hp VVT engine?

I did our 1.2 by removing the coils for better access. I'd read that it's recommended to remove the battery and battery tray for access but was keen to avoid disconnecting the battery in case the battery code was lost or "other problems" came about. However I'd since read, here on our wonderful forum, that the radio code is stored in the body ECU so, as long as you keep the original fit radio, if you disconnect the battery it will automatically recognize the radio when you reconnect the battery and this is true for both our cars which have had their batteries disconnected a number of times by me when working on them - we have a 2010 1.2 Panda and a 2012 1.4 Punto in the family at this time. HOWEVER, As koalar suggests above, you are as well not to disturb wiring any more than needed, especially on the 1.1, which is known to be rather susceptible to continuity problems in the wiring to the coils so, in your particular case, probably removing the battery and tray and leaving the coils alone might be the way to go? However I've not done this job on a 1.1 so maybe someone else could advise?

Thermostat failure is something I've had on pretty much all the FIRE engined Fiats we've run - resulting in cold running of the engine - fit a new thermostat and all good again for a few years. Keep one of these cars long enough and you'll almost certainly be going to do a thermostat on it!

There have been reports of problems experienced when trying to bleed the cooling system when filling up with coolant. I've never had this problem but I do have my own wee way of doing it. If it interests you you can have a read about it here: https://www.fiatforum.com/threads/beckys-timing-belt-all-done.459967/

Please feel free to ask anything you like as I'm sure quite a few of us will have done this job and have our own take on how best to do it. A reasonable tool kit with maybe some 3/8 drive sockets and extensions helps a lot.
 
The thermostat in the link above does not mention if it comes with the gasket

Unless I have missed some obvious


My local motor factors always comes with a new gasket

If you syphon a bit out of the header tank you will not loose much antifreeze
 
The thermostat in the link above does not mention if it comes with the gasket

Unless I have missed some obvious


My local motor factors always comes with a new gasket

If you syphon a bit out of the header tank you will not loose much antifreeze
Good point that, about the gasket I mean. The genuine FCA item doesn't have the gasket included and you'll see S4p list it separately. The Original Birth came with a gasket in the box. I wondered about whether to buy a gasket or not before buying and rang Mick at S4p for his advice which was when I learned a bout this. Like you, I've found ones from my local factor - for almost any make of vehicle - seem to come with a gasket in the box. Which is a good thing because I think £5.76p is a bit steep for a wee gasket? https://www.shop4parts.co.uk/?name=store&op=Product&ProdID=6243 Even more from the dealer. The genuine FCA thermostat is steep enough when compared to the original birth item with out adding insult to injury by charging that for a gasket over and above? : https://www.shop4parts.co.uk/?name=store&op=Product&ProdID=470

I'd never heard of Original Birth (after a lifetime in and around the motor trade) before I started buying from S4p and was a little unsure when I bought the first thing of that brand - which was the metal cooling pipe which runs along the front of the engine - However I've found quality to be excellent and have had absolutely no problems and find the parts fit nicely too.
 
Maybe I should say, after extolling the virtues of S4p above, that I have no connections with them at all but I am quite a fan. They have never supplied me with anything which isn't of good quality - even if a lot of it is names I've never bought before. I believe a lot of their stuff is directly sourced from Italy which probably explains the unknown brand names. I've rung them on quite a number of occasions asking advice on parts and have always found them very helpful and pleasant to talk with - No high pressure sales here. I'm sure they would be very happy to give advice to anyone even if you ended up not buying from them. By the way they can help with a lot of other stuff not listed on their website and they don't list everything available for every vehicle on that actual model's web page. So if you can't see it it doesn't mean they don't have it!
 
When I did Becky's (2010 1.2 Panda 60Hp) I don't remember splitting the support bracket for the coils like he does in this video? Anyway, I removed the whole lot including the aluminium bracket he leaves behind. If I remember it's held on by just 3 M6 bolts (so Metric 10 socket) and the bolt at the bottom is done by feel with an extension on either a 3/8 or 1/4 drive and ratchet as it's only visible with a mirror. This sounds daunting but in the event, if you know that bolt is under the bracket at the bottom (look in a mirror) then it's easy enough to feel what you are doing. Once the whole coil pack is out of the way getting at the thermostat is a "walk in the park" and cleaning up the mating face on the head becomes very easy.

If you do it this way then it's worth noting that the aluminium bracket also acts as a closing plate for the hole in the end of the cam cover/head where the distributor drive was for the first versions of the FIRE engine. This isn't a problem but you might want to buy a new O ring seal for when you put it back together. I hadn't thought about this when I did mine. I didn't have an O ring which would fit in my universal kit so I waited 'till the Monday and rang the dealer who told me it would have to be ordered specially and they would give me an estimated delivery time if I ordered one. I decided to reuse the old seal - which looked Okish and still quite pliable, cleaned up the casing with brake cleaner and applied a light smear of my favourite Loctlte SI 5980. Now, several years later, there's no signs of any leaks. I think you could probably fit the thermostat without a gasket just using this sealant and it would be fine.

Once you get stuck in you'll probably find this is not too difficult a job, definitely one of the more manageable "serious DIY" panda tasks. Good luck.
 
Yes the plate come off complete and you can move the whole lot aside without disconnecting the connectors

Not needed and not worth the risk in my opinion on a 1.1 with their temperamental wiring

It only gives you better visibility for cleaning the matting surface but the job can be completed without touching anything other than the thermostat housing, battery and trays
 
It only gives you better visibility for cleaning the matting surface but the job can be completed without touching anything other than the thermostat housing, battery and trays
That's all I removed when I did mine. Disconnect and take out the battery, leave the ECU attached to its carrier bracket, unbolt the bracket from the battery tray, unclip the wiring without breaking any connections and move the ECU and its attached wiring aside. This gives you enough clearance to remove the battery tray, after which the thermostat housing is easily accessed. If you syphon the coolant out, you only need to remove the hose on the thermostat housing; there's no need to disturb the bottom hose.
 
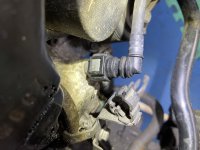
Does anyone know how to open these couplings without breaking anything? There’s a square button on each side (two opposite each other). I’ve tried a gentle squeeze with pliers but nothing happens. What’s the tip for safely removing it?
The image is onto the thermostat. The coupling is free to turn so it’s presumably connected to a male pipe on the ‘stat end.
 

Attachments

  • 9ADB348F-5D51-4EB6-89BD-D8FD721512BE.jpeg
    9ADB348F-5D51-4EB6-89BD-D8FD721512BE.jpeg
    2.8 MB · Views: 36
Does anyone know how to open these couplings without breaking anything? There’s a square button on each side (two opposite each other). I’ve tried a gentle squeeze with pliers but nothing happens. What’s the tip for safely removing it?
The image is onto the thermostat. The coupling is free to turn so it’s presumably connected to a male pipe on the ‘stat end

Looks like a standard quick fit connector

Normally just push with your finger and thumb on the two rectangle button while twisting and pulling

Sometimes you have twist and push first
 
I found this on line.
I unscrewed the male fitting from thermostat. I still can’t get the (allegedly) QD connector to disconnect. The push buttons hardly move so you get no idea if the clips have released.
Why do Fiat insist on using this sh*t?
 
It’s a standard fitting used in millions of applications

Never had one fail

If the buttons will not push in easy the pressure has forced it tight up the tapper. You need to push it further on first. Not sure using pliers is a good idea.

 
It’s a standard fitting used in millions of applications

Never had one fail

If the buttons will not push in easy the pressure has forced it tight up the tapper. You need to push it further on first. Not sure using pliers is a good idea.


good video koalar - I like that one.
 
If the buttons will not push in easy the pressure has forced it tight up the tapper. You need to push it further on first. Not sure using pliers is a good idea.


Yes, first try pushing it onto the pipe a bit. Some of these lines carry quite a lot of pressure these days - My Ibiza pumps 6.6 bar from the tank up to the high pressure pump for the DI system on the engine. Many of these clips are retainers which just keep the connector on the pipe, the fluid seal is achieved by an internal O ring type seal. Pressure in the line is trying to force the connector off the pipe which is prevented from happening by the retaining clip. This effect tends to jam the retaining clip so if you push the connector further on to the pipe this often releases this locking effect and allows much easier release of the clip. I think the clips get broken because when people find it's not releasing by "finger power" they don't engage the "little grey cells", reach for the long nose pliers and apply forces the plastic was never designed to resist. Pushing it a little further onto the pipe, perhaps with a wee bit of twisting too, helps to let some fuel lubricate the rubber seal which eases things even further.
 
Back
Top