panda.jpg

Panda Panda 100HP project (cooperman style!)

Introduction

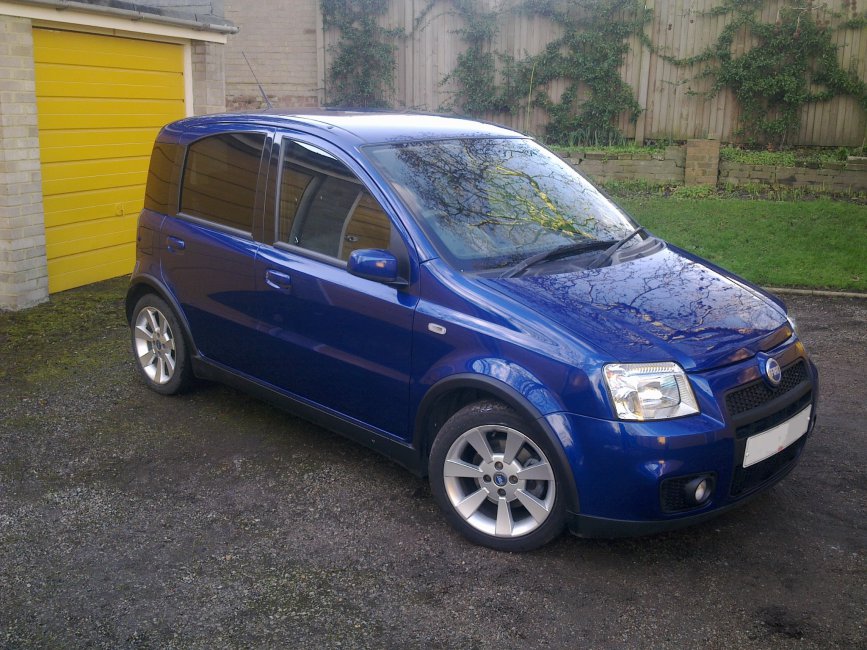
Right thought I would start a thread as there are a few mods happening to my panda and wanted somewhere to have them all in one place! I have owned my 100HP since 2010 and love it! She gets serviced at fiat evry year and had belts and water pump replaced last year. I wanted to start modding her but not go OTT as been there and done it before! Hopefully you guys like it!
So this is what I have done:

Day one cleaned!
panda.jpg
panda rear.jpg

BMC Panel filter replaced and clear indicator bulbs front and back fitted:
Before
panda orange bulbs.jpg
After
Panda cleat indiactor bulbs.jpg

Gear leaver blue detailing done with touch up pen:
gear leaver.jpg

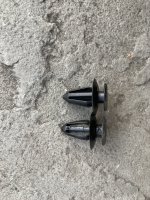
Ultersport rear 80mm back box fitted, with multi hole exhuast rubber to space it away from the bumper:
Before
009 (2).jpg
After
011.jpg
Panda new exhaust rubber 27213.jpg

Home made induction mod give great induction noise over 3000rpm!:D here is the link to how I made it https://www.fiatforum.com/panda/319449-100hp-induction-mod-under-30-a.html:
Before
019.jpg
After
028.jpg


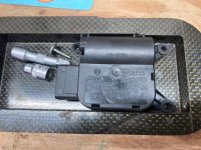
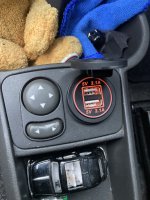
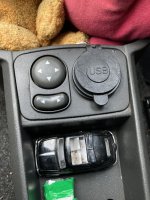
New tax disc holder fitted:
Before
008.jpg
After
tax disc after.jpg

Pressed metal plates (Yes I know the legal issues with these before everyone starts kicking off!:devil:) but wanted to have a clean look!
Front
metal front plate.jpg
Back
rear number plate.jpg

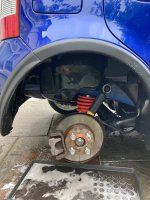
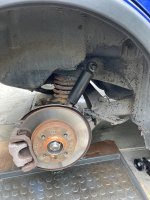
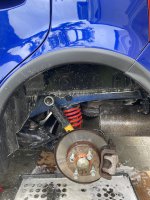
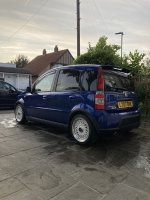
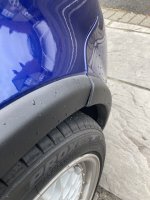
Really happy with the way the car is coming on! The rear end is looking nice and fat, will be looking at getting a silver rear fog light bulb to balance up the lights and looking at spacers the same as Demi has to fill the arches a bit more. All 4 tyres will be getting replaced also for Toyo T1R's as got some cheap front tyres put at the mo and had enough of them!! Lesson learnt!
My BMW bike blew one coil, so I limped to a nearby dealer to buy a replacement. The guys says, "don't you want two". Yes but at £80 each I'll take the one thanks. Half way home the other coil failed so I had to turn around and go back to the dealer.

When the 100HP blew a coil, I bought a full set.
Just gives me piece of mind! 👍
 
The front end rebuild is finally finished!
All together it took me about 10 hours but while there was a few stressful moments the sense of satisfaction doing it correctly is massive!
To recap the wishbones where changed for the correct 100hp ones, the top mounts where changed and corrected to face the right direction, the original 2007 shocks were changed out after the thread on one snapped on me while trying to replace the top mount leading to a panicked call to GSF and a cab ride as it was a Saturday morning and i needed the car for Monday!
On the plus side the old shocks literally were well past their best and the ride is now really smooth!
All the engine mounts were replaced as they were all worn out!
And his finally got his Toyo tyres back on with a full track to replace the mismatched tyres from one side to the other! 🤦🏻‍♂️😂
Next job rear shocks and springs and replace the cigarette lighter for a usb charging port! ☺️
 

Attachments

  • IMG_6328.jpeg
    IMG_6328.jpeg
    2.7 MB · Views: 65
  • IMG_6453.jpeg
    IMG_6453.jpeg
    1.1 MB · Views: 65
  • IMG_6399.jpeg
    IMG_6399.jpeg
    1.6 MB · Views: 67
  • IMG_6342.jpeg
    IMG_6342.jpeg
    1.6 MB · Views: 65
  • IMG_6340.jpeg
    IMG_6340.jpeg
    3.9 MB · Views: 68
  • IMG_6338.jpeg
    IMG_6338.jpeg
    2.3 MB · Views: 70
  • IMG_6331.jpeg
    IMG_6331.jpeg
    3 MB · Views: 70
  • IMG_6330.jpeg
    IMG_6330.jpeg
    2 MB · Views: 59
Last edited:
Is this damaged?

View attachment 424022

Already answered but here's a photo


View attachment 424023
That's what I thought - spindle is centred towards the back of the oval housing. I can never remember which end has the triangle. Fitting the other way around risks a steering wobble as it reduces the castor angle.

My top mounts were flaking where rubber "flash" has gone onto the metal backing but the bond between rubber and metal is good and there is no cracking in the rubber so I have not replaced them. The bearings were OK so I re-used them. Some bearings can be opened and packed with grease but if they are dry, you are better buying new. ePER has the Fiat parts numbers.

That all said, with the car on its wheels, check the locknut base heights against the inner wing mountings. You can also compare the retaining cups. If they are not equal the mounts are degraded or just different and should be replaced as a pair.
 
I had to replace the air vent movement actuator as the old one would work for a couple of adjustments then stop!
I was lucky enough to sauce a good second hand one, when refitting you just have to make sure the white plastic cog is in the right position so the cogs match! 😇
 

Attachments

  • IMG_6687.jpeg
    IMG_6687.jpeg
    146.9 KB · Views: 59
  • IMG_6686.jpeg
    IMG_6686.jpeg
    119.1 KB · Views: 60
A bit of future proofing and a mod well worth doing for any panda owner! As we all know the cigarette lighter is rubbish for any phone charger and hardly works.
I fitted a double USB port this evening nice simple job, simply remove the panel and the old cigarette lighter, the usb charger screws into the same hole.
Locate the power wire of the ignition and earth, remove the 3 wires out of the old connection block, tape up the 3rd light power wire as you won’t need this.
Connect the wires the right way round and refit! ☺️☺️ I even got it in the matching orange so it’s the same as the dash lights!
Oh and I got all the change out that was rattling around in the centre console! 😂😂
 

Attachments

  • IMG_6691.jpeg
    IMG_6691.jpeg
    2.2 MB · Views: 65
  • IMG_6692.jpeg
    IMG_6692.jpeg
    3.1 MB · Views: 62
  • IMG_6693.jpeg
    IMG_6693.jpeg
    1.5 MB · Views: 67
  • IMG_6694.jpeg
    IMG_6694.jpeg
    2.5 MB · Views: 72
  • IMG_6696.jpeg
    IMG_6696.jpeg
    1.8 MB · Views: 66
  • IMG_6697.jpeg
    IMG_6697.jpeg
    2.1 MB · Views: 60
  • IMG_6700.jpeg
    IMG_6700.jpeg
    2.1 MB · Views: 62
  • IMG_6699.jpeg
    IMG_6699.jpeg
    2.4 MB · Views: 61
What’s more interesting than all that USB stuff is…a cigarette lighter…a cigarette lighter?!?! You should have left it for rarity value alone!
On a more serious note, I put a usb charger/socket where that little round grill is above the gearlever for a friend so they could use their phone for satnav
 
Well not a bad mornings work! The B6’s are on along with the new Spax springs to replace the old rusty ones.
While I was there i cleaned up the subframe and also the wheel arches.
On the road the B6’s defo feel a lot more planted then the ones that came off.
 

Attachments

  • IMG_6769.jpeg
    IMG_6769.jpeg
    1.8 MB · Views: 67
  • IMG_6766.jpeg
    IMG_6766.jpeg
    1.9 MB · Views: 63
  • IMG_6765.jpeg
    IMG_6765.jpeg
    2.2 MB · Views: 69
  • IMG_6762.jpeg
    IMG_6762.jpeg
    1.8 MB · Views: 62
  • IMG_6761.jpeg
    IMG_6761.jpeg
    3.2 MB · Views: 57
  • IMG_6758.jpeg
    IMG_6758.jpeg
    2.1 MB · Views: 59
I would love to fit airbag rear springs to the diesel but getting info on spring rates has already messed up the idea.
 
I would love to fit airbag rear springs to the diesel but getting info on spring rates has already messed up the idea.
Panda 1.1 1.2 and 1.3 rear springs all use the same rear coils

Wire dia 12mm
Number of coils 4.5
Length 295.5mm
Load (daN) for resulting lengths: 202.5mm) 310
Colour of mark white-blue


Van, 4x4, 100hp and natural power use different spings
 
Ooh that's handy. Thanks :cool:

On a close look, let's see what this means.

Free length 295.5mm. Compression to 202.5mm uses 310 DecaNewtons = 316.112 kg-force over 93mm
Imperial would be 695 pounds over 3.66 inches = 189 inch-pounds.
 
Last edited:
Do you remember wehn springs had a colour code for rates/loads, then everyone went off and did their own thing. Fiat we’re always orange or black coils with two coloured rings painted on…always confused me as an apprentice wehn pre 80’s cars came in and the old hands in parts dept would confuse me even more!
 
What else are you meant to do on the longest day of the year! Washed the pandavan and also refitted the drivers side wheel arch with 3 new clips as one had failed! I now have a super close fitted wheel arch! 💙
 

Attachments

  • IMG_7027.jpeg
    IMG_7027.jpeg
    1.6 MB · Views: 42
  • IMG_7028.jpeg
    IMG_7028.jpeg
    2.1 MB · Views: 44
  • IMG_7029.jpeg
    IMG_7029.jpeg
    1.7 MB · Views: 43
  • IMG_7030.jpeg
    IMG_7030.jpeg
    3.1 MB · Views: 39
  • IMG_7031.jpeg
    IMG_7031.jpeg
    1.8 MB · Views: 45
  • IMG_7032.jpeg
    IMG_7032.jpeg
    2 MB · Views: 43
My trim reconditioning continues! The front bumper trim was loose at the top and it wasn’t in line with the arch (which I fixed with new clips last week).
I pulled off the trim and it was obvious the body shop who (very badly) painted the bumper during the time after I sold him had broken all the clips and had just put screws through the end of what was left of the original clips to keep the trim on! 🤦🏻‍♂️🤦🏻‍♂️
I cleaned up all the area, fitted fresh new clips and boom clipped into place and looking flush!!
Next will be the side skirts! 😬
 

Attachments

  • IMG_7117.jpeg
    IMG_7117.jpeg
    1.3 MB · Views: 38
  • IMG_7118.jpeg
    IMG_7118.jpeg
    1.3 MB · Views: 36
  • IMG_7119.jpeg
    IMG_7119.jpeg
    1.9 MB · Views: 39
  • IMG_7120.jpeg
    IMG_7120.jpeg
    1.9 MB · Views: 40
  • IMG_7121.jpeg
    IMG_7121.jpeg
    2.2 MB · Views: 37
  • IMG_7122.jpeg
    IMG_7122.jpeg
    3 MB · Views: 39
  • IMG_7125.jpeg
    IMG_7125.jpeg
    1.7 MB · Views: 34
  • IMG_7124.jpeg
    IMG_7124.jpeg
    1.7 MB · Views: 36
  • IMG_7126.jpeg
    IMG_7126.jpeg
    1.3 MB · Views: 37
  • IMG_7123.jpeg
    IMG_7123.jpeg
    1.4 MB · Views: 42
Big day for the pandavan today with the last of the maintenance issues being sorted, new radiator fitted, needed to be slightly modded on the top intake pipe with a few lugs removed to fit the original pipe.
I counted 4 leaks in the old rad! 😬
Also the air con as been re gassed after I fitted I new high pressure valve hopefully that should cure my gas loss after a few months!
 

Attachments

  • IMG_7182.jpeg
    IMG_7182.jpeg
    3.6 MB · Views: 41
  • 06cd465c-1b1b-4b3e-b163-adffdffd466a.jpeg
    06cd465c-1b1b-4b3e-b163-adffdffd466a.jpeg
    144 KB · Views: 42
  • f3c80605-6d8e-44b1-b238-ccae077def26.jpeg
    f3c80605-6d8e-44b1-b238-ccae077def26.jpeg
    282.6 KB · Views: 41
Back
Top