panda.jpg

Panda Panda 100HP project (cooperman style!)

Introduction

Right thought I would start a thread as there are a few mods happening to my panda and wanted somewhere to have them all in one place! I have owned my 100HP since 2010 and love it! She gets serviced at fiat evry year and had belts and water pump replaced last year. I wanted to start modding her but not go OTT as been there and done it before! Hopefully you guys like it!
So this is what I have done:

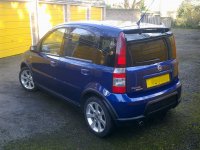
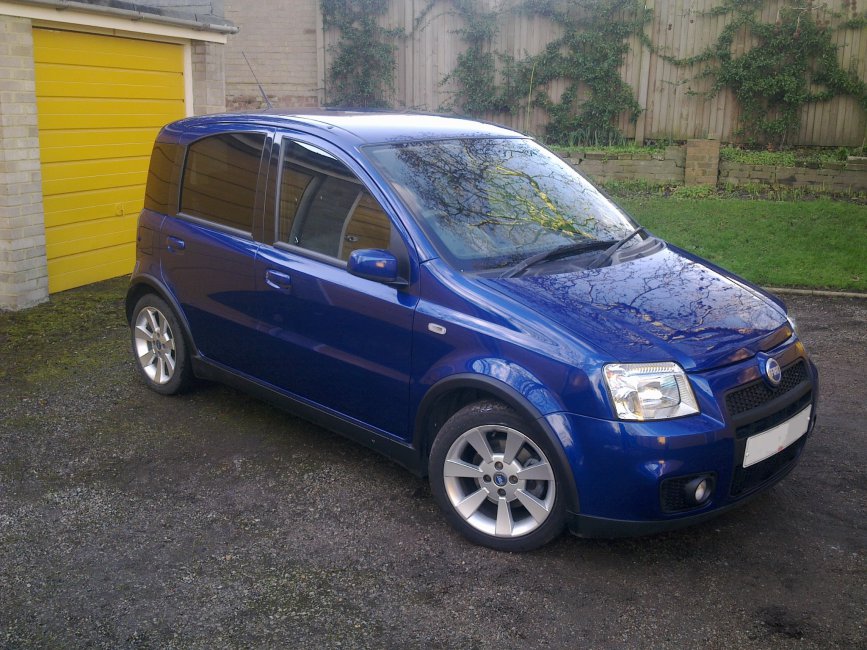
Day one cleaned!
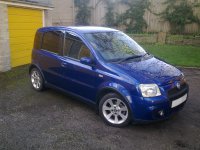
panda.jpg
panda rear.jpg

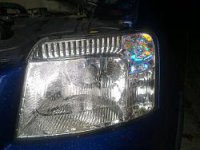
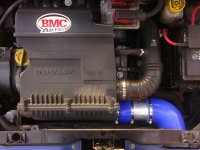
BMC Panel filter replaced and clear indicator bulbs front and back fitted:
Before
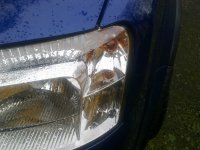
panda orange bulbs.jpg
After
Panda cleat indiactor bulbs.jpg

Gear leaver blue detailing done with touch up pen:
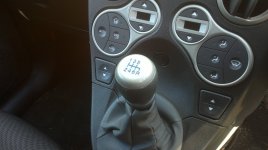
gear leaver.jpg

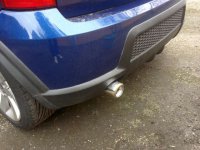
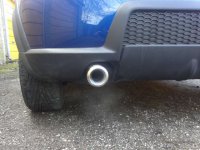
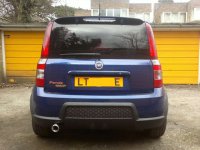
Ultersport rear 80mm back box fitted, with multi hole exhuast rubber to space it away from the bumper:
Before
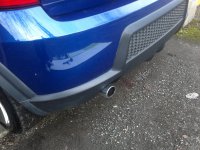
009 (2).jpg
After
011.jpg
Panda new exhaust rubber 27213.jpg

Home made induction mod give great induction noise over 3000rpm!:D here is the link to how I made it https://www.fiatforum.com/panda/319449-100hp-induction-mod-under-30-a.html:
Before
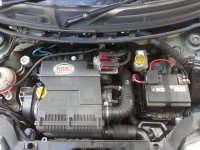
019.jpg
After
028.jpg


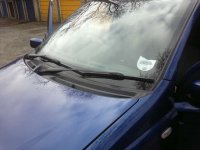
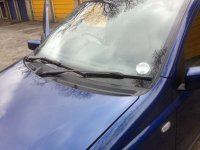
New tax disc holder fitted:
Before
008.jpg
After
tax disc after.jpg

Pressed metal plates (Yes I know the legal issues with these before everyone starts kicking off!:devil:) but wanted to have a clean look!
Front
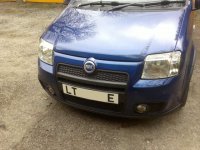
metal front plate.jpg
Back
rear number plate.jpg

Really happy with the way the car is coming on! The rear end is looking nice and fat, will be looking at getting a silver rear fog light bulb to balance up the lights and looking at spacers the same as Demi has to fill the arches a bit more. All 4 tyres will be getting replaced also for Toyo T1R's as got some cheap front tyres put at the mo and had enough of them!! Lesson learnt!
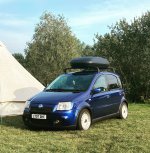
I needed to make the pandavan a little more practical for summer holidays with the kids!
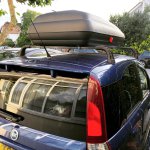
Hopefully this should give us enough extra room!
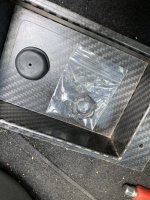
Also got the box in carbon affect 💙😂☺️
 

Attachments

  • 613C76D2-B1EC-4DC3-9EE5-BD3A8E70A0D8.jpeg
    613C76D2-B1EC-4DC3-9EE5-BD3A8E70A0D8.jpeg
    598.7 KB · Views: 59
  • E23375E9-40A8-4E11-823C-4C02A2DE849E.jpeg
    E23375E9-40A8-4E11-823C-4C02A2DE849E.jpeg
    438 KB · Views: 58
  • C7D81E1B-A404-40B2-AA0E-BD2F6B47B021.jpeg
    C7D81E1B-A404-40B2-AA0E-BD2F6B47B021.jpeg
    547.3 KB · Views: 66
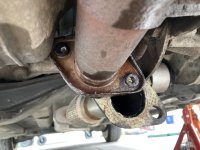
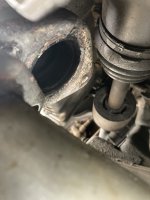
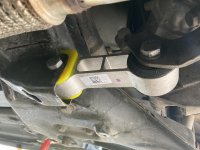
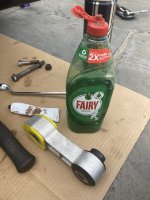
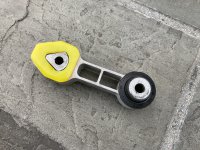
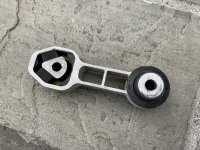
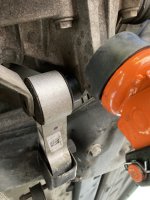
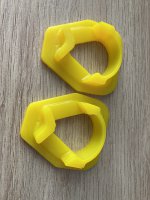
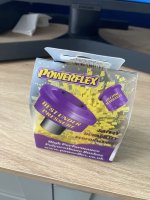
Well hello powerflex!! New lower mount bush fitted, was pretty easy to fit (let’s not talk about the 2 hours it took me to replace the exhaust bolts that decided to shed their threads while doing the nuts back up!)
The car now Feels a lot more solid on the road with abit more of a vibration in the cabin but nothing major!! 💙
 

Attachments

  • IMG_7372.jpeg
    IMG_7372.jpeg
    2.1 MB · Views: 64
  • IMG_7369.jpeg
    IMG_7369.jpeg
    1.9 MB · Views: 56
  • IMG_7368.jpeg
    IMG_7368.jpeg
    2.6 MB · Views: 57
  • IMG_7367.jpeg
    IMG_7367.jpeg
    1.8 MB · Views: 52
  • IMG_7365.jpeg
    IMG_7365.jpeg
    4.4 MB · Views: 58
  • IMG_7366.jpeg
    IMG_7366.jpeg
    4.3 MB · Views: 68
  • IMG_7363.jpeg
    IMG_7363.jpeg
    1.8 MB · Views: 51
  • IMG_7357.jpeg
    IMG_7357.jpeg
    2.2 MB · Views: 58
  • IMG_7356.jpeg
    IMG_7356.jpeg
    1.6 MB · Views: 51
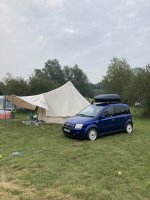
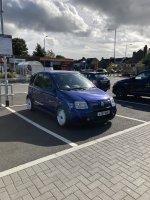
Back from holiday, the pandavan did amazing job and it pretty much did it all on a tank of fuel. The roof box is a great addition for those extra storage need’s especially having 2 kids!
Fully loaded it was probably sitting the lowest it’s ever sat!
If you’re not scrapping while driving around the camp site you’re too high! #lowlife 😂
 

Attachments

  • 69775E98-1ADE-4A4E-9C5A-6F1E64F28877.jpeg
    69775E98-1ADE-4A4E-9C5A-6F1E64F28877.jpeg
    2.8 MB · Views: 61
  • IMG_7785.jpeg
    IMG_7785.jpeg
    2.5 MB · Views: 59
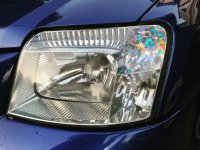
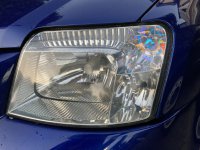
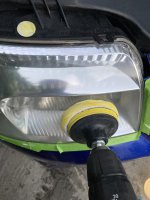
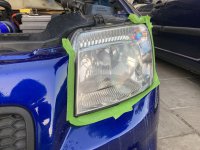
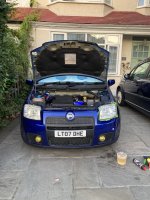
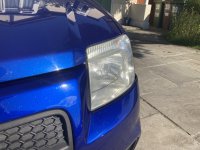
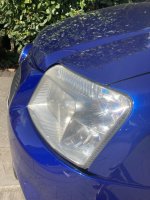
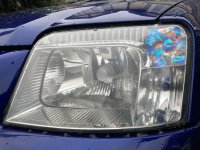
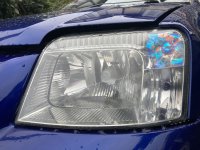
A bit of head light restoration this evening, I had a headlight T-cut kit left over from my Mercedes so I thought I’d give it a go!
You can see how cloudy they looked, the next picture shows the right head light done compared to the left one. I used 2000 sand paper on a drill, then some cutting compound, then a polish then finished off with the T cut sealant.
For no cost I think they have come up looking ace! 🇮🇹💙
 

Attachments

  • 7EA7421F-3BAD-405E-AC57-9A7BD3B68361.jpeg
    7EA7421F-3BAD-405E-AC57-9A7BD3B68361.jpeg
    3.4 MB · Views: 51
  • IMG_7853.jpeg
    IMG_7853.jpeg
    2.7 MB · Views: 50
  • IMG_7850.jpeg
    IMG_7850.jpeg
    1.9 MB · Views: 49
  • IMG_7849.jpeg
    IMG_7849.jpeg
    2.7 MB · Views: 53
  • IMG_7847.jpeg
    IMG_7847.jpeg
    1.9 MB · Views: 49
  • IMG_7844.jpeg
    IMG_7844.jpeg
    2.5 MB · Views: 56
  • IMG_7843.jpeg
    IMG_7843.jpeg
    1.6 MB · Views: 46
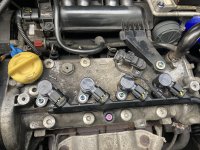
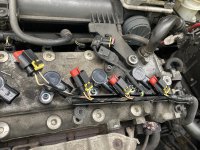
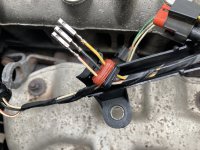
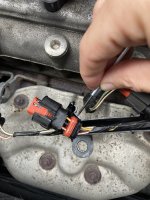
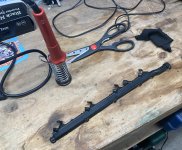
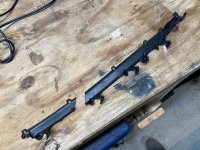
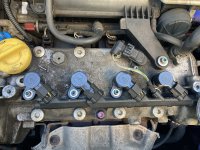
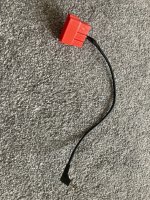
That’s it job done! All my broken coil connects are now fixed, I had to fix the wire rail as when I broke down after autoitalia the RAC man snapped it (not really his fault as they are made out of tissue paper!) I plastic welded it back together, this is probably the hardest part unclipping all the plastic tabs to expose the wiring.
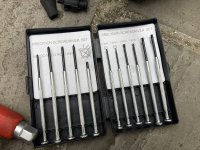
The plugs themselves are not hard to get off you just need a little cheap precision screwdriver set.
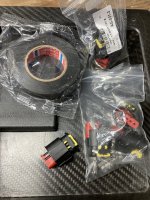
You have to prise off the back plastic cover and then pull back the red rubber (a bit of wd40 makes this easier) next I just broke off the 6 tabs that hold the 3 connects on and the connector just pulls off leaving the 3 wires. Simply push the new connector on and refit the rubber and the back plastic and it’s done!
 

Attachments

  • IMG_7972.jpeg
    IMG_7972.jpeg
    3.8 MB · Views: 51
  • IMG_7968.jpeg
    IMG_7968.jpeg
    3.4 MB · Views: 50
  • IMG_7967.jpeg
    IMG_7967.jpeg
    3 MB · Views: 50
  • IMG_7966.jpeg
    IMG_7966.jpeg
    1.9 MB · Views: 45
  • IMG_7965.jpeg
    IMG_7965.jpeg
    1.6 MB · Views: 42
  • IMG_7953.jpeg
    IMG_7953.jpeg
    3.1 MB · Views: 50
  • IMG_7952.jpeg
    IMG_7952.jpeg
    3.8 MB · Views: 49
  • IMG_7948.jpeg
    IMG_7948.jpeg
    3.8 MB · Views: 45
  • IMG_7947.jpeg
    IMG_7947.jpeg
    2.3 MB · Views: 53
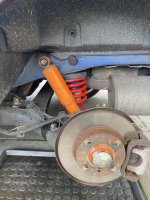
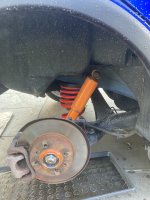
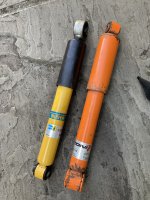
So an interesting day, I haven’t been getting on with the Bilsteins since I fitted them, I’ve felt they have made the car to nervous and that they couldn’t keep with the front end which has meant the tail has stepped out a few times, as your read previously in this build I had koni sports and have always run cars on konis.
I was able to sauce some second hand ones to test them, at this point it’s worth mentioning this is just my opinion I think a lot of it depends on your individual setup, so I have Spax -25mm lowering springs all round and standard front shock, I have to say fitting the konis have transformed the handling, they don’t seem to be stressed or nervous over the bumps which was the issue I was getting with the bilsteins B6’s, I’m not saying the bilsteins are bad it’s just with my setup and the way I like the car to be the konis suit it so much better!
I’m super happy now as the cars on rails 🤙🏻😁
 

Attachments

  • IMG_8271.jpeg
    IMG_8271.jpeg
    2.1 MB · Views: 46
  • IMG_8269.jpeg
    IMG_8269.jpeg
    2.2 MB · Views: 52
  • IMG_8268.jpeg
    IMG_8268.jpeg
    1.8 MB · Views: 44
  • IMG_8267.jpeg
    IMG_8267.jpeg
    4 MB · Views: 47
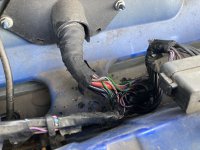
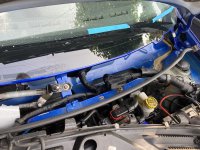
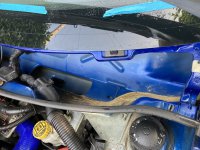
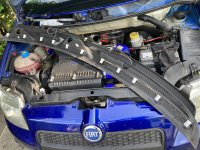
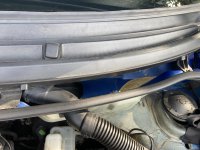
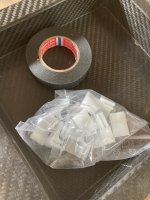
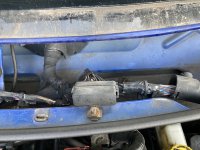
Good little bit of future proofing today, the wires in my scuttle were looking abit worse for wear, I removed the wiper scuttle cover and re wrapped all the wiring with fabric electrical tape, really happy with the result.
While I was there I cleaned out the scuttle and drain holes.
I got to use the new clips that I bought when I refitted the wiper scuttle cover it’s probably the first time in a while it’s had all the clips back on!!
Anyway another little job done! 🇮🇹💙🐼
 

Attachments

  • IMG_8347.jpeg
    IMG_8347.jpeg
    2 MB · Views: 52
  • IMG_8349.jpeg
    IMG_8349.jpeg
    3.1 MB · Views: 53
  • IMG_8350.jpeg
    IMG_8350.jpeg
    2.3 MB · Views: 55
  • IMG_8351.jpeg
    IMG_8351.jpeg
    2.7 MB · Views: 56
  • IMG_8352.jpeg
    IMG_8352.jpeg
    2.8 MB · Views: 49
  • IMG_8353.jpeg
    IMG_8353.jpeg
    2.8 MB · Views: 53
  • IMG_8356.jpeg
    IMG_8356.jpeg
    2.3 MB · Views: 55
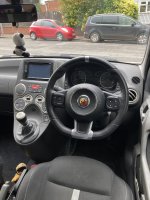
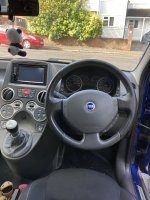
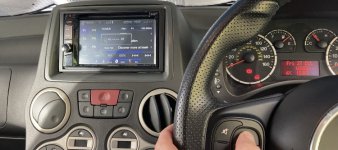
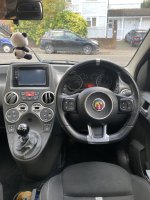
So I’ve taken the plunge and fitted a S4 Abarth steering wheel! I picked it up for £60 on Fb marketplace which is probably the best deal I’ve ever had! 😄
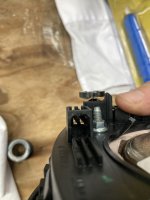
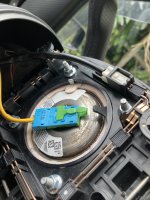
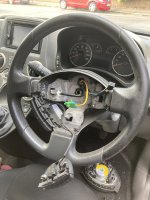
So to debung the rumours this wheel and air bag was a straight swap, the Abarth airbag was a single connector one and the panda connected clicked straight in, doing a bit of research a few people who had fitted these have said you have to remove a piece of plastic from the wheel for the horn connector to fit but they never said why! Me being silly just fitted the connector straight in as it looked like it was a like for like connection.
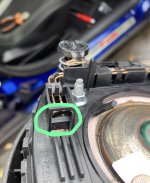
It’s only when I reconnect the battery did the horn being stuck on make me release you have to invert the connector, to do this you have to remove a small bit of plastic (green circle) and that gives you enough clearance to fit the connector upside down.
I fitted the wheel back using a new nut, reconnected the airbag the battery and it was all perfect, the buttons don’t work but they didn’t work with the kenwood head unit with the old wheel so I’m not really bothered (but I am in the process of trying to make them work! 😇☺️)
The wheel does feel like a good update to the interior and with the Abarth seats I have it’s really brought the interior up to date.
 

Attachments

  • IMG_8723.jpeg
    IMG_8723.jpeg
    2.1 MB · Views: 59
  • IMG_8721.jpeg
    IMG_8721.jpeg
    1.3 MB · Views: 62
  • IMG_8724.jpeg
    IMG_8724.jpeg
    661.4 KB · Views: 50
  • IMG_8718.jpeg
    IMG_8718.jpeg
    1.8 MB · Views: 49
  • IMG_8715.jpeg
    IMG_8715.jpeg
    2.4 MB · Views: 49
  • IMG_8714.jpeg
    IMG_8714.jpeg
    1.9 MB · Views: 51
  • IMG_8711.jpeg
    IMG_8711.jpeg
    2.1 MB · Views: 57
Well with a lot of help from Wazzer on here I was able to wire in the Abarth wheel to my Kenwood head using the setup he recommends, I’m pleased to report every button now works on the wheel! 😊
 

Attachments

  • IMG_8793.jpeg
    IMG_8793.jpeg
    3.5 MB · Views: 53
  • IMG_8837.jpeg
    IMG_8837.jpeg
    304.6 KB · Views: 49
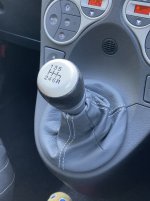
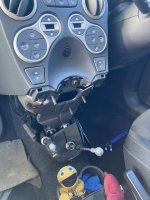
So the Fiat 500 gear selector is in and wow what a difference it makes! ☺️ think it
helped the one I got was from 2022, there was a lot of slop and play in the original knob and the bush on the original selector.
Pretty easy swap over 5 bolts and 2 clips and you just swap the complete units over.
I used my gator as it matches the seats so I had to get the sewing kit out.
For £22 it was well worth it and I would recommend the swap.
 

Attachments

  • IMG_8966.jpeg
    IMG_8966.jpeg
    632.7 KB · Views: 47
  • IMG_8973.jpeg
    IMG_8973.jpeg
    1.8 MB · Views: 47
  • IMG_8987.jpeg
    IMG_8987.jpeg
    2.2 MB · Views: 50
  • IMG_8988.jpeg
    IMG_8988.jpeg
    2.2 MB · Views: 49
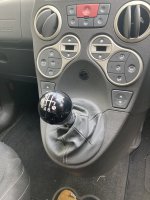
Does the original gear knob fit the 500 stick?

Not keen on the 500 gear knob but I've found a stick assembly without the knob so could fit mine on there instead
 
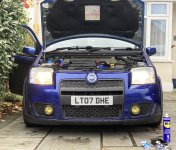
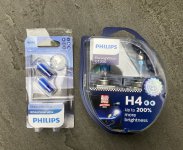
As winter is drawing in thought it was time to update the headlight bulbs, reading some reviews I opted for Philips Racing Vision H4’s and matching side light bulbs.
Overall they look a lot whiter, the picture of the front of the car shows the standard lights on the left and the Philips ones on the right and the second headlight picture is both bulbs fitted. 👍🏻🇮🇹🐼💙
 

Attachments

  • IMG_9132.jpeg
    IMG_9132.jpeg
    2.4 MB · Views: 34
  • IMG_9131.jpeg
    IMG_9131.jpeg
    1.9 MB · Views: 34
  • IMG_9130.jpeg
    IMG_9130.jpeg
    2.4 MB · Views: 33
  • IMG_9129.jpeg
    IMG_9129.jpeg
    3 MB · Views: 30
What’s more interesting than all that USB stuff is…a cigarette lighter…a cigarette lighter?!?! You should have left it for rarity value alone!
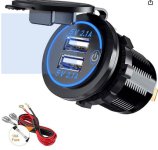
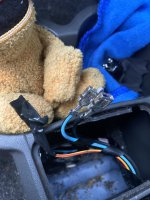
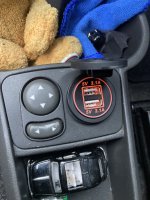
On a more serious note, I put a usb charger/socket where that little round grill is above the gearlever for a friend so they could use their phone for satnav
Hi, Could I ask you to cast your mind back & tell me how you got access to the battery terminals or 12v/GND supply for fitting a usb charger to that round unused vent, My USB charger came wired with an inline fuse.
 

Attachments

  • fiatusb.jpg
    fiatusb.jpg
    63.7 KB · Views: 25
Hi, Could I ask you to cast your mind back & tell me how you got access to the battery terminals or 12v/GND supply for fitting a usb charger to that round unused vent, My USB charger came wired with an inline fuse.
Hi, I took the power for the original cigarette lighter power feed.
 

Attachments

  • IMG_6695.jpeg
    IMG_6695.jpeg
    1.9 MB · Views: 27
  • IMG_6697.jpeg
    IMG_6697.jpeg
    2.2 MB · Views: 27
Back
Top