General More horrendous welding finds…

Currently reading:
General More horrendous welding finds…

Joined
Apr 23, 2015
Messages
50
Points
97
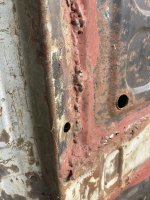
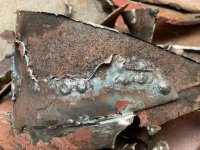
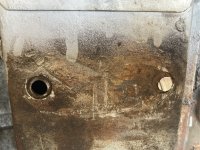
I’m still cutting out some of the welding on this abandoned project….its just awful
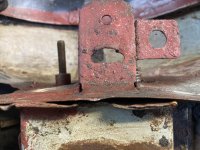
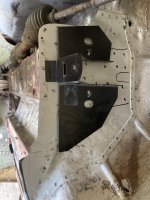
So if you fancy a laugh view the following .
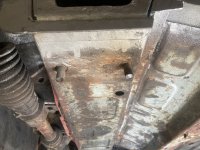
The first picture shows total lack of connection between the front bump stop bracket and the leaf spring support tunnel end.
 

Attachments

  • IMG_4130.jpeg
    IMG_4130.jpeg
    3.3 MB · Views: 103
  • IMG_4121.jpeg
    IMG_4121.jpeg
    2.1 MB · Views: 56
  • IMG_4118.jpeg
    IMG_4118.jpeg
    2.9 MB · Views: 55
So, onto the bolts holding down the leaf spring.
These are M10 x 1.25 pitchx 60mm long. Having chased the threads with a suitable dia, I thought I’d see how strong they were for future use. Well, they weren’t!
They snapped further down the thread quite easily. So before I weld the inner wheel arch repair panel, I’ll be using 4 new bolts , with an extra internal spreader plate.
Having drilled out the remains stub of the bolt, the head within the “tunnel” knocked away surprisingly easily. Retrieving all debris which has now fallen to the bottom of the other end of the tunnel, a magnet gets it all out.
 

Attachments

  • IMG_4153.jpeg
    IMG_4153.jpeg
    3.6 MB · Views: 32
Bolts cut off and centre drilled. The rear most bolt, despite being off centre to hole on the tunnel (15mm), it was in its factory fitted position, and still lines up with the aluminium support brackets. The front suspension will in fact have a modern upgrade to a front beam with those coil over units.

Having made a zintec 1.0mm sheet repair panel, joggled it’ll be ready for welding in place. Just need those m10 bolts before I do.
 

Attachments

  • IMG_4153.jpeg
    IMG_4153.jpeg
    3.6 MB · Views: 32
  • IMG_4154.jpeg
    IMG_4154.jpeg
    4.2 MB · Views: 33
  • IMG_4155.jpeg
    IMG_4155.jpeg
    3.5 MB · Views: 36
  • IMG_4157.jpeg
    IMG_4157.jpeg
    2 MB · Views: 34
Picture three of first post - truly impressive.....:ROFLMAO:
As you are going to be fitting one of Kelvyne's cross-members, see if he can supply (lend?) you a pattern for the location of those 4 studs that retain the cross-member---there is not a lot of free-play in his cross-member as it is made to the exact measurements of a 'factory' box-section. When one fits the normal spring,the fitment-design of the springs mounts does allow for a little bit of mis-alignment.
 
Luckily having taken some previous measurements on the tunnel studs they are spot on. I made up up a jig before I removed the wheel arch studs as its supporting back plate I had to remove. Thank you for the input.
It would be quite easy to think you know where it goes, but pre planned approach is definitely key.
 
Back
Top