

Here's the Master Cylinder Replacement Guide. Up here for a week so I can more easily incorporate comments, modifications, suggestions, more photos, etc.
Worry not, O Custard, I'll PM you and ask you to delete the thread as soon as everyone has had their say.") (This is why I want/wanted a wiki/swiki for the Guides and FAQs.)
(This is why I want/wanted a wiki/swiki for the Guides and FAQs.)
Firstly, the diagnosis that there is a fault with the master cylinder is a bit tricky: it'll feel a little like there's air in the system, except the pedal will keep on sinking. A sure sign for me was that sitting in traffic, holding the car on the footbrake, it'd roll forward (or backwards). Essentially, fluid was slowly escaping from the seals, but because the leak is internal, there is no tell tale drip.
A Google for “master cylinder” or “master cylinder fault” should turn up plenty of ideas.
Secondly, it's possible to rebuild a master cylinder. The only real competence required is knowing whether the pile of bits on your bench is actually worth rebuilding. I won't be covering a rebuild, as the car I'm putting the new master cylinder on is my daily hack and I needed it the next day. Maybe later.
Thirdly, this guide is offered in the belief that it is useful, but you follow it entirely at your own risk and on the strict understanding that no warranties, implied or otherwise, apply. You cannot hold Fiat Forum or myself responsible for the consequences of your actions.
Work methodically, work cleanly, work safely.
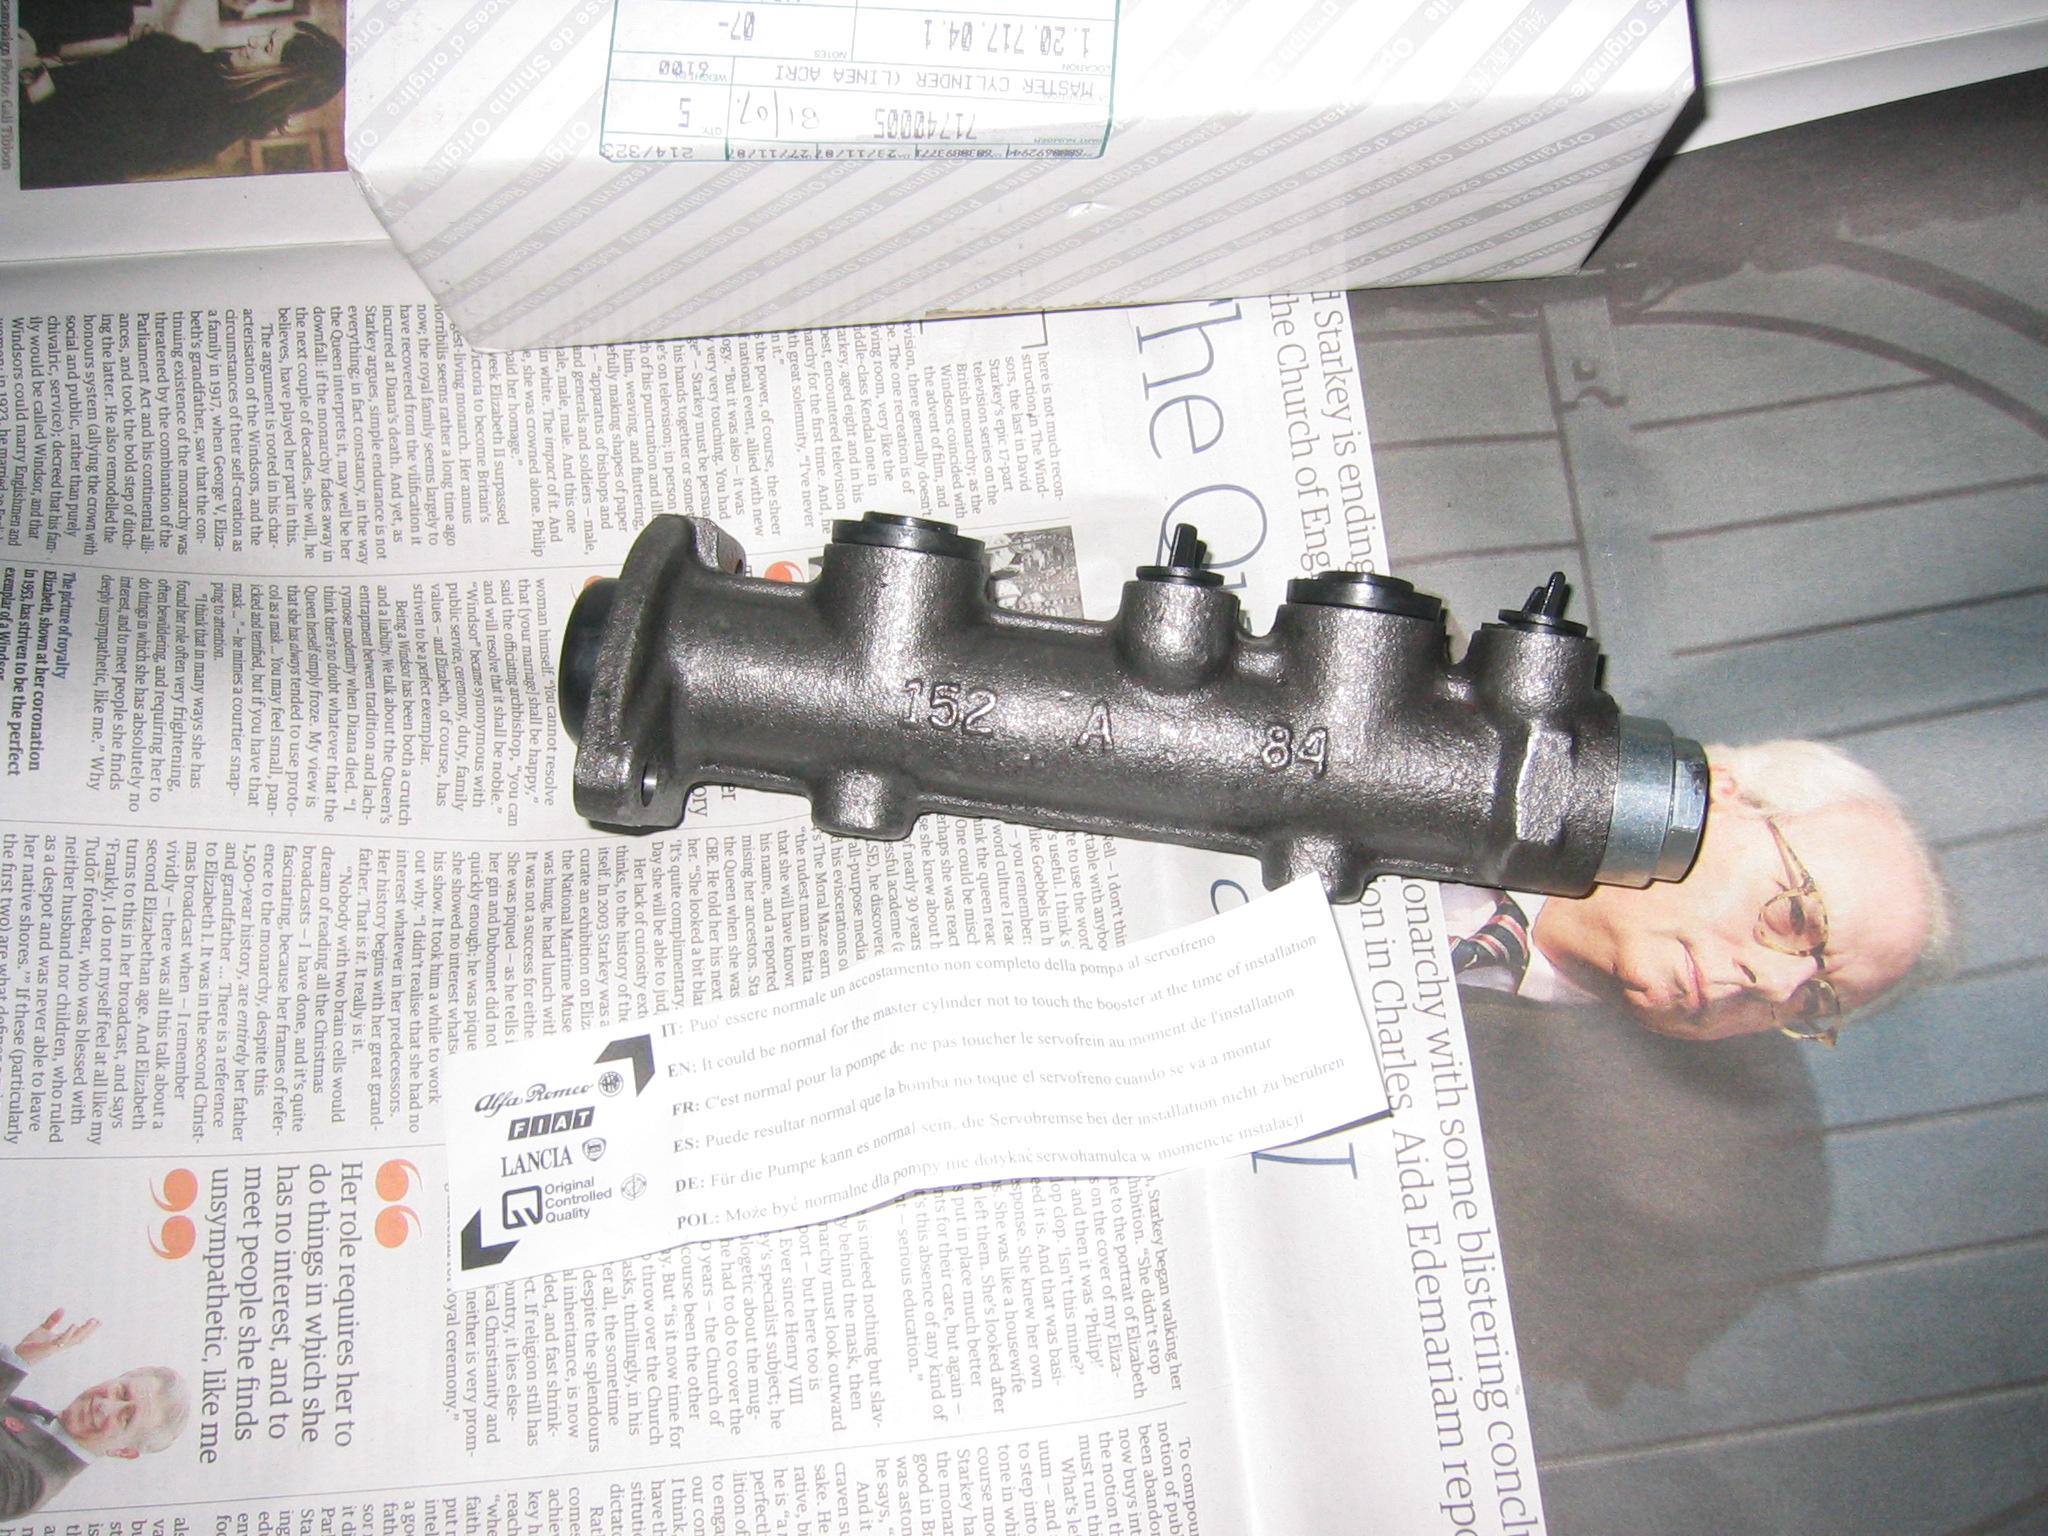
OK, let's begin. You need a brake master cylinder: I got mine from Club Cento's Fluffy the Impaler (Mick) for a little under £20 plus VAT. It should come with seals and will look something like this:
Tools: some method of bleeding the brakes, an 11mm brake spanner, a socket set including a 13mm socket and an 8mm socket. An 8mm spanner would be useful, I like the ratchet ones with a 6 point ratchet head and an open end. A jack is optional, but if you use a jack you must use an axle stand. A poultry baster or enema syringe is useful. Brake fluid – Dot 4 -- (of course), but because brake fluid is really unpleasant and nasty stuff, some water to put down over any spillages and a sponge to get any from paintwork. A small pry bar or long, medium sized, flat screwdriver. Some penetrating oil.
Photo of brake bleeder and brake spanner
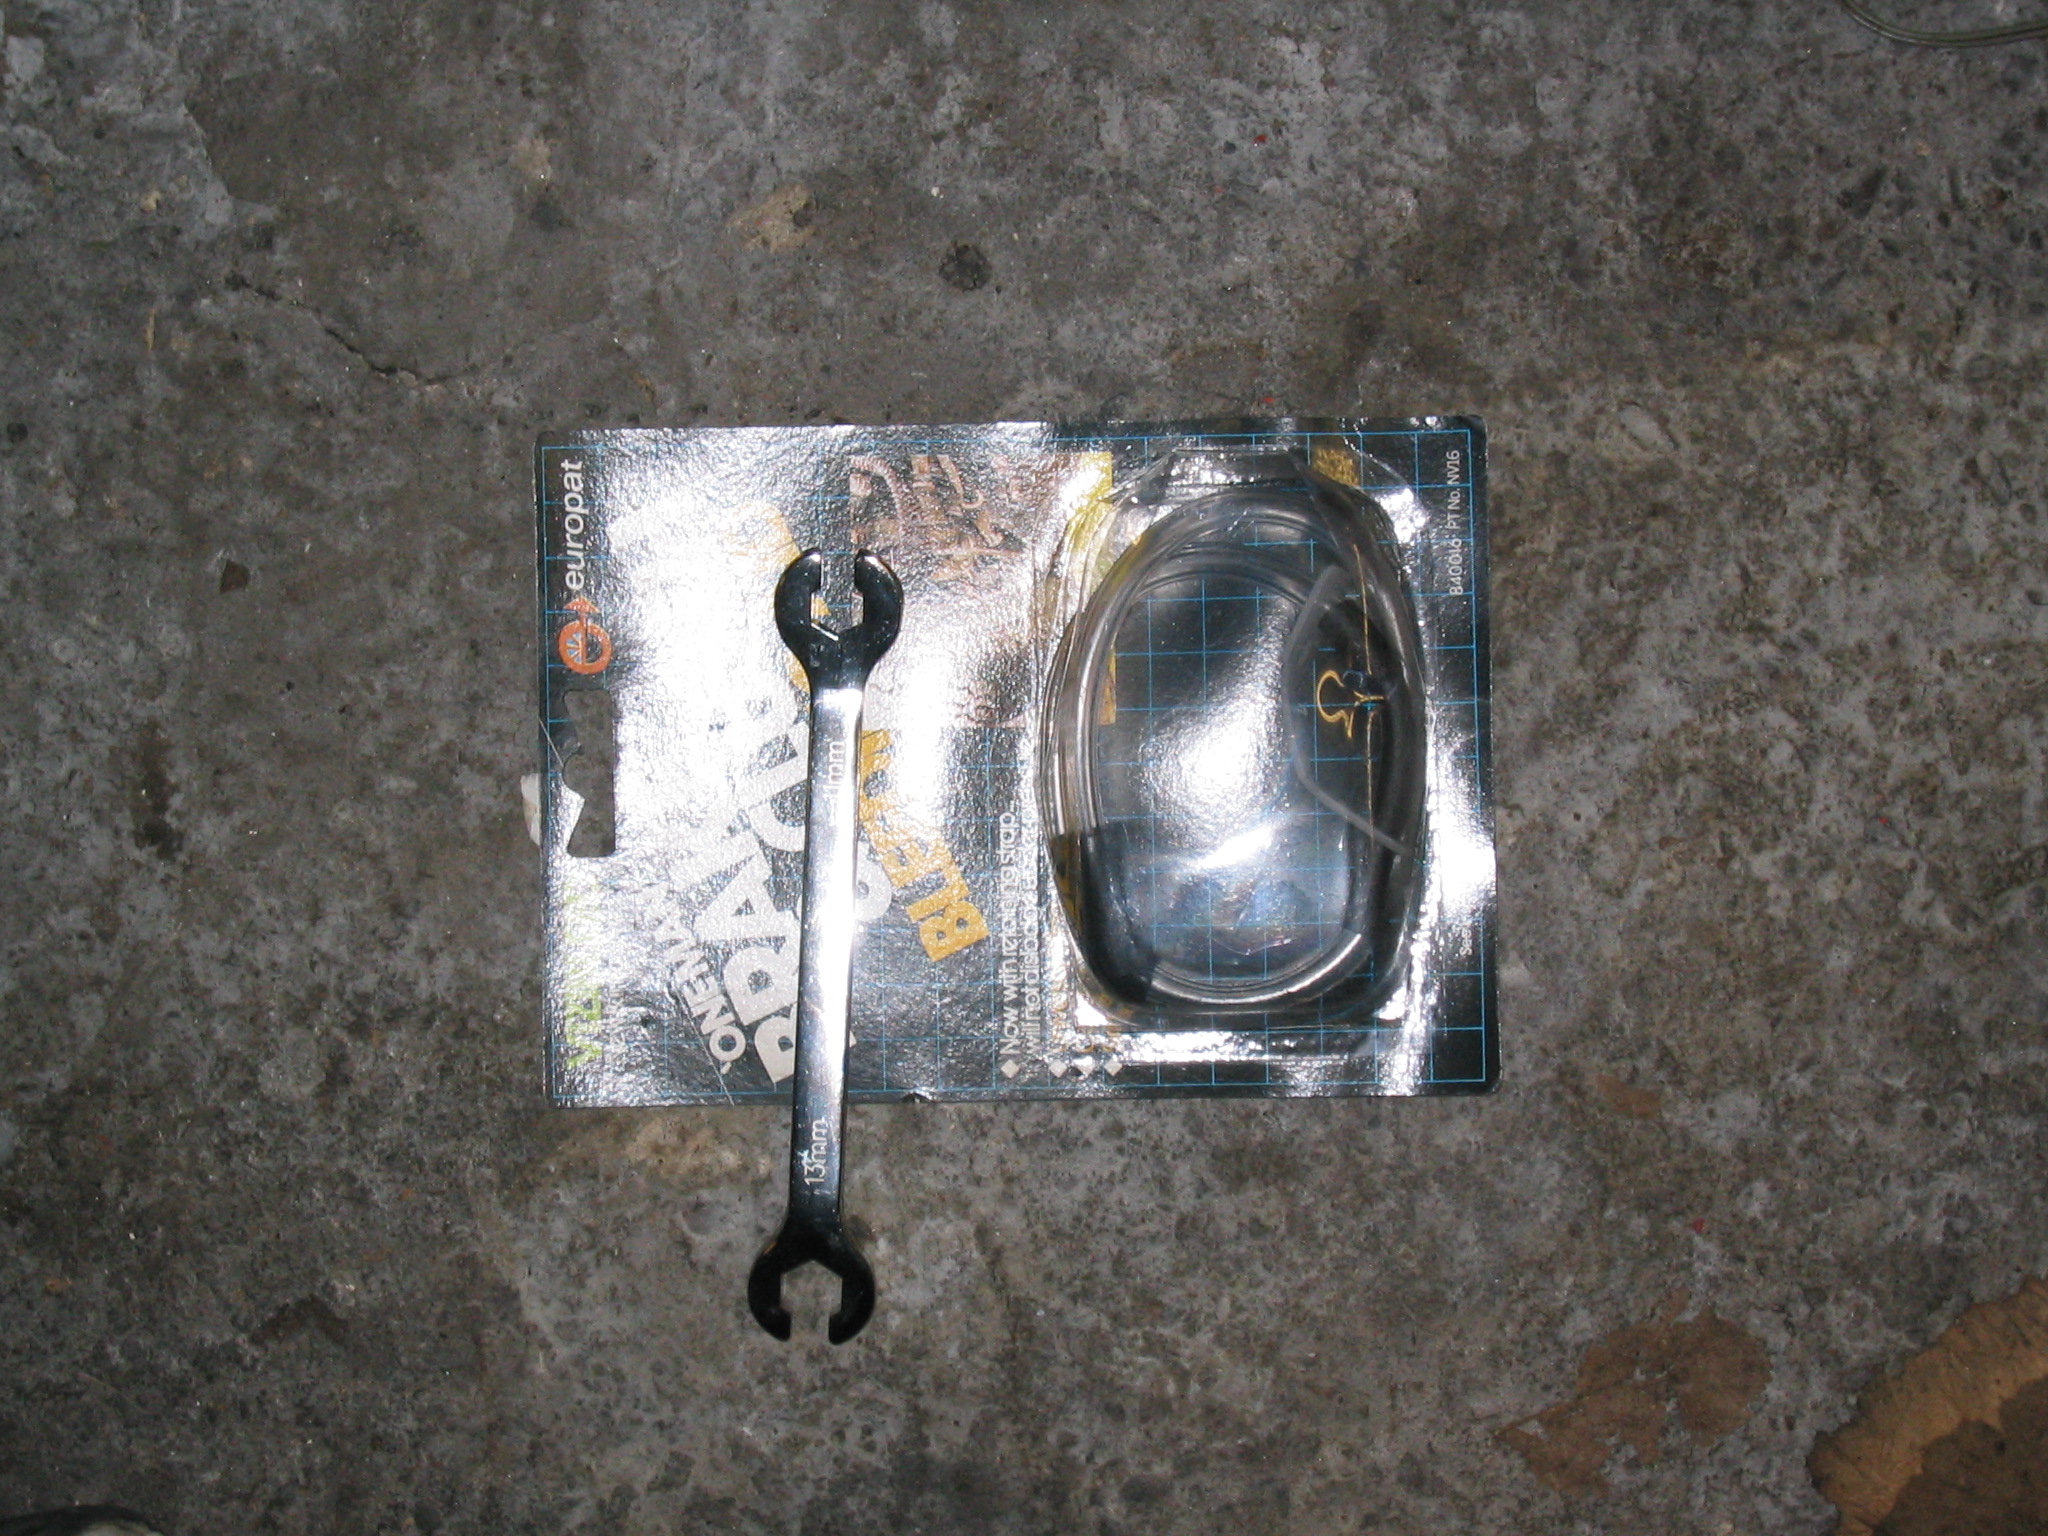
showing the brake spanner I got from Halfords. It's a great piece of production engineering, but absolutely useless for this job. You need the part around the hole where the nut will sit to be much thinner. Your local factor may well have a suitable spanner. A brake spanner is essential for this job as brake nuts round off too easily if you use an ordinary one.
Open the bonnet and remove anything which will get in your way. On Blue 2 the only thing I had to remove was the induction system.
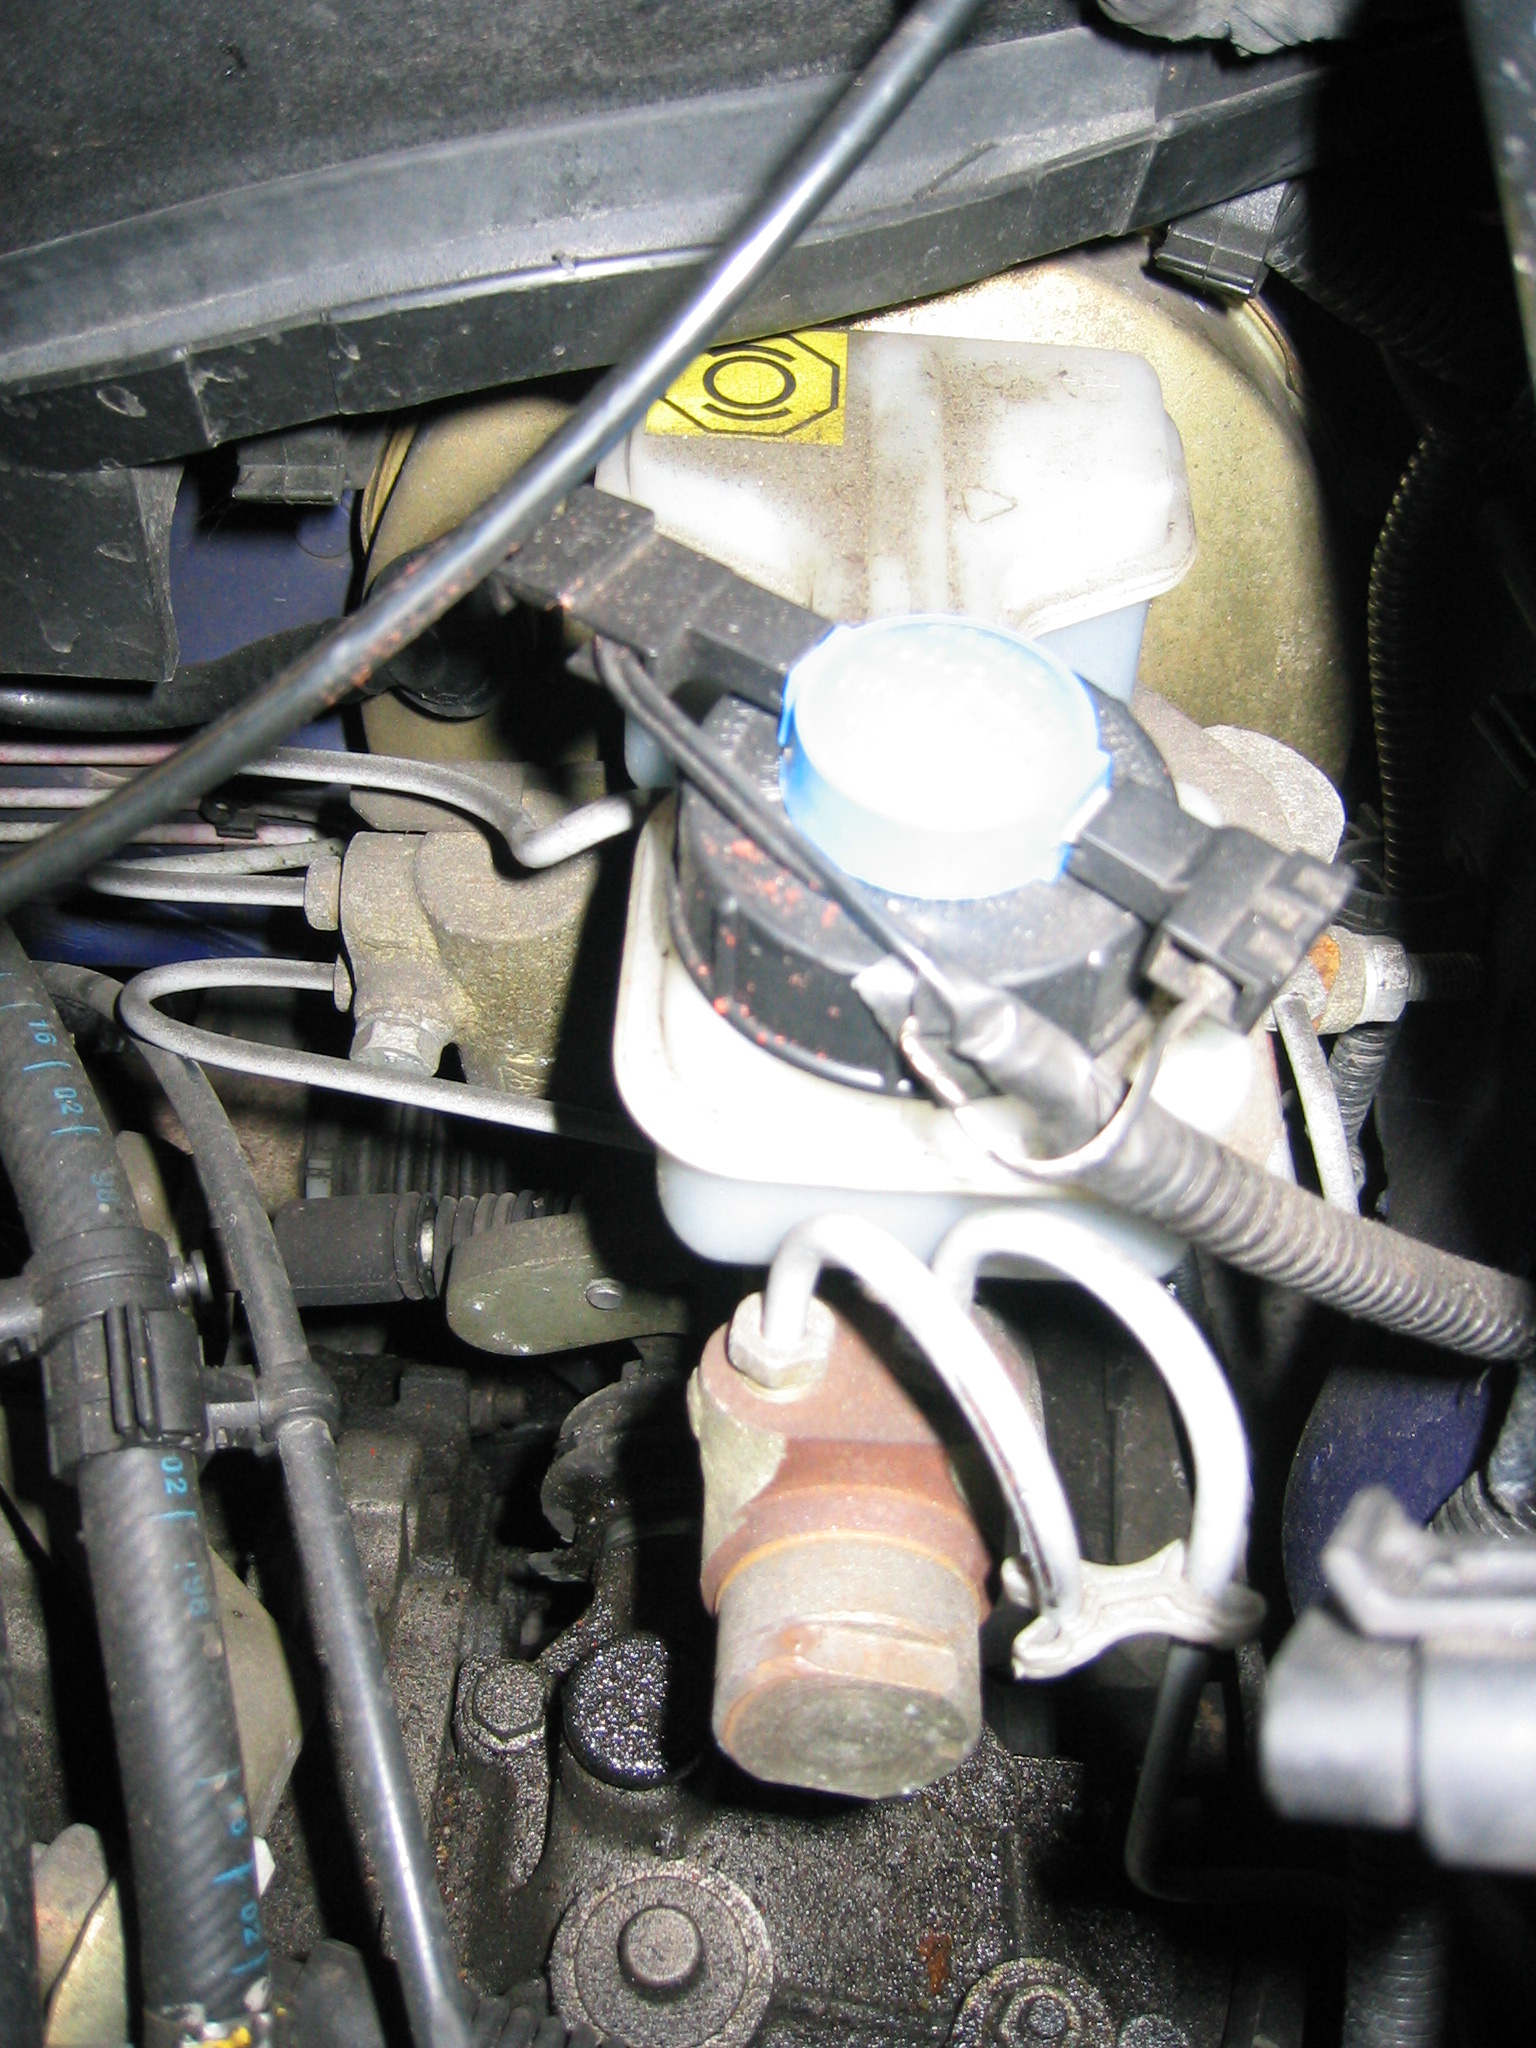
In car, it looks just like this.
Unscrew the cap. You can either put it aside or undo the connectors and remove it completely. Either use the baster/syringe to empty the reservoir, or open one of the bleed nipples and pump the fluid out with the brake pedal.
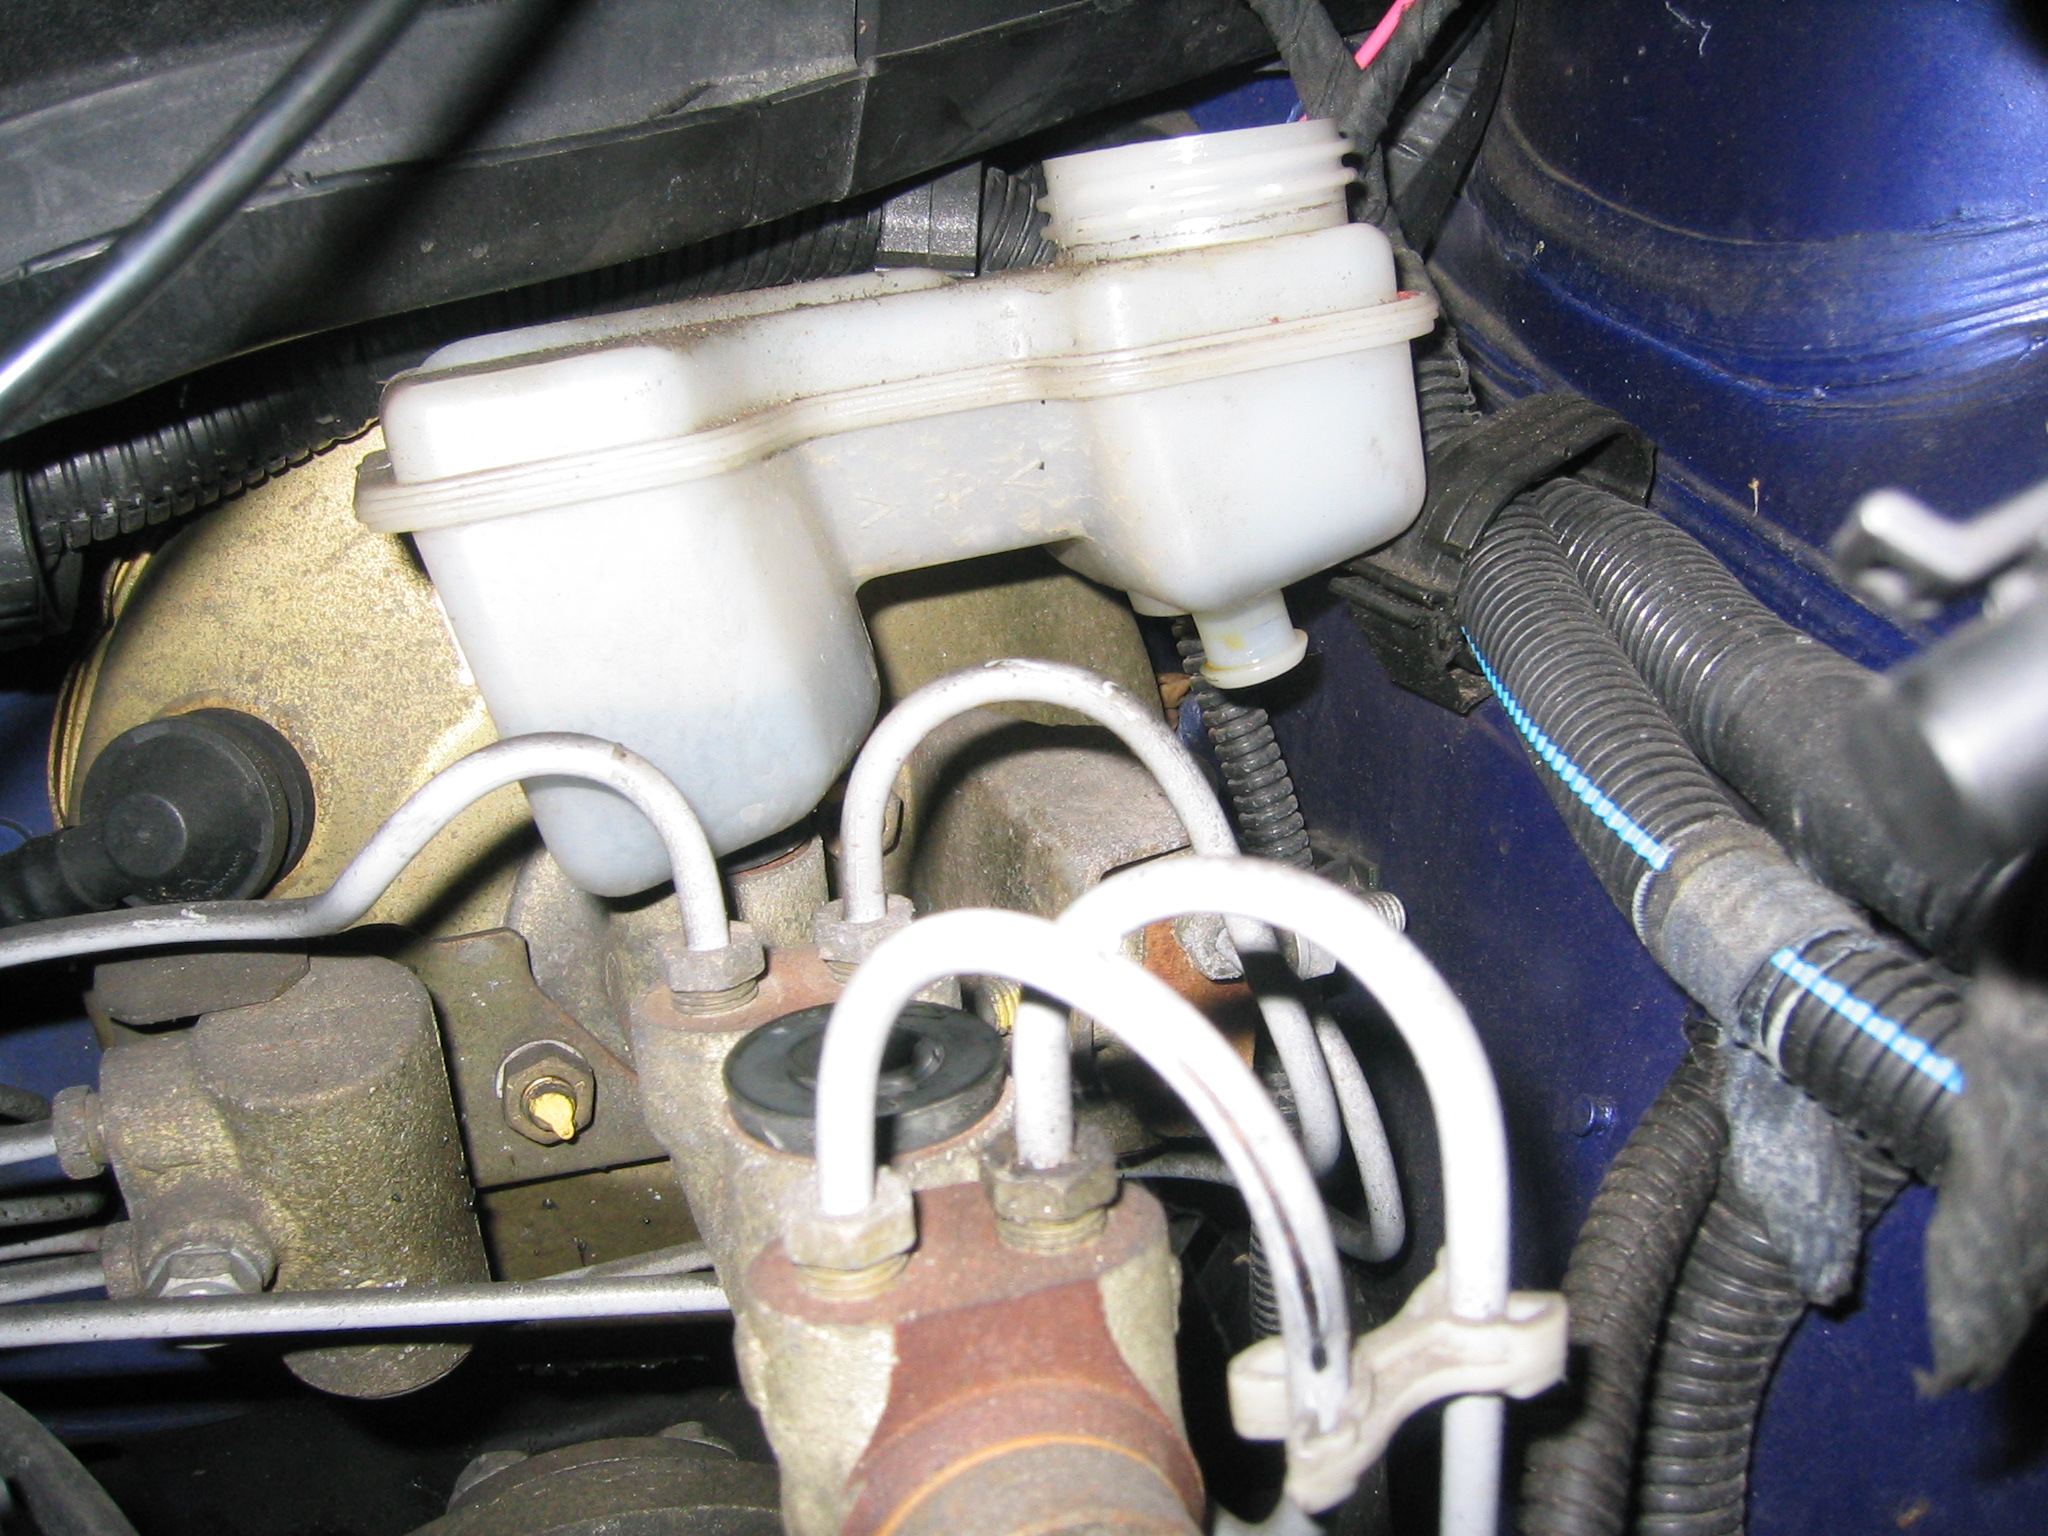
Next, lever the reservoir off with any convenient tool. I used a screwdriver. Be very careful not to damage the brake pipes. You do need to use a fair bit of force. Usually the front comes off first:
and you can then set to work on the back.
Once the reservoir is off, place it somewhere clean and be careful to wash any drops of fluid which fall on your paintwork off with water.
The brake nuts have been known to seize onto the brake lines. If that happens, the lines will break, so some penetrating oil would be a wise investment. Now, undo the brake nuts and gently pull the brake pipes out of the way:

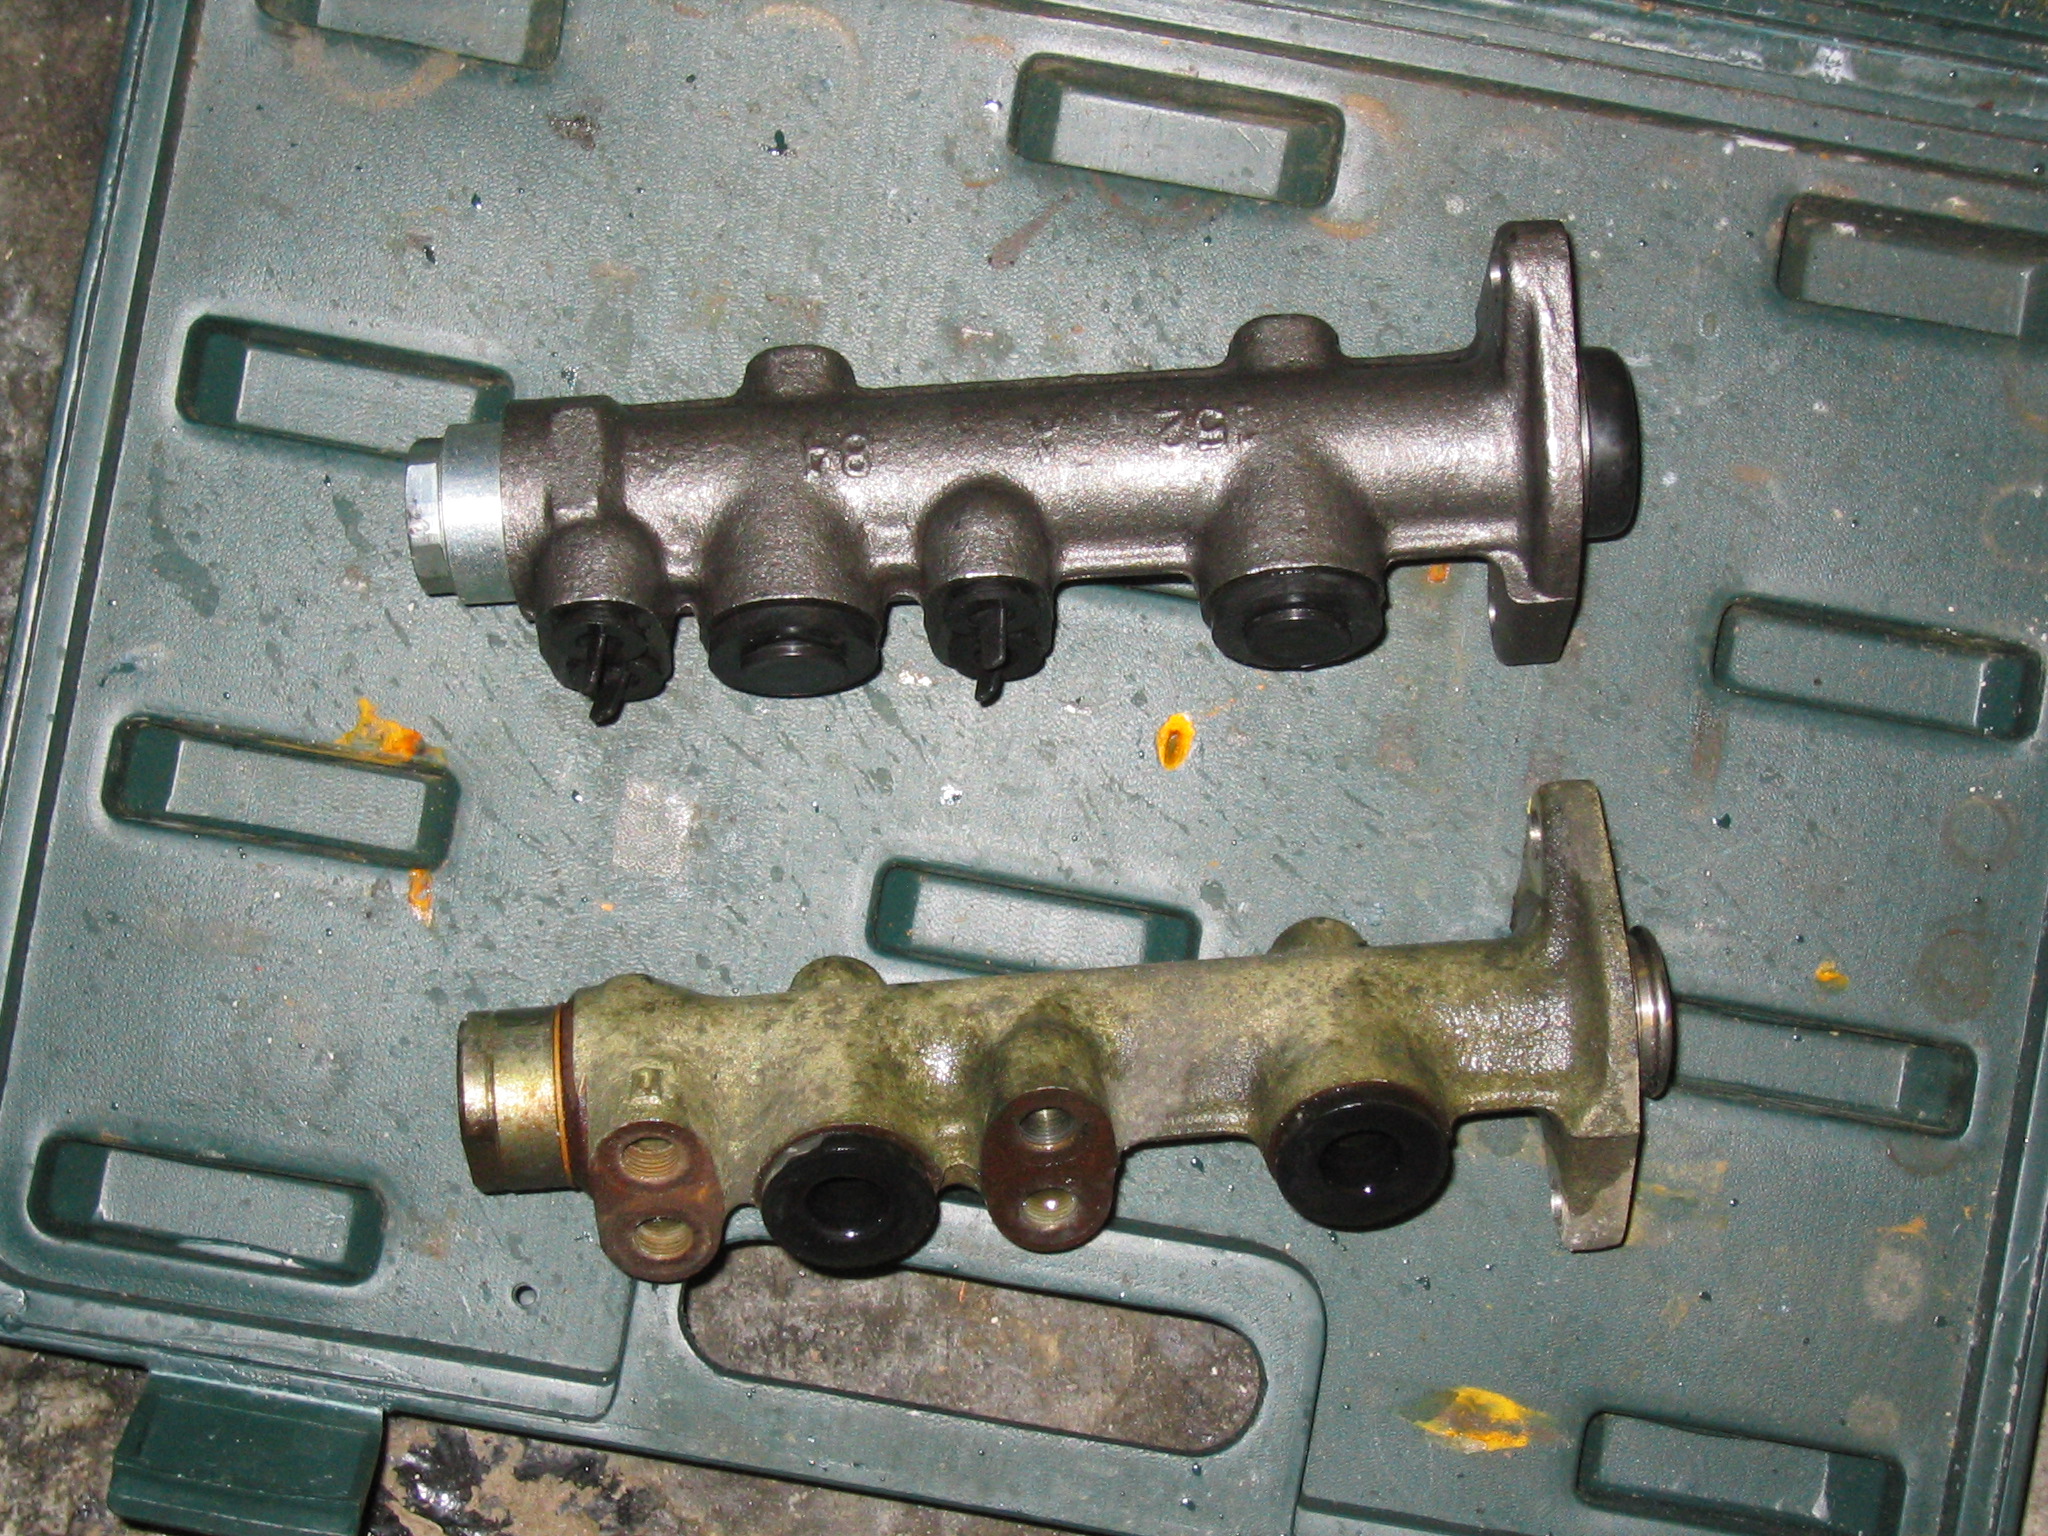
Undo the two 13mm nuts holding the master cylinder to the servo, and pull the bracket out gently until it clears the stud and allows you to pull the master cylinder out. Put the master cylinder aside. Now's your opportunity to compare old and new, just in case you've been given the wrong part.
Carefully remove the rubber plug on the back of the master cylinder and replace the master cylinder body, bolting it to the servo.
Remove the plugs in the brake pipe holes. One at a time and gently, pull the pipes back into position. You'll have to fight the tension in the pipe to get the nut to line up. The threads are fine and the nuts delicate. It's absolutely essential to screw the nuts well in by hand before you take a spanner to them, or you'll almost certainly cross thread them. Do each nut up nice and tight.
Now, prise out the bungs (not the seals!) from the reservoir fittings. Lubricate the reservoir where it pops into the master cylinder and the seals themselves well with fresh brake fluid. The reservoir is a push fit, and it really needs pushing on! Usually the front goes on easiest, then you have to use some sort of lever on the top of the reservoir to push it in. When you can feel no clearance between the top of the seal and the reservoir, it's on well enough.
Finally, fill the reservoir with brake fluid and bleed the brakes.
There's some controversy about the correct order to bleed in.
The Porter manual says do it clockwise or anti clockwise (or once one way, once the other), do it twice, and do it with the engine running. To my mind, doing it with the engine running, especially in an enclosed space, is potentially lethal (and you don't need the servo anyway) and the bleeding order should take into account the diagonal split brakes.
The Haynes gives the order as N/S rear, O/S front, O/S rear, N/S front, and that works for me. By now you'll be tired, forgetful, cold, wanting a beer or a cuddle or some combination of the preceding. I label the tyres with a piece of duct tape and a magic marker so I get it right.
Remember, crack the bleed nipples open (with a 6 sided spanner or socket, 8mm) just enough to let fluid out, just off their seats. Push the pedal slowly, as pushing it fast can damage seals. If you're doing this with a one person bleeder, you can tell when the air is out of a particular line by the change in sound. After you've done one line, tighten up the nipple and check there's still plenty of fluid in the reservoir, and check for any leaks around the master cylinder. Then do the rest. Usually the pedal starts to go stiff just as you're thinking it never will and doing the last line. Check the fluid level, put the top back on the reservoir, clean up and go for a very slow test drive on very quiet roads.
I like to leave it a few days and then re-check for tiny leaks and re-bleed for max pedal.
me

Worry not, O Custard, I'll PM you and ask you to delete the thread as soon as everyone has had their say.
(This is why I want/wanted a wiki/swiki for the Guides and FAQs.)Firstly, the diagnosis that there is a fault with the master cylinder is a bit tricky: it'll feel a little like there's air in the system, except the pedal will keep on sinking. A sure sign for me was that sitting in traffic, holding the car on the footbrake, it'd roll forward (or backwards). Essentially, fluid was slowly escaping from the seals, but because the leak is internal, there is no tell tale drip.
A Google for “master cylinder” or “master cylinder fault” should turn up plenty of ideas.
Secondly, it's possible to rebuild a master cylinder. The only real competence required is knowing whether the pile of bits on your bench is actually worth rebuilding. I won't be covering a rebuild, as the car I'm putting the new master cylinder on is my daily hack and I needed it the next day. Maybe later.
Thirdly, this guide is offered in the belief that it is useful, but you follow it entirely at your own risk and on the strict understanding that no warranties, implied or otherwise, apply. You cannot hold Fiat Forum or myself responsible for the consequences of your actions.
Work methodically, work cleanly, work safely.
OK, let's begin. You need a brake master cylinder: I got mine from Club Cento's Fluffy the Impaler (Mick) for a little under £20 plus VAT. It should come with seals and will look something like this:
Tools: some method of bleeding the brakes, an 11mm brake spanner, a socket set including a 13mm socket and an 8mm socket. An 8mm spanner would be useful, I like the ratchet ones with a 6 point ratchet head and an open end. A jack is optional, but if you use a jack you must use an axle stand. A poultry baster or enema syringe is useful. Brake fluid – Dot 4 -- (of course), but because brake fluid is really unpleasant and nasty stuff, some water to put down over any spillages and a sponge to get any from paintwork. A small pry bar or long, medium sized, flat screwdriver. Some penetrating oil.
Photo of brake bleeder and brake spanner
showing the brake spanner I got from Halfords. It's a great piece of production engineering, but absolutely useless for this job. You need the part around the hole where the nut will sit to be much thinner. Your local factor may well have a suitable spanner. A brake spanner is essential for this job as brake nuts round off too easily if you use an ordinary one.
Open the bonnet and remove anything which will get in your way. On Blue 2 the only thing I had to remove was the induction system.
In car, it looks just like this.
Unscrew the cap. You can either put it aside or undo the connectors and remove it completely. Either use the baster/syringe to empty the reservoir, or open one of the bleed nipples and pump the fluid out with the brake pedal.
Next, lever the reservoir off with any convenient tool. I used a screwdriver. Be very careful not to damage the brake pipes. You do need to use a fair bit of force. Usually the front comes off first:
and you can then set to work on the back.
Once the reservoir is off, place it somewhere clean and be careful to wash any drops of fluid which fall on your paintwork off with water.
The brake nuts have been known to seize onto the brake lines. If that happens, the lines will break, so some penetrating oil would be a wise investment. Now, undo the brake nuts and gently pull the brake pipes out of the way:
Undo the two 13mm nuts holding the master cylinder to the servo, and pull the bracket out gently until it clears the stud and allows you to pull the master cylinder out. Put the master cylinder aside. Now's your opportunity to compare old and new, just in case you've been given the wrong part.
Carefully remove the rubber plug on the back of the master cylinder and replace the master cylinder body, bolting it to the servo.
Remove the plugs in the brake pipe holes. One at a time and gently, pull the pipes back into position. You'll have to fight the tension in the pipe to get the nut to line up. The threads are fine and the nuts delicate. It's absolutely essential to screw the nuts well in by hand before you take a spanner to them, or you'll almost certainly cross thread them. Do each nut up nice and tight.
Now, prise out the bungs (not the seals!) from the reservoir fittings. Lubricate the reservoir where it pops into the master cylinder and the seals themselves well with fresh brake fluid. The reservoir is a push fit, and it really needs pushing on! Usually the front goes on easiest, then you have to use some sort of lever on the top of the reservoir to push it in. When you can feel no clearance between the top of the seal and the reservoir, it's on well enough.
Finally, fill the reservoir with brake fluid and bleed the brakes.
There's some controversy about the correct order to bleed in.
The Porter manual says do it clockwise or anti clockwise (or once one way, once the other), do it twice, and do it with the engine running. To my mind, doing it with the engine running, especially in an enclosed space, is potentially lethal (and you don't need the servo anyway) and the bleeding order should take into account the diagonal split brakes.
The Haynes gives the order as N/S rear, O/S front, O/S rear, N/S front, and that works for me. By now you'll be tired, forgetful, cold, wanting a beer or a cuddle or some combination of the preceding. I label the tyres with a piece of duct tape and a magic marker so I get it right.
Remember, crack the bleed nipples open (with a 6 sided spanner or socket, 8mm) just enough to let fluid out, just off their seats. Push the pedal slowly, as pushing it fast can damage seals. If you're doing this with a one person bleeder, you can tell when the air is out of a particular line by the change in sound. After you've done one line, tighten up the nipple and check there's still plenty of fluid in the reservoir, and check for any leaks around the master cylinder. Then do the rest. Usually the pedal starts to go stiff just as you're thinking it never will and doing the last line. Check the fluid level, put the top back on the reservoir, clean up and go for a very slow test drive on very quiet roads.
I like to leave it a few days and then re-check for tiny leaks and re-bleed for max pedal.
me
Last edited by a moderator: