OP
OP
Hiya Bollie! ") and thanks for your compliment.
and thanks for your compliment.
I’m sorry you cant add/modify your B in Belgium.
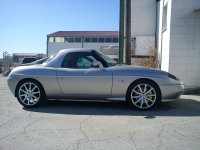
Its taken a few years to get her this way and cost some pounds but I have truly become fond of my Barchetta and plan to restore and modify her as best as I can.
The 17” wheels was one of my very first modifications back in 2007 and everything since then I have had installed, I consider to have only improved the way the B drives, handles and looks.
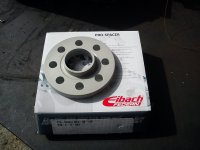
Occasionally falling into the odd deep pot hole can be felt as being a little hard on the wheels but I am running a low 40mm profile tyre but overall adding the Bilstien suspension, Eibach ARB kit, poly bushes and my new rear Teflon suspension bushes makes the Barchetta feel so much more solid and glued to the ground.
The handling has improved vastly; there is no or little body roll and just today I managed another test run on some small bendy roads and she felt superb,
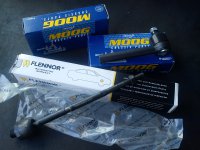
Now it been a while since I have had a good blast in her and there is a few issues to still be dealt with, i.e. New steering rack ends, rear bearings, tracking and the new brakes to bed in fully but she felt real good, smooth, tight and taught round the bends.
At one point there was a small roundabout that I kept flying around until I was nearly dizzy :spin: and she just stayed glued to the tarmac without letting go.
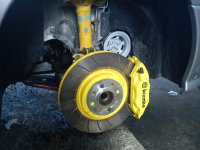
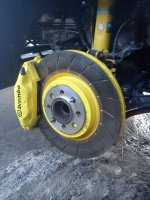
The Abs is currently not working due to me painting the rear hubs and discs but surprisingly hitting the brakes stoped me well too.
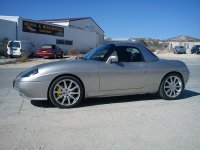
Now! I would like to see her sitting/riding a little lower generally for cosmetic purpose but this may compromise the now comfortable road use I have.
I,m still debating the idea and if I remember correctly the B as standard felt a bit soft & wavy when pushed a little, especially on bendy, twisty roads but she now feels like a real sports car.:woot:
and thanks for your compliment.I’m sorry you cant add/modify your B in Belgium.
Its taken a few years to get her this way and cost some pounds but I have truly become fond of my Barchetta and plan to restore and modify her as best as I can.
The 17” wheels was one of my very first modifications back in 2007 and everything since then I have had installed, I consider to have only improved the way the B drives, handles and looks.
Occasionally falling into the odd deep pot hole can be felt as being a little hard on the wheels but I am running a low 40mm profile tyre but overall adding the Bilstien suspension, Eibach ARB kit, poly bushes and my new rear Teflon suspension bushes makes the Barchetta feel so much more solid and glued to the ground.
The handling has improved vastly; there is no or little body roll and just today I managed another test run on some small bendy roads and she felt superb,
Now it been a while since I have had a good blast in her and there is a few issues to still be dealt with, i.e. New steering rack ends, rear bearings, tracking and the new brakes to bed in fully but she felt real good, smooth, tight and taught round the bends.
At one point there was a small roundabout that I kept flying around until I was nearly dizzy :spin: and she just stayed glued to the tarmac without letting go.
The Abs is currently not working due to me painting the rear hubs and discs but surprisingly hitting the brakes stoped me well too.
Now! I would like to see her sitting/riding a little lower generally for cosmetic purpose but this may compromise the now comfortable road use I have.
I,m still debating the idea and if I remember correctly the B as standard felt a bit soft & wavy when pushed a little, especially on bendy, twisty roads but she now feels like a real sports car.
:woot:Attachments
Last edited: