Technical Just started and could do with some 4x4 help.

Currently reading:
Technical Just started and could do with some 4x4 help.

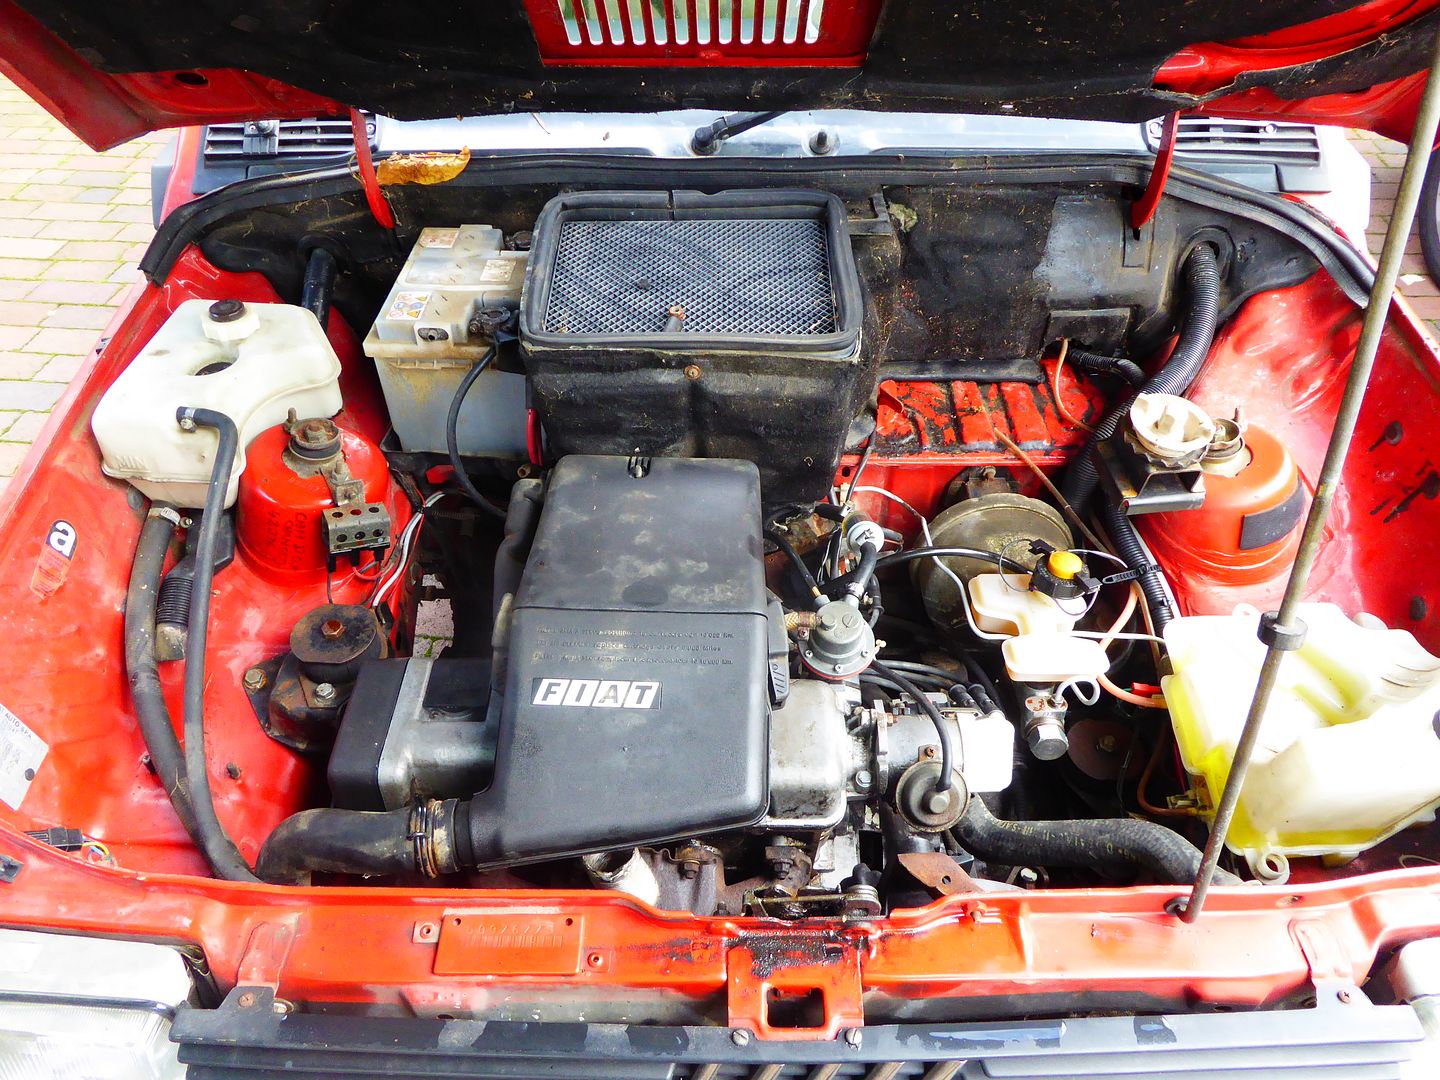
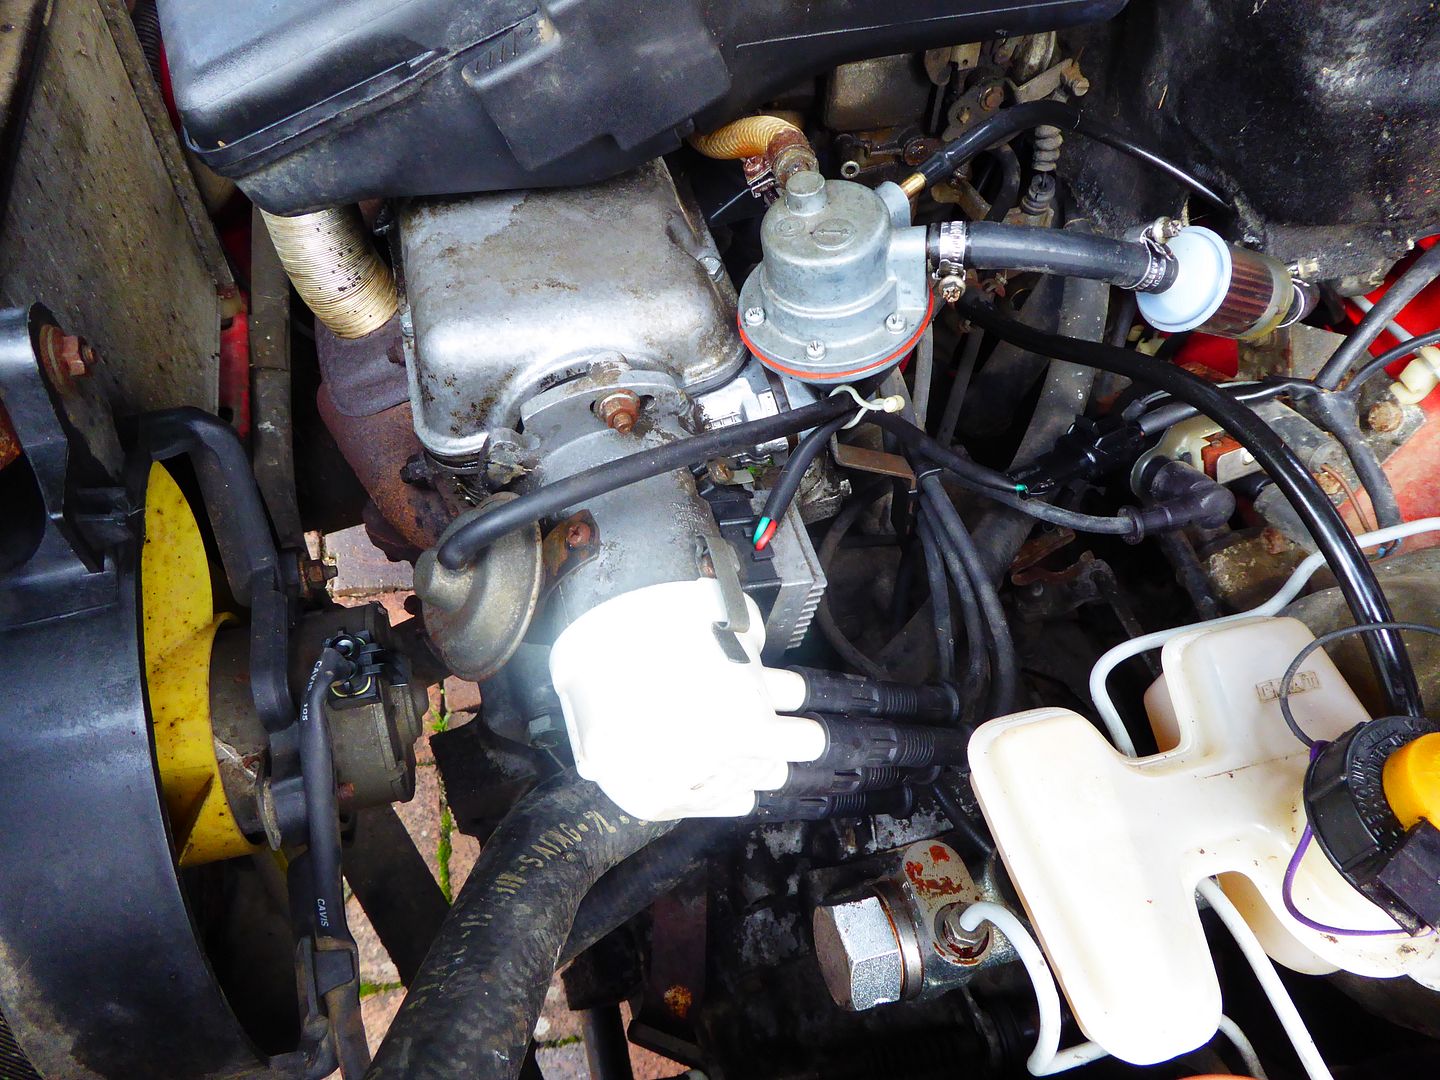
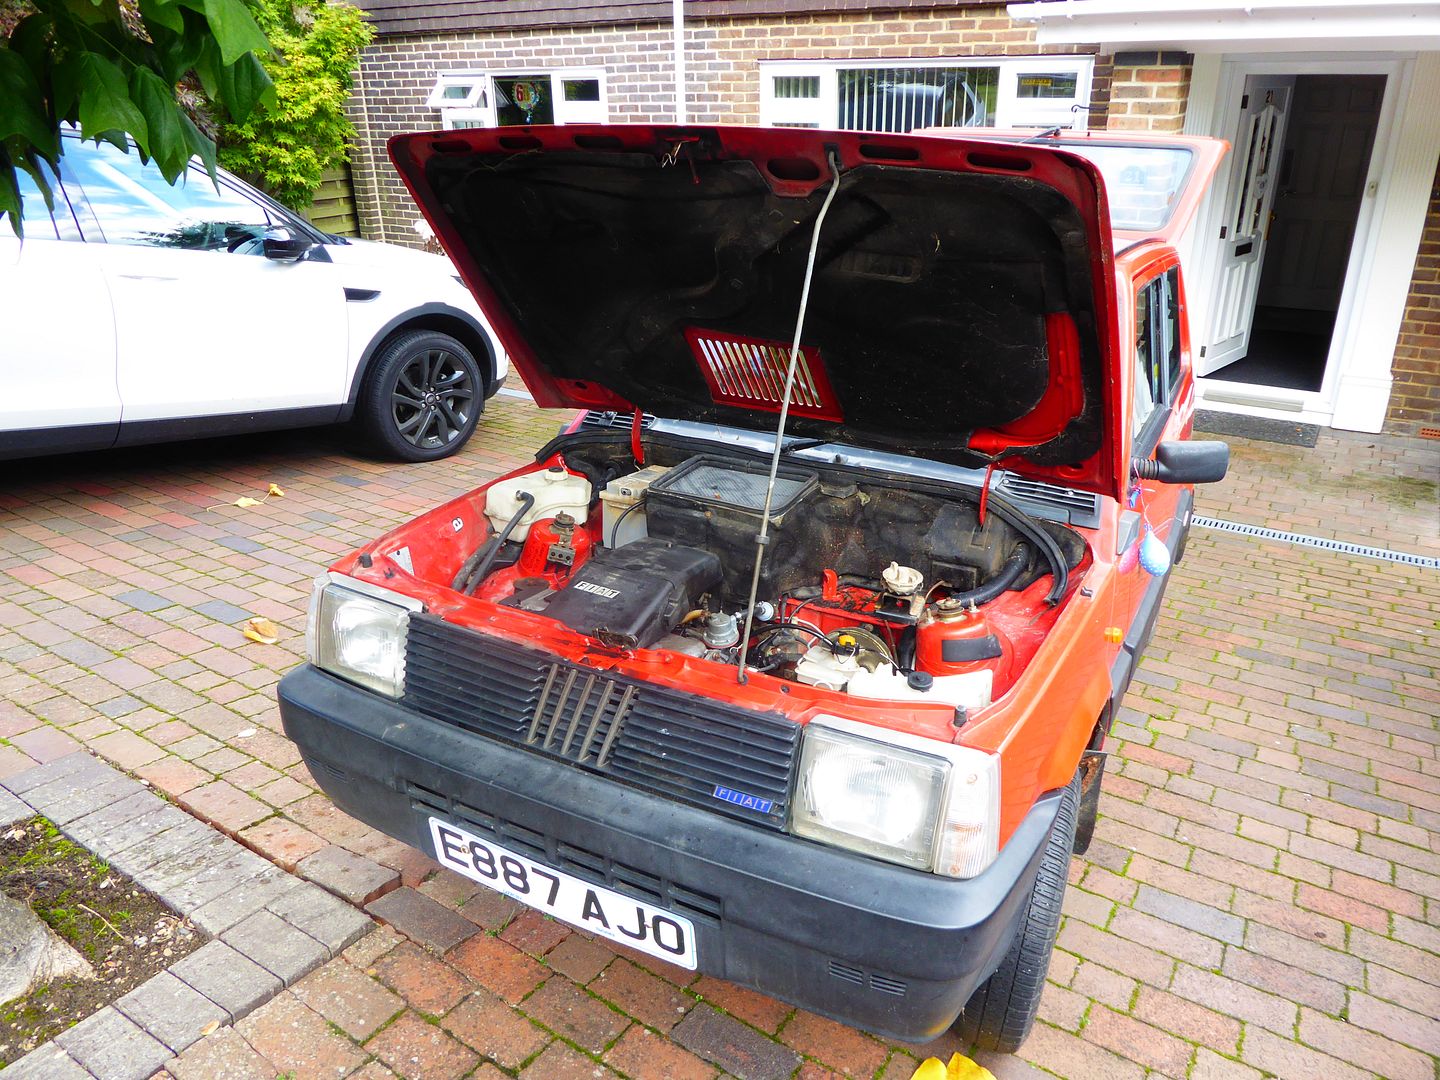
Under the bonnet looking encouraging.


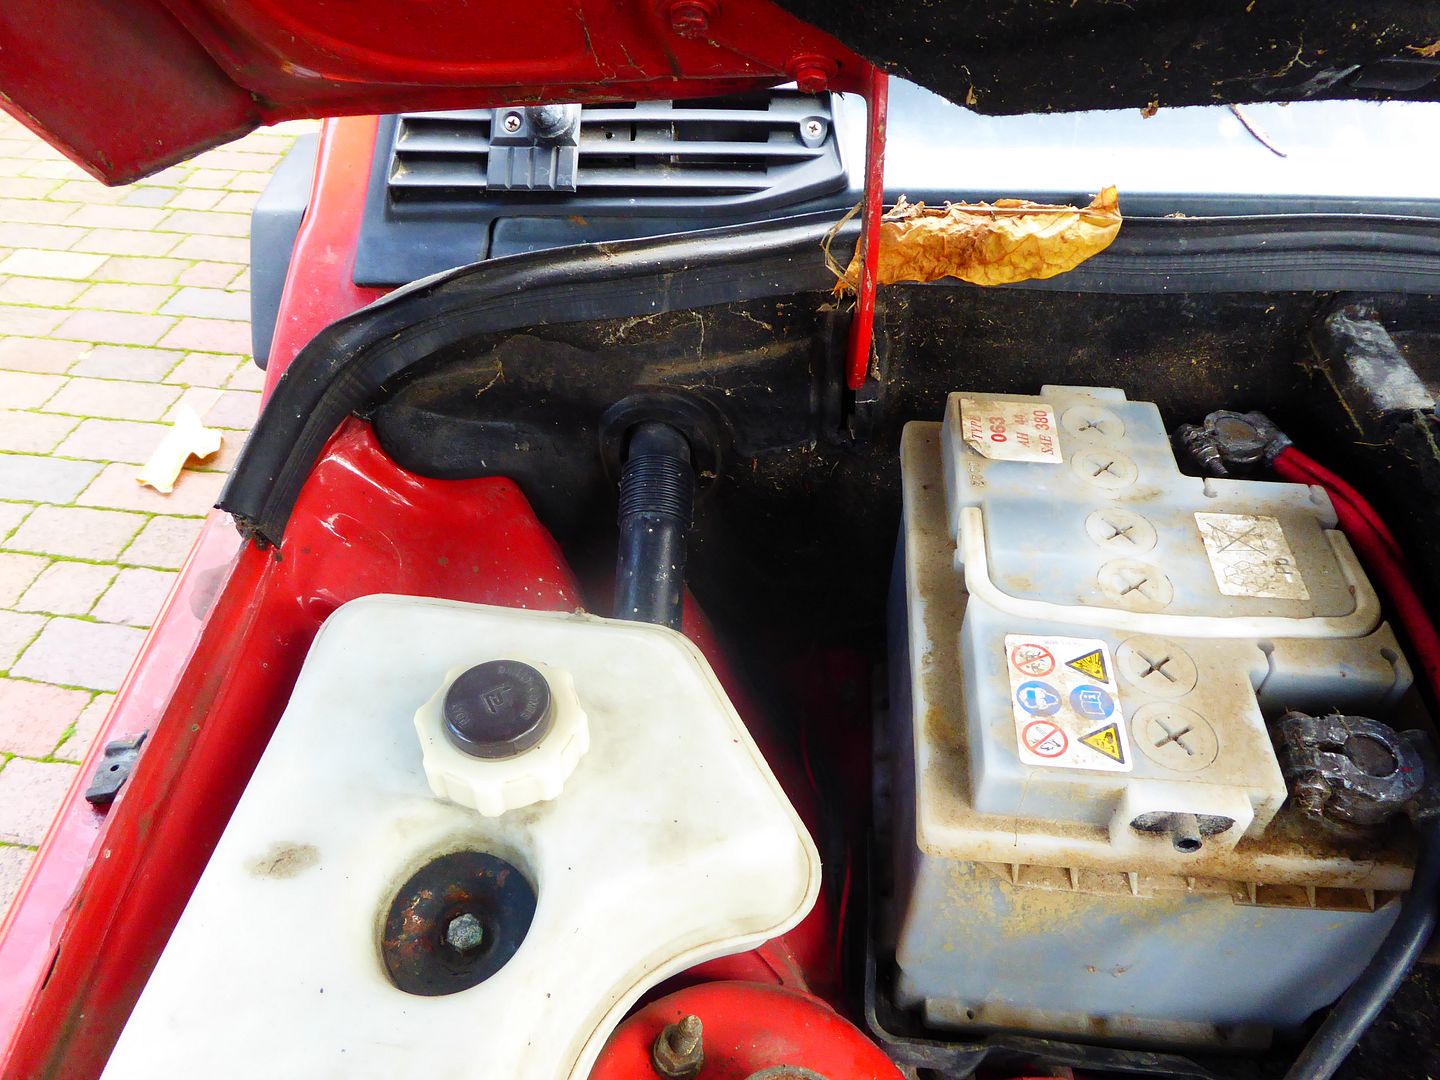
Battery not bolted in and holding a charge passed its capability.


No real rot here which was encouraging.


All the service history I will ever see?


Think its a new fan. Damage to the rad confirmed this had indeed been done.


New brake parts!


Other recent service parts found.


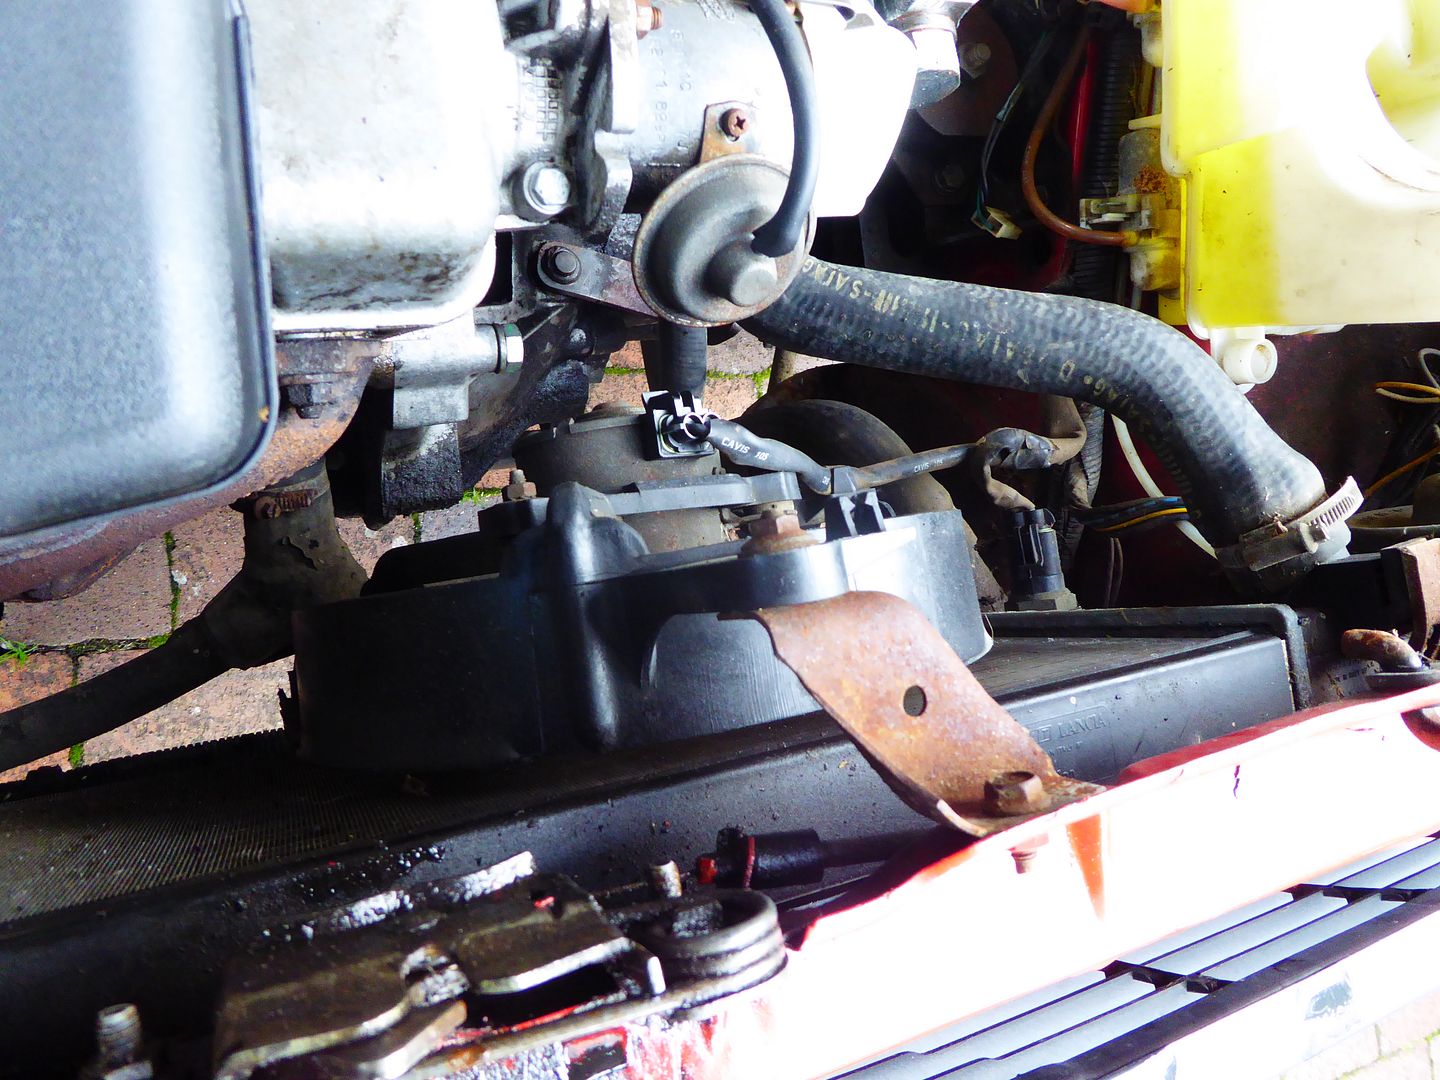
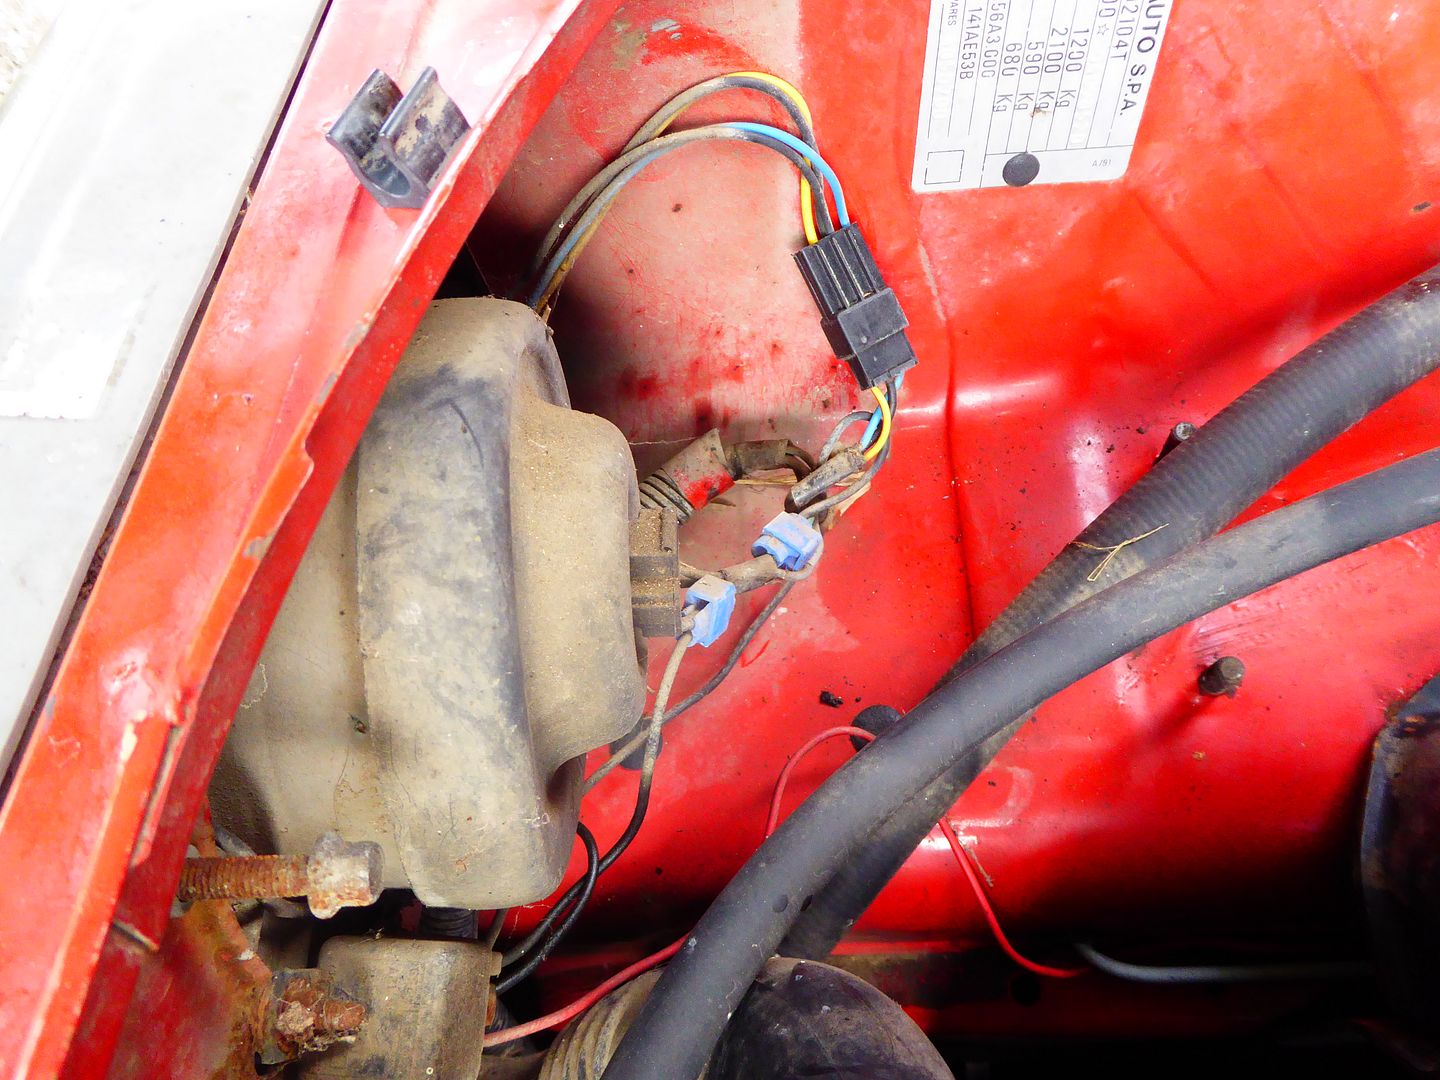
Hate these clips. Just stinks of a bodge job.
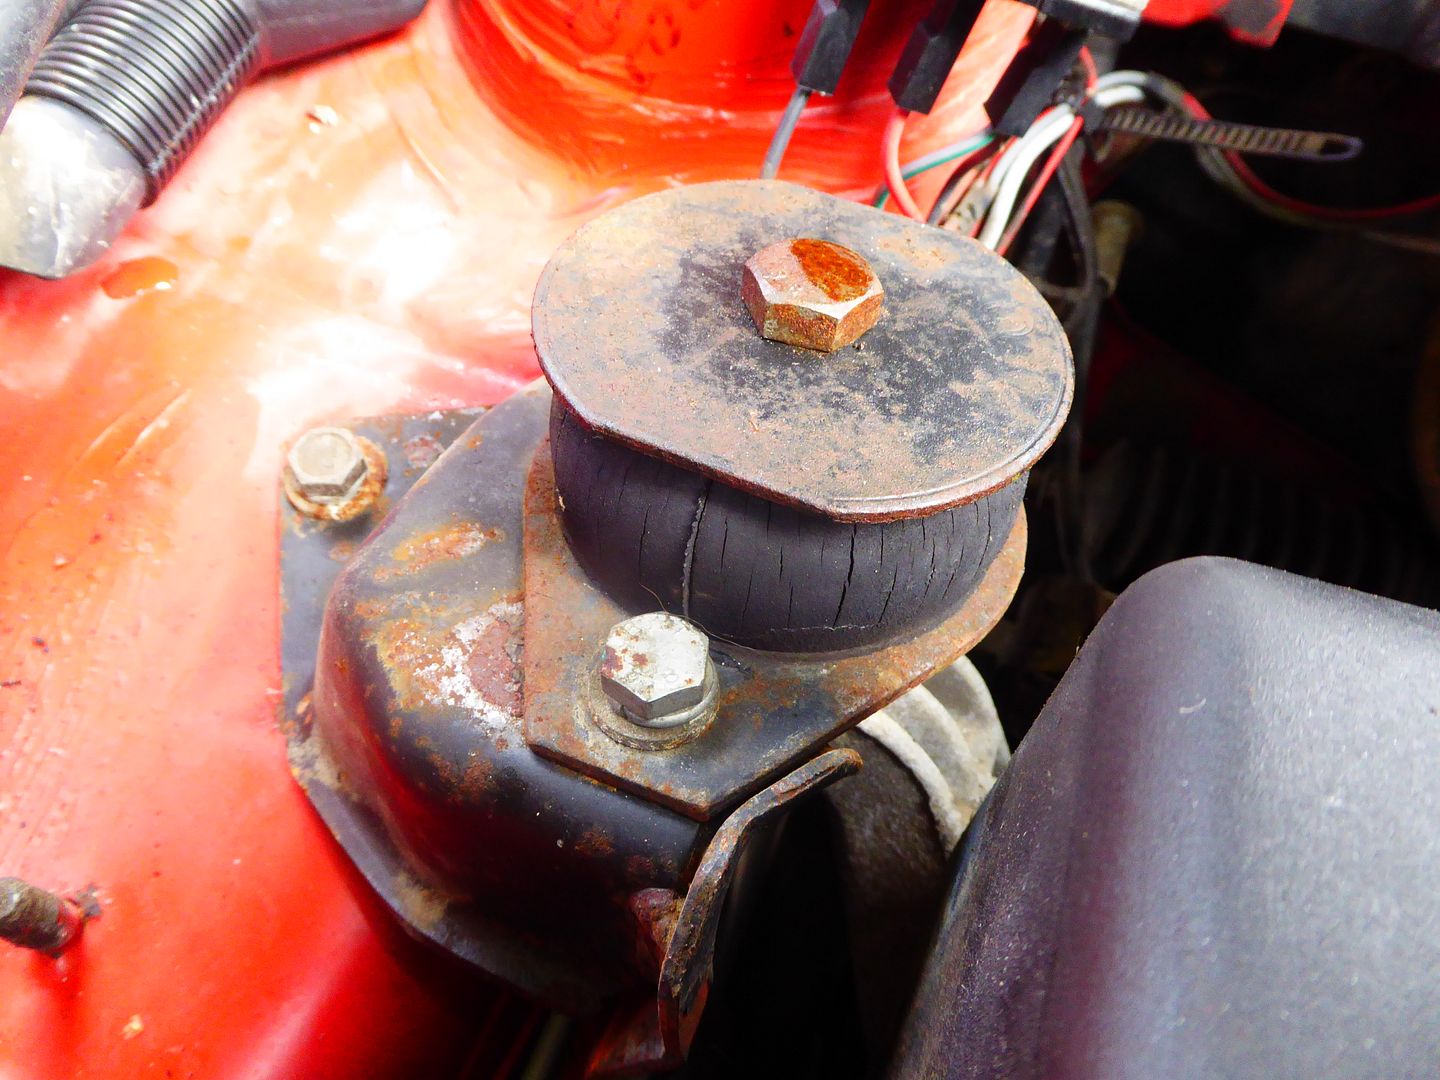

Dead Mounts


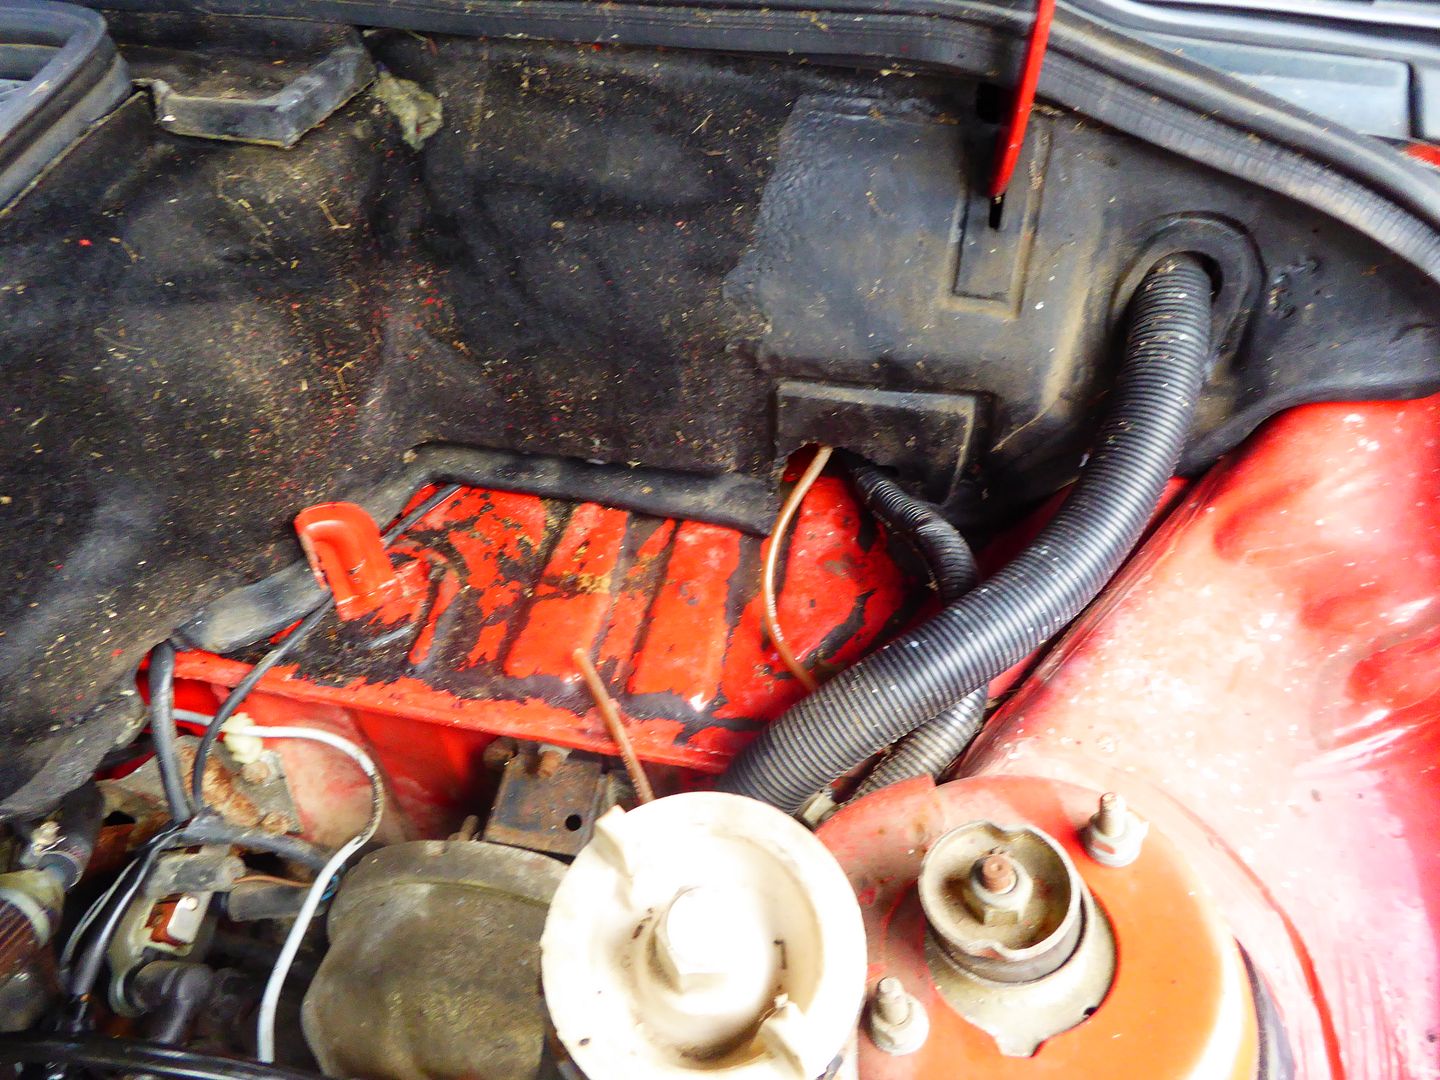
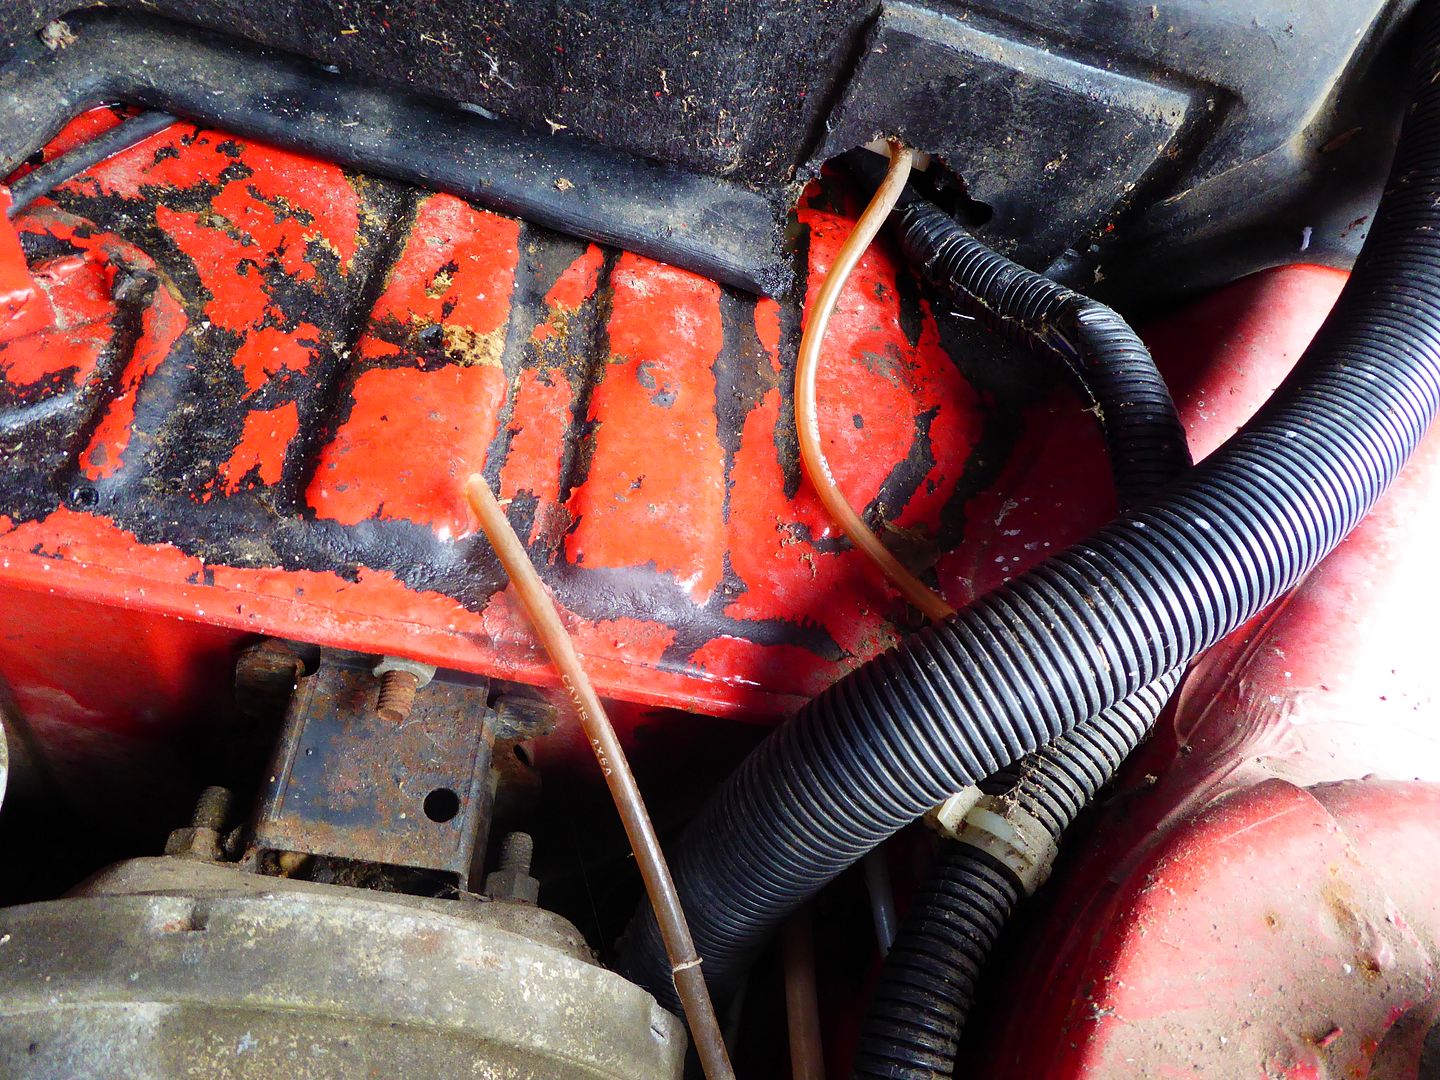
Something ate my washer hose?


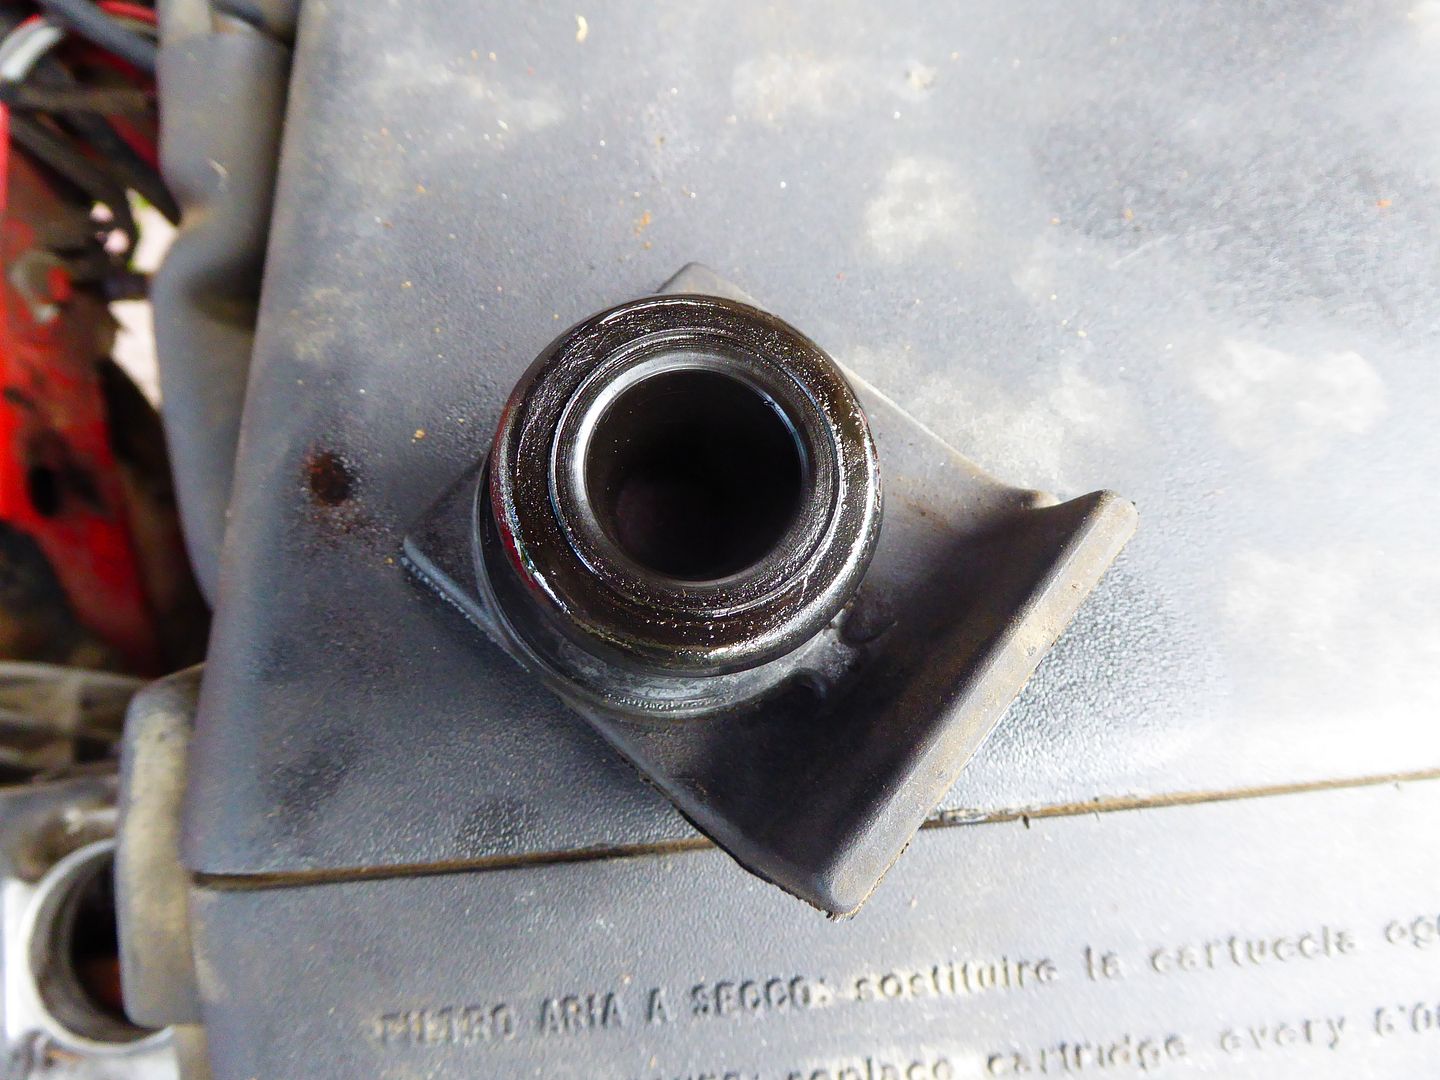
No mayo in the oil cap
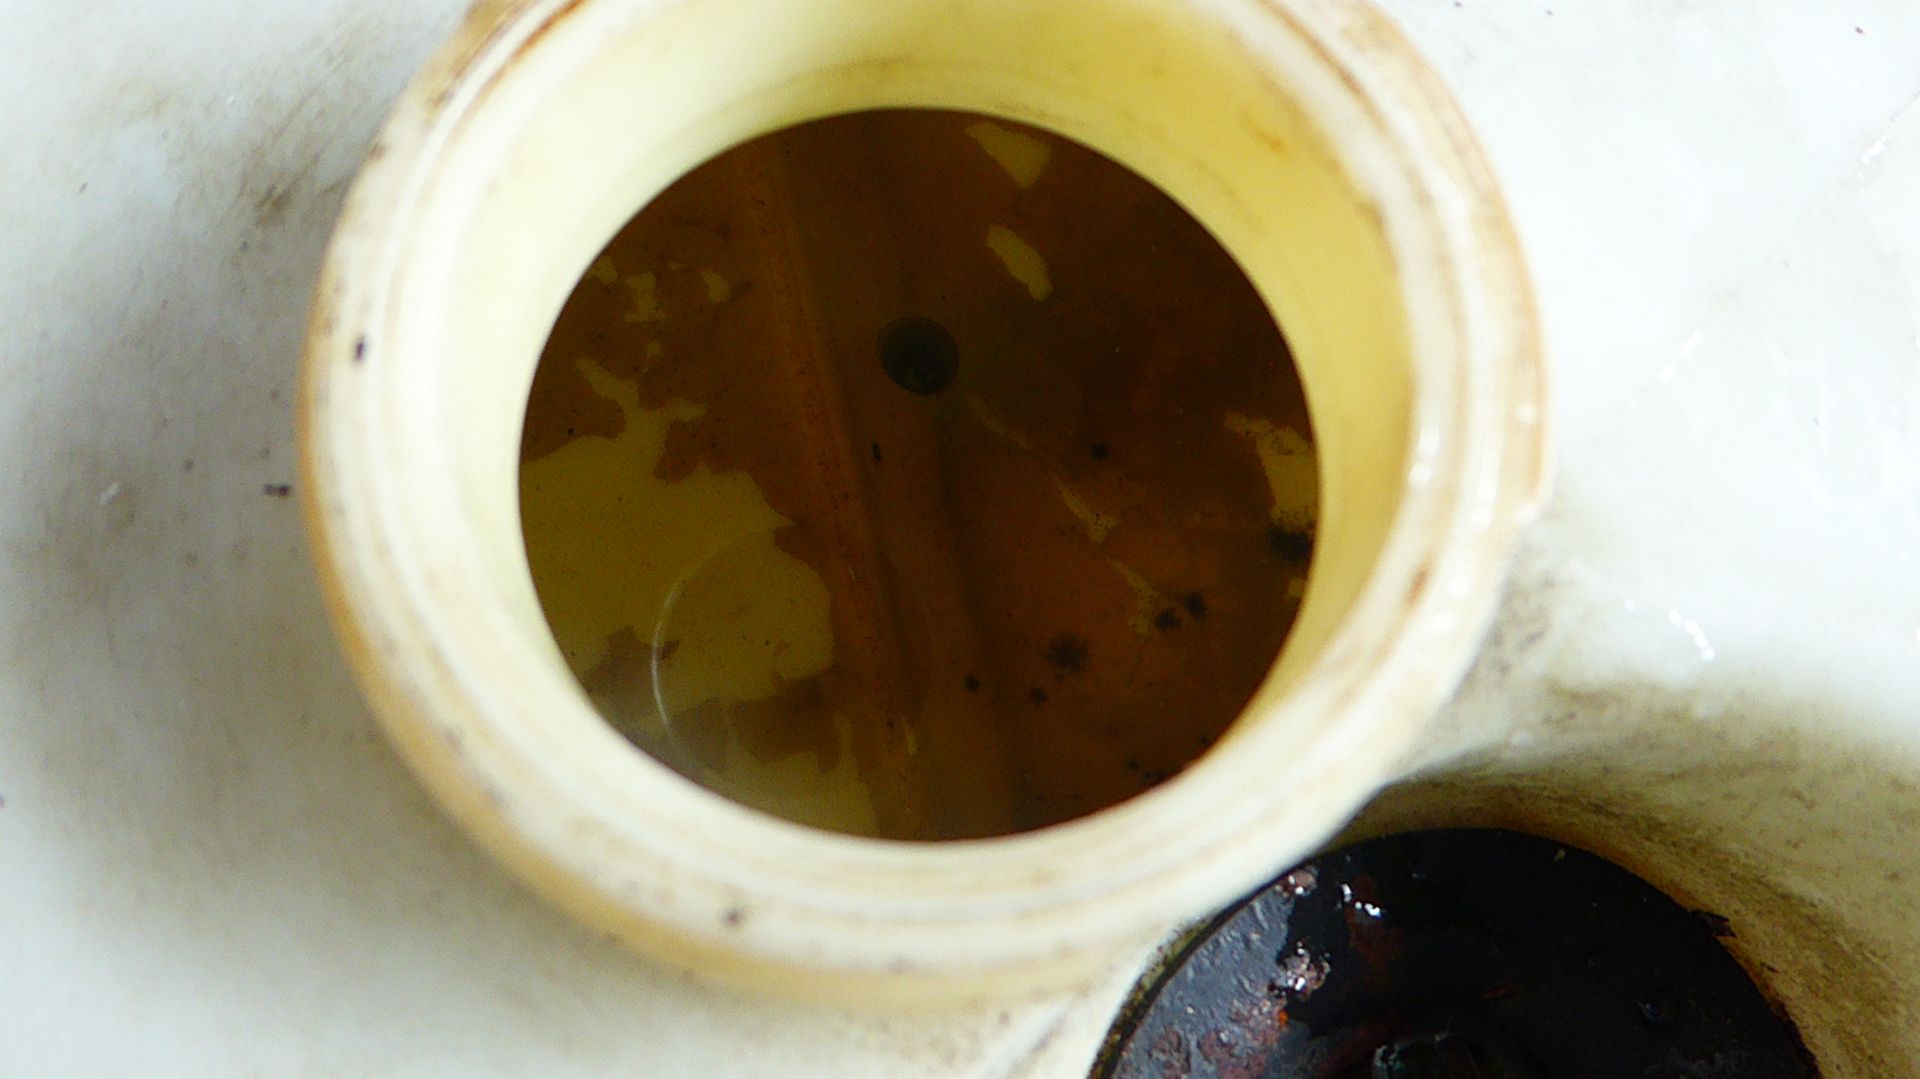

Or on the stick


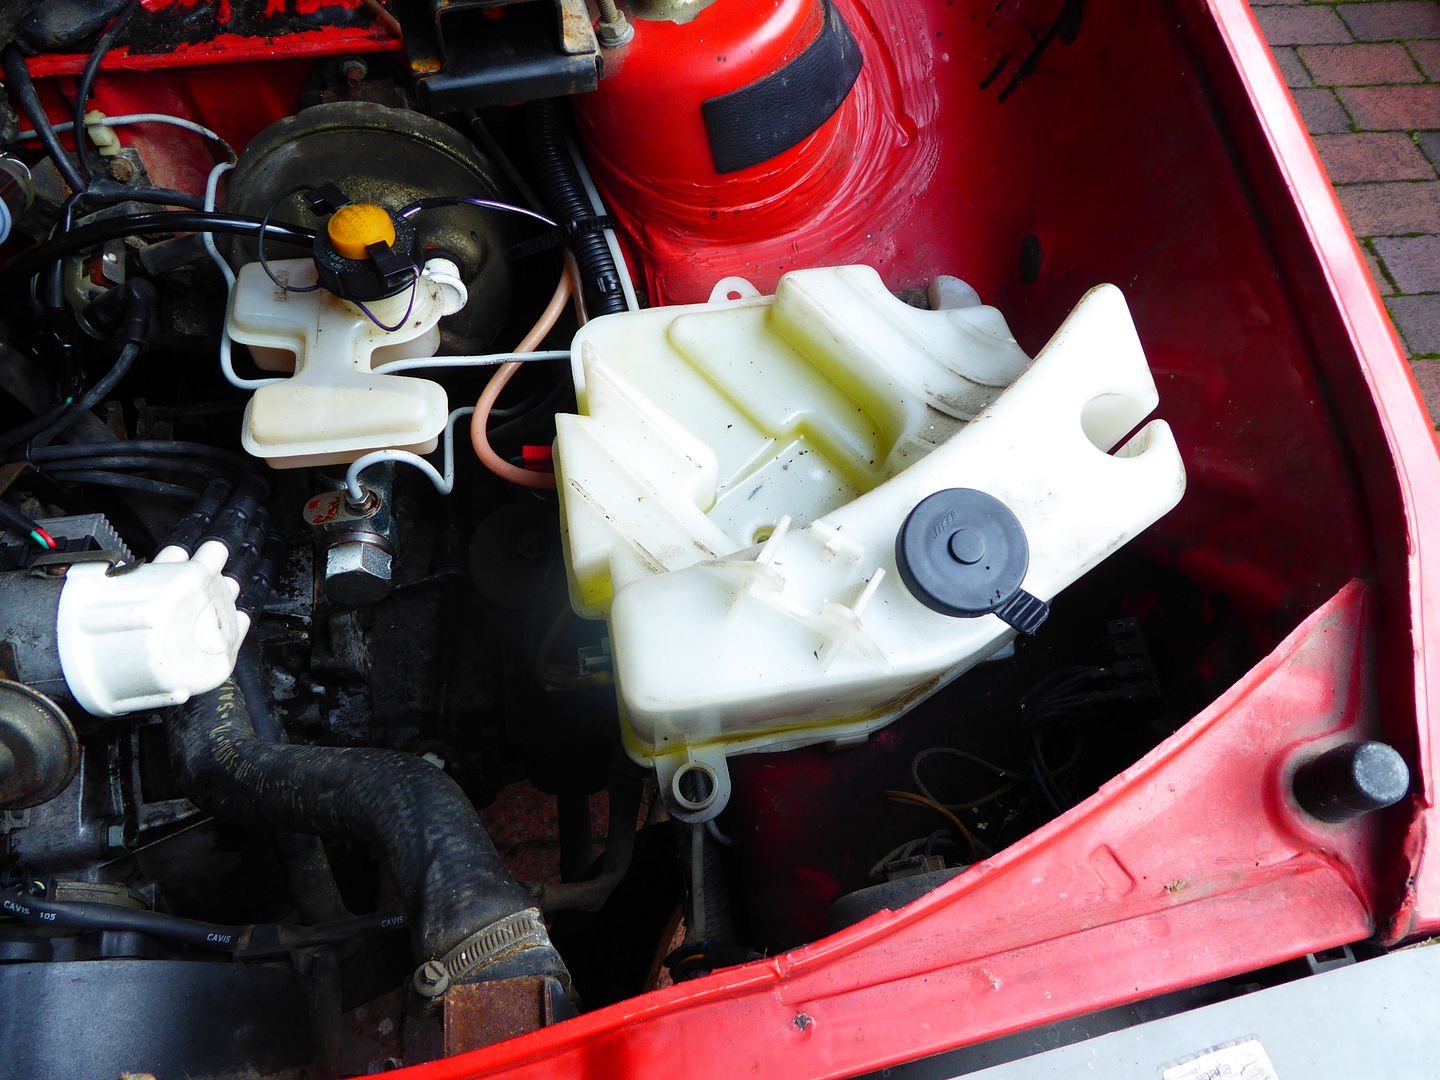
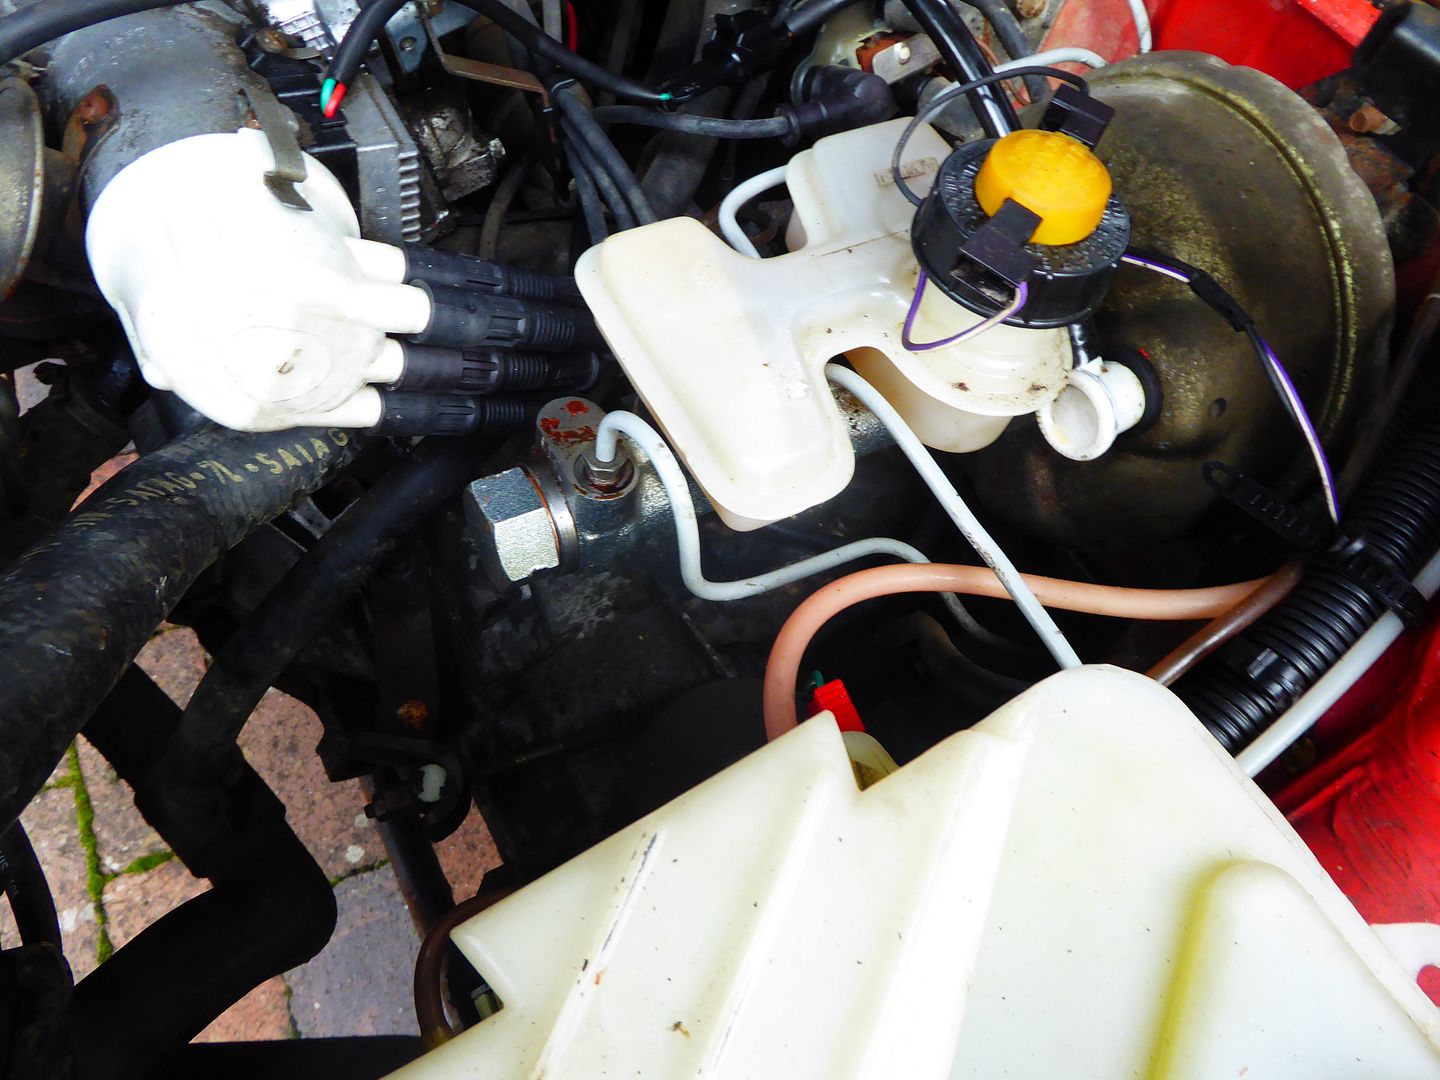
Or in the header tank.


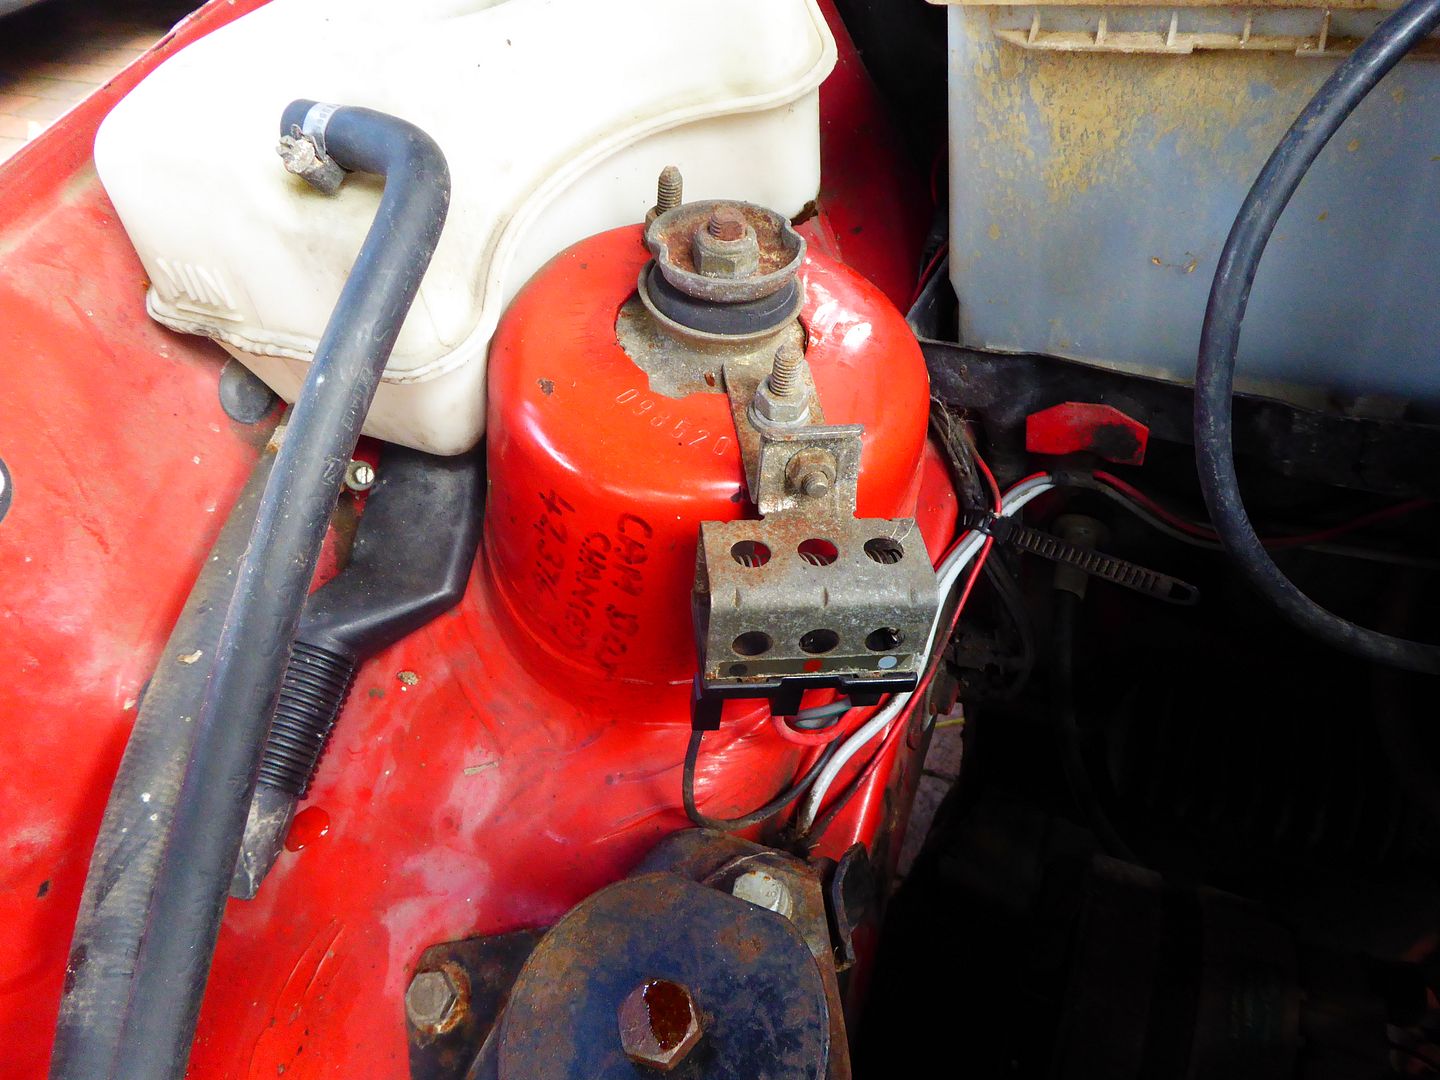
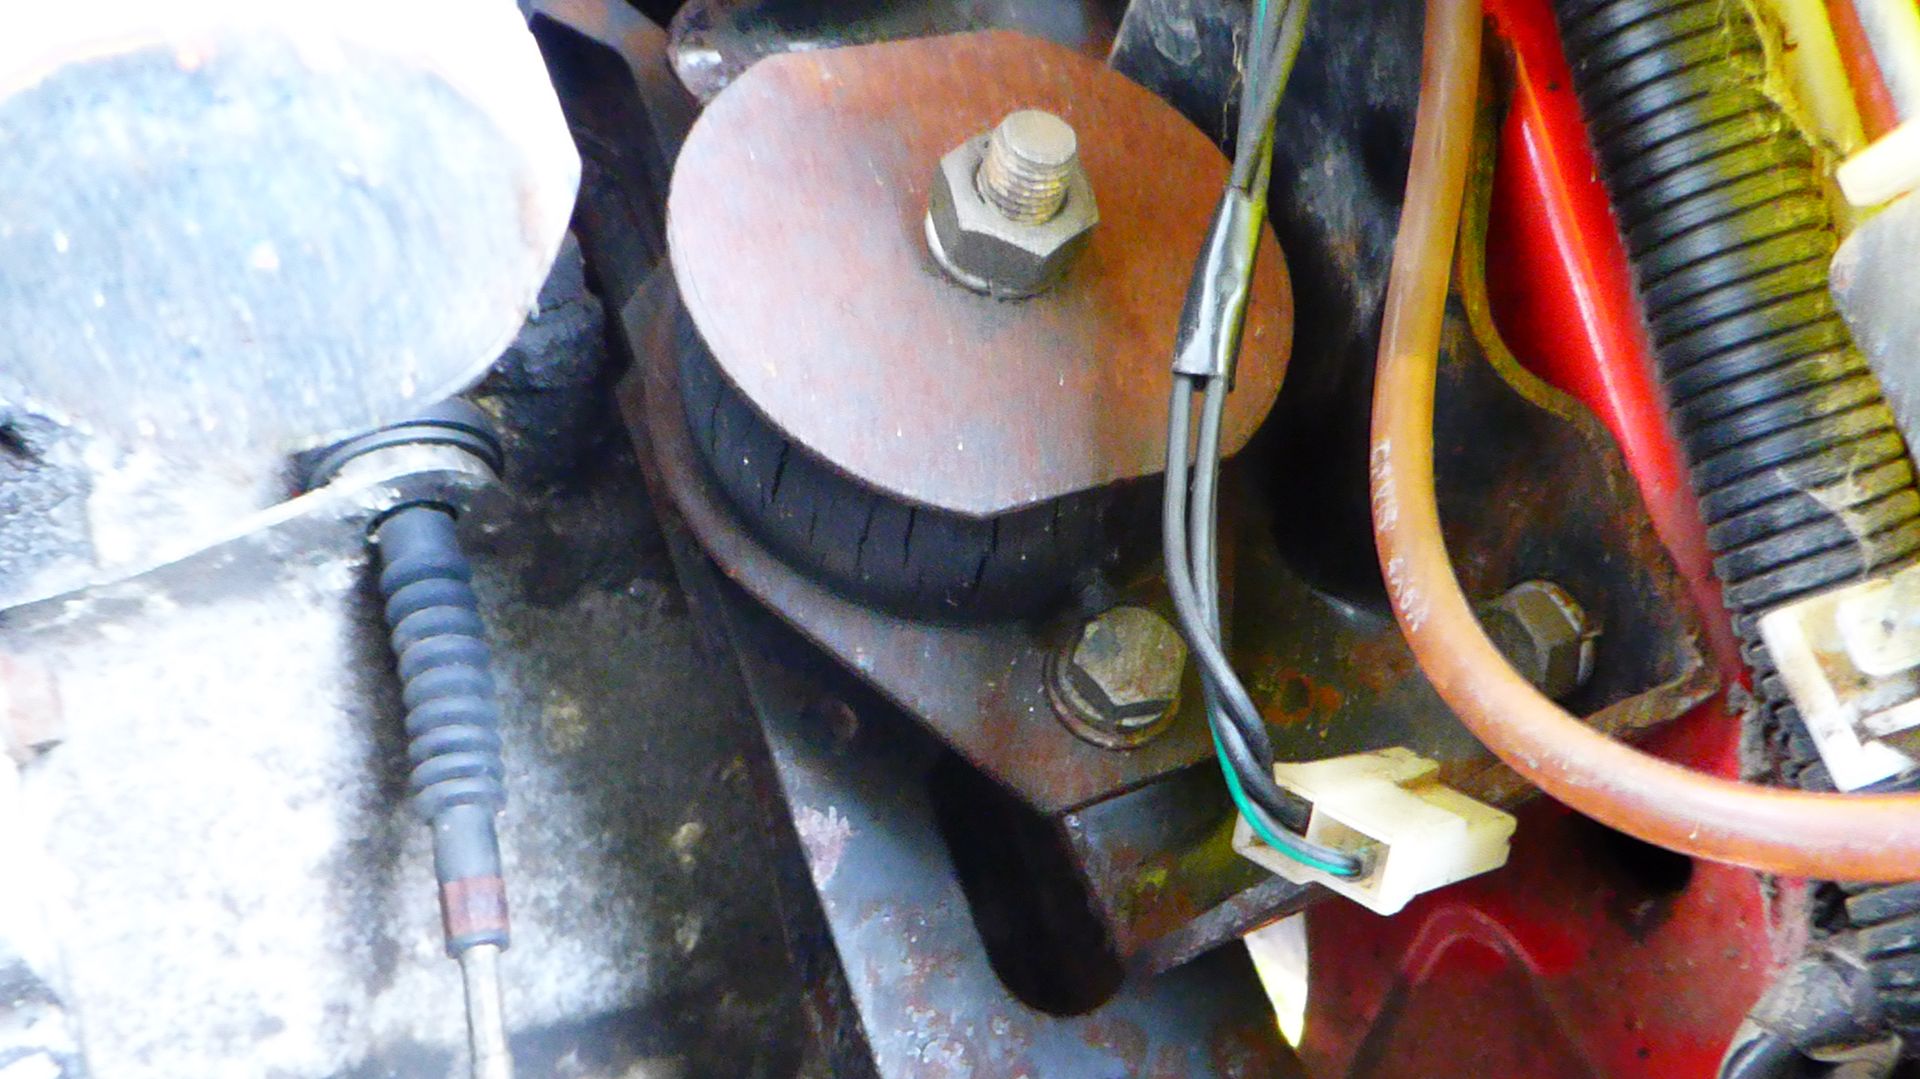
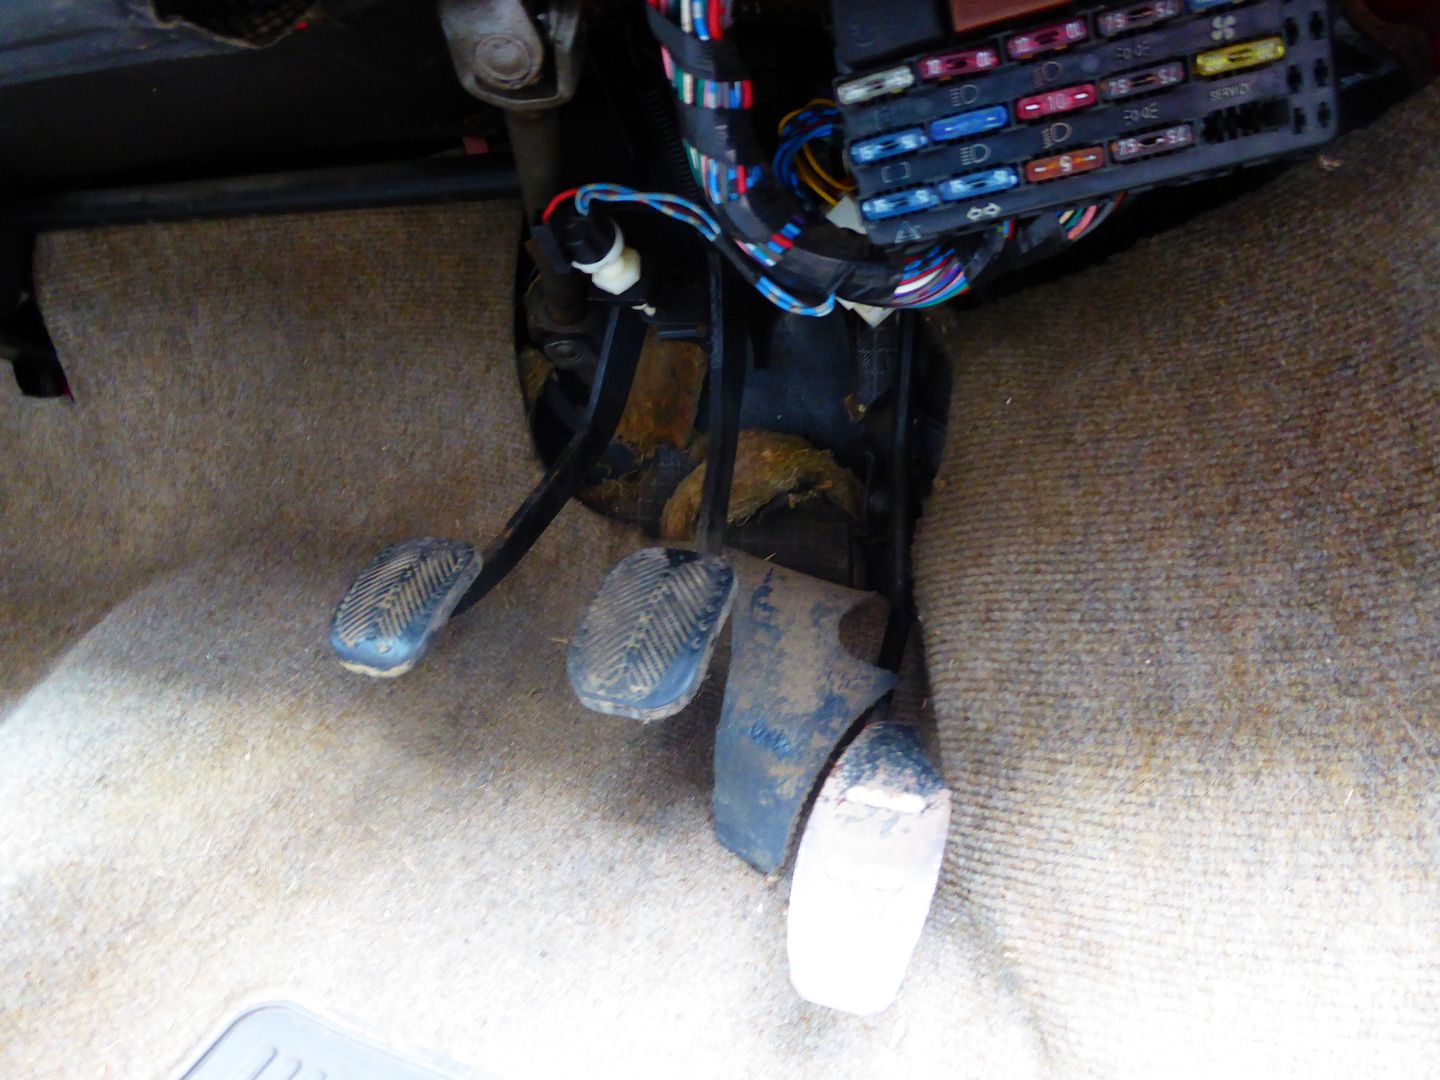
Just one of the electrics. Duct tape fuse box holder?


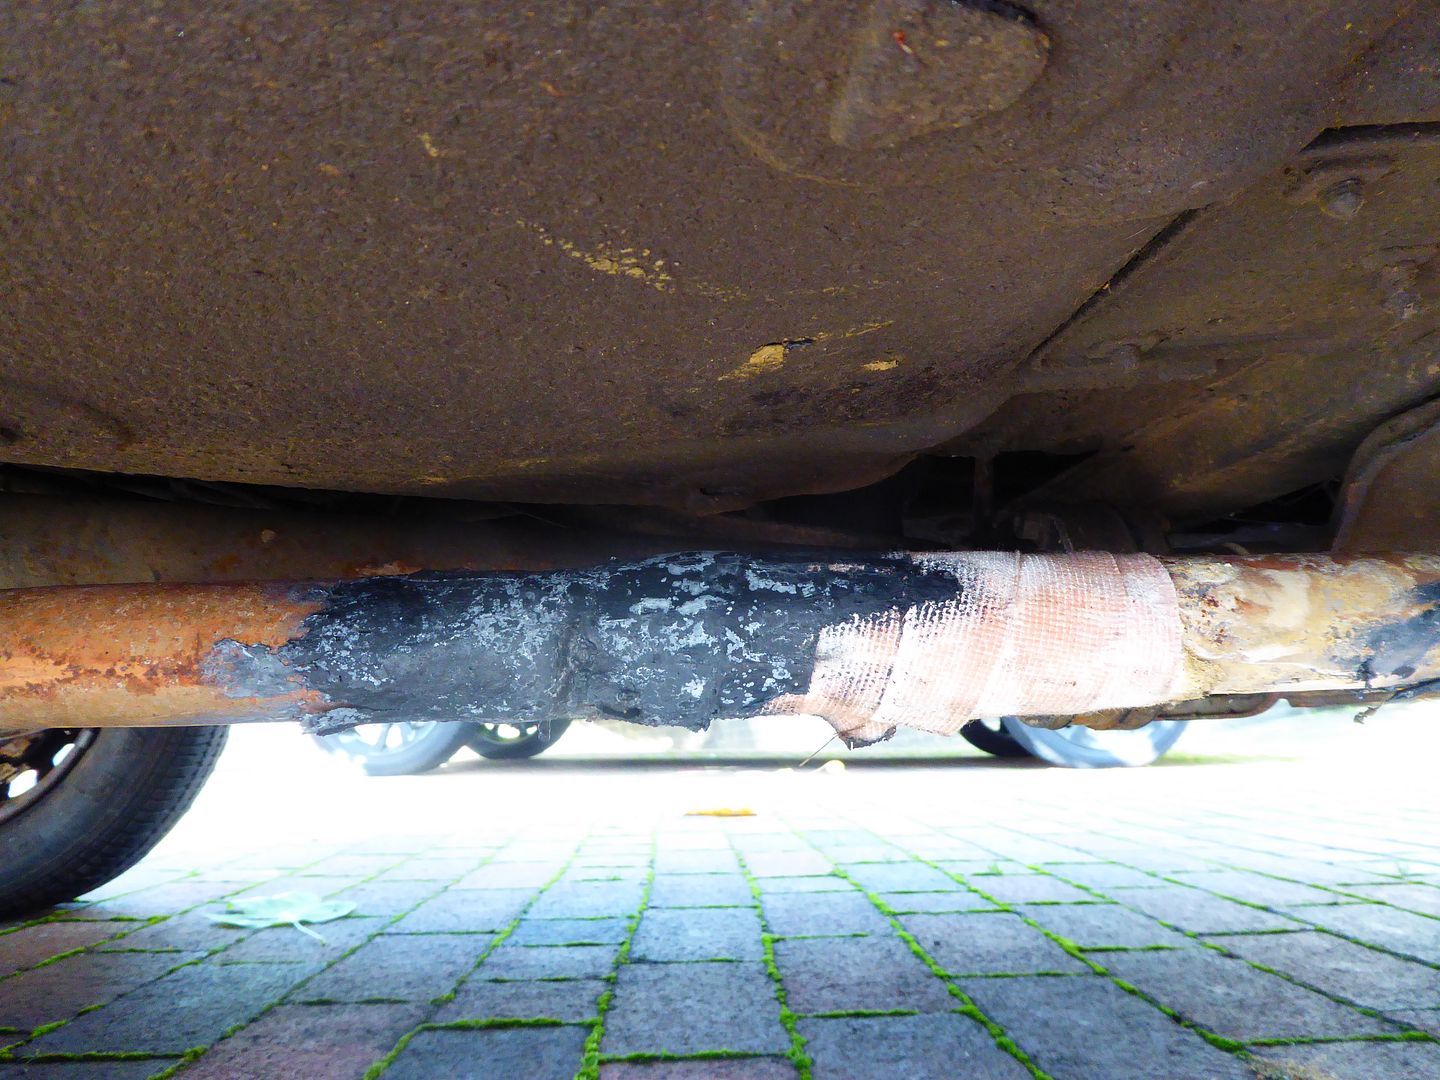
Exhaust is probably the rustiest bit on these wheels. Real Mad Max sound effects.


Now to work.


More to come.

 
Last edited:
Whole car gets a pre-wash of 25% APC, 25% TFR and hot water.
Not that there is going to be any wax issues and much is coming off but as my Great Uncle (who restored ex-police Jags back in the 50/60s and sold them as one careful owner said) you have to really wash a car to really know it.


Then Mr Jet Wash


De-mudding


Next make it snow. Plus 10% shampoo.
Now I know its not a show car (yet) but rule No1 do no harm.
Plus I love snow!


One day we will rule the real stuff!


Quick jet and I could stop here do a days work some tyres and MoT it. Nope:devil:


Jet the engine bay with spray gunk.


Finished so far.


Smells of wet cow dung round here:confused:


Now the rusty bits. Lets see if its patch or panel time.:worship:

Nearside front - patch


Nearside rear - patch or arch?


Offside front - grind it later but thinking panel.


Offside door - 1/3 panel as can hide the join under the door trim line?


Nearside door - same as above?


Now my welder hates this stuff but assured him its just to stop any more and I will grind it all off...promise.


Broken cable under the insulation. A previous solder job.(n)


Ready for the tear-down:slayer:


Just downloading yesterdays work.(y)
 
Last edited:
Found a good site for parts diagrams to assist in the tear down. In reality it seems pretty straight forward but might help someone.

https://www.fiatdalys.lt/en/catalog/groups/2R/0/0/M6,M7,M8/0/GD

Acquired a Haynes manual and yes I know it doesn't do 4x4 but for an eBay £3 had to be done.

Missed this typical picture before of why all washes should be two bucket and with grit guards.


Then given another bit of service history...nuff said but in terms of an MoT this list is way short.


First of many boxes.


Insulation out.


Spare clamp present and in good order.


Header tank and plastics out.


Washer motors obviously a problem as both disconnected.


Lots of space for the engine pull.


Insulation out and in pretty good nick. Trim tool to save the clips.


All in one part!


And all the clips survived! Small victories.(y)


Something been living in the vent. Geneally a lot of mouse poo under the insulation but all with chipboard bits not much of the Fiat diet eaten.


Think they were living in the airbox! UGH!


Grill off and confirmation someone took the radiator out and crunched in. leak test planned.


MoT approved duct tape behind the headlamp....wonder why?


Ah a further relay clipped in.


Yup its the aftermarket fog light cables I guess?


Air inlet happily located at splash height. Do I think snorkel? Perhaps?


Both lamps out.


Welder friend round and we are going to grind the rot before any panels get purchased. Generally thought amazing condition for a 30 year old Italian.

More later.(y)
 
Ok check the. Rear cross members, leaf support boxes inside wheel arches rear , perforation too around window seals, rear tail gate under the seal inner sill to floor pan connection boot floor to inner arch floor connection rust perforation behind windscreen seal list is endless but a good start for large areas it' is better to tackle a whole area rather than spot patch
Good luck steve

Thanks. Most of the floor and side coverings are off now and still looking OK.
Spent a few coffee's debating the patch to panel thing. Given the price of them its almost a no brainer but we will see.
Once I get the bumpers off and lift the car off the ground the real screwdriver pokeing game can begin.:eek:

Derek
 
If you need good diagrams of the car and correct part numbers etc check out eper. Its Fiats offical parts catalogue, you stick your vin number in and can see exploded diagrams of all parts of the car. You can also see all of the correct part numbers and any that may have been replaced with newer part numbers too.
 
So between the rain/sun the tear down continued.

Seats out...so far all the bolts moving easily(y)


The foam seems to be breaking down however...


and some persuasion required.


Seat belt wont retract..so that's on the parts list.


Rear seat clamps removed and the carpet clips intact.


Console out. Think this is holding the car together real overkill on screws.


Floor looking good so far but somethings missing....


Ahh one of these.


Second seat out.


Looking good underneath...no nests...


The magic lever of 4x4ness. Simple screw.


Does the gear level cover screw off? Seems like it should?


That's out then. Keeping as a template for the new stuff.


Thinking Panda people are cheapskates normally do better than 4p and a spoon under a carpet.


All the insulation and covers out. Almost all intact but the drivers pad disintegrating.


Ready for the new residents?
No rot so far!


More soon....
 
Last edited:
Re: Just started and could do with some 4x4 help. Pic Heavy Now.

Now time to lay into some trim.


Parcel shelf brackets pretty much fell off.


Seat belt and the trim panel pretty easy pull.

All clips intact...but someone has been here before me...


Other side had seen some abuse. Now in two parts plus Evostick.


Insulation removed and retained. Dynamat will be the replacement throughout.


Dead seat belt removed and evidence its not the first time.


Rear Lights out.


and looks pretty rot free through here...

and here


Is this the tow bar wiring?


Steering coloum insulation pretty shot.

But no rot here.


First repair!
The bonnet catch is now located and refitted(y)


Radio aerial creative routing?


Something living here recently perhaps?


Ok Panda owners are OK. £2 coin stuck under the radio!


Now the CSI bit..... some overseas travel?


and some not so nice stuff. Lets hope it all went well...


Radio taken from a Golf that looks like its no longer on the road. Panda beats Golf! Radio is available if anyone wants it for spares.


Nasty wiring. So radio may work but not here.


Then started pulling the dash.


Working lighter. Panda people are really generous(y)
And more money in the door box.
Almost be self funding build at this rate.


Next fix?
Removed the EvoStick which wasn't and did a bit of welding.
One repaired panel (bit of sanding and texture spray to follow).


So that is about all for a few days as have to do something called work. No where near as much fun.
Will draw up a parts list later. Have £2.68 to spend and a tea spoon!:eek:
 
More Pics...

So good news is the paint has been selected.

BMW 416 Carbonswartz

Black in the sun and really dark blue in the shade...weird


Inside outside engine bay paint all parts ???


Yup inside, out and under.
Black trim in silk
Some other stuff secret at present.
Leather seat recover planned
Engine parts mix of copper/gold/stainless depending on how it looks.
Suspension mainly silk black.
Fabric ordered for the inside panels and headlining share later.
Undecided on exhaust thinking stainless twin pipe? Anyone done one?
Engine stays standard output.
Rid height standard and will ride on standard rims + M&S tyres.


Inspiration needed for the dash/instruments. Have access to some random gauges mostly military.


Vintage DAB/Bluetooth


Pretty simple really.


Thoughts on the SJ snorkel? Thought it would look good but they look crap up close?
 
Punto st st down pipe fits but needs shortening or go 12. 16 v mk 1 punto engine direct fit really need a 50mm lift if going off roading Rx8 seats are the way to go electric & heated
 
That sent me down a road of Punto parts I didn't want to go to.
There seems to be a lot of Mk2 Punto manifolds and stuff but nothing tubular for the Mk1.
Any one found a Panda friendly tubular manifold?

As the engine is low miles I think a swap is not on this shopping list.
Will see when we get it out next week. Things could change.

Had a look at mightypanda on Monday night. What nice folks Panda keepers are!
The Rx8 looks nice and Richard gave me a set of washers for the conversion.
However still not sold on it yet. the Original seats are in such good nick it could be a waste.

We will see. Hoping for some dry patches this weekend as all my work is 'ghetto garage' (driveway) till we get to paint prep.
 
The Rx8 looks nice and Richard gave me a set of washers for the conversion.
However still not sold on it yet. the Original seats are in such good nick it could be a waste.

We will see. Hoping for some dry patches this weekend as all my work is 'ghetto garage' (driveway) till we get to paint prep.

If youre not sold on RX8 seats you could look into nice Alfa ones, I know VmanC has fitted his fair share of them.
 
Electrics and Engine Bay Strip

Well the Panda looked a bit unloved today so may have to buy some bamboo shoots?


Working against the weather today but that's 'ghetto garage'.

Plan dash and air-box out.


Hose clips and all the bolts fell out easily.


Wiper motor out first.


Air-box bolts loose?


Heater buttons easily pulled off.


and all the dash screws removed.


First bit off.


Also the 'loose' vent.


Horn push pulled out.


Slightly different to Haynes...


Found the small screws behind the wheel.


Big socket time!


Now this has to come off.


Lock nut under the cowling.


Also dropped the choke cable.


Cable cover not in the best condition.


Just pull...


How did I end up with all this in here?


Dash screws out.


Speedo lift to lock ring was easy.


Dropped the switch panel and found another bodge cable take off.
Looks like the fog lights were driven off the rear window heater?


All out now.


One screw for the vent panel.


Lots of spiders made homeless in this project.


Side vents pretty clogged with crap.


Mini Alien face hugger living behind the dash?


One soft dash ready to roll.


Start pulling the spaghetti.


This fell out....


Did they really route the door light switch behind a clip in plastic cover?


Found water in the radiator fan connection...not good...


Gutted the Panda!


Remove fan motor.


Then lifted the radiator clamps.


Few marks.


Heater Module then fell out. Needs a real clean out but all works.


Close to naked Panda?


Pulled out the Panda veins.


Interior light pretty simple.


Same for the sun visors.


Something missing here?


Next step engine hoist as pulling the alternator and starter motor cables will be easier with a bit more access.


Interior fabric samples arrived so may play with that later.(y)

Next is motor and all the glass but a bit short of space now!
Rain tomorrow so probably no more progress for a few days.(n)
 
Last edited:
Look like you've nailed it now .Are the wheels all coming off too to allow full access
To the whole body ??
 
Look like you've nailed it now .Are the wheels all coming off too to allow full access
To the whole body ??


Oh yes!
Soon as the inside is stripped its up on jacks for the rear spring set and the front shocks to come off.
Just wondering about the steering rack..looks pretty simple.
Think the prop etc will also have to go so I can finish what nature has started on the shall we call in under seal but isn't really?
Is there much that can be done with the 4x drive unit?
 
Ok I found that the easiest way to strip a panda is by using 2 bread trolleys those with 4 castors place a wheel on top of each them jack up the front and push them under to the door post then take off front struts and drive shafts so the engine and box are left remove jack panda will sit engine down go take off the rear props then remove rear axel and wheels complete with handbrake cable cut the rubber brake hose roll the unit out then exhaust tank ect
Undo the gearbox and engine mounts lift the front up and over engine then push panda back done phew. Or as the manual states.
Best of luck.
Hopefully the gearbox and take off should be good pretty robust if all standard but a few of us do have self inflicted problems
Are you planning to join us in wales for the next planned meet
Next year
 
Last edited:
Back
Top