General Franko the 1971 500L

Currently reading:
General Franko the 1971 500L

Sorry to hear that about your health Owen; slow down please!!!
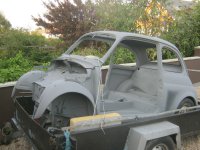
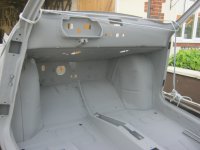
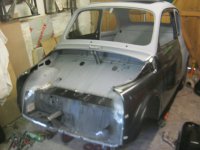
Great news about Franko, Sean. Where do you take him to for the sandblasting? Presumably a place whose main business is something other than cleaning up 500 shells?
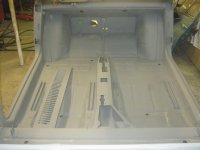
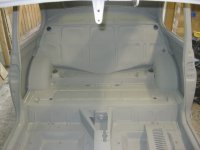
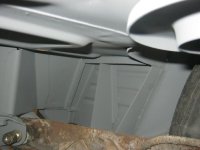
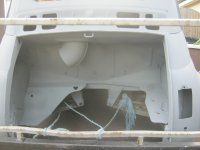
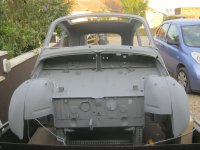
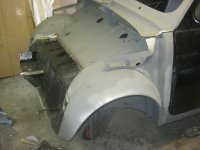
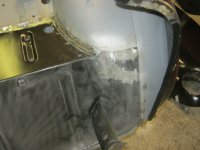
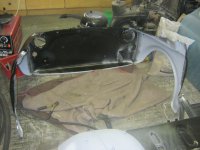
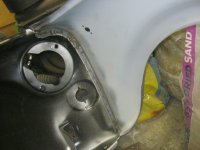
I wish I had somewhere like that near me and although I think I got rid of all the important rust by hand...takes ages though, as you know.
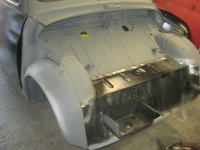
How much help did you need getting him on the trailer? can't me much weight left there.
 
Lucky enough I have a blasting company 5 miles from my home.
They blasted an MGB roadster for me a few years ago and done a great job.
As you can see I made a little trolley for the front and I managed to roll Franko onto the trailer all by myself. Very light now all the rust has gone.
I got a call earlier to say its all ready, so I shot down there to take a look.
He is looking good, sadly didn't have a camera to hand so photos to follow!
They use a crushed glass media, and get this, they used 210 cfm. That's major air flow considering most diy compressors push out 4-9 cfm.
They couldn't blast the new 1/4 panels on the flat areas as it might distort them, but everything else has been blasted and now coated with a coat of weld through primer. This I great as any additional welding can be done without cleaning the paint off, although I usually do give it a quick clean.
All those tricky little areas are now clean from rust, even the vent area above the engine compartment, I could never have got in there with wire wheels etc.
My neighbour has just gone to collect him as although I am now a proud owner of a trailer (much to the wifes disgust) I don't have a tow bar yet.


Total cost £300 including primer and £20 for my neighbour!
 
As promised some photo's of Franko now he has been blasted of all rust.
cool.gif
 

Attachments

  • IMG_6844.JPG
    IMG_6844.JPG
    608.7 KB · Views: 52
  • IMG_6868.JPG
    IMG_6868.JPG
    390.6 KB · Views: 44
  • IMG_6870.JPG
    IMG_6870.JPG
    376.6 KB · Views: 45
  • IMG_6864.JPG
    IMG_6864.JPG
    430.5 KB · Views: 45
  • IMG_6853.JPG
    IMG_6853.JPG
    330 KB · Views: 39
  • IMG_6854.JPG
    IMG_6854.JPG
    296.8 KB · Views: 35
  • IMG_6847.JPG
    IMG_6847.JPG
    299.6 KB · Views: 50
  • IMG_6858.JPG
    IMG_6858.JPG
    312.8 KB · Views: 34
  • IMG_6856.JPG
    IMG_6856.JPG
    391.3 KB · Views: 53
  • IMG_6863.JPG
    IMG_6863.JPG
    330.6 KB · Views: 52
  • IMG_6849.JPG
    IMG_6849.JPG
    346.2 KB · Views: 60
  • IMG_6852.JPG
    IMG_6852.JPG
    351.4 KB · Views: 40
  • IMG_6860.JPG
    IMG_6860.JPG
    337.9 KB · Views: 40
  • IMG_6845.JPG
    IMG_6845.JPG
    475.8 KB · Views: 62
  • IMG_6848.JPG
    IMG_6848.JPG
    312.2 KB · Views: 39
Wow looks amazing Sean, looks like a new car. I had just opened the thread and up popped the pictures, they weren't there when I first opened it.

That is a really good price and it's got a nice coat of primer to keep the dreaded rust a bay for a little while.

Tony
 
Cheers Tony,
As you can imagine I am very pleased, it makes such a difference seeing no rust, sealer & one colour on everything. I find it allows you to take focus on what you need to do.
Next job is get the front on then slowly work around the vehicle one panel at a time and finish off any welding (pin holes) & carry out any filler repairs.
When I am happy with it all, I suppose the next big decision is what colour!
 
I forgot to ask, how is yours going? I noticed you haven't updated your thread for a while. Keeping an eye on Peters, that's coming along nicely.
Done anymore videos recently?
 
I forgot to ask, how is yours going? I noticed you haven't updated your thread for a while. Keeping an eye on Peters, that's coming along nicely.
Done anymore videos recently?

Hi Sean I have been on a course down at Gatwick for the last eight weeks, so have hardly had a chance to go near It. I bought a set of wheel dollies for him yesterday so I could manoeuvre him back into the smaller shed without doing any damage, as it is a bit of a tight squeeze, they work really well.

He was running yesterday but I must admit it didn't sound very healthy, seems to be a bit of a knocking noise coming from somewhere. I need to start him up tomorrow to see if I can suss out where it's coming from.

Tony
 
Another full day in the garage. I fitted the doors on again and then clamped all the front panels on for a final trial fit. Once happy with the gaps (or as good as I can get them) I then got the front inner panel welded in place.
I have decided to fit the front end in one piece. Because the scuttle panel sections which go over the front wings were corroded or been so badly damaged by previous poor repairs I cut them off. This allows the front wings to be welded to the front panel before fitting to the car. Its a bit of a squeeze to get it on, but it will be a better job.
This allows me to spot weld the wings to the front panel, this will help any excess heat/burning of the weld through primer and therefore help to prevent further corrosion. Also prevents any nasty mig wleds on show. Anyone who has fitted a front panel on its own will know what I mean, theres not much room in there to weld and grind the heads off.
I have also keyed the inside of the front wings and gave a coat of grey etch, this will be better than the black to cover when sprayed, especially if I go with a light colour. Its also far easier to prep them off the car than when on, my hands aren't that small to get into those tricky parts.
All the inner wing parts have been given another coat of zinc primer for extra protection.
Unfortunately I run out of CO2 so I need to finish 2 more welds, prep the front panel and then it can all go on.
smile.gif

I hope to get it all on this week in the evenings, depending on if I am allowed!
 

Attachments

  • IMG_7029.JPG
    IMG_7029.JPG
    390.6 KB · Views: 71
  • IMG_7028.JPG
    IMG_7028.JPG
    388.4 KB · Views: 54
  • IMG_7026.JPG
    IMG_7026.JPG
    407.2 KB · Views: 58
  • IMG_7024.JPG
    IMG_7024.JPG
    369.3 KB · Views: 65
  • IMG_7030.JPG
    IMG_7030.JPG
    500.7 KB · Views: 44
  • IMG_7031.JPG
    IMG_7031.JPG
    490.4 KB · Views: 54
  • IMG_7032.JPG
    IMG_7032.JPG
    455.9 KB · Views: 54
Brings back memories. :)
I like your neat spot-welds. I did it with MIG in -situ because I was trying (successfully) to keep alignments. But you're right that it can be awkward/messy. I did loads of prepping, loads of practising and took some good deep breaths before embarking on all that, but I would still have preferred your tidy look.
 
I know what you mean about prep work, trouble with changing the whole front is the quality of the panels. If you are changing one, it's easy to make a few tweaks to make it fit.
But when you have the whole front , each panel needs tweaking. The problem is you don't know which one is wrong. So plenty of trial & adjusting required.
Had a look at your resto earlier Peter, well done it's looking really good, I am especially impressed by your roof rails. That's another car you have saved!
 
I second what Peter said very neat Sean and really good thinking to spot weld the panels together before putting them all on the car. Makes life a lot easier.

Where do the end of those wings weld onto the car? Is it onto the A post inside the door near where the hinges are?
 
Spot on Tony, the flanges just wrap round the a post. I have pre drilled the holes and will plug weld them. You have to take the doors off to get to them all. I am hoping to spot weld the arches and the lower front panel.
How's that engine of yours doing ?
 
I can see that you really work things out first Sean, so one thing here to advise you about that you might not expect. When I plug welded that flange at the door pillar I asumed that with everything else in alignment the shut line had to be perfect.. But there was a small amount of tension in the panel which had the effect of pulling the A-post shut line slightly wider than it had been on the dry run. Obviously the door had to come off for welding.
I don't know how you can avoid this but I ended up welding on a very fiddly extension to the vertical end of the wing .on the driver's side.
Equally, you don't want the gap tolerance as good as a modern car because the hinge geometry brings both it and the door leading edge very close to the wing when opening.
 
fiat had bother lining up panels so did triumph ie use of metal leather spacers etc to get panels as close as , when using repro panels there is a limited to what u can do and that looks ace owen nw
 
fiat had bother lining up panels so did triumph ie use of metal leather spacers etc to get panels as close as , when using repro panels there is a limited to what u can do and that looks ace owen nw

Fiat had a 'persuader' for use on door hinges, like a fork at 90 degrees to a bar.
Triumph had a special booklet on aligning the body tub and bonnet to the chassis on Heralds and Vitesses.

Al.
 
Fiat had a 'persuader' for use on door hinges, like a fork at 90 degrees to a bar.
Triumph had a special booklet on aligning the body tub and bonnet to the chassis on Heralds and Vitesses.

Al.

Good to know it's not just me.
When you see the odd video of them on the assembly line and the speed and decisiveness of all the guys welding them up, it's a wonder that any sort of quality control was effective.
Even so, my memory of non messed about 500s in the early eighties was that they were actually very well assembled.
 
Back
Top