podro
New member
Fiat Scudo Conversion - ply lined, quick release rear sets, side windows, etc.
Hi all,
Thinking of converting your Scudo, Expert, Dispatch. I decided to convert my 2007 Fiat Scudo Van. Lots of people went Yuck
 ! Why would you bother, its a Fiat, not a VW. Well its half the price, and once yea fix all the issues (failing lights, clutch, flywheel, etc.) its a pretty OK van. I managed to do it for under £1,400, and its a pretty decent job I must admit myself. Cheap and Cheerful!
What I Did:
Ply lining & Felting
Gutted it first.
Ply-Lined the floor (doubled up on 5 mm)
Ply-Lined the sides and Roof (3mm)
Felted Sides and roof - (This part takes time, worth watching a few clips on You tube before starting this process)
Lined floor with industrial none slip flooring (get it from most flooring stores)
Fitted Interior Lights - (hooked power from wiring for Cigerette light at rear of van)
Fitting the seats: (see pics) - fairly straight forward. (bought them of ebay, brand new - quick release mechanism)
Fitted Tracks (Captive nuts already built into chasis for most holes)
Fitted seats
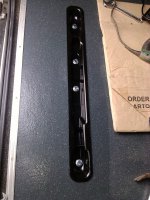
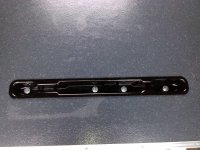
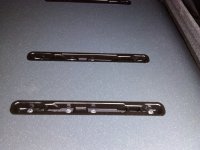
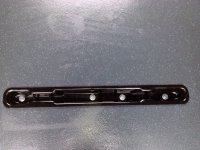
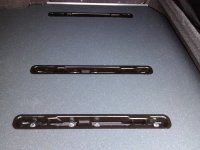
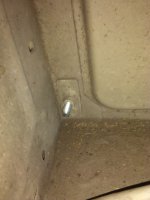
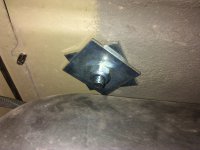
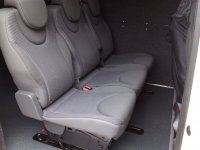
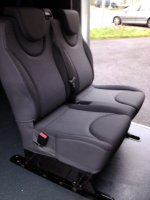
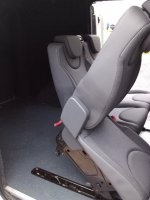
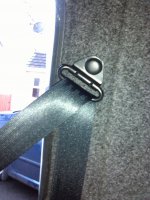
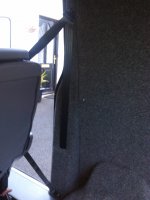
Fitted seat belts (see pics)
Relatively straight forward. (Bought Univeral belts/Buckles a little bit of head scratching, but used front ones as a guide)
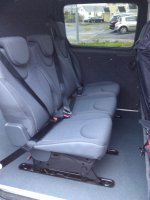
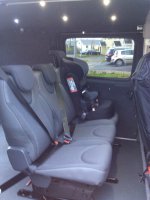
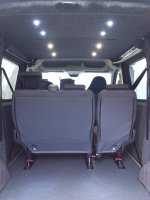
Fitted Tinted side windows (see pics)
Bought these from ebay, good price
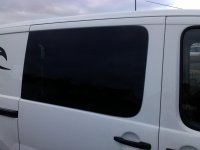
could have installed these myself, but got a mate to them as he was a professional window fitter. At this point the wife is winging about the amount of time spent on it, so it was less head ache for someone else to do this.
She's now ready for Action!
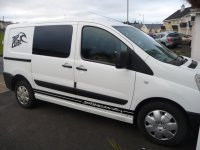
Had a few Surf weekends in it + Family camping - kids/dog/surfboards, buggie, bikes, etc. It'll take pretty much everything you can imagine stuffed in the back or on the roof! The removable seats are very handy for when me and the dog head off for a surf weekend. Just chuck in a mattress and away yea go! Am I glad I did it? Definitly, the pleasure I get just driving it now makes it all worth while!
Cost break down:
Ply line & Felting & flooring £ Floor boards 5mm ply 40.00 Flooring HD - non slip Material 70.00 Floor Labour 35.00 Felt + glue (for interior walls & Roof) 100.00 Lights (chrome - Ebay) 40.00 Additional Lights (chrome - Ebay) 40.00 Side & Rear & roof panals 3/5mm ply 50.00 metal strips for stepped edges 30.00 Silicon glue - seams 20.00 Sub Total
425.00
Seats & side windows
Detachable Seats and Tracks for floor 280.00 Seat Belts (2 sets) 120.00 Pallet delivery 100.00 Side Windows (both sides) 215.00 P&P for Windows 39.10 Professional Window fitter- (Tempo Glass - Lbr x 2 hrs + glue) 90.00 Assessor's Certificate for work done 70.00 Sub Total
914.10
Overall Total 1,339.10
Hi all,
Thinking of converting your Scudo, Expert, Dispatch. I decided to convert my 2007 Fiat Scudo Van. Lots of people went Yuck

What I Did:
Ply lining & Felting
Gutted it first.
Ply-Lined the floor (doubled up on 5 mm)
Ply-Lined the sides and Roof (3mm)
Felted Sides and roof - (This part takes time, worth watching a few clips on You tube before starting this process)
Lined floor with industrial none slip flooring (get it from most flooring stores)
Fitted Interior Lights - (hooked power from wiring for Cigerette light at rear of van)
Fitting the seats: (see pics) - fairly straight forward. (bought them of ebay, brand new - quick release mechanism)
Fitted Tracks (Captive nuts already built into chasis for most holes)
Fitted seats


Fitted seat belts (see pics)
Relatively straight forward. (Bought Univeral belts/Buckles a little bit of head scratching, but used front ones as a guide)


Fitted Tinted side windows (see pics)
Bought these from ebay, good price

could have installed these myself, but got a mate to them as he was a professional window fitter. At this point the wife is winging about the amount of time spent on it, so it was less head ache for someone else to do this.
She's now ready for Action!

Had a few Surf weekends in it + Family camping - kids/dog/surfboards, buggie, bikes, etc. It'll take pretty much everything you can imagine stuffed in the back or on the roof! The removable seats are very handy for when me and the dog head off for a surf weekend. Just chuck in a mattress and away yea go! Am I glad I did it? Definitly, the pleasure I get just driving it now makes it all worth while!
Cost break down:
Ply line & Felting & flooring £ Floor boards 5mm ply 40.00 Flooring HD - non slip Material 70.00 Floor Labour 35.00 Felt + glue (for interior walls & Roof) 100.00 Lights (chrome - Ebay) 40.00 Additional Lights (chrome - Ebay) 40.00 Side & Rear & roof panals 3/5mm ply 50.00 metal strips for stepped edges 30.00 Silicon glue - seams 20.00 Sub Total
425.00
Seats & side windows
Detachable Seats and Tracks for floor 280.00 Seat Belts (2 sets) 120.00 Pallet delivery 100.00 Side Windows (both sides) 215.00 P&P for Windows 39.10 Professional Window fitter- (Tempo Glass - Lbr x 2 hrs + glue) 90.00 Assessor's Certificate for work done 70.00 Sub Total
914.10
Overall Total 1,339.10
Last edited:

