Technical CD Changer Help :)

Currently reading:
Technical CD Changer Help :)

Joined
Oct 26, 2007
Messages
382
Points
210
Location
Runcorn, Cheshire
Hi,

It's been posted before but nobody actually posted a solution.

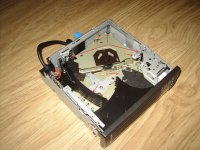
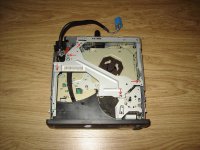
I've just bought a Stilo cassette head unit with CD Changer. I've installed the head unit and input the M-code and it works fine. However, the CD changer doesn't appear to be working. All the lights are on and the buttons are all flashing orange. There seems to be discs in 1 and 4, and they won't let me eject.

The head unit goes through the process of checking discs, and then goes to CD4 Pause. Not wanting to sound dense, I couldn't work out how to play a CD, I can't see a play button on the head unit.

Any ideas whats wrong? Do I need to prompt the CDC to ask for a code? Could it be jammed?

Any help appreciated!

Owen.
 
Good to know the codes worked OK. :)

The IDC-A09 CD changers are notoriously unreliable as you've obviously found out. If all five lights are flashing, it means that the mechanism is stuck or broken. This can be caused by the part of the mechanism that lifts the individual CDs to the CD motor and laser having gone out of synchronisation, or that one or more of the 25 (appx) plastic gear wheels that connect the various parts together is worn or has broken teeth. I suspect these problems are caused by trying to select another CD too quickly and before a previously selected one has finished loading into the mechanism.

The lift mechanism moves up and down on three revolving threaded posts, if you open the case, you'll probably find that the lift mechanism is at an angle. It should be horizontal. You'll probably also find two CDs stuck in the mechanism.

The CD changer is fully controlled from the HU. When it's working, you select the CD changer by repeatedly pressing the SRC button on the HU (each press must be less than one second) until "CDC" appears in the display. To change to the next or previous CD, press the "1 CD+" or "2 CD-". You can also select a CD by briefly pressing the relevant number button on the CD changer. Press the CD changer button for more than two seconds to eject a CD.
 
Last edited:
Yeah! Thanks for the codes Dave! (y)

I've open the changer up and removed the two CD's out of it. What an appauling taste in music the previous owner has! Everything looked fine in there, but now I know what to look for, I'll have another look in daylight!

Owen.
 
I have a built in cd changer in my car in the top glove box and it a waste of space as it doesn't work. Well it does but only when it wants too.

Think it's a common problem. bloody stupid thing.

And if it does work then it wont play copied cd`s
 
This is my second now too.. This one is for my Dad. I decided the one in my car was too much trouble so I went for the Dension Icelink plus. That enables you to use and charge your iPod/iPhone through the CD changer function :)
 
I managed to repair one of these last week. Took about three hours but most of that was finding out how it was supposed to work. I can't remember exactly what I did, it was a matter of checking all the parts and assembling and adjusting it logically.

Some points I do remember that may help:

The top cover just levers off but the bottom cover is held on by T8 and T10 TORX screws.

The ribbon cable cable that connects the front panel to the PCB fits into a connector with two locking clips. Slide the clips up with a finger nail or small flat screwdriver to release the cable. Make sure the clips are raised before refitting the cable then push the clips back down to lock the cable.

I needed to remove the top plate (5 screws arrowed) because the lever (A) had become disengaged from the lever below it. The bottom of lever (A) has a raised ridge that fits into a slot in the flat lever below it.

At rest, and without any CDs installed, the two sets of levers (B & C) should each be aligned as in the picture. Levers C should be aligned by spring pressure but one or more of levers C may need pushing back into line.

The CD carriage moves up and down on the three threaded rods (D). It should be at the same height on all three rods and at the correct position to allow the appropriate slot in the locking catch (E) to engage with the edge of the carriage.

If the carriage is not horizontal, you will need to adjust one, two or all three of the threaded rods. On the bottom of the unit there are two large white plastic levers. Holding one of them down (can't remember which) releases the plastic gears so you can turn the rods manually until the carriage is horizontal. It's best to adjust all the rods so that the carriage is either at the top (CD1) or bottom (CD5) position because you also need to ensure that it's also aligned with the aproppriate slot in the locking catch (E).
.
 

Attachments

  • PICT1021 Label.JPG
    PICT1021 Label.JPG
    290.3 KB · Views: 283
  • PICT1018 Label.JPG
    PICT1018 Label.JPG
    260.3 KB · Views: 282
Last edited:
That's really helpful! Thank you! I've just installed the second changer and it worked!! Then I changed to play disc 5.. And then the same problem :bang: All lights flashing and screen just says CD1 Pause.

I've opened up the 1st unit and the carriage did seem to look a bit unlevel, I think I've made things worse and little bits seemed to spring off and I didn't know where they'd come from. Maybe I'll try again with this unit but takes things steadier.

If that fails, I'll just get him a Dension or something. Seems these CD changers are really really flimsy. Shame theres not an aftermarket one that would still work with the standard radios.

Thanks again Dave!

Owen.
 
I managed to repair one of these last week. Took about three hours but most of that was finding out how it was supposed to work. I can't remember exactly what I did, it was a matter of checking all the parts and assembling and adjusting it logically.

Some points I do remember that may help:

The top cover just levers off but the bottom cove is held on by two different size TORX screws. They are either T10, T15, T20 or T25. I can't remember which two.

The ribbon cable cable that connects the front panel to the PCB fits into a connector with two locking clips. Slide the clips up with a finger nail or small flat screwdriver to release the cable. Make sure the clips are raised before refitting the cable then push the clips back down to lock the cable.

I needed to remove the top plate (5 screws arrowed) because the lever (A) had become disengaged from the lever below it. The bottom of lever (A) has a raised ridge that fits into a slot in the flat lever below it.

At rest, and without any CDs installed, the two sets of levers (B & C) should each be aligned as in the picture. Levers C should be aligned by spring pressure but one or more of levers C may need pushing back into line.

The CD carriage moves up and down on the three threaded rods (D). It should be at the same height on all three rods and at the correct position to allow the appropriate slot in the locking catch (E) to engage with the edge of the carriage.

If the carriage is not horizontal, you will need to adjust one, two or all three of the threaded rods. On the bottom of the unit there are two large white plastic levers. Holding one of them down (can't remember which) releases the plastic gears so you can turn the rods manually until the carriage is horizontal. It's best to adjust all the rods so that the carriage is either at the top (CD1) or bottom (CD5) position because you also need to ensure that it's also aligned with the aproppriate slot in the locking catch (E).


Many thanks for posting this. Spent Sunday afternoon doing it. The torx size you need for the outer case are T8 and T10.

You will need this link as well

https://www.fiatforum.com/stilo/186819-blaupunk-a09-cd-changer-howto-fix.html


As mine was well out of sync.

At the moment the player is working again!

Also mine was from a Punto mk2 Sporting..
 
Last edited:
Back
Top