Technical Stilo Key Refurbishment

Currently reading:
Technical Stilo Key Refurbishment

Joined
Jul 23, 2008
Messages
873
Points
143
Location
Bucharest
Hi,

When I bought my Stilo the previous owner gave me 2 keys. One of them was pretty badly worn, and with the prices quoted on it I decided to recondition it.

The key is working fine, except for the fact that the plastic is very worn and the unlock button seems to be out of shape, but I think I can fix it.

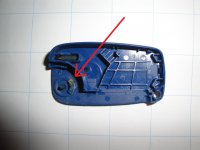
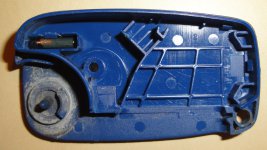
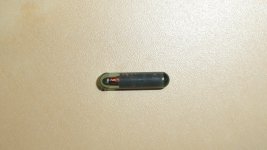
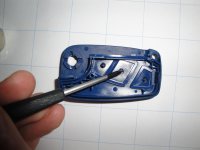
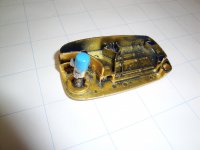
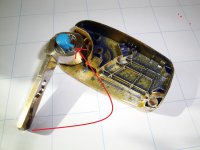
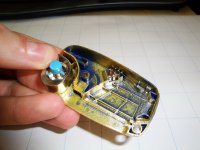
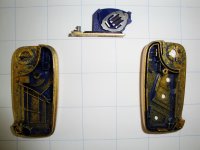
However, upon opening the key by the usual procedure, (badge off unscrew pull) I saw some sort of ampoule inside. It's not connected to anything so what exactly does it do?:yum:

DSC05117.jpgDSC05118.jpg
 
Last edited:
I would've thought it's some circuit part on the motherboard. So how do you actually program this if it's not connected to anything? Or is it communicating by wireless with the remote and ecu?
 
I would've thought it's some circuit part on the motherboard. So how do you actually program this if it's not connected to anything? Or is it communicating by wireless with the remote and ecu?


Its a Transponder, they dont need their own power supply like a battery. They are powered by the radio signal sent from the car. The transponder returns a similar radio signal to the car that contains a special code. If the car recognises it the immobiliser is disarmed when you turn the key.

They have to be programed into the car by a dealer.
 
Last edited:
Just as Shadyman says, it's a transponder, just like the chips they insert into dogs and cats. They wouldn't be too happy if they needed nicad batteries inserted too :)

But Stilo is better than those kind of chips and uses rolling code technology where the code is changed and moved on to the next code each time it's activated
 
Out of interest, how easy was it to split the two halves of the key fob Vlad?

Very easy. The hardest part was to remove the badge without damaging the plastic cover too much. Once I started unscrewing, the pieces started separating themselves because of the spring that moves the key into place and back. It's really not rocket science at all. The buttons can be removed as well by applying some pressure from the inside of the case.

All that's left now is to figure out a way to polish those pieces of plastic without too much damage.

Well that's very interesting, I didn't know this much technology was inside the key. :)
 
Last edited:
All that's left now is to figure out a way to polish those pieces of plastic without too much damage.

Plating of ABS plastic is now common. Gold, Chrome etc are all readily available for small items.

Borough Ltd.
Finishers of Plastics
65 PROGRESS ROAD
ESSEX
SS9 5JT

Phone: 01702 425425
Fax: 01702 425400

http://www.borough.co.uk/electprocess.html
 
Cheers to all of you for the answers, really appreciate it.

@Shadeyman: I live in Bucharest, sending the key in Essex for plating would go as far as probably buying a new key.:yum:

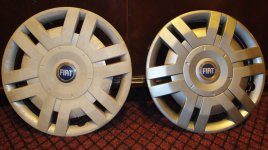
I would go for the spray paint i think, I pulled out a pretty good job on my dads wheel covers. Only downside is it's gonna chip off in about 2 months of use.:)

DSC05068.JPG
 
Last edited:
I checked but there's no place in Romania that can do this :)

So basically I'm going to make the key gold to match the beige velved interiour I have.

Will post before and after picture in this thread in the days to follow.
 
Right. Finally found the time to do some work on it. I am also going to briefly explain how to disassemble the key, in case anyone else wants to do it.

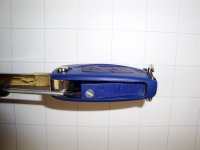
Step 1: Battery removal:

Use a flathead screwdriver to remove the battery and turn the locking bolt to the "unlocked" position. The gently pull out the casing like suggested in the picture below.

Fiat Stilo Key Disassemble 1.jpg

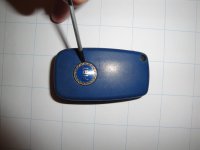
Step 2: Badge removal:

Gently remove the FIAT badge on the side. (mine was superglued on so I ended up damaging the sidewalls a little bit, so that's a risk you'd have to live with it).

Please note I used an even smaller screwdriver, pictures are for demonstration purposes.

Fiat Stilo Key Disassemble 2.jpg

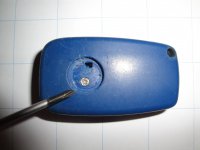
Step 3: Casing disassemble:

Use a philips screwdriver and unscrew the bolt that's keeping the key together. As you unscrew you may feel that the plastic parts are becoming undone with it. That's normal, just make sure you try to keep them together until you get the screw out because the spring that moves the key forward when pressing the release button may come off flying. :)

If they stick together, start pulling it apart from the battery compartment, and you would cause less visible damage to the plastic casing. In any case, DO NOT pull them apart applying pressure on the main board.

Fiat Stilo Key Disassemble 3.jpg

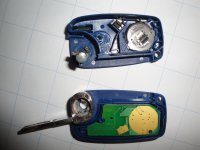
Step 4: Components removal:

You now have access to the main board, buttons and transponder. Gently remove all of them. The transponder is held by a plastic secure clip that is part of the plastic cover. Use a screw driver and pull it out.

You will notice my battery is still there. I still suggest removing it before you open the key. :)

Fiat Stilo Key Disassemble 4.jpg

Step 5: Buttons removal:

Use a screwdriver to gently push the buttons out from the inside. Preferably, use something plastic that would cause as little damage as possible. If you do it right, you can't mess anything up.

Please also remove the plastic transparent knob that sits on top of the LED in the same way.

Fiat Stilo Key Disassemble 5.jpg

In the following post I will explain how to refurbish it.
 
Last edited:
Refurbishment:

To complete this job, you will need the following:

a. paint thinner
b. rough cloth
c. sandpaper (the finest, 200)
d. spray paint in the desired color
e. optional paint for the release button

Step 6: Cleaning:

Thoroughly clean the plastic bits as good as possible. If you have deep cuts, use the finest sand paper (200) to clear them, as they will cause imperfections to the casing. Then rub it against a rough cloth or something to further remove the imperfections. The general idea is to make the casing as clean and smooth as possible. The color will fade, the casing will look pretty ugly after this process, there's no turning back now. :)

Step 7: Casing repair:

There may be several things wrong with the key. In my case, the knob wouldn't stand upright, but to the right. This is because of wear and tear. The zone you need to fix is located in the picture below:

Before:
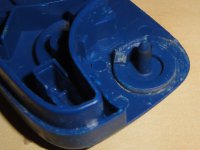
Fiat Stilo Key Disassemble 6.5.jpg

After:

Fiat Stilo Key Disassemble 6.jpg

What I did was to cut the piece of plastic away and put a new one with the exact dimensions there. Bison Gel Superglue works just fine. You need gel glue because it dries after about a minute and not instantly. This is a small part and would require some maneuverer to fit it. Afterward I have polished it using the standard weld gun used for electronics.

If you are having trouble pressing the buttons on the remote it may be due to the fact that the plastic in the button has shifted away from the click mechanism. Just pull it back and you should be fine.

Step 8: Preparing for the paint job:

Put some duck tape where the buttons were. Make sure it is put right, because a lot of layers will cause the part to shrink and cause problems on the assembly.

Apply paint thinner on the plastic covers. This is a very important process, because it acts like a primer. We cannot use primer because we would make the paint too thick and ruin everything. Let the paint thinner dry. Afterward, gently spray the plastic bits.

If you are using metallic paint, you will notice that the job is uneven. No panic. Use more layers. I used 5. In any case to not smudge the paint all over the place. You need several good layers to get it to look good.

The battery cover should be done in the same way, but with less layers of paint. Remember to mask the important parts of it to keep them away from the paint.

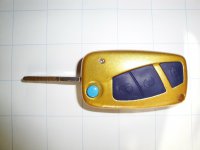
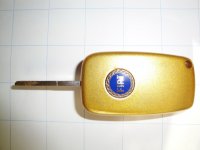
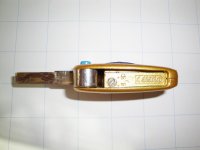
Paint spray dries partially in about half an hour. After all the layers, remove the duck tape from where the buttons were. If you see that the paint is uneven, apply another layer with it removed. Afterwards, use cotton buds to wipe out the excess paint. Final results are the following:
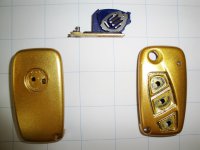
Fiat Stilo Key Refurbishment GOLD 2.jpgFiat Stilo Key Refurbishment GOLD 3.jpg
 
Last edited:
Wow that looks great. Are you leaving the buttons as is or can they be painted?
 
Step 9: Assembly:

After the parts gave completely dried (1 day the least), it's time to put them together. Reinsert the buttons, and all the accessories as they came out. This is all pretty straight forward. Only place where one can encounter problems is the key release mechanism.

What you need to do is to put the spring in the release bolt and then put the bolt on the main board with the key on top as below:

This picture contains only the bolt and spring just to see where you need to put them:

Fiat Stilo Key Refurbishment GOLD 4.jpg


Now, after this is done, gently pull the spring in the direction of the arrow and in the upright position, as shown in the below picture:

Fiat Stilo Key Refurbishment GOLD 5.jpg

After this is complete, you need to keep it pressed with your finger while putting the casing together. Please make sure everything is in place before doing so.

Fiat Stilo Key Refurbishment GOLD 6.jpg

After this is done, tighten the screw and stick the Fiat badge on. Don't use Super Glue, you may need to open it again. Use Moment Universal, the type of glue used to stick the sole of shoes. This is elastic and will not cause damage if you want to open it. Alternately, just use silicone.
 
Last edited:
Step 10: Posting final results and words:

Thank you for all your help so far, I've met some great people here and hope to be giving back at least a part of all the help I got.

Fiat Stilo Key Refurbishment GOLD 7.jpg

Fiat Stilo Key Refurbishment GOLD 8.jpg

Fiat Stilo Key Refurbishment GOLD 9.jpg

Please note that this is not a new key, It is almost 9 years old and was used to start the car for more than 75000 miles. Also, my Stilo it belonged to a carpenter. You can imagine where it's been.

Cheers to all.

PS: It would help if one of the guys could change the name of the thread the "Stilo Key Refurbishment" so people can find it easily. If you want to post it to the Guides section or not, I leave it up to you.
 
Last edited:
Back
Top