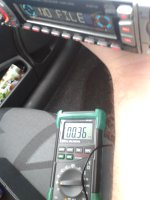
So here it is
This is your own work, I personally nor are Fiat Forum Reliable for any damages or injuries to you / your surroundings / your equipment / items
This is simply a guide on whats what
No equipment list - as this will vary greatly on your available items
A multimeter wouldn't hurt, wire and connection terminals MAY be required as well
Why does your new stereo fail to power up
The later mk2s and the mk2b series of punto swapped from the conventional system of a power signal stereo to a Canbus stereo
Canbus is great in a sense, as it can quieten the radio when your going slow, but nudge it up when you giving the car some hell
Or when (if fitted from factory) you receive a call and it'll sort it out for you
The problem been, most aftermarket radio's work on the old style of a power signal, where as the canbus is the cars body computer controlled, IE the car tells it to turn on and off via a data packet instead of a 12v electrical jolt
When you plugged your new stereo into the car, the stereo was only getting 1 of the 2 power feeds that it requires, hence why people often say they hear the stereo spool up - but not switch on
as the permanent power feed is there, but not the jolt of electricity to tell it get it lazy bum moving
To fix this - we ignore the canbus side and add a 12v "switched or ignition" signal
This comes from 1 of 2 places on the punto
You drop a wire down the back of the central dash near the stereo and wire it into the loom for the cigarette socket wiring making a fixed connection
Or my option which i think is easier
You use a piggyback fuse like such
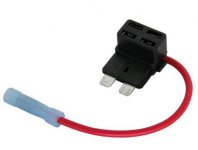
Why do i use one of these?
A - the current been drawn is tiny
In-facthere is me measuring it right now
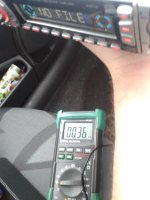
That's 0.36milliamps = Less then 1ma (this will be different from stereo to stereo and brands / models etc - Mine is a cheap Ripspeed unit that tbh junk)
B - should the wire that goes to the stereo become damage and short, its cut off at 2amps via the fuse in the piggyback holder, If hard wired into the cigarette socket wiring, it'd have to handle 20amps before blowing the fuse....
2amps = much sooner, less chances of a fire
C - I Cba to spend time stripping the center console out to get my soldering stuff out to make a sound connection
D - its not that expensive, and should i wish to remove it - i can do much more easily, or even disable it (pull fuse out)
So which option you going for? Option 2
The wiring on the stereo
Here is what the canbus stereo is like
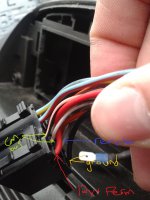
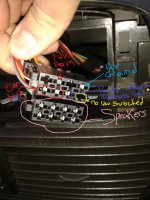
As you can see from the front, where the 12v Switched feed should be - the pin is missing, there is nothing there, as this is now done via the can bus
and here is what your stereo connection may look like
These do vary
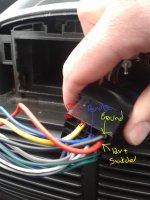
Did you notice that suddenly colours have now changed as well? And that there is now suddenly an extra wire
This is where it gets a little confusing, but bear with me
- Black is still black for ground - Ensure these pins meet
- Remote lead (12v signal for subs/amps) Goes from Grey to blue, this guide aint bothered about this right now
- The 2 canbus wires, dont have anything to connect to, thats important
Note: DO NOT USE THESE WIRES TO PROVIDE 12V SIGNAL TO AFTERMARKET UNITS. THESE ARE NOT 12V POWER LINES, BUT MORE LIKE 12V DATA LINES. THESE SEND PACKETS OF INFO AROUND THE CAR, AND DON'T USE 12V AS SUCH
- The Cars Red 12v+ Permanent Feed suddenly changes to a Yellow wire. Most stereo's ive seen use yellow for this reason.
Ensure yours is same by looking in the manual
This is a 12v constant feed to retain settings and stations stored in the cars memory, if the power fails, these stations are lost
Canbus systems sometimes don't loose these - neat huh?
- Lastly, there is a Red wire that suddenly connected to nothing on the cars wiring harness and Here is what actually is most peoples issue
That red wire (on stereo harness)is the 12v Switched feed
So How do i get a new 12v switched feed to my stereo
Well i opted for the piggyback fuse
So here we are
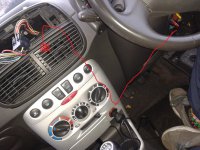
Its best to drop a length of wire down from the stereo to the little kick panels near the clutch pedal on the driver side (Removing this panel make its a lot easier)
I stuck my wire down somewhere so it all didn't just suddenly drop through
This was then cable tied to plastic trims and other wiring looms to take it up into the fuse-box area
For example
[/LEFT]
[/CENTER]
Fused at 2amps (smallest i could find for a mini blade fuse + available from halfords), this is plugged into the fuse for the cigarette socket, as this will make a nice switched feed (So much so i run my DRL of this as well!)
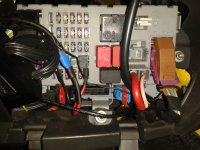
And you will be left with something like this
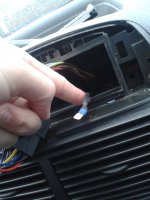
I used double barrel / insulated wire rated at 11amps, this means the wiring wont be the weak point in a short circuit, the fuse will be
So now you have your cable ready to plug in
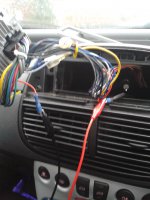
I had to use Spade terminals, as my cheapo butt/bullet connections snapped when i tried to disconnect them. But that new wire you installed, Bypasses the ISO connector (which takes from the cars wiring to the stereo's) And connects into the stereo's harness most of the way up
See where my crocodile leads connect, what will happen behind the dash
Testing time
Don't use your best CD - use the radio or a memory stick something you can get out if it goes wrong
So the fuses are installed in the piggyback fuse holder
The stereo is all connected up
Put the key into the ignition, and turn the ignition on
The stereo may come to life, some you have to press On first
And Hello!!!
When you turn the ignition off - the stereo should go to sleep (depending on settings on the stereo)
Some go dead - like mine
Some say goodbye and shutdown
Some may stay on for 30seconds, they all vary
But its still not working :(
Check fuses
A - on back of the stereo
B - The Cars fuse box for the stereo - get the manual out
C - Check your fuses for the piggyback holder and check both are okay
D - Check you've got 12v permanent feed (test light or multimeter required here)
E - Check the ignition or switched feed is giving 12v when the ignition is on
F - Check connections, So start from the fuses, working back up to the stereo fittings
G - Still not working - Get posting! Not on this guide, but on the Punto mk2/b section
Clean install time
Now you have the FUN task of trying to get all that wiring and gubbins to hide away behind the stereo to make it sit flush before fitting the remaining trims
There no real advise for this, as some will drop in 1st time
some will be a pain in the backside (like mine!)
There are 2 holes either side where wiring originates from (left for ariel) (right for car loom)
You can try feeding more loom back down them to make more room
Also in the middle of the stereo fitting is a giant lump - ensure your wiring goes either under or over this, as not to trap and damage any cables
Hope this helps!
GOOD LUCK!


