Old rusty cables/linkages will fail, soon or later. When you have a hard time rolling rear window down or up, it's time to repair/replace whole mechanism (window regulator/lift/winder - whatever you call it).
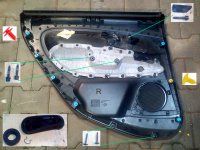
1. Remove the crank-handle and door trim panel. Example picture, right side (most pictures in this Guide will cover the left side).
There are tutorials in the internet (YouTube videos, forums - search).
Example link: https://www.fiatforum.com/grande-pu...o-replacement-external-rear-door-handles.html
2. Rain (or car wash) water goes into the doors, that's normal. But droplets spin (like a "bend" or "curve" in a football) and go towards the inside of the car, where white foam (it is a seal) stops them. In result, almost everything is wet (mechanisms inside the doors). This foam must be detached carefully and put back together later, so it is fully sealed, all around.
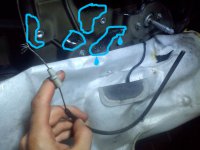
3. Low-res animated GIF (click if not playing). Water runs everywhere...
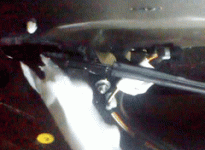
4. In theory electrical plugs/connectors are sealed, but water will get there too (given enough time).
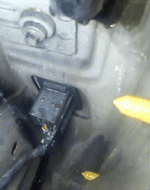
5. So linkages/cables will rust and "freeze". And break when you try to open/close the window using too much force (if it's resisting, don't crank anymore, stop it = you must repair it, nothing will help at this point, no WD-40 spraying etc., it can make it even worst).
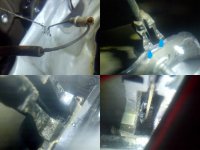
6. Removing the winder/lift mechanism is easy. Four nuts, 10 mm + undo the clip holding the glass (it is easier to do it with window about half way open - during assembly too). Watch out, don't crack the glass (when it falls down - secure it somehow, wedge something between the window and door or support it).
Example video (non-english language): http://www.youtube.com/watch?v=4MTUXTzFk4w
Another one (search, there is more): http://www.youtube.com/watch?v=ch-q8DS3rHY
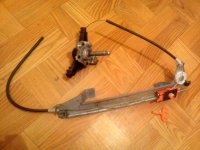
7. Most common thing is a cable/linkage failure (more precisely 1 out of 2). If you can buy "linkages only" in your country (and it's the cheapest option), do it.

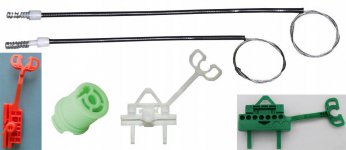
8. There are also repair kits available. Depends on the country (sometimes - like eBay UK - repair kits are more expensive than complete winders - that doesn't make sense).
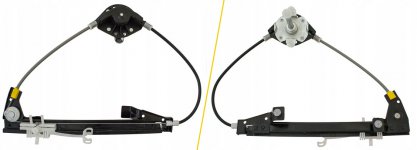
9. Third option (easy one). Lift/Winder mechanism swap (so you do complete regulator swap or linkages only - two most sensible options).
10. Dismantling the winder is a bit tricky. You need good pliers to bend-open 4 pieces of steel (or drill, to remove the 4 rivets - depends on winder type, style).
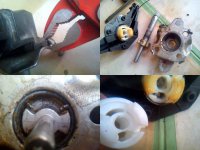
11. Cable roll/drum exposed. One of the linkages trashed badly. There are two: top one (shorter - it lifts the window up), bottom one (longer - it pulls the window down). Bottom one suffers the most (water -> rust).
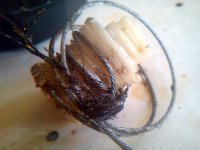
12. Mind how the cables ("wire ropes") are installed on the drum. This is a left side of the car. Top (shorter) cable goes first.
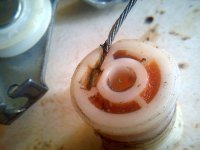
13. If you are replacing the sliders, mind the linkages orientation (which one goes first and where). Don't forget the black foam (protects the glass).
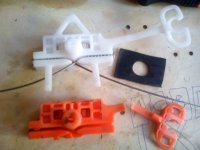
14. To prolong the life of the mechanism, everything must be covered in grease ("load" the cables, drum, slider and the rail).
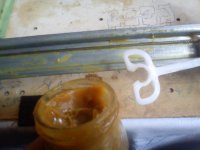
15. There's no, one and only "correct" assembly procedure. But here is an example. Left side, short top linkage goes first into the drum and slider should be in the top (window closed) position.
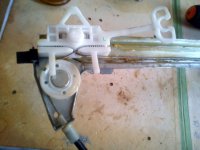
16. Then you wind the other, longer (bottom) one, until it will appear to be "too short" (but it's not).
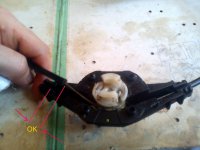
17. To make it easier, don't place the cable shield (other end) into the rail mount point. The winder must be assembled first (cables and their outer shields/covers in place). Seems to be difficult, but it's not. One turn more or less makes a difference: cable is "too short" (good) or too loose (bad).
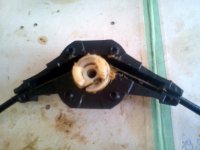
18. So last step should look like this. Forcing the bottom cable shield into the place. It (cable being "too short") provides the tension (preload) in the mechanism.
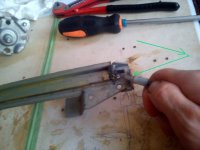
19. Right side of the car was different. "Procedure" was flipped. Bottom (long) cable goes first and slider in the bottom (window open) position. Drums were identical R/L (if they are not in your car, "the procedure" may be flipped-back again, pay attention).
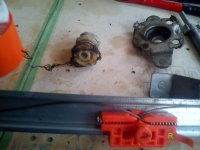
20. But sliders were not (there is a "right" and "left" version).
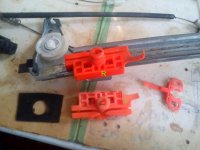
Put everything back together: winder - may require position adjusting (to make window move as freely/smoothly as possible), foam sheet (seal), internal door handle linkage, door trim/panel, crank handle.
1. Remove the crank-handle and door trim panel. Example picture, right side (most pictures in this Guide will cover the left side).
There are tutorials in the internet (YouTube videos, forums - search).
Example link: https://www.fiatforum.com/grande-pu...o-replacement-external-rear-door-handles.html

2. Rain (or car wash) water goes into the doors, that's normal. But droplets spin (like a "bend" or "curve" in a football) and go towards the inside of the car, where white foam (it is a seal) stops them. In result, almost everything is wet (mechanisms inside the doors). This foam must be detached carefully and put back together later, so it is fully sealed, all around.

3. Low-res animated GIF (click if not playing). Water runs everywhere...

4. In theory electrical plugs/connectors are sealed, but water will get there too (given enough time).

5. So linkages/cables will rust and "freeze". And break when you try to open/close the window using too much force (if it's resisting, don't crank anymore, stop it = you must repair it, nothing will help at this point, no WD-40 spraying etc., it can make it even worst).

6. Removing the winder/lift mechanism is easy. Four nuts, 10 mm + undo the clip holding the glass (it is easier to do it with window about half way open - during assembly too). Watch out, don't crack the glass (when it falls down - secure it somehow, wedge something between the window and door or support it).
Example video (non-english language): http://www.youtube.com/watch?v=4MTUXTzFk4w
Another one (search, there is more): http://www.youtube.com/watch?v=ch-q8DS3rHY

7. Most common thing is a cable/linkage failure (more precisely 1 out of 2). If you can buy "linkages only" in your country (and it's the cheapest option), do it.

8. There are also repair kits available. Depends on the country (sometimes - like eBay UK - repair kits are more expensive than complete winders - that doesn't make sense).

9. Third option (easy one). Lift/Winder mechanism swap (so you do complete regulator swap or linkages only - two most sensible options).

10. Dismantling the winder is a bit tricky. You need good pliers to bend-open 4 pieces of steel (or drill, to remove the 4 rivets - depends on winder type, style).

11. Cable roll/drum exposed. One of the linkages trashed badly. There are two: top one (shorter - it lifts the window up), bottom one (longer - it pulls the window down). Bottom one suffers the most (water -> rust).

12. Mind how the cables ("wire ropes") are installed on the drum. This is a left side of the car. Top (shorter) cable goes first.

13. If you are replacing the sliders, mind the linkages orientation (which one goes first and where). Don't forget the black foam (protects the glass).

14. To prolong the life of the mechanism, everything must be covered in grease ("load" the cables, drum, slider and the rail).

15. There's no, one and only "correct" assembly procedure. But here is an example. Left side, short top linkage goes first into the drum and slider should be in the top (window closed) position.

16. Then you wind the other, longer (bottom) one, until it will appear to be "too short" (but it's not).

17. To make it easier, don't place the cable shield (other end) into the rail mount point. The winder must be assembled first (cables and their outer shields/covers in place). Seems to be difficult, but it's not. One turn more or less makes a difference: cable is "too short" (good) or too loose (bad).

18. So last step should look like this. Forcing the bottom cable shield into the place. It (cable being "too short") provides the tension (preload) in the mechanism.

19. Right side of the car was different. "Procedure" was flipped. Bottom (long) cable goes first and slider in the bottom (window open) position. Drums were identical R/L (if they are not in your car, "the procedure" may be flipped-back again, pay attention).

20. But sliders were not (there is a "right" and "left" version).

Put everything back together: winder - may require position adjusting (to make window move as freely/smoothly as possible), foam sheet (seal), internal door handle linkage, door trim/panel, crank handle.

