Technical Fiat 500 pollen filter replacement

Currently reading:
Technical Fiat 500 pollen filter replacement

mercboy2004

New member
Joined
May 16, 2015
Messages
2
Points
1
Hi,
i have recently bought Fiat 500 1.2 (2011 - UK - RHD) for my daughter. Just had timing belt/aux belt/water pump replaced.

To save a few quid, i thought i would replace pollen filter...

I have read all threads - looked at images - prior to posting this...

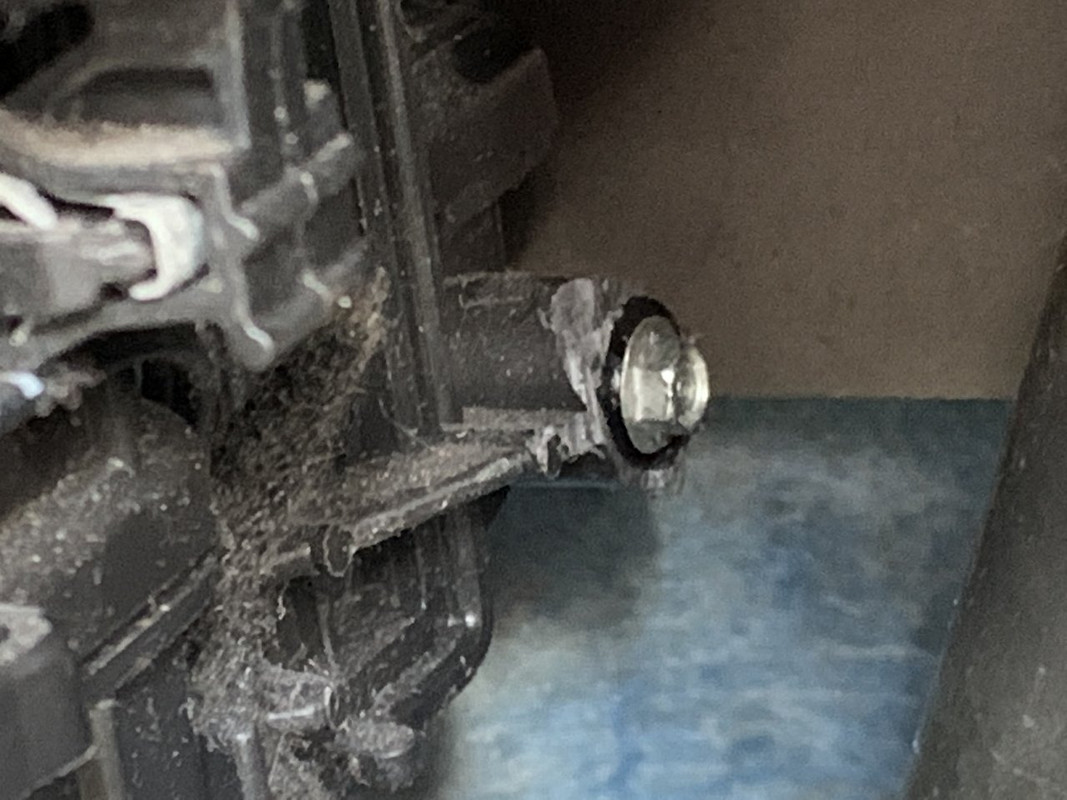
I have taken off trim panel (by side of clutch) and located casing which i assume contains filter (correct size etc)

But... the side panel where i would expect it to come off...doesn't. It looks like a blanking panel?
The 2 screw holes either side of the housing (lower left/upper right) don't appear to ever have had a screw in them? I was expecting to have to remove 2 screws and effectively remove a slim panel based on other posts images... but am faced with a smooth end - nothing to unscrew/tabs to pull etc?

What am i doing wrong?

Cheers M
 
Hi, no it doesn't have air con...this would explain why all I can find is a blanking cover!

Thanks for your quick response.
 
Hi, no it doesn't have air con...this would explain why all I can find is a blanking cover!

Thanks for your quick response.
Apologies for restarting an old thread, but this could be misleading.
I have just changed the cabin filter on a 2008 1.4 Sport. Whilst trying to work out how to do it, I found this post.

The car has what is described above as a 'blanking cover' with no evidence of screws ever being fitted. However, it does have aircon so there should be a pollen filter.

I persevered in getting the cover off and found something that I assume used to be a filter but now resembled a solid block of soot, seeds and other detritus. Could be it has never been changed as there is no evidence of the cover having been removed.

In short, don't assume because there are no screws it is permanently sealed and there is no filter!

Mike
 
Pollen filter replacement on a right hand drive Fiat 500 is quite possibly the most fiddliest job I've ever done on one of these cars. The first time I ever changed one, it took me about 40 minutes, the second time, about 30 minutes. And yes, you are undoubtedly correct, the pollen filter most likely had never been changed.

Thankfully, the pollen filter on our i10, takes around a minute and a half to change as it's located directly behind the glove box, a pull out, push in cassette. If only Fiat could have come up with something similarly simple. :rolleyes:
 
It seems many were never fitted with the screws, but only the aircon cars had filters. It is quite possible that a filter could be fitted to a non-aircon car, but I've not heard of anyone doing it yet. The non-aircon covers are often glued on, so easily destroyed.

On a LHD car the job is easy and quick.
On the Panda, probably same in the footwell as the 500, it is easiest if the steering column is released from the rack and moved away. Should always replace the bolt with new.
 
Pollen filter replacement on a right hand drive Fiat 500 is quite possibly the most fiddliest job I've ever done on one of these cars. The first time I ever changed one, it took me about 40 minutes, the second time, about 30 minutes. And yes, you are undoubtedly correct, the pollen filter most likely had never been changed.

I agree it's fiddly but if it's the fiddliest job that I'll come across on this car then I'm happy :). Took about 5 mins to get the new filter in once I'd worked out how to remove the cover, you just have to work out which way to approach the 'slot' to post it in and bend it around the various obstacles, and you need a good torch / worklight. Doesn't mean it's not a s**t design though!

Mike
 
I did mine about a year ago just after we got the car. Once I finally got the cover plate off I decided that for future ease of replacement that I would trim the lip that countersinks the bottom screw. So I can just easily remove it with a 5.5mm spanner insteed of a pair of pliers turning a 5.5mm socket.
 
I did mine about a year ago just after we got the car. Once I finally got the cover plate off I decided that for future ease of replacement that I would trim the lip that countersinks the bottom screw. So I can just easily remove it with a 5.5mm spanner insteed of a pair of pliers turning a 5.5mm socket.

My cover is held by a torch bit and two hex bolts

The interior cover has nothing holding it in place just slid the cover out and replaced the filthy filter
 
I did mine about a year ago just after we got the car. Once I finally got the cover plate off I decided that for future ease of replacement that I would trim the lip that countersinks the bottom screw. So I can just easily remove it with a 5.5mm spanner insteed of a pair of pliers turning a 5.5mm socket.

This is the best bit of advice for anyone attempting this.

I used a Stanley knife to trim the lip around the bottom bolt in situ..


then used of all things a diddy Tamiya 5.5/6.0mm spanner from my old radio control toolbox


I think the filter needed a change, I wouldn’t be surprised if this isn’t the original from 6.5years and 36k miles ago!

 
Back
Top