General Progress on my Uno

Currently reading:
General Progress on my Uno

Nice, very nice. Couple of questions, why have you left the hose for the cold air feed. Also where does your hot air feed pipe from the exhaust manifold go? Most people appear to remove when fitting an after market aircleaner. What about the breather hose? Sorry that is three questions...

I've got a target now!
 
Mint bay distortionrockets (y)!

One little thing :spin:. I take it you have an audio amp somewhere :D.

You could loose the red wire from across the back of the bay by going through the Speedo cable grommet, or drill through the Left Hand drive blanking plate ;).

I’m liking you’re bay a lot!

Regards,
Louie.
 
matt your engine bay is stunning! haha. reminds me i need to get a strut brace!

ok thats not a bad idea for the audio cable i will try that. if not i will cover it in blue hosing!

pottleflump...
by cold air feed do you mean the huge black hose pointing towards the K&N? that would look silly in blue. lol
i had to leave the breather pipe for the water because the blue hose kit i bought did not include a pipe that was large enough to cover that.
the other end of the air pipe for the manifold is located just behind the front grill. i had to remove some trim to fit it there but i believe it cools the manifold down when at speed (and doesnt look half bad)

thanks for the feedback :D
 
distortionrockets said:
the other end of the air pipe for the manifold is located just behind the front grill. i had to remove some trim to fit it there but i believe it cools the manifold down when at speed (and doesnt look half bad)

thanks for the feedback :D

Ironically, you will impair performance by doing that! Exhausts manifolds work better the hotter they get. Look in rally supplies/ performance tuning shops, and you will see they offer 'exhaust wrap' for manifolds and exhaust systems. The idea being that you wrap this insulating material round the exhaust/ manifold, and by doing so you keep the heat in the manifold. This then makes the temperature in the manifold hotter and helps keep under-bonnet temperature cooler. By running the manifold hotter you increase gas flow potential, and aid extraction of exhaust gases.

Sorry to rain on your parade :( , but the rest of your engine bay is looking good (y)
 
Well my latest (slow) progress on my car(s) has been to drain and flush the coolant, change the oil and take the front headlights and indicators off the donor.

I needed a new O/S headlight and both indicators were worse for wear; plastic covers are fine but the actual housings are past it and cracked - well they are 18 years old! The ones of the donor are fine and in better shape despite the car being near 20 years old. Just need to fix on now. Next thing to do tomorrow is to try and get the vacuum advance unit off the distributor. Its location is a little more tricky on the 1116cc than on the 999cc.

On the welding front my brother in law is coming over during the bank holiday weekend, he has a welder, being a mechanic, so hopefully can get the rear arch sorted and in theory it should be good for the MOT :)

Unfortunately I'm lacking space with 2 cars crammed down the side of the house. I can't keep the donor on the road now the lights and grill are missing and the other has no MOT/Tax.

I've also hopefully sorted out some new seats thanks to Peter :D A tastefully pink and green but they look in good shape which is the main criteria.

Pictures to follow soon......
 
Looks good , i once jet washed a Toyota Carina 16v , and consequently it refused to operate properly for 3 weeks , the offending item been a suppressor cap which had a hairline crack in it , resulting in a short across the block plug hole . which was half filled with water :mad: . Like the golden rule preparation is everything , you gotta keep electrics out of the war zone or you could get chew !
 
SuperUno, No air filter in a rally car?! :eek:

DistortionRockets, nice work, good to see another someone taking pride in their FIRE-engined Uno (y) You'll find that it stays looking pretty good too, unlike the various domestic tasks you could have spent that time on, e.g. washing clothes, cutting grass, weeding gardens... they will be just the same in a couple of months, where the Uno will still be lookin' great!

I managed to destroy a Honda alternator once, after cleaning the engine bay.

thepottleflump - the indicators-story sounds familiar :) 
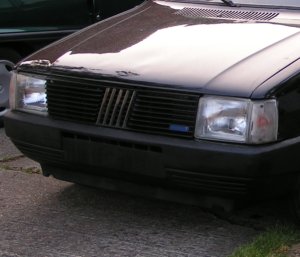
I think the problem is that there are many different suppliers of these light units, some are aftermarket, and generally speaking the original-fit items are much better quality long-term. Another common manifestation is matt-finish, yellowed lenses.

As for the lacking of space, move to New Zealand where you'll be able to have about 10 acres on the outskirts of town, with a four-bedroom house, for about the price of a flat where you live :D Of course, you'll only earn a third as much money, but that can be worked around...

-Alex
 
Here is my engine bay, I still want to put RAM iduction on when i've got the time and money, but here is the progress
 

Attachments

  • Photo-0131.jpg
    Photo-0131.jpg
    187.2 KB · Views: 65
Where abouts are you in redhill mate?
southside way or mestham way or a bit in between?

i go to east surrey college so you might see a mk2 turbo going around during the day very soon! lol
 
Next update, not much as I was away for the weekend. Took the vacuum advance unit off both vehicles. The one on the 45s is definatly shot, you can see the diagram is damaged. It is good on the 60s :D Now all I need to do it get it onto the distributor which is easier said than done! Will be trying to heat the plastic to hopefully soften and expand it a bit. Couldn't see an easy way into the dizzy to ease it on.

Need to get this sorted asap because both cars need to move to make way for my imminent garden project. I've got sh** loads of timber and sleepers arriving any day now to retain the garden!!!!
 
Pottleflump, changing the vacuum advance unit is actually very easy - a ten minute job at most.

I wouldn't worry about heating the plastic before fitting. The secret is (going by memory) to get a small flat blade screw driver to push up on the plastic arm so it fits into the little metal ball on the advance/ retard part of the dizzy.

It's been a while since I did one, but it's just two screws and the plastic arm to fit. In fact, I think that if you can get a screw driver with the tip bent over 90 degrees into an 'L' shape, you can get the screwdriver though the gap in the top plate of the dizzy and hook the plastic arm onto its locating ball.

My memory is hazy, but I do remember that it is not a difficult job.

Oh, and instead of heating the plastic arm, a very small amount of grease on the locating end would probably help (y)
 
tried the grease and still the bugger won't go on. Should be a 10 minute job I agree if that little plastic git would just slip over its metal ball. Just spent 10 minutes trying to get the git on already!!

A quick cuppa, scratch and continue....
 
Right well it has been sometime since I updated this thread.

Progress since the last update

1) First stage polish completed but needs loads more work to complete the paintwork. Going to wet sand the paintwork shortly.
2) Drums and calipers painted to tidy up and hide the rust, especially on the drums.
3) Car lowered all round on some brand new Jamex springs. New front shocks fitted, just because. New shocks bought for rear, still to fit.
4) Welding of rear arch completed this Sunday thanks to my brother-in-law!!!! No pictures yet, will get them up shortly.

To do -

1) Main priority to get the thing on the road and an MOT - going to get it down the test station and get the list of things that need doing. I am expecting a few. Means refitting the interior which I stripped to assess the rust situation which turned out to be limited to the drivers side arch.

Will get some pics up real soon, I promise - here is a little teaser

teaser.jpg
 
:woot: Mk1 update, update, update!

Sounding and looking good so far Pottleflump. Mk1 Unos always look nice in dark colours (says he with a bright red one!) Is yours black or very dark blue?

As for wet sanding the paintwork, before you try that have you tried using cutting compound? You can get surprisingly good results, though it is hard work. Check the link to see how well my oxidised red paintwork came up (y)

https://www.fiatforum.com/uno-styli...-year-old-paint.html?highlight=polishing+year

If that doesn't work, then you may have to resort to wet sanding. When I've tried this I've used very fine wet and dry (approx. 1500 grade), dampened with a water solution containing some washing up liquid to aid lubrication and also to help keep the paper clean. You'll still need to use a polishing compound afterwards, but as a last resort it could be a way of rescuing paintwork without having to fork out for a respray.

One last thing, from the few 'teaser' pictures :)p ) we've seen of your mk1 is it a metallic colour? If it is, then you'll have to be very, very careful about wet sanding the paintwork. Cutting compound and wet sanding only really works on non-metallic paint finishes, because on metallics you risk rubbing off the top layer of lacquer.

Either way, good luck Pottleflump and I really look forward to seeing the pictures (y) (y) (y)

Oh, and will you bring it to the ACE Cafe Italian meet one day?

Cheers!

Chas
 
Back
Top