Technical Nanni 540cc Engine Build

Currently reading:
Technical Nanni 540cc Engine Build

Toshi 975

Prominent member
Joined
Jun 30, 2009
Messages
1,974
Points
650
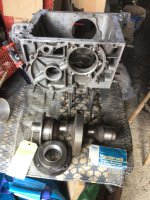
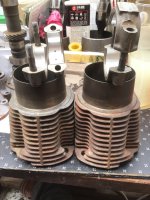
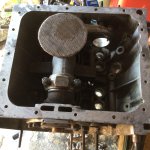
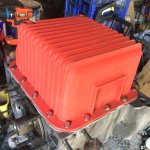
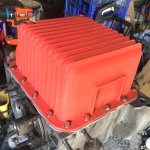
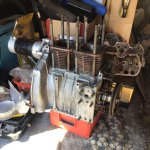
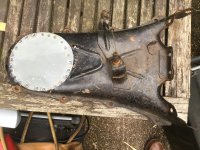
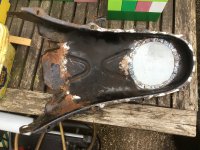
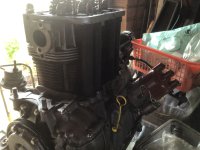
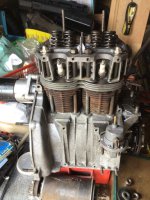
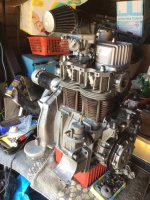
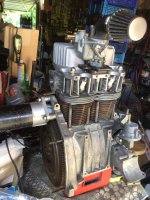
You can take the Fiats out of my garage but you can’t take the Fiat out of me. So I had to sell all my cars as working on them became beyond me but all through my long illnesses I continued to help people all over the world with spares and even bought more parts when the mood took me. Even without cars I still had a couple of projects up my sleeve, one being centred around a very old unused 540cc piston and barrel set and a rather rare alloy sump. I was told that these part were sourced from Nanni but they have no markings but the pistons were made by Asso who still make pistons in Italy. I had to source new piston rings and gudgeon pins ( I machined down 126 ones) as the originals had corroded badly in poor storage. With new rings fitted I mounted the high compression pistons on 126 con rods to get the advantage of an extra oil squirt jet onto the bores. Then pistons installed in barrels.
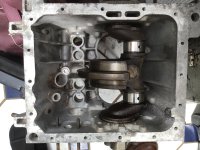
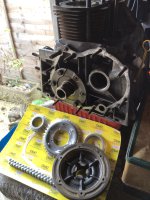
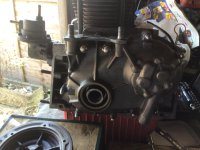
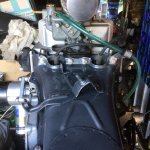
I had a bare 499 crankcase ready and also a reground crankshaft complete with new main and big end bearings which are now installed with a new oil seal in the rear. Pistons, barrels and con rods now in place , oil pick up tube fitted (why do gasket sets never include that fat o-ring seal) so ready for the sump. Being an alloy sump I have gone for the no gasket fit, using a smear of instant gasket with stainless hex screws and heavy duty spring washers.
 

Attachments

  • 60799ECD-C904-43EB-97E0-EB5B62113ABD.jpeg
    60799ECD-C904-43EB-97E0-EB5B62113ABD.jpeg
    1 MB · Views: 200
  • 34CC0284-9BCA-4967-B0B4-46D2C2309230.jpeg
    34CC0284-9BCA-4967-B0B4-46D2C2309230.jpeg
    1 MB · Views: 94
  • FA466B19-7ABE-46A0-8FD0-27FEA81FCAFE.jpeg
    FA466B19-7ABE-46A0-8FD0-27FEA81FCAFE.jpeg
    2.1 MB · Views: 87
  • EBB028A6-A84D-43A0-9C4D-B1FE7F5324AB.jpeg
    EBB028A6-A84D-43A0-9C4D-B1FE7F5324AB.jpeg
    743.3 KB · Views: 84
  • 17C6751C-834B-4562-AB48-CF279BF8869F.jpeg
    17C6751C-834B-4562-AB48-CF279BF8869F.jpeg
    838.9 KB · Views: 87
  • E83B88CB-D5AD-49E8-985E-21CFACEC7D0F.jpeg
    E83B88CB-D5AD-49E8-985E-21CFACEC7D0F.jpeg
    1.3 MB · Views: 96
You can take the Fiats out of my garage but you can’t take the Fiat out of me. So I had to sell all my cars as working on them became beyond me but all through my long illnesses I continued to help people all over the world with spares and even bought more parts when the mood took me. Even without cars I still had a couple of projects up my sleeve, one being centred around a very old unused 540cc piston and barrel set and a rather rare alloy sump. I was told that these part were sourced from Nanni but they have no markings but the pistons were made by Asso who still make pistons in Italy. I had to source new piston rings and gudgeon pins ( I machined down 126 ones) as the originals had corroded badly in poor storage. With new rings fitted I mounted the high compression pistons on 126 con rods to get the advantage of an extra oil squirt jet onto the bores. Then pistons installed in barrels.
I had a bare 499 crankcase ready and also a reground crankshaft complete with new main and big end bearings which are now installed with a new oil seal in the rear. Pistons, barrels and con rods now in place , oil pick up tube fitted (why do gasket sets never include that fat o-ring seal) so ready for the sump. Being an alloy sump I have gone for the no gasket fit, using a smear of instant gasket with stainless hex screws and heavy duty spring washers.
So sorry to hear about your health problems David, but delighted to hear that you can still cope with the "odd project" It is interesting that you think that your sump is by 'Nanni'. I also have 'acquired' one of those sumps---an alloy sump with a cooling passage in the bottom; just like the 'tin' sumps. Look after yourself, take care and stay away from those wild woman!
 
So sorry to hear about your health problems David, but delighted to hear that you can still cope with the "odd project" It is interesting that you think that your sump is by 'Nanni'. I also have 'acquired' one of those sumps---an alloy sump with a cooling passage in the bottom; just like the 'tin' sumps. Look after yourself, take care and stay away from those wild woman!
The wild woman is having an early night 🤭
The Nanni connection is by word of mouth from the friend I bought the parts from and he was told that by the guy who I believe was the buyer. They came with an abandoned Barchetta kit car that was going to be based on a Fiat 500N. You are the first person I have heard of that has one of these sumps and one mystery to me is that it is unused so assume that the dusting of red paint is original. Also the pistons I have are unlike those from the current 540 kits.
 
Sackcloth and ashes for me today🙀
Fooled by a mark on one big end bearing cap I found I had installed it the wrong way around and for those who do not know that has the effect of totally locking up the engine. I thought the expected stiffness was a bit extreme so a couple of steps back with the sump back off confirmed my fears. All sorted now and no damage done so the work can continue.
 
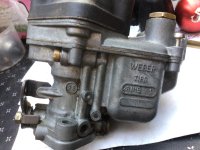
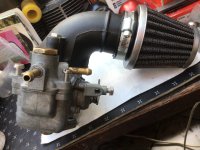
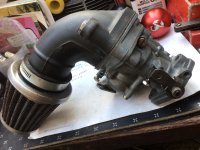
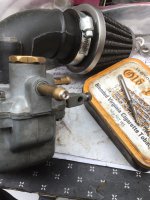
On a more positive note I bought an incomplete Weber 28IMB on eBay that looked to have potential. I was not wrong as the main parts were in excellent condition for an old Italian made carb but the choke mechanism was missing and somebody had fitted a new service kit that was such poor quality I have or am replacing all those bits.
71B88F63-482E-48DB-A3C7-70ACABEA970B.jpeg897C22B2-1D9C-4DB5-8D4A-9D57D7BE42F7.jpeg95A08359-F882-4004-8AC2-A63A414E1961.jpeg
 
Next move was to select and prepare a 126 timing chain cover. Had to check it would fit. I wanted to use one of these to get the benefit of the larger oil pump. Popped a new fuel pump on at the same time.
D20E1245-762D-4A6B-A584-B947665B76D4.jpeg
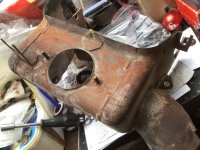
Then went on to search for the tinware I needed. Had to remove a thermostat housing from a spare engine which was caked in black crud inside and out and cleaning looked like a grim prospect so I resorted to chucking it in a fire which worked a treat.
 
I've nothing really to add, other than to say I love a good engine build thread! Keep it coming!
Well I am trying, some say very trying 😳
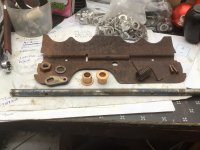
I have done some repairs to thermostat housing flaps I the past but not to this extent. The main housing has had a brush down after the fire and I have sorted out a better flap spindle and sourced new flanged oilite bushes as one was non existent
88303767-9855-4109-BAD8-B83FE9C980E4.jpegB0D8CE48-EAFC-47C9-A34B-A6097B0C93F9.jpeg
 
Nothing added to the main engine but lots of preparation going on. Had to seal off the fuel return on the carb as it is a 126 Weber IMB28. used my tried and tested method of tapping an M5 thread into the brass connection and sealing it with a grub screw.
A9E3869B-3B9E-47F1-9079-B22F5462D826.jpeg
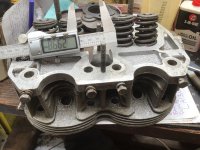
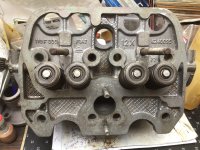
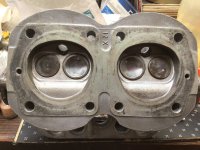
Stripped down the head for a final clean and replace the non existent oil seals so that is now ready to go.
413822D7-A200-4D92-AC88-8E21841F03A1.jpegAA15F206-259F-46BF-B93B-B39EDD1DA1F4.jpeg
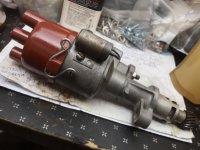
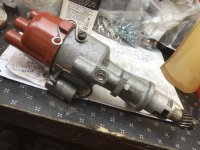
Sorted out a nice distributor which I rebuilt, just waiting for a couple of components from Motobambino.
E71AE8DD-6433-4B00-AB07-6F318AA94735.jpeg00D22B23-72B9-47E2-A919-0E24B1C29564.jpeg
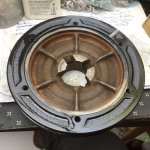
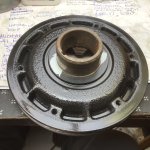
Then a good clean and paint job on the crankshaft pulley. I painted on a line to mark the timing mark to make it easier when using a strobe.
82886922-B1E0-4431-AB55-774DBC4D89C2.jpeg87E8AACF-BC38-46E2-8232-0A9DF0B75A75.jpeg
 
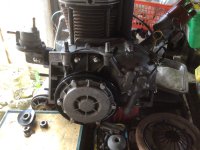
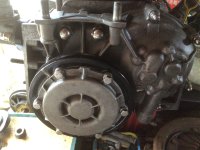
Fitted the crankshaft pulley and centrifugal oil filter yesterday then sorted out an oil light pressure switch. Post arrived with a new rotor arm and low tension insulators which completed the distributor so put that in place. After a search I found a set of 500 pushrods, initially I only found two but I was spurred on by the fact that nobody seems to sell them. With sets of pushrods, pushrod tubes and cam followers I was able to fit the cylinder head. As always sensitive about the fit of the pushrod tubes and seals so as I lower the head and prior to torquing it down I make sure I can rotate the tubes and seals are in place.
I think I am doing quite well as having started with a bare crankcase I have found all of the parts in my stock of new and used parts apart from the two distributor parts which I did have but on complete distributors so chose to buy new ones 😀4F0B71F5-3557-41FA-BE97-BDDE8E2D485E.jpegBB7AFD64-161A-4F7C-8B87-073BCD86EE3E.jpegD5506C68-02E1-48CE-9E3B-BF547A08F86B.jpegA4360565-4141-43A3-9981-E5396B911A61.jpeg
 
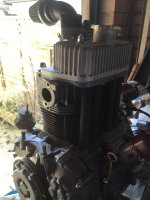
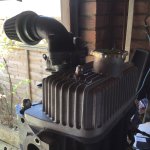
Sorted out a nice set of rockers, got those fitted and tappets set. I had not fitted an alloy rocker cover before but have heard they can be a problem and this was the case as the thicker cover side interfered with the carb so had to do a little work with the Dremel to fit the cover and the carb.
2C12C730-BE2E-474F-8AD6-071D3AB44F8A.jpegAD22364E-A5E9-4C57-8981-F59B6A00D569.jpegE4B47A52-E657-4FD0-8ADE-9FCA1A990B6F.jpegF3F494F3-99FD-41FB-AE6D-FEFB9E6459FB.jpeg
 
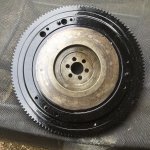
Spruced up a good 500 flywheel
C26633EA-BAA4-4764-B410-045DE1A729F6.jpeg
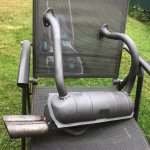
then went looking for a 500 exhaust that had fallen down an inaccessible gap in my garage years ago and I managed to hook it out. I could not remember what condition it was in but was pleasantly surprised as apart from surface rust it is vey solid. Much wire brushing, a coat of rust treatment than a couple of coats of high temperature paint and hey presto.
32F7BC97-2B28-4E5F-8816-02579E22D700.jpeg
It is also in my favourite twin pipe style but one other surprise, it has the makers name “ZARA, Made in Italy“. must be old as I cannot find anything on the internet about Zara exhausts.
 
Spruced up a good 500 flywheel
View attachment 408986
then went looking for a 500 exhaust that had fallen down an inaccessible gap in my garage years ago and I managed to hook it out. I could not remember what condition it was in but was pleasantly surprised as apart from surface rust it is vey solid. Much wire brushing, a coat of rust treatment than a couple of coats of high temperature paint and hey presto.
View attachment 408987
It is also in my favourite twin pipe style but one other surprise, it has the makers name “ZARA, Made in Italy“. must be old as I cannot find anything on the internet about Zara exhausts.
In trying to sort out some information for a contact regarding "Radbourne Racing", I found a brochure advertising the parts that they could supply for the 500. In those pictures was one of an alloy sump, showing the same 'underside air passge like the factory tin sump'. Now, for a short while, Radbourne fitted Giannini parts---although I can see no names on the parts, could that unusual sump be a Giannini part?
 
In trying to sort out some information for a contact regarding "Radbourne Racing", I found a brochure advertising the parts that they could supply for the 500. In those pictures was one of an alloy sump, showing the same 'underside air passge like the factory tin sump'. Now, for a short while, Radbourne fitted Giannini parts---although I can see no names on the parts, could that unusual sump be a Giannini part?
As I said it was word of mouth but no documentary evidence and as you say there are no identifying markings.
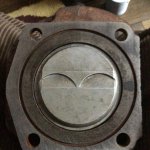
are there any pictures of pistons as this is one of the high compression ones that came in the 540cc kit along with the sump?
1DEBA2A2-014C-4AE1-8BFE-6459436B5740.jpeg
the piston crown is different from the current 540 kit.
 
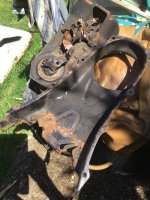
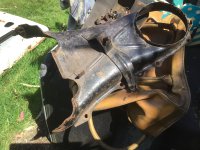
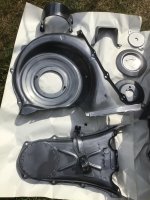
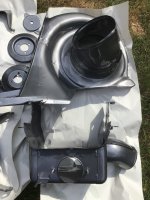
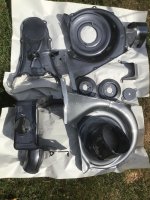
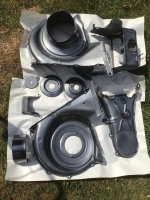
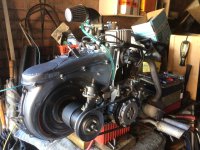
There has been a bit of a lull here as I had to locate the tinware parts in all my bits, do a bit of straightening then get some welding done before the parts were ready for the powder coating. Every engine I have ever done before has always been the traditional black so for my special little engine I wanted a change. Not keen on the primary colours and after a chat with the coaters I opted for a more discreet Graphite. Holidays and covid held up the coating which was frustrating but gave me time to rebuild a Dynamo, offer up the exhaust with brackets which required three new studs and connect up and test the ignition circuits which is giving me a good spark.
Got the tinware back this afternoon and the end result is very pleasing. The pictures do not really do it justice as they look pretty much black but are in fact a mid grey with a metallic look. Before the coaters started work on the bits they rang me to check I wanted Graphite as they said it was more expensive being a four stage process of sand blasting, spray coating, oven bake, 2nd powder coat, 2nd oven bake, lacquer spray and final oven bake.
E019629A-82F3-4BA8-A4B7-F1FEE89E5A8B.jpeg
4DC2421F-B729-4456-9CF3-2BA71355257B.jpeg3ADB20C0-D9DA-4B2B-8158-697E6D172ECC.jpegC78BB525-07A6-4C36-A260-96E83410F6F3.jpeg4112A957-E1AD-4319-B61C-835B5ECEAE90.jpeg
 
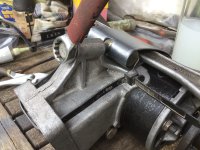
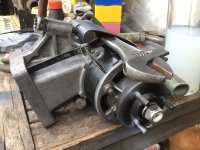
Getting the tinware back made way for the next wave of activity. Got some work to do before fitting and one being getting the Dynamo back in its cradle which I was not looking forward to having struggled with one some years ago. If you have ever done this you will know what I mean. I thought it best to do on the bench and offered up all the bits and as expected it was impossible to line up the clamp bolt with the sprung steel band just using my hands. So I diverted my energy to my head and arm for a bit of head scratching and this is what I came up with.
E72A1373-B08C-41F7-9A06-733BF9B22DD1.jpeg580086E2-2E68-4874-95C6-B6CE9C75E1C2.jpeg
looped a big cable tie through two pedestal mounting bolt holes and through the loop on the steel band above the bar with the threaded hole then inserted my adjustable spanner so I could apply pressure more comfortably. Then after some bouts of pulling and pressing on the spanner along with progressive tightening of the cable tie I got the bolt in. So my newly refurbished Dynamo is ready for mounting.
B76F844F-1C78-4EFE-9B49-A63D9B99B8C1.jpeg
 
Frustrating day yesterday as I started to rebuild the thermostat housing. Got the flap installed quite nicely with one new oilite bush. I had what I thought were two new thermostats. Turned out they were both knackered as was another one from my used spares then another one I removed from a complete housing so had to order a couple from Mark at Motobambin.
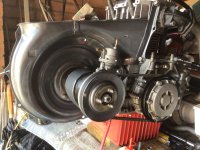
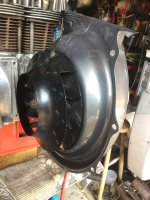
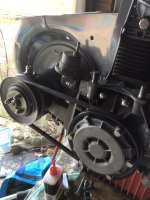
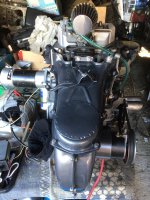
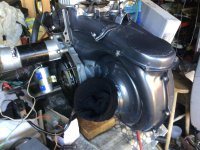
Better day today with Dynamo fitted but left it slightly loose then offered up the newly coated tinware starting with the front fan cover Again leaving the bolts slightly loose so as to get best fit and alignment. Retrieved a reinforced fan from my loft. After suffering the catastrophic failure of a fan some years ago I had a couple powder coated to give them a little more integrity. Rear fan housing fitted then the top cover. All still loose but got everything lined up 😀
C4036601-BADF-4407-A017-AC0728540027.jpeg52EFD042-BA8B-4E0E-8C0E-B79727AF2BD5.jpegA09BEEE4-D94F-496E-9637-3DB163FFB060.jpeg
B3F284B0-6D12-45E2-9CDF-AC042C0C3A59.jpeg3AFDC355-AB2A-4954-A4E7-8FFBD26C00F6.jpegDDEB8AE7-6A2A-4F77-888B-38EF00F6FF87.jpeg
1E525ED8-E36D-4363-973D-8982AEE09A41.jpeg
 
Back
Top