OP
OP
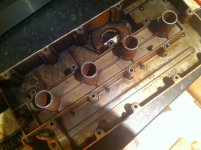
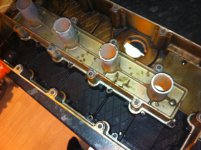
Fingers..... What do you think...
There is a cardinal rule in engine building, "Don't mix up the bearing caps". The trick is to remember that the parts were originally bored in assembly, so the split line is never exactly on the center of the bore. One half circle will always be slightly different than the other, which is why the bore size changes when you swap bearing caps. Mix up the bearing caps and the crankshaft will sieze up when the bolts are tightened. The fix for this misadventure is not particuarly difficult, just takes a little head scratching, and it's not so tough with a 4-cylinder engine.
The easy way is to start with four con-rods on the work bench, label the rods 1-2-3-4 and the caps A-B-C-D respectively. Tighten the caps, measure the bores with a dial bore gauge, and record the numbers. Add the 4 various size bores together and divide by 4 to find the average. This number is the same for all Austin B-series engines (con-rods only) and should be spot on equal to the standard numbers shown in article CS-106
Then you take one rod with oversize bore (call it 1A) and one with undersize bore (call it 2B, swap the caps, tighten them down, and measure the bores again. You will find that the bore size is now different. When holding rod 1, the change of bore size (1A minus 1B will be equal to the difference of radius between cap A and cap B. When holding cap A, the change of bore size will be equal to the difference of radius between rod 1 and rod 2. You then know which rod and cap have greater radius and by how much. Repeat the exercise for 3C and 4D vs. 3D and 4C, and record all those bore sizes as well, before and after. So far you have only R&R'd the bearing caps once each.
Then take one of the largest caps and assemble it with one of the smallest rods, and vice versa. Ditto for all of the parts. Tighten the caps and measure all four bores again. If you got the head scratching and subtractions right you may have four identical bores on the first try, in which case you're done. If not, then you have already tried two of the four possible caps on #1 rod, and it wouldn't take long to try another one (or two) if you have to. When you get just one assembly with the correct bore the job gets lots easier as the number of permutations among the remaining 3x3 gets to be a lot less. Repeat for other parts if necessary. The object is to end up with four identical bores.
When you do get four identical bores, mark the rods and caps 1-2-3-4 on either side of the split line so they won't get mixed up again. If you don't have number stamps you can use a center punch to apply prick marks, 1 dimple for #1, 2 dimples for #2, etc.
There is another way to do this with engine in the car and no dial bore gauge. You only need to remove the oil pan and loosen the connecting rod caps so the crankshaft will turn freely. Label the rod caps A-B-C-D from front to back so you don't lose track of which is which. Tighten one rod cap only, and see if the crankshaft will still turn freely. If it does, label that rod cap "O" for oversize (even thought it might actually be perfect). If the crankshaft goes tight when the rod cap is snugged down, label the cap "U" for undersize. Then loosen the cap so the crank turns freely again. Repeat this exercise for all four rod caps. Make note of which "tight" cap is on which rod, as it surely does not belong on that rod.
You will most likely have two tight caps and two loose caps (law of chance and averages). I don't think it is geometrically possible to have 3 tight caps. Take any tight cap and swap it with any loose cap. Repeat single cap tightening and rotation testing again. Once again, make note of any "tight" cap and which rod, as it does not belong on that rod. By continuing to systematically swap a tight cap with a loose cap you will eventually end up with four loose caps, and the crankshaft will turn freely when all bolts are tightened.
This may or may not be the absolute optimum combination, but in most cases it is "close enough for a G-job", and a street engine will run happily ever after. With a little additional time and patience you can check all 4 journals with PlastiGage. If they are indeed all same clearance, you're done. Otherwise the results of the PlastiGage measurements will tell you which caps are tight and which are loose, and you can do a little more cap swapping to get better results. I have done this with a 4-cylinder engine a couple of times, taking 30 to 45 minutes each time. I had to do it with a 6-cylinder engine in situ once, taking more like 2 hours to get it right. I'm sure it would be possible with 8-cylinders (maybe all day), but for 8-cylinders it might be quicker to pull the pistons out and take the parts to the work bench to use the dial bore gauge.
_______________________________________________________
_______________________________________________________
You can guess which section ive done.. The part started T here is another way to do this with engine in the car and no dial bore gauge. You only need to remove the oil pan and loosen the connecting rod caps so the crankshaft will turn freely. Label the rod caps A-B-C-D from front to back so you don't lose track of which is which. Tighten one rod cap only, and see if the crankshaft will still turn freely. If it does, label that rod cap "O" for oversize (even thought it might actually be perfect). If the crankshaft goes tight when the rod cap is snugged down, label the cap "U" for undersize. Then loosen the cap so the crank turns freely again. Repeat this exercise for all four rod caps. Make note of which "tight" cap is on which rod, as it surely does not belong on that rod.
.....
Honestly does anyone think the plastiguage is worth the investment? if so... where can it be picked up cheap from, other than ebay?
Thinking im in no rush to get it together, and a few quid could save a rebuild...
Last edited:
")