Technical Just started and could do with some 4x4 help.

Currently reading:
Technical Just started and could do with some 4x4 help.

Engine Beheaded

Just a few images from the passed day.

So as hinted the head was coming off.

Rocker cover came off very easily, assisted by the oil leak I guess.


Nothing horrible but needs a clean.
The did the 1/2 turn at a time on the head bolts. All seemed a bit 'loose'

Lifted the head off with no effort...too easy?


No evidence of break through or weeping so happy days!

Gasket fell off and careful to hold the collar stuck in the gasket.


Nothing horrible here. Just suspicious as hardly any carbon build up?

Light sand (really light) with 1000 and 3000g and its all looking good.


Then notice a mix of piston markings and machining marks.


Bores look good and nothing obvious so not sweating about a visit from the piston pixie(y)

Now the head looks pretty correct for the mileage so pretty sure someone has been here before and did a 1/2 job.


Will be tidying this up when I do the valve seals.

More soon.....


Last edited:
First Pass - Engine Paint

Just grabbed a few pics of the block painting.
Some overspray and a bit of touch up to do but VHT grey on the block and VHT silver on the sump.

Given the rot (hours of wire brush and sanding) on the sump I am pretty happy.

Before


After


The cars in final paint next week!(y)
 
So a few evenings and bits of weekends work targeted at the engine. Didin't all go to plan not that the Fiat side let me down just suppliers...:mad:

So my B marked piston is .010 oversize as is convention. Pulling the head bolts found a washer missing as well (n). Rather glad I did this.:)


First was to pull the camshaft. Few marks but no obvious wear or defects:)


So nothing obviously broken so and stripped out the lifters and valves.


The oil feed just pryed out and the O rings still functional.
Blasted the holes out with the air line.


Removed the front pulley which would of been a whole lot easier before the head came off... lesson learned. This seal has become a nemesis.


Pulled the valve seals and it didn't go well. They all fell apart. Then I started to rescue the bits left inside. Duh! Just pull the whole body out dummy!:bang:


In my defence it was late and I had noticed the camshaft seal was going to be an issue. No mercy showed to the valve seals.


Now time to clean up the head. The plug holes had trapped a lot of gunk.


Didn't have a mini spark plug tap so cut a slot in one of the old plugs. Seemed to work well.


Bit more work needed on the valves


Cam cover needs a good clean as well.


Back to old school valve seating.


Clean out and light coating of oil before popping the new valve seals in.


Ricambio gasket set ...no camshaft oil seal FFS.


Baffel plate cleaned up well


Bit more work needed on the cover but a Jizer soak worked OK.


Started polishing.


Just a test fit.


So the camshaft oil seal arrived today(y) but its the wrong fecking one(n)

So this weekend will have to be propshaft and gear linkage refurb.
Visitmg the body shop on Monday so hope to have some better news there.:)


When is the first outing Dc


God knows. The more I do the more I find!
Was hoping to gate crash the meet in Wales.
Paint delayed
Interior delayed
Work sending me all over the place......
Soon?

Anyone know where I can get this dry fluffy grease from?


Yup need two sets of these...
 
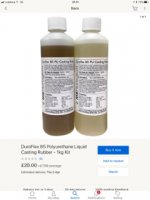
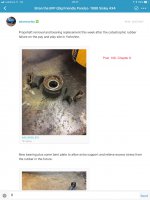
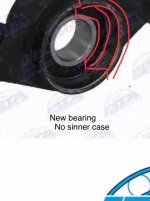
Nice check the rubber supports. If at all torn or split Replace , but these original bearings don’t normally go it’s just the rubber housing it would be best to retain the originals with either a metal strip added to the top and bolted in place. See Adams post in Brian the BFP Or As i did try but failed (due to a crap mould issue ) use shore 87 polyurethane 2 pack and create a new rubber around the original bearing. This would have been very good method but my mould leaked leaving only 1/3 of the required rubber. BUT this had adhered to both the bearing case and metal fixtures and was far stronger than the rubber. The cost was £13:50 for 1/2 litre opposed to € 110 each for an O M E part cheaper replacement part are around £35 each but the bearing is a standard (not spinner type ) I will repeate the above process then report results

IMG_0382.JPG
IMG_0387.JPG
IMG_0384.JPG

more crap to deal with.
 
Last edited by a moderator:
Painting Time

Long time posting these pics due to work and another vehicle at our Ghetto garage facility (driveway).
After a chat with Ricambio I figured out the camshaft seal was missing from the kit but then I ordered a crankshaft seal (me FFS). Lesson one don’t order stuff at 11.30 at night in a hurry.
Anyway Eurocarparts actually had one in stock.
So the build continued.
New water pump and tensioner.

New thermostat.

New dipstick seal and a quick bit of shrinkwrap…

Supplied stretch bolts had a different torque to Haynes.

Still did the oil soak and drain

Another ahhem moment….

Lots of new oil added to the wearing faces.

Then fitted the new belt.

Then a bit of ‘wrappin’ bling.

Fuel pump back on and cam cover dropped on. Waiting for some socket screws.

Recon 75 Amp alternator easy fit.


Need a Punto pulley.
Prop Strip didn’t go well.(n)


Other end not much better. Rigid bearings.

New ones just delivered.

Good News! Paint!
So Panda was wrapped for the short trip to the paint booth.

Over Baked Panda anyone?

The chaps make a start.

Getting hot in here

First coat.

Much later…


Panels done.


Finals


Back to the workshop for the finishing.

It won’t show on these images but the black in normal light to pearl and metallic red glow in bright light is just what I wanted. Well done @hrautoworks (y)


And just had a call from the trimmers and we have some samples for the seat decor to look at good times.:slayer:
 
Great stuff Dc that’s going to be awesome 6 weeks rebuild I guess from now. As you said just miss wales. Try make one of the other meets [emoji23][emoji898][emoji209][emoji1009]
 
The build begins...

Panda is home! Managed to borrow a Panda enclosure to keep the elements off until the panels and glass are back in place.
Few images to share.


Guys have given it a near mirror finish.

Me photographing me looking at me…

Bonnet with no flash.

And with flash…it’s pretty interesting paint.

House has even more Panda parts in it.

Ben and Jake even painted the brackets and all the bolts!

More soon!
 
Dc before glazing use water proof duct tape on all the steel to steel spot welded seams on the windows and tail gate. Get 3” and then tear in half from the roll alternating use fold over the seam . Tail gate, bottom edge when glazed lift rubber seal in each corner and add a plastic packer say 2-4 mm thick then trim back to make a small gap allowing water to drain. As it will get in from above older tail gates had drain channels In the corners !! Front dream has drain points as you know
 
Last edited:
Appreciated thanks!
Just need sometime to get started. One thing I do have a lot of is duct tape!
Derek
 
Hi it’s me Again. Top tip when reassembling all the rubber plastic items. Use. Food grade silicon grease to ease In place. As it won’t hurt the rubber and is pretty dissolvable [emoji108][emoji12]
 
Well for a number of reasons mostly work and weather no visible progress for some time. I have been experimenting with the new alternator and have an alignment issue with the new Punto pully.
Thinking I need a shim?
Anyway the sun came out so a few hours trying to get the Panda shell waterproof.
Thanks for Steve for the gaffer tape hint.

Actually, made quick sense when you see the metal clips in the trim rubbers. Don’t want to risk that new paint. Plus takes up the slack from used seals.

Seals all washed and then soaked in CG Trim Gel. A light application of a hot air gun and the seals come up almost like new.

From

To

Then I find out I have a squatter ffs!
Neighbours cat has made a nest in my Panda Tent!

This Panda had better grow some teeth and defend its home!


Started with the tail gate and gave the ram a good clean and shine.

Four bolts and its back on.

Ram back in and happy I kept all the bits!

Door frames for the tape work next.

New pot of Trim Gel and then fit the door seals

One door back on.

Bit of paint work still to do.

Need to fill this hole.

Lash of Tiger Seal on this.

Lots of screws on the securing plate.

Pop the seals back in place. Will need to glue these back in later.

Then drop the roof back in. Some tape to hold it in place until I fit the hinges and lock.

Looking a bit heavy metal here?

Steve I hope this is Panda Man and not Panda Maw which I now know means ‘the jaws or throat of a voracious animal’? Anyway beers owed. Thanks for this!

Steve’s donated clip!

Window taped, seals cleaned and treated.
Windows in.


So lots to do this weekend!
Thanks for looking.
 
Ace Dc. It is great to build it back up downhill all the way all the best Steve.
 
Well a lot done but not a lot of time to share.
The bonnet post got a gold lacquer and I managed not to lose the retaining clip.


One of the last bits of rubber seal goes in.

Identified and clean up all the door furniture.

Bit of ease on the lock clamp.

Cleaned up the mechanisms

Refitted the posts…..a bit slack until it’s all lined up.

Bit better.

Greased up the window regulators.

Inside the door worst bit is trying to get the white plastic bit to clip onto the ball ended bit.

Glass cleaned up with a scraper. Stickers all going.

Dropping back in only difficult with the plastic clip going back through the hole in the glass.

Refit the slides and then reinstall the seals and trim.

Door locking post needs a bit of movement. Wondered why nothing lined up with the scribe marks. Dummy then realised this is the salvage door from Ricambio Int.

Now the drivers door glass didn’t want to plan and the slightly damaged clip lost a tab. Useless. Lucky the salvage door was a donor. Wonder why you can fit a new clip…3D printer idea?

Next the mirrors seem to have taken some age damage.


Plastic filler, light sand, texture paint and they are looking lots better.

Coat of satin black.

Clean up the mounts and lube the seals.

Bit of finishing yet to do.


Got some paint on the hinges.

Both mirrors done.

A little packet smuggled out of Italy…..

Trim clips fitted to the holes.

Trim panels primed, satin blacked and test fitted.


More later…
 
Back
Top