Glopsy.JPG

Multipla Glopsy

Introduction

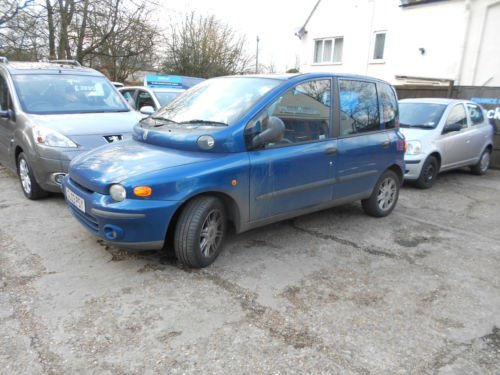
Here's my new Multi,pictured on the day I picked her up, resplendent in what looks like a years worth of road grime :rolleyes:

I've serviced her, fixed numerous electrical issues including getting the remote CL working again and got her through an MOT a few days ago.

Next up is a drive belt tensioner change, as mine makes a real racket, bleed the clutch to see if I can get a better pedal, change the gearbox oil and then try and find a pair of roof bars before our holiday in May :)
Still plodding along thanks. Got the MOT soon but unless there's something drastic underneath we should be ok. Still on the lookout for a towbar but have also been tempted by an S-max advertised locally.
 
Rather annoyingly the drill bits I ordered online failed to turn up so the towbar job is on a bit of a hold. I did however start to take out the boot carpet and side trims in prep for the drilling/wiring.
 

Attachments

  • IMG_20200412_115656317.jpg
    IMG_20200412_115656317.jpg
    2.8 MB · Views: 59
That plug looks like a cd connection to me.

When I wired my trailer wires in I simply soldered them to the original wiring, never been a problem and they've been there about 4 years.

Good luck with the build
George
 
Drill bits were waiting for me at home when I got back from work this afternoon so it looks like I'm good to go on my next day off.
 

Attachments

  • IMG_20200414_172101148.jpg
    IMG_20200414_172101148.jpg
    4.3 MB · Views: 56
Looks like a CD player connection to me too.
When I came to fit our towbar I found there had been one on before so holes already there if a bit badly drilled. I had to take two wires across from one side to the other for the tail lights and indicator.
 
Thanks Longprest. The cable from the plug heads off towards the front of the car maybe a previous owner had a cd changer in the boot? Rear trim and carpet are now all out so just need a day off and then I can crack on with it.
 
Sorry Tub, been off the net for a day or two.

All my near side wires provided feeds for everything on the nearside, I did take wires to the off side for a separate side, brake and turn supply, if I remember correctly this was more to do with bunching than anything else (when you've connected all the wires together and added the shrink tube it does make quite a bunch and there's not that much space around)

Make sure nothing is turned on when you start soldering - in fact, check and mark up what wires have to go where and then disconnect the battery, you really don't want a live soldering iron melting any cables.

Hope this helps

George
 
Today was towbar day. I'd already taken out the two side panels in the boot and got the carpet out of the way to reveal the dimples that need drilling out to give you a starting point(arrowed) for the rest of the holes. I used a step drill bit as three holes per side need opening out to accept a tube spacer that sits inside the cars box section. It was a bit trial and error, especially as the instructions were badly translated but by doing a hole at a time,fitting the bar/ removing it etc helped line everything up.
 

Attachments

  • IMG_20200419_102737492.jpg
    IMG_20200419_102737492.jpg
    3.7 MB · Views: 52
  • IMG_20200419_111345608.jpg
    IMG_20200419_111345608.jpg
    3.2 MB · Views: 55
Last edited:
Once all the holes were drilled it was just a case of sliding the tube spacers through the holes and into the box section,putting the spreader plates in place,including the two underneath the car and then bolting the bar up to it.
Wiring went through a grommet on the near side and up by the light. A bit of multimeter work to see what wire did what and then soldered/heat shrink tubing. I did need to run a few wires across to the osr for the fog light and indicator and I wired in the audible buzzer on the nsr.
All in all it took me about 4 hours with a few well placed tea breaks.
 

Attachments

  • IMG_20200419_130558334.jpg
    IMG_20200419_130558334.jpg
    4.3 MB · Views: 59
  • IMG_20200419_130602685.jpg
    IMG_20200419_130602685.jpg
    3.8 MB · Views: 54
  • IMG_20200419_151421390.jpg
    IMG_20200419_151421390.jpg
    2.7 MB · Views: 55
  • IMG_20200419_151416211.jpg
    IMG_20200419_151416211.jpg
    2.7 MB · Views: 50
  • IMG_20200419_151409671.jpg
    IMG_20200419_151409671.jpg
    2.7 MB · Views: 57
  • IMG_20200419_153150260_HDR.jpg
    IMG_20200419_153150260_HDR.jpg
    4.2 MB · Views: 48
Managed to pick up a puncture yesterday and had to deploy the 17 year old space saver. Sadly the tyre couldn't be repaired as the nail had gone in too close to the sidewall,so Glopsy now has two new ones.
I've always used Goodyear efficient grips but my local tyre place didn't have any in so they recommended Hankook Prime3's. Price wise they're fairly similar at £113 a pair fitted and having only driven a few miles in the dry so far on them it's too early to give an opinion,but I'll report back when I've put them through their paces.
 

Attachments

  • IMG_20200716_174916936.jpg
    IMG_20200716_174916936.jpg
    5.4 MB · Views: 50
Back
Top