General Franko the 1971 500L

Currently reading:
General Franko the 1971 500L

Thinking about it again I think I bought all the rubber hoses first and didn't intend to change the pipes but when I went to undo them to replace the hoses they wouldn't budge so had to buy the pipes separately.

I would have bought the kit you are referring to in the first place as the pipes were replaced years ago but we're still in good shape.
 
The steel pipes, as original are fiddly to fit but do look the business when done. You need the originals as templates because the lengths are very accurate and have no room for error. I had to make a small extra piece which is needed to extend to the master cylinder on RHD.

I bent them all successfully by hand using odd bits of pipe as a former and had no kinks (in the pipe;)) at all. It really impressed the MOT man who said to one of the lesser mechanics." None of your crappy copper here".:D
 
Well my parts are ordered, should be here early next week hopefully.
My 650 engine is the type without a distributor, so I bought Tony's spare 650 casing so I can change it to a dizzy type.
Took some time degreasing & removing the light corrosion. The fuel pump rod had been bent & I had to remove it with a grinder. I have re-tapped all the bolt holes to clean them out & sanded all the mating surfaces flat using a metal plate & some 120 grit sandpaper.
Had to do a little bit of sanding where the main bearings go in as someone had knocked them out with something hard and slightly damaged the casing and the bearings wouldn't go back in the holes.
Just needs a thorough final clean and blow all the swarf out.
Alternator has all been cleaned and ready to go, well it will be when I receive my new brushes.
All the fan & thermostat housing are ready to go to the sandblasters as they had a lot of light surface rust. Also taking my rear springs, heater ducting & lower engine shield. I could do them with my blasting cabinet, but it will probably take me a day, where as this lot will probably cost about £50 to be blasted with more power than my compressor & will get coated in primer.
Its good to have all the mucky stuff done now.
 

Attachments

  • IMG_9394.JPG
    IMG_9394.JPG
    1.9 MB · Views: 36
  • IMG_9406.JPG
    IMG_9406.JPG
    1.2 MB · Views: 40
  • IMG_9407.JPG
    IMG_9407.JPG
    1.3 MB · Views: 35
  • IMG_9408.JPG
    IMG_9408.JPG
    1.2 MB · Views: 37
  • IMG_9390.JPG
    IMG_9390.JPG
    1.3 MB · Views: 43
  • IMG_9399.JPG
    IMG_9399.JPG
    1.9 MB · Views: 50
  • IMG_9396.JPG
    IMG_9396.JPG
    1.1 MB · Views: 42
Nice detailing Sean. You're spending a lot more time than me getting those things like new. It's heading into Tony territory for perfect presentation.

I think he has overtaken me TBH. It's the blasting cabinet that is defeating me, if I had one of them the whole car would have gone through it.:D

I must admit I did start to rub down the crankcase with some 120 and then thought why am I doing this, you can hardly see any of it. The bit that really stands out is the timing chain housing, which I can see in Sean's pictures looks rather nice, I assume that got blasted? I might have to take a drive and visit him, I have a spare gasket.;)
 
Peter, it's always difficult to know whet to draw the line. Like you, I try to reuse as much original parts as possible. Unfortunately not everything can be salvaged.
Your 500 was rather rusty in places most 500's don't rust. But the rest of your car was in far better condition than mine.
I know myself too well, and if I had bought a half decent 500 I probably would have still ended up doing a full rebuild.
 
Tony, for once I didn't use the blast cabinet for the crankcase. I called 2 local engine machine shops to see if they could clean the block in one of those high pressure degreasing units,1 was closed down & the other said they are no longer allowed to use them due to health & safety.
So it was back to good old petrol, gunk, wire brushes & the like.
They said not to sand blast it as the grit can get imbedded in the alloy
I did blast the cam shaft cover though and then gave it a coat of silver paint. As you said it's only that and the dizzy side of the casing that you see.
You are always welcome if you fancy a day trip out to the seaside.
 
I will do once my high powered engine is installed and running. I am having problems with the carb as I think I mentioned before and Peter is aware of from the other forum.

The Polish built carb even though it is based on a Weber has slight difference, like the width of the butterfly spindle and I believe some of the jets. Trying to find parts for it is virtually impossible but it would probably help if you spoke Polish. All I have learnt is Gasnik for carburetor.

I could have bodge it and hoped for the best but going forward it's always going to be an issue getting rebuild kits etc. I had to bite the bullet and buy a rebuilt Weber 28 IMB from Van der Laan for €89, which at least I know I can get all the bits for in the future. Plus €89 is actually quite a good price.
 
I went for this kit for mine.
C01055/2 Carburetor repair kit 28 IMB 3-4/250
Fiat 126 P (German version)
I hope it's the right one. I told Fred what set up I had. He was surprised I had the expensive alternator & questioned the brushes I ordered, but agreed when I sent Some photos.
I haven't stripped my carb yet, but the butterfly all seems to be in good condition, so after the problems you have had I will probably just strip, clean & change gaskets unless anything is clearly damaged.
 
Sean, it occurred to me that you're getting such a nice finsh on things like that alternator, have you thought about protecting them with clear lacquer like I used on my wheels. Comes in an aerosol so would suit Tony too. It dries really quickly and is very smooth.
 
Sean, it occurred to me that you're getting such a nice finish on things like that alternator, have you thought about protecting them with clear lacquer like I used on my wheels. Comes in an aerosol so would suit Tony too. It dries really quickly and is very smooth.
Already there Peter.
I used lacquer on the timing chain cover, gives a bit of a shine but tends to change the silver colour. I left the alternator just in the wheel cover silver as this looks more original. Will have to see how it lasts.
Only trouble with aluminium is that it is difficult to get rid of those little speckles it gets with age. I really don't want to be spend ages grinding, sanding & polishing to a mirror finish - life's too short!
If you sand blast it, it cleans it but then you lose the sheen from the casting finish. So best to clean it & then give it a coat of paint similar shade to aluminium.

Another option is to anodise it. Decorative anodising will keep the colour and sheen you want and should last another 20+ years. Naturally not all parts would suit anodising and it's no good for your cast engine components, but items like sump pans and rocker covers etc should be fine.

cheers, Steve
 
Last edited:
Oh its all go here!
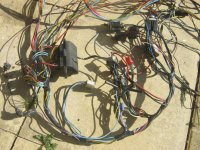
Spent most of yesterday sitting in the sunshine cleaning my wiring loom.
cool.gif
The sun was out and it was far too nice to be in the garage. It came up quite clean & even the connectors appeared to be in good condition.


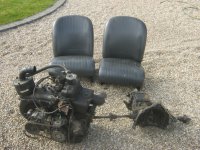
Had a really good result yesterday, my Pal Peter in Birmingham kindly brought my attention to a 126 engine & gearbox on a local trading website.
thumb.gif

I called the guy who had bought a 126 with the intention of putting a motorbike engine in it.
nutter.gif
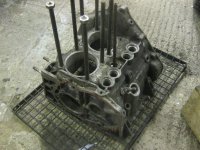
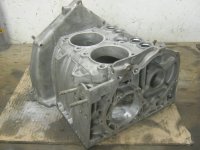
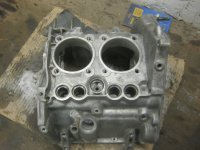
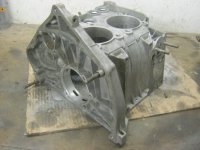
He was selling the engine, gearbox & 2 seats and if I took them out I could have the lot for £150. So like a rat up a drainpipe I was there last night just as it got dark to remove them. Within an hour of fiddling around in the dark & no trolley jack (he said he had one so I didn't take mine) the unit was out & in the back of my car. I have yet to strip the box to see what condition it is in, but that's the chance you take.
The 2 seats are in great condition. They are the early 126 seats without the reclining mechanism, but they have the catch that stop the seats from tilting. I saw a pair of 500L seats sell on E-bay last year for £190 if I remember correctly. And they needed recovering - shocking!
eek.gif

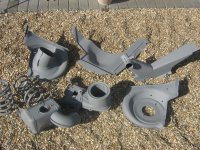
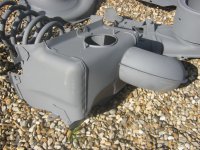
Also I have just picked up my parts (tin work for you Aussies) from the blasters. Well worth £60, that would have taken me 1 1/2 days in my cabinet and they primed them.
Now what do I start on first?
scratchchin.gif
hopefully my parts will turn up Friday, then I really wont know what to do first!Ahhhh
 

Attachments

  • IMG_9409.JPG
    IMG_9409.JPG
    2.1 MB · Views: 34
  • IMG_9417.JPG
    IMG_9417.JPG
    2.3 MB · Views: 39
  • IMG_9412.JPG
    IMG_9412.JPG
    2.4 MB · Views: 42
  • IMG_9399.JPG
    IMG_9399.JPG
    1.9 MB · Views: 41
  • IMG_9414.JPG
    IMG_9414.JPG
    2.3 MB · Views: 51
  • IMG_9415.JPG
    IMG_9415.JPG
    1.5 MB · Views: 36
Back
Top