Introduction
Just finished a little project in time for Brooklands, so some of you may have seen it there. Bought just before Christmas coz my Daughter needed to upgrade from a pushbike back into a car, and I wanted to get some ideas out of my head and into the metal ") .
.
I did lend her one of my Pandas while she waited for this one, so please don't think I made her cycle through the winter just coz Daddy wants to play.
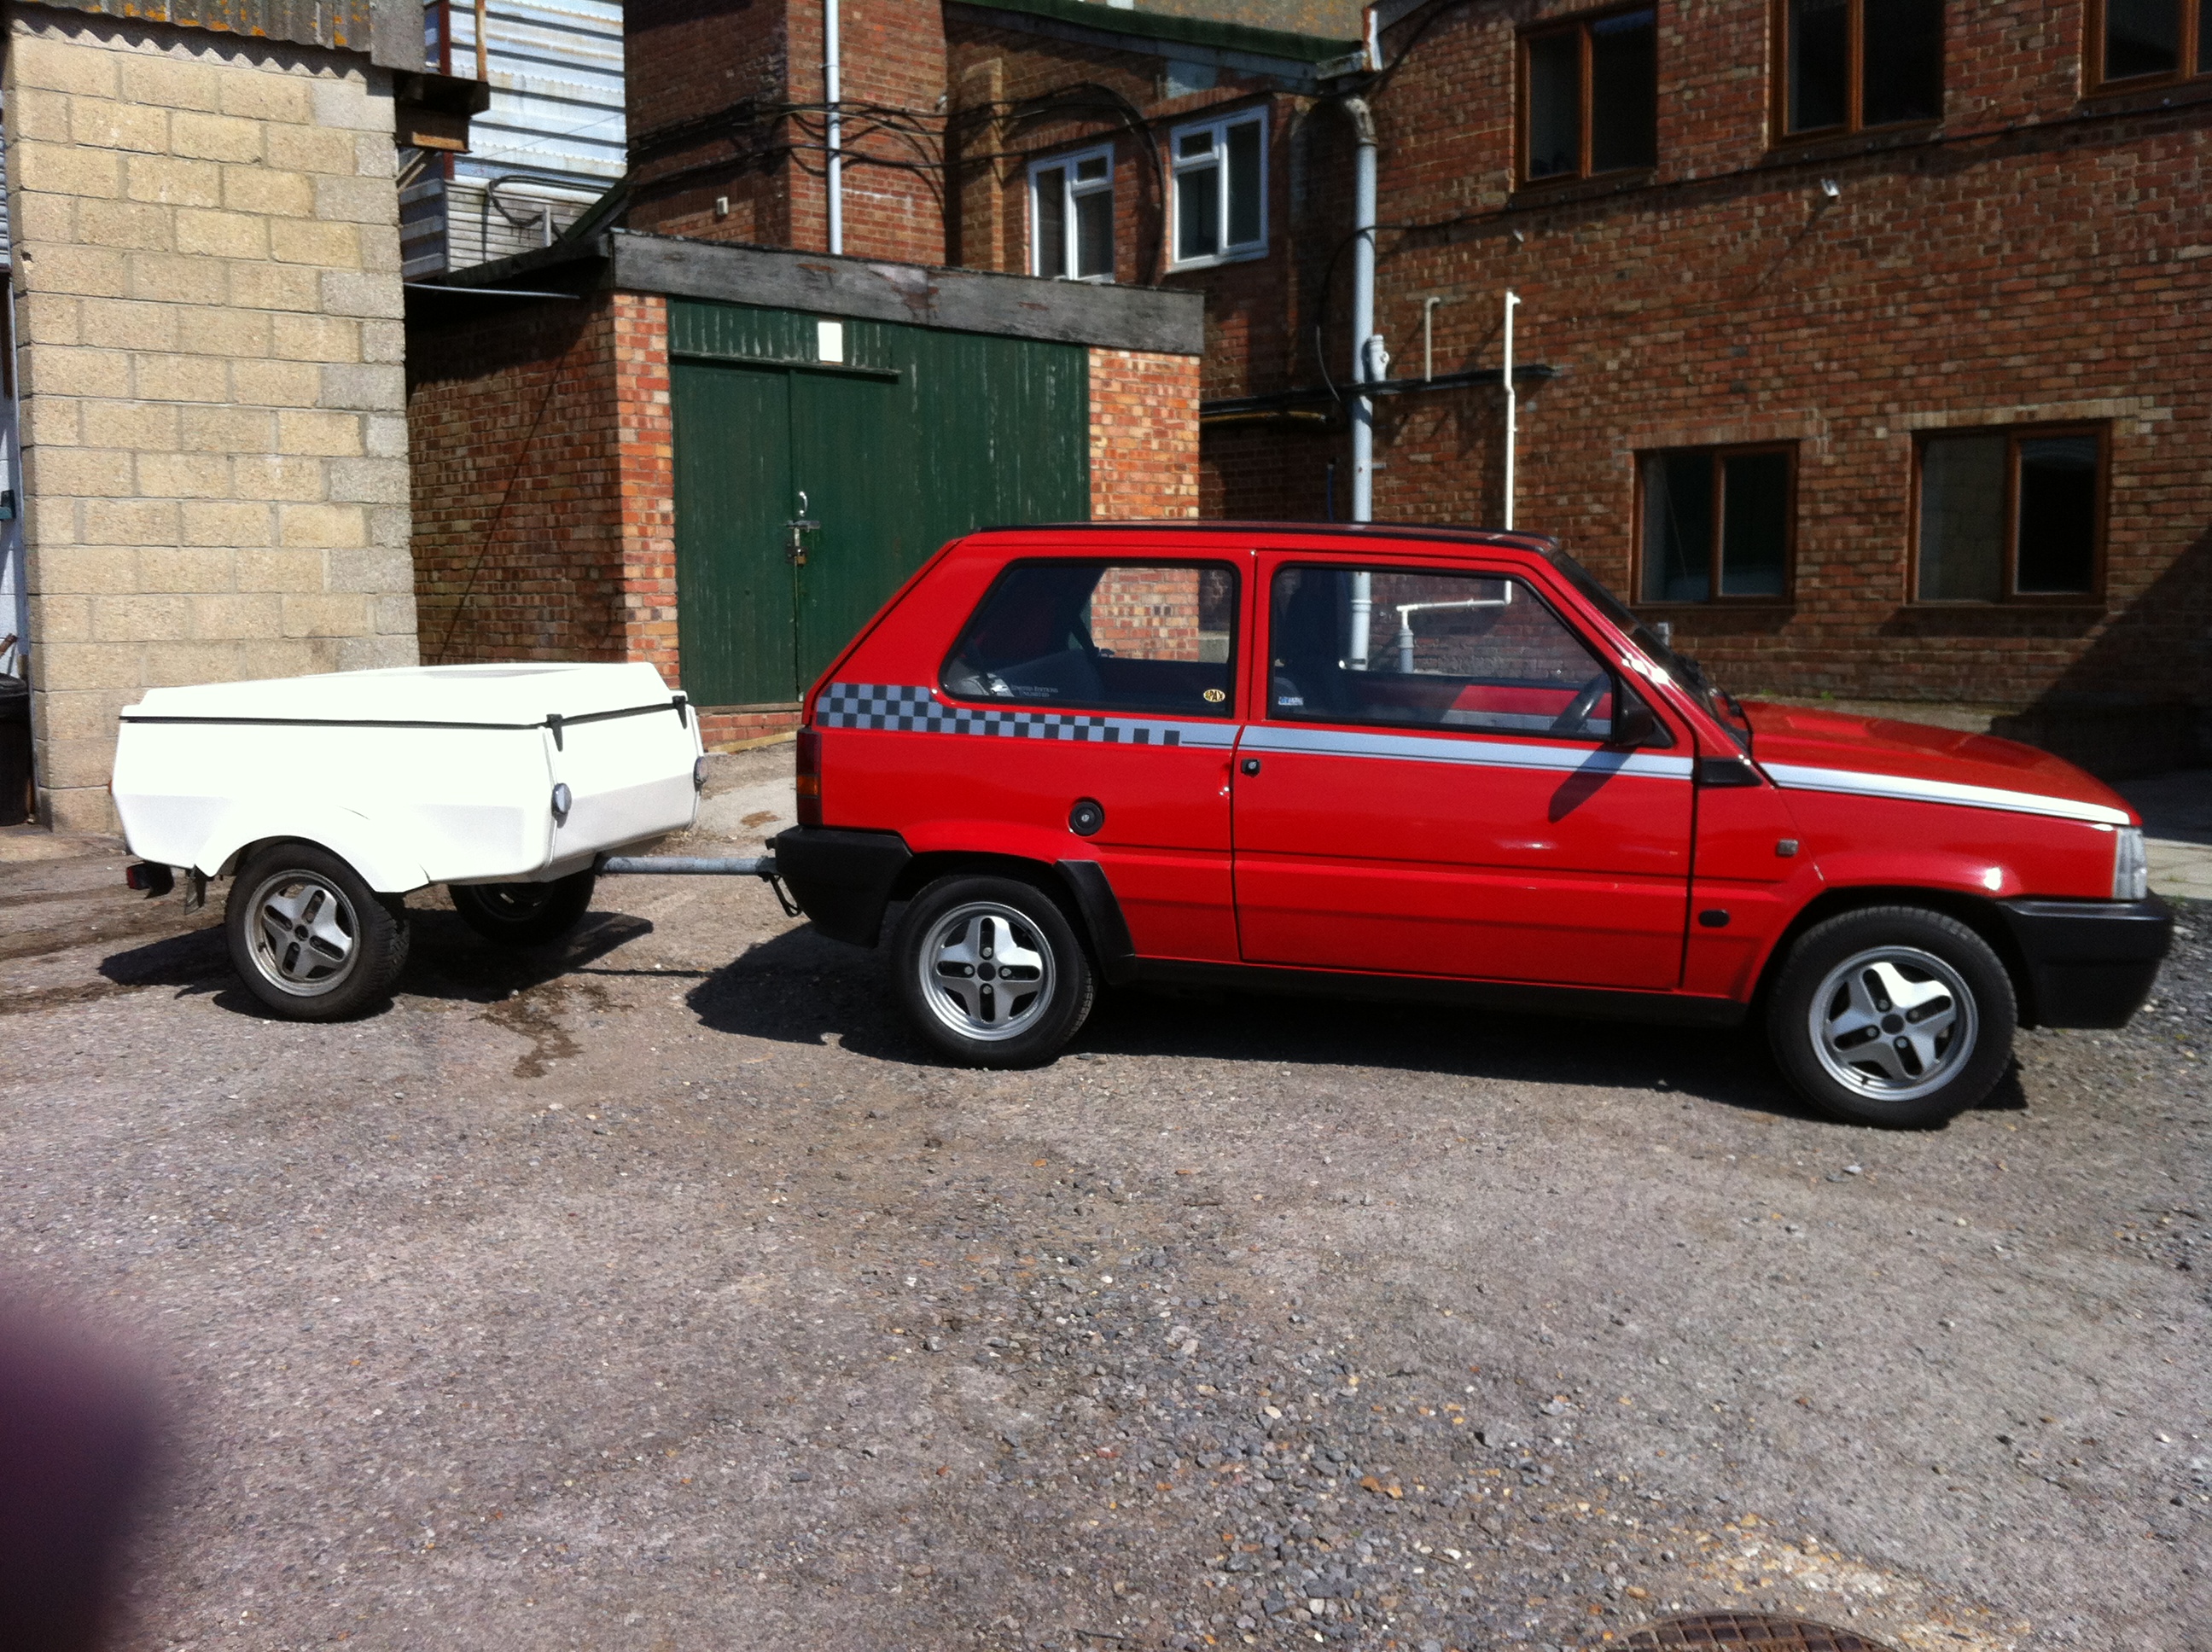
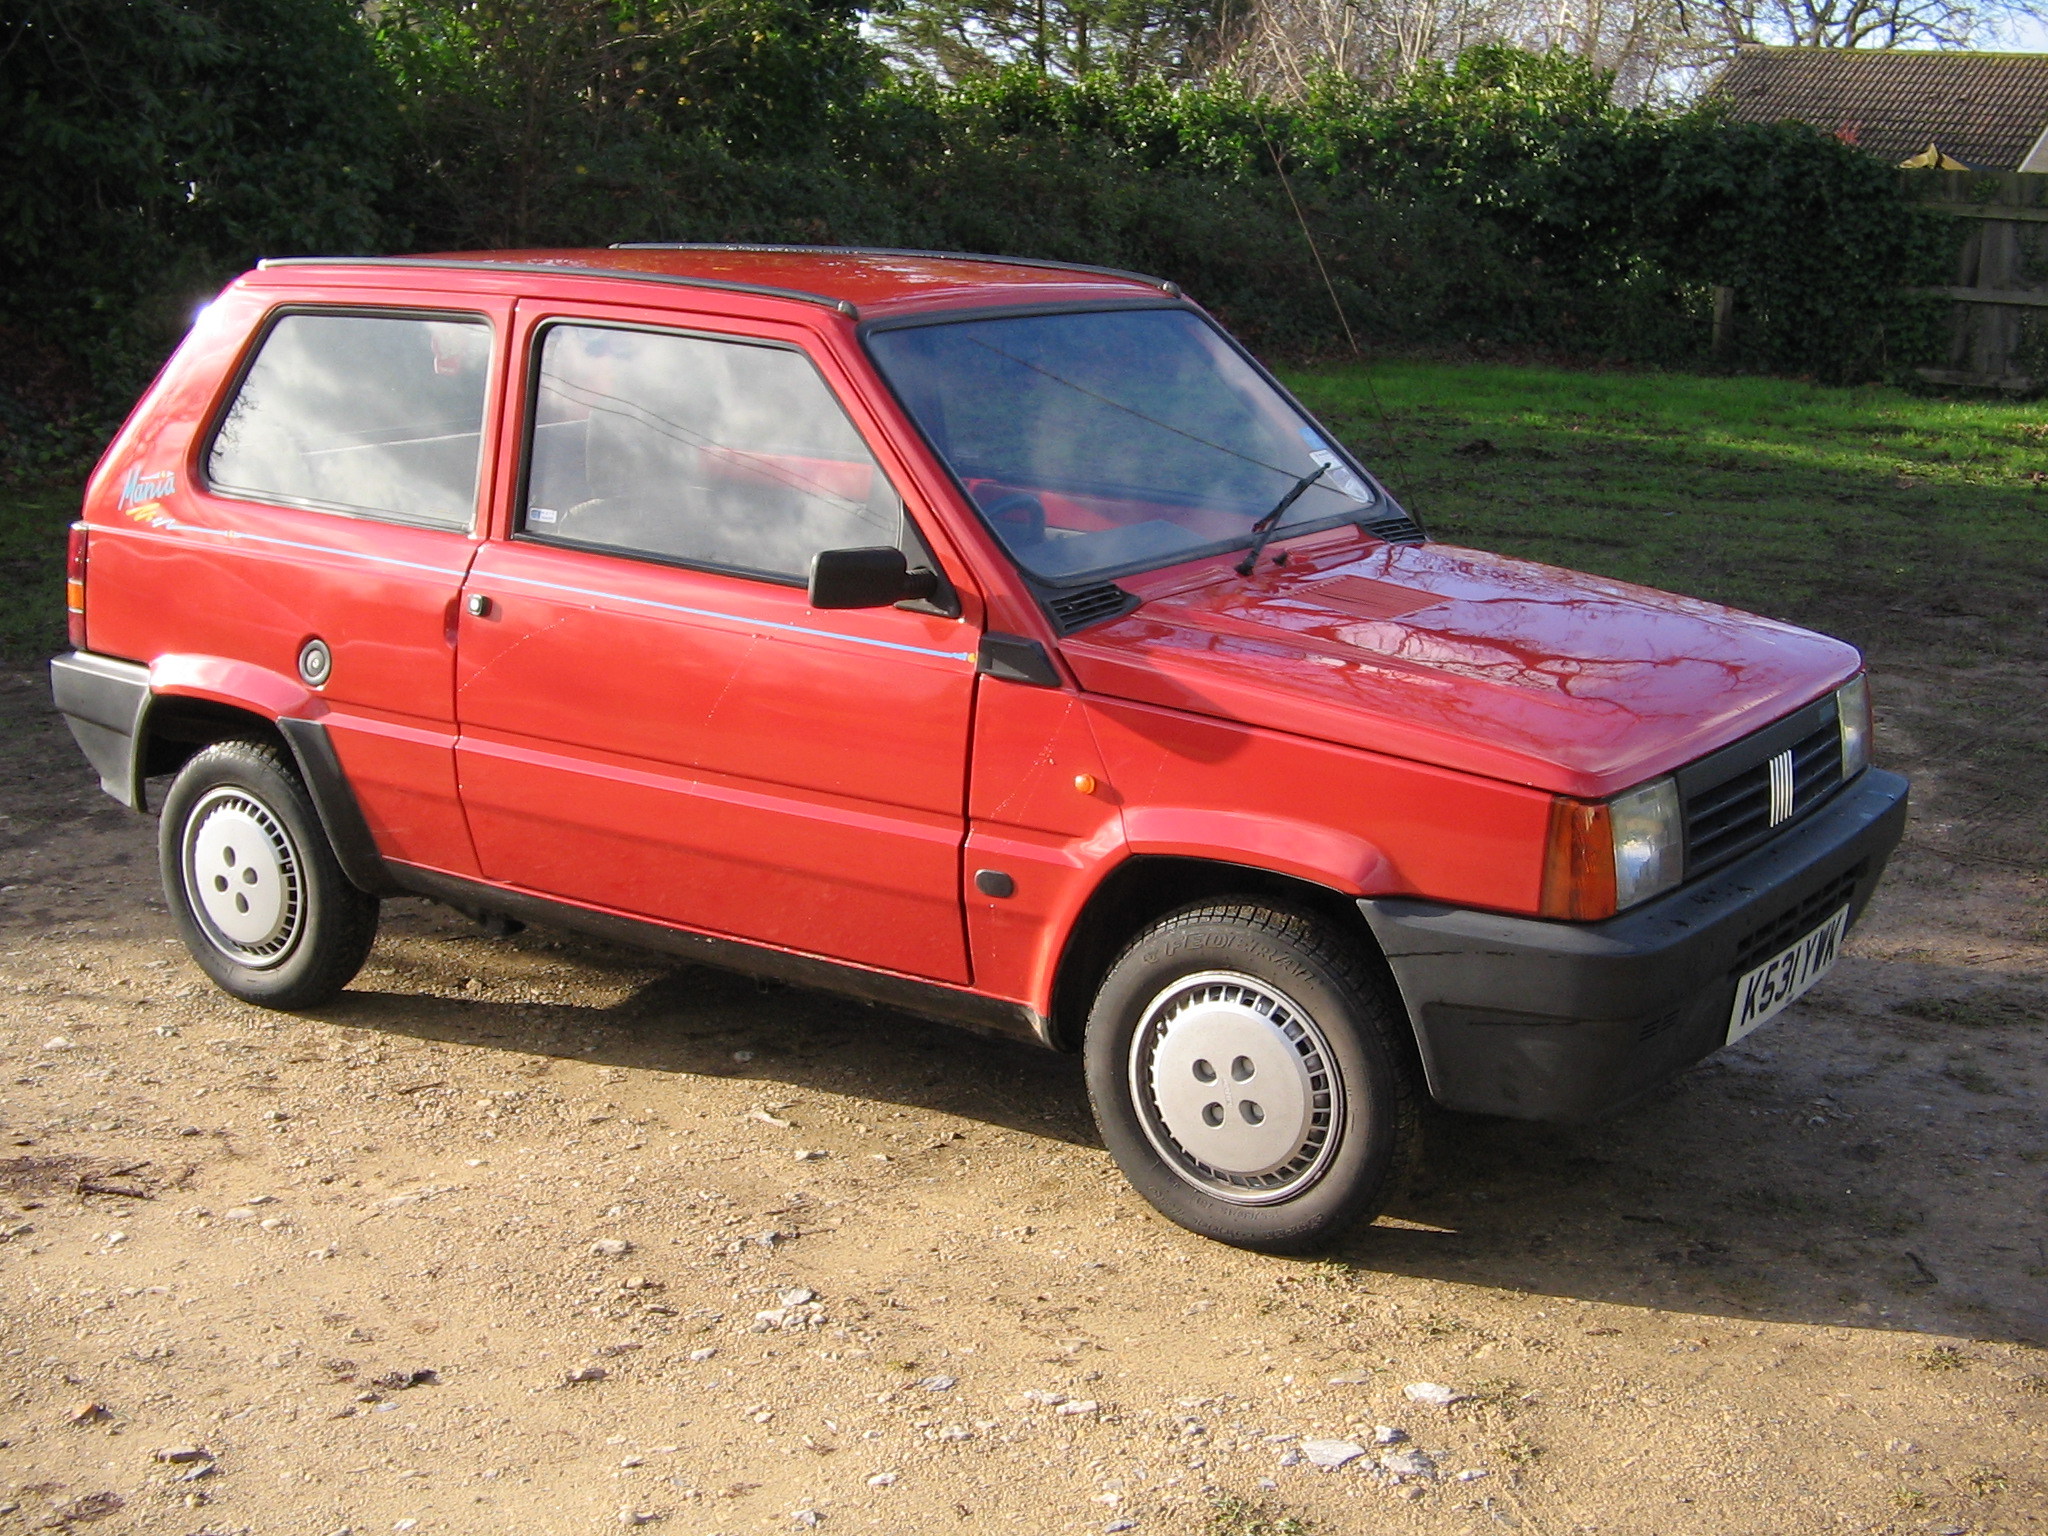
Some pictures of the finished item.........
She's a Fiat Panda 750 Mania (Daughters name is Charmain, hence the threads title) Bought from Ebay for £103.
No tax or mot, poor performance, and no exhaust silencer, but bags of potential. This was her the first day on my drive....
First part of the plan was to get her road legal, briefly, this involved
£80 of welding to inner sills.
Replace o/s/f wheel bearing.
New tailpipe.
Re-set cam timing.
Full service and clean up.
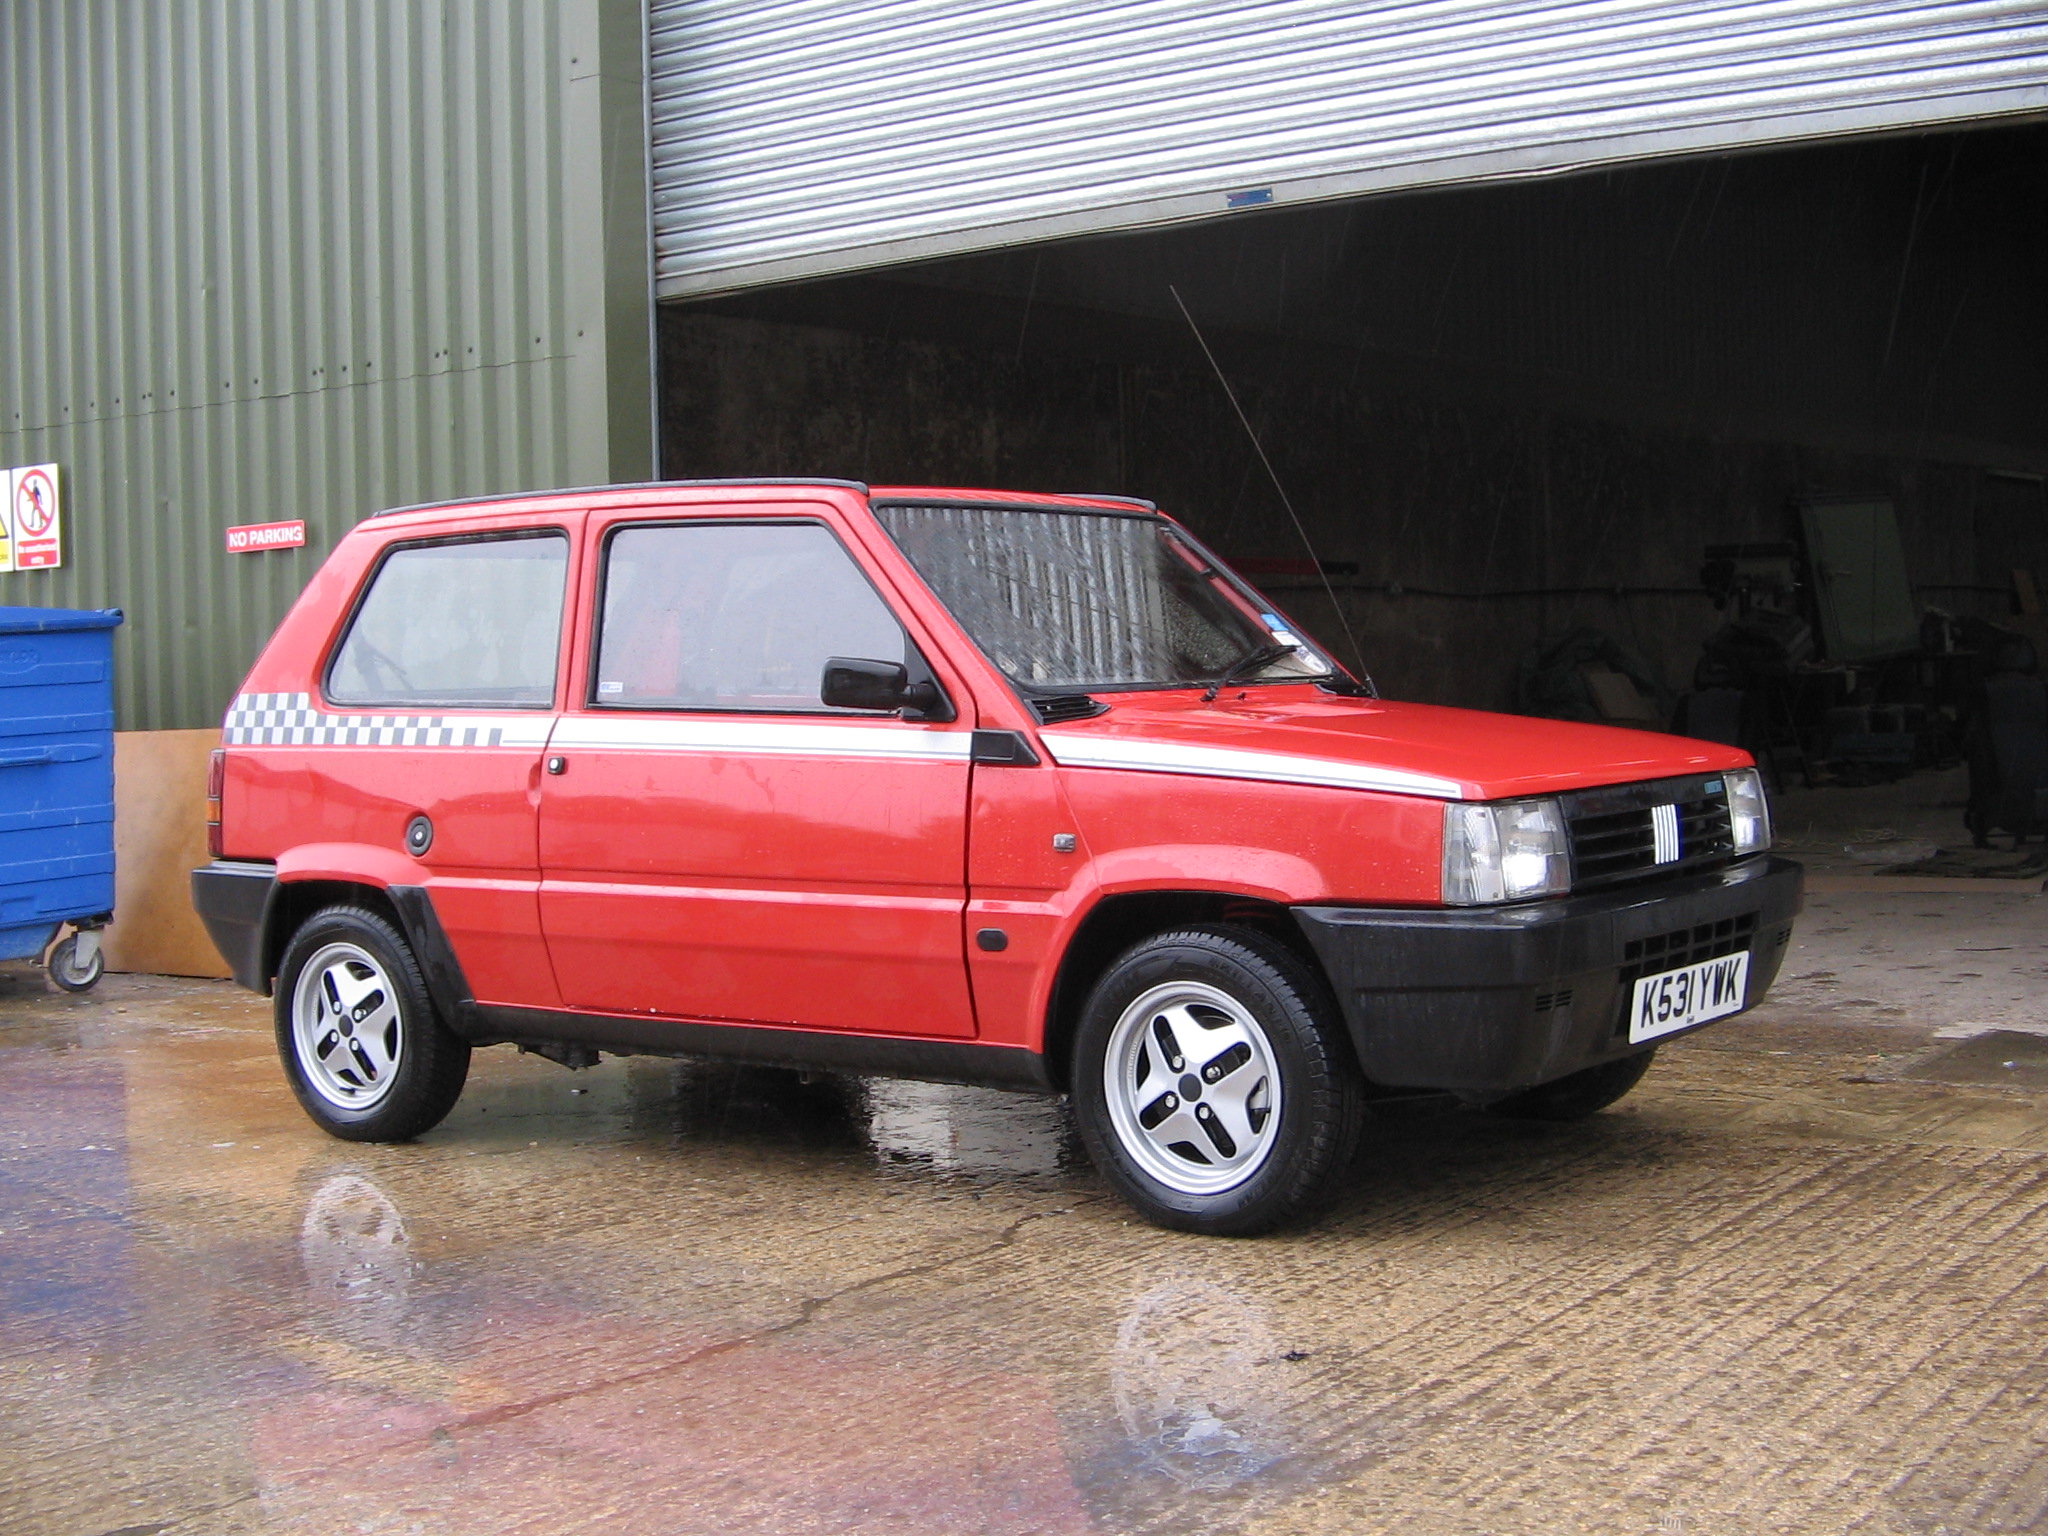
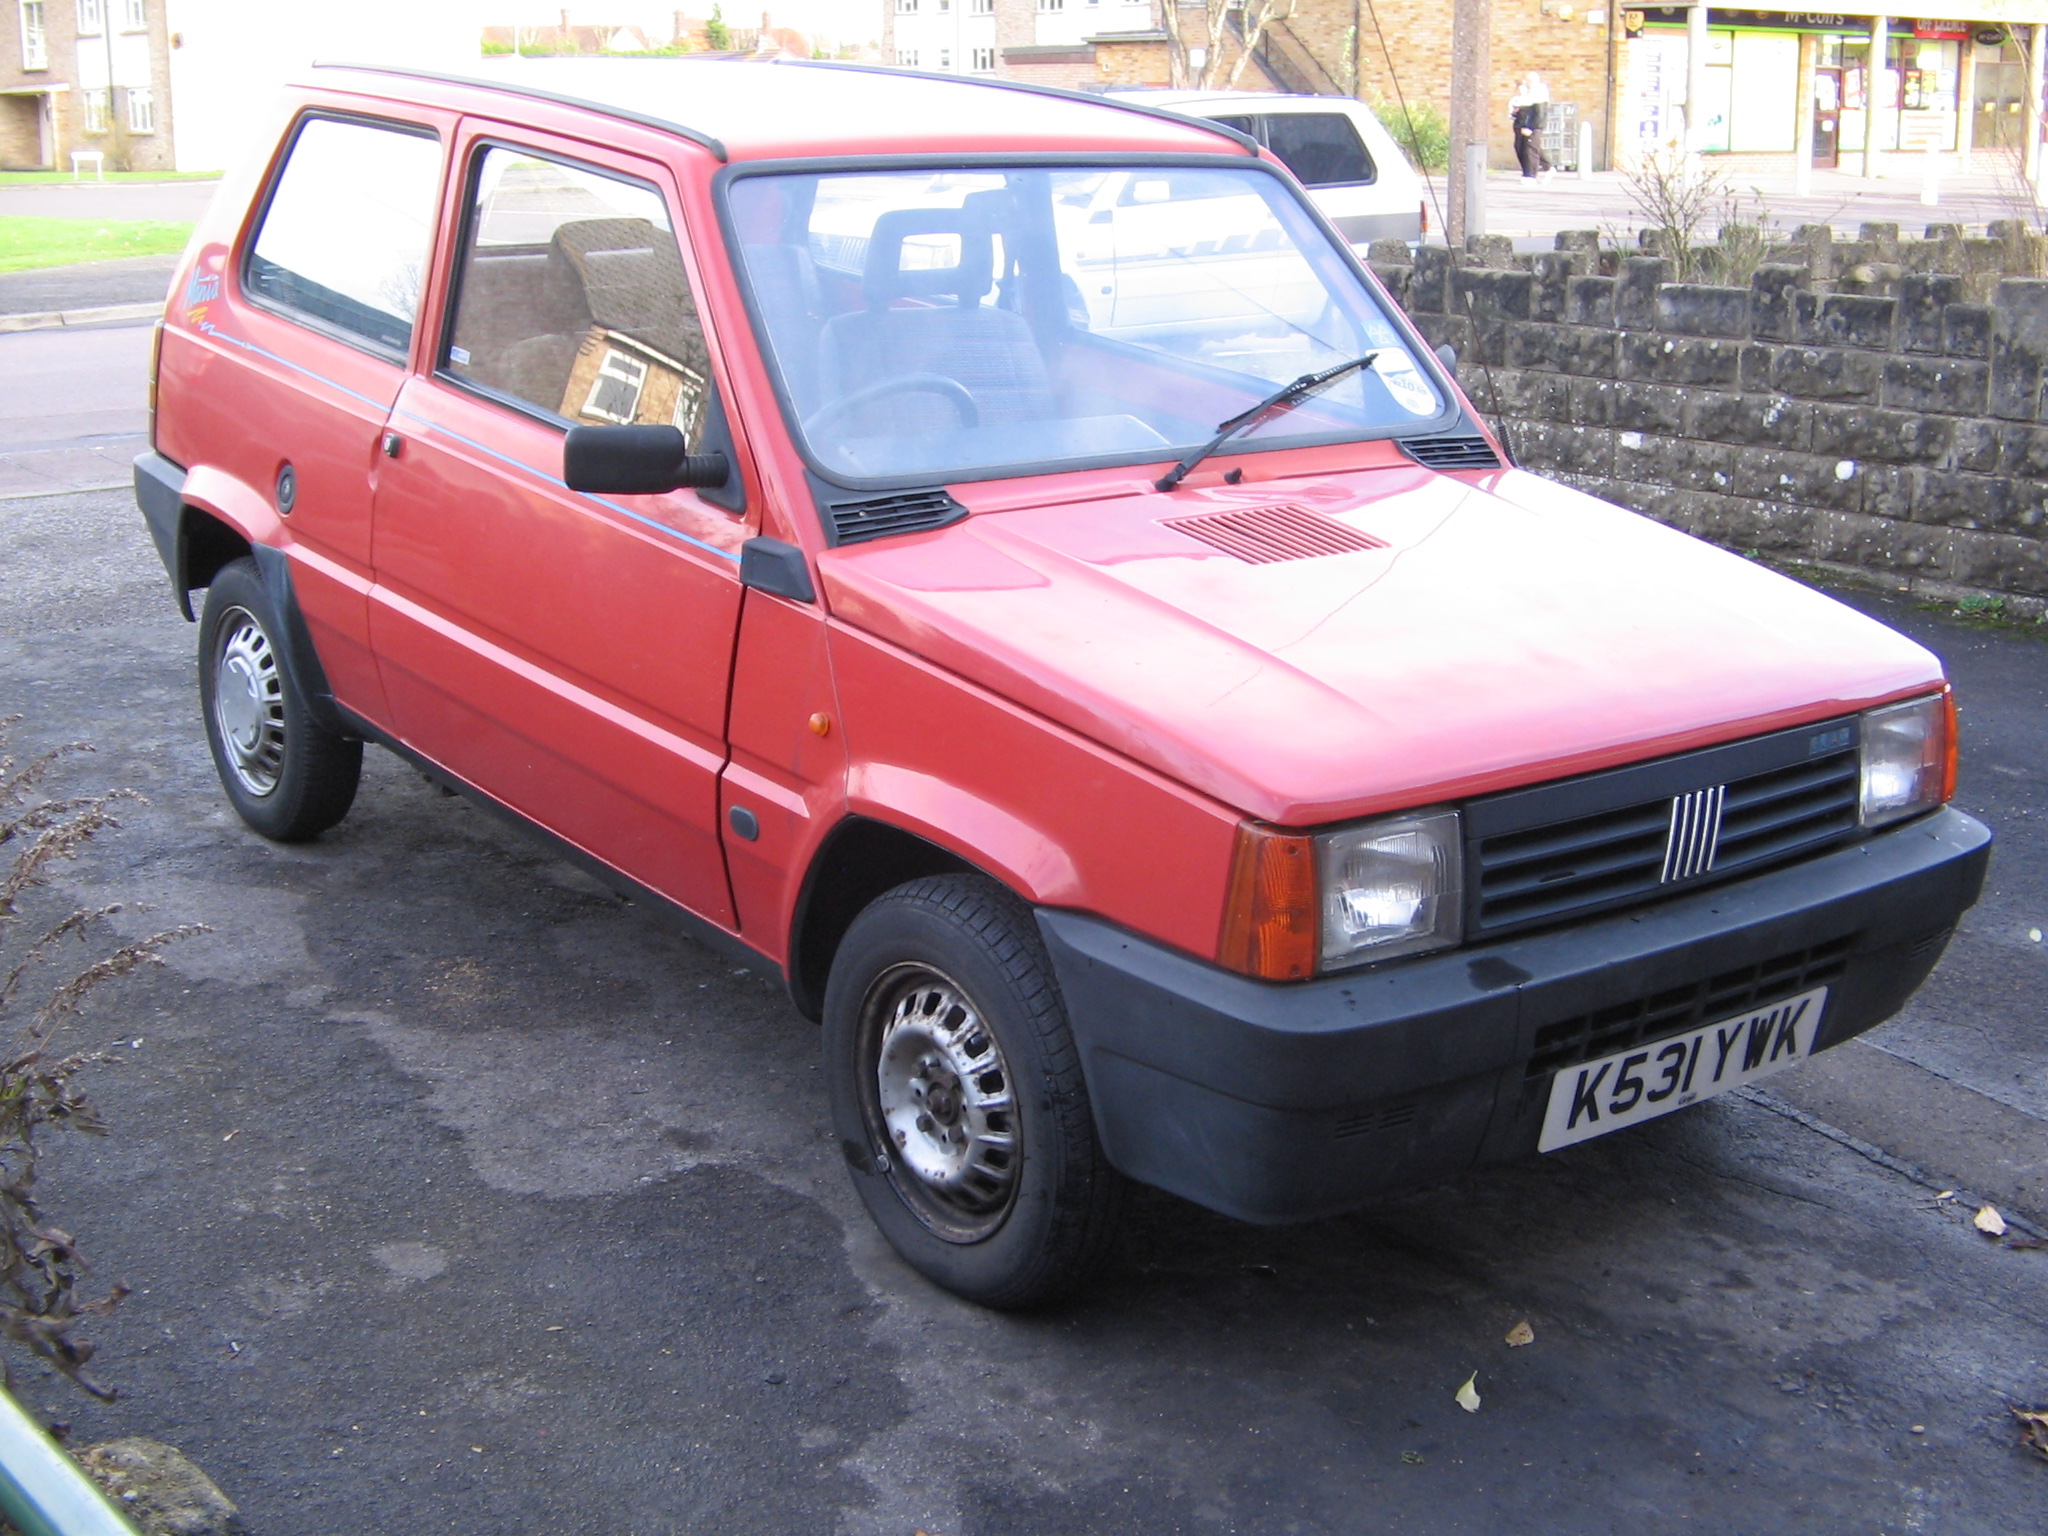
After this little lot the total cost was about £250 and this is how she now looked............
Now for the fun stuff.
Again, briefly, this is a list of work carried out to bring her from the above picture to finished.
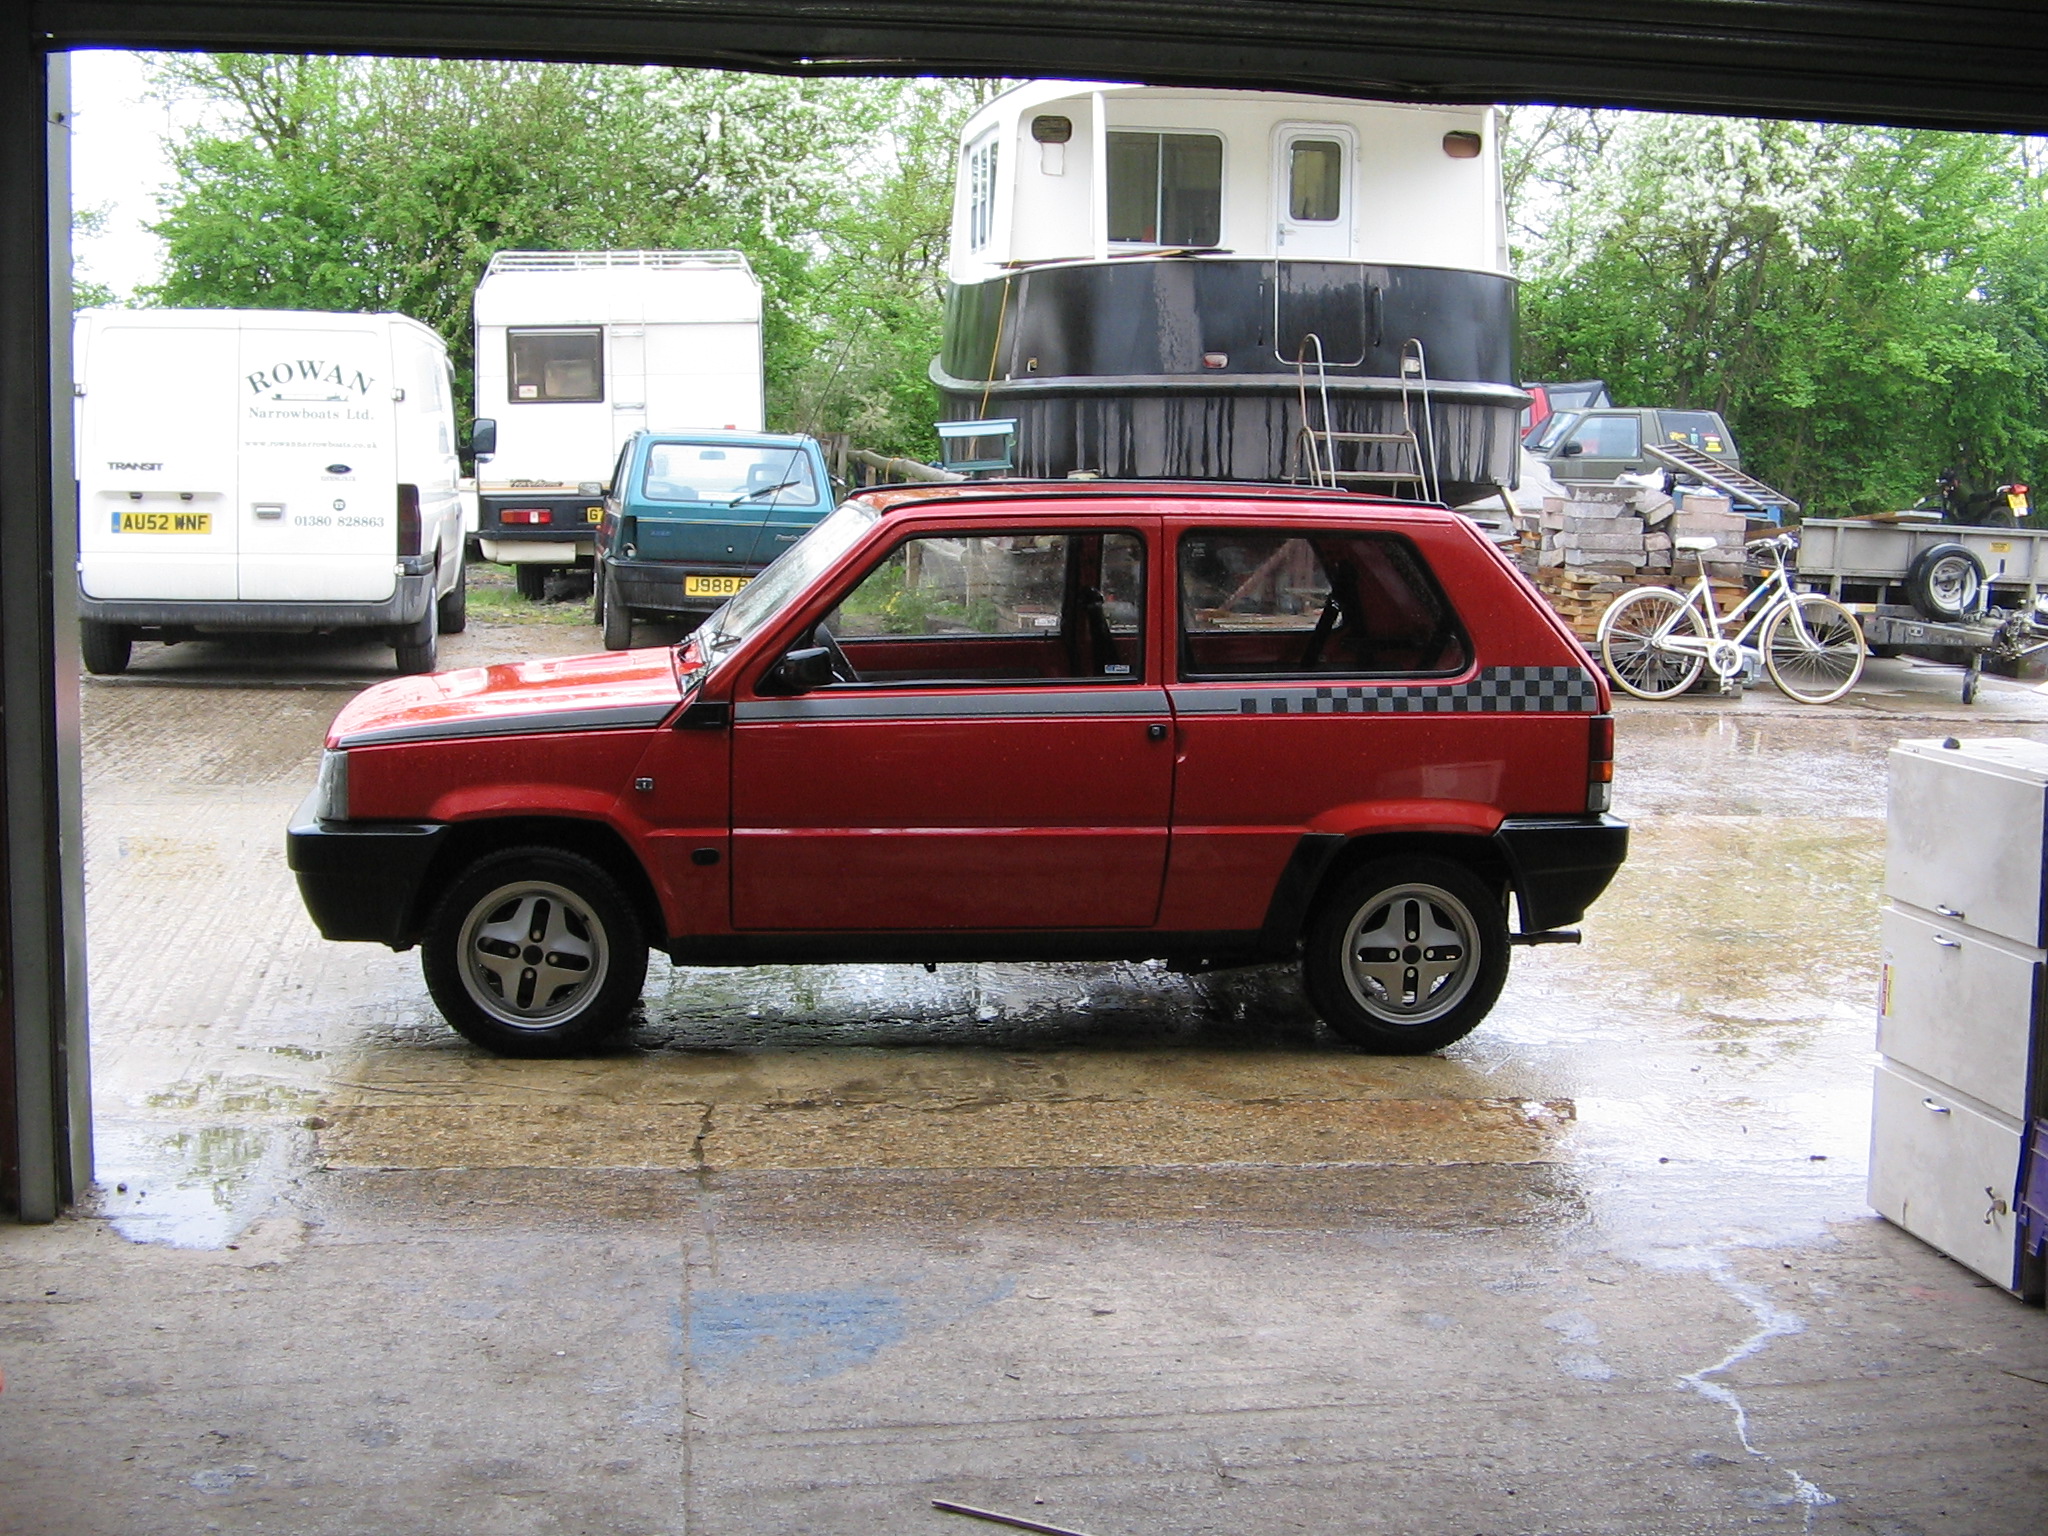
Go faster stripe made from cutting up a couple of viper stripe kits and making my own design.
Wheels and tyres from a 127 sport, refurbed by myself and fitted with 10mm spacers on the rear.
New standard shocks with new Spax coil springs lowering car by about 40mm.
Replace side repeaters with Rover items fitted with chrome bulbs.
Replace orange front indicators with clear ones, also with chrome bulbs.
Clean and paint suspension and brake parts as I go.
Remove gearbox, free off and lubricate clutch mechanism and gearchange linkage.
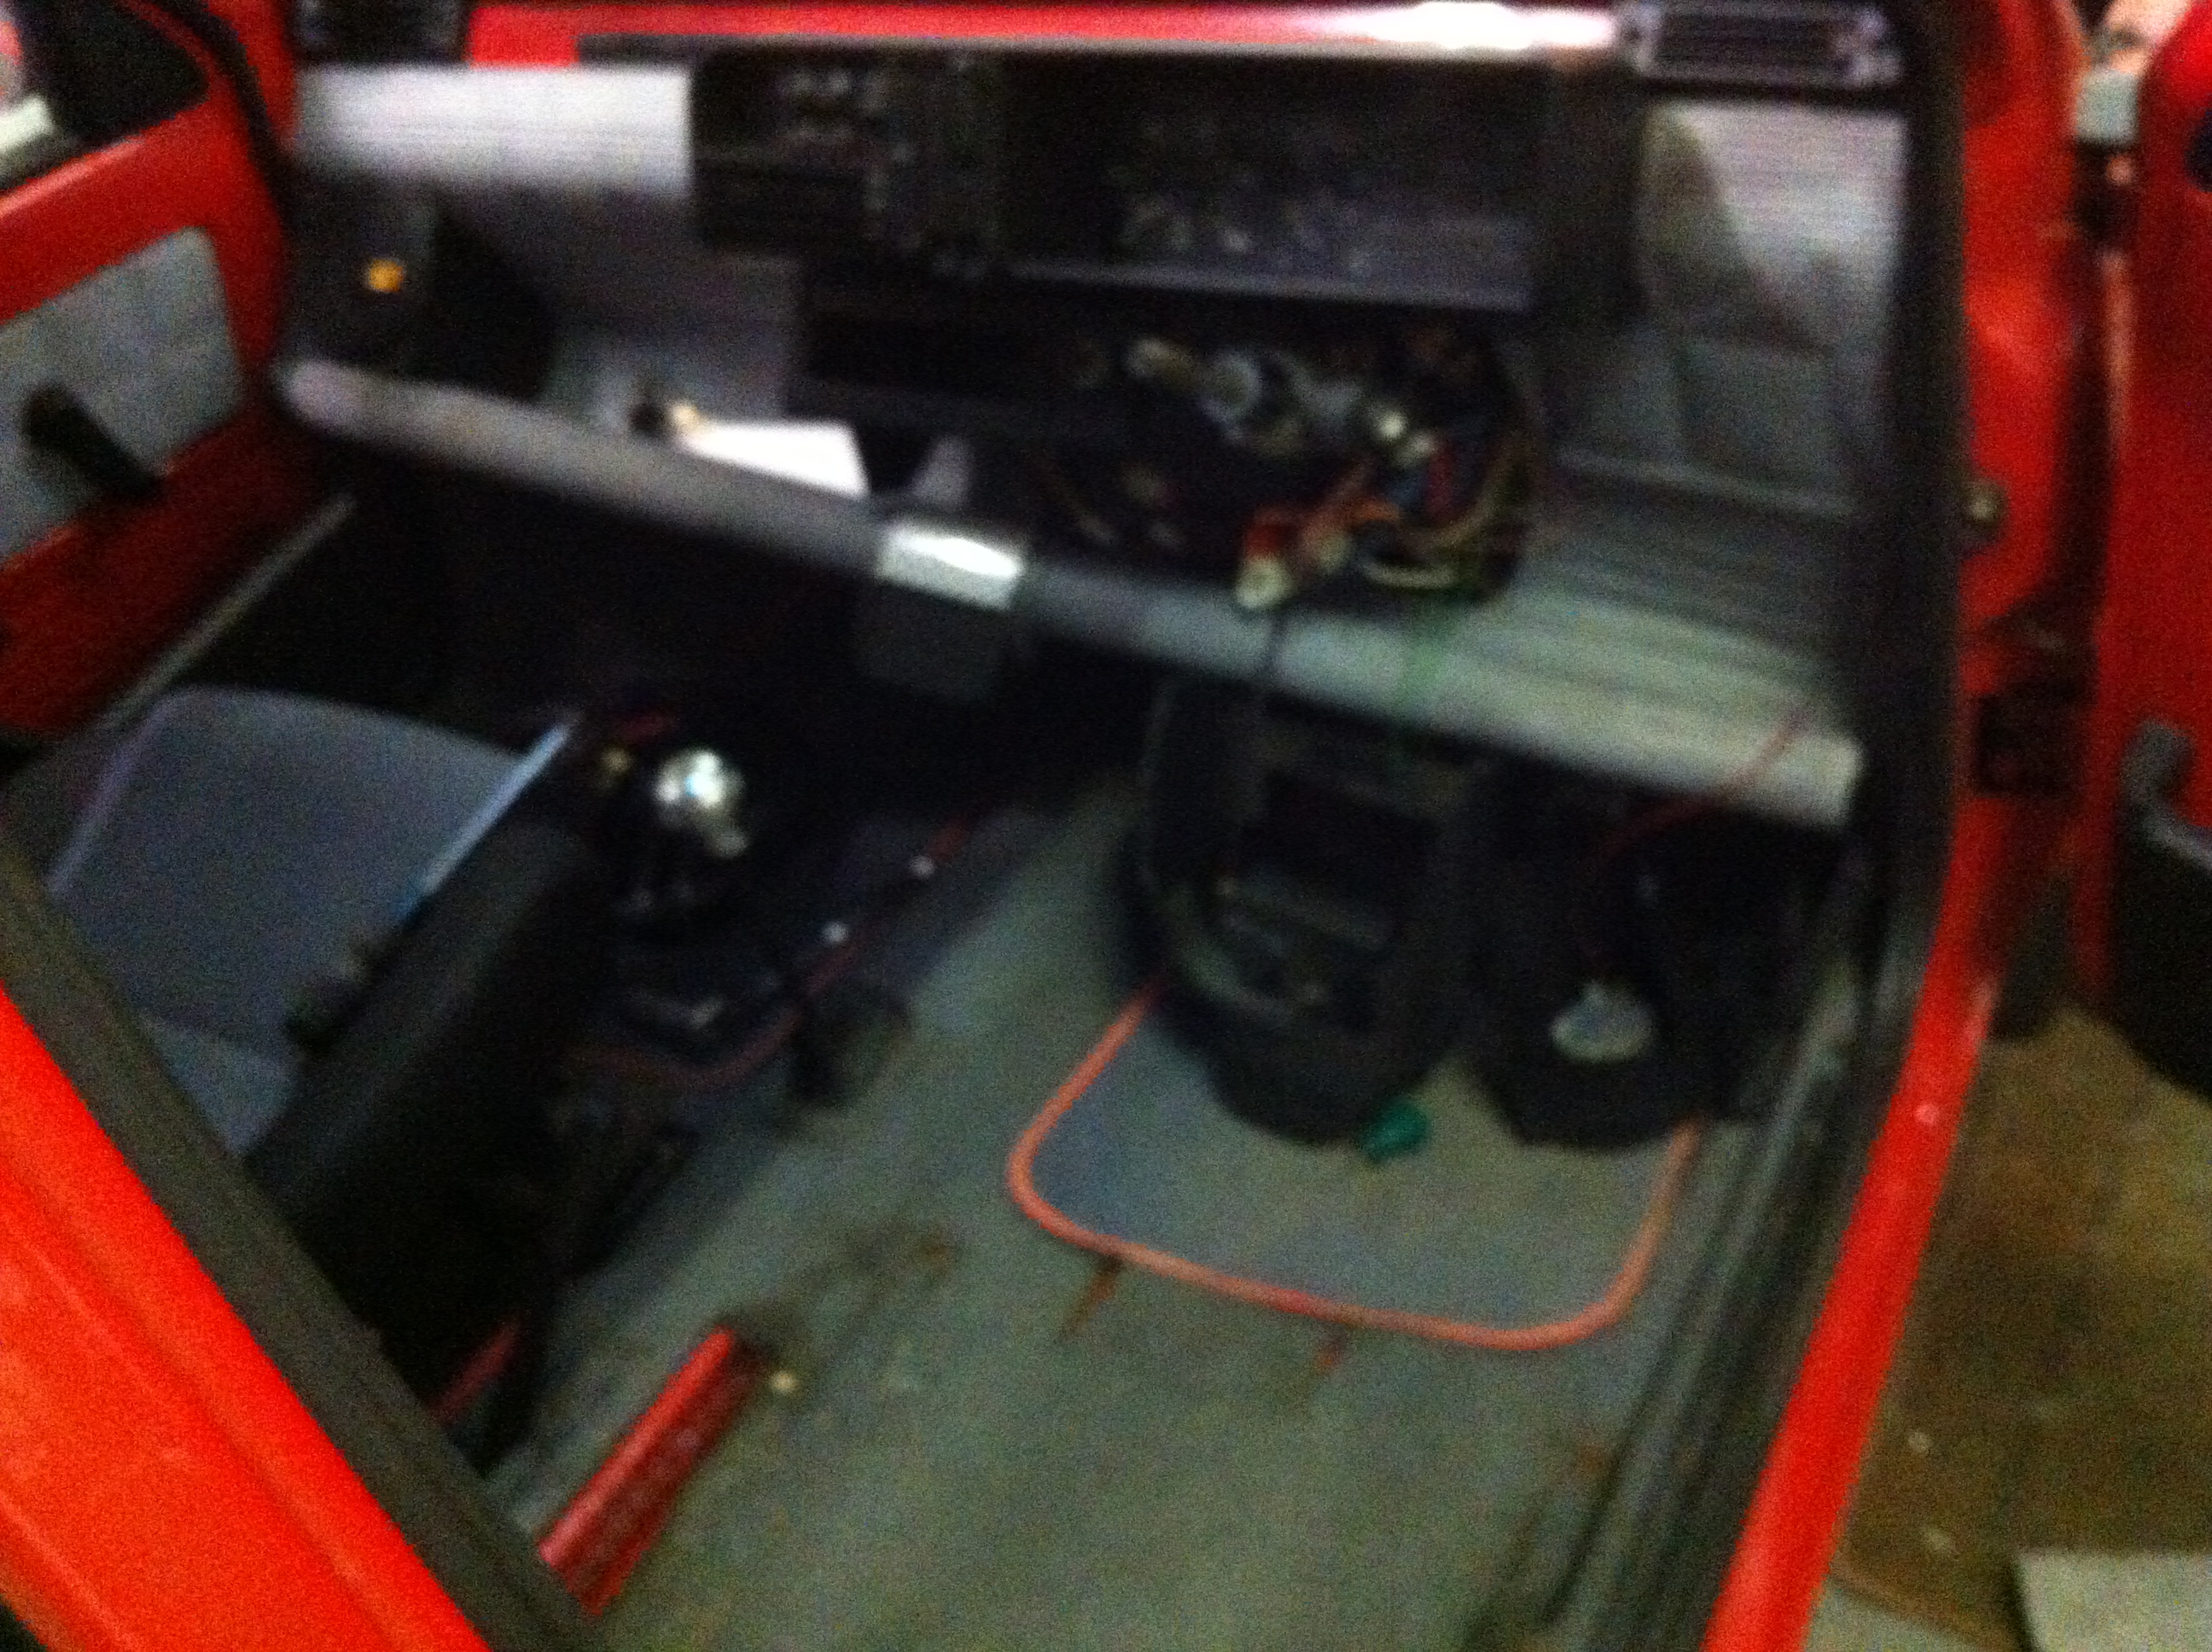
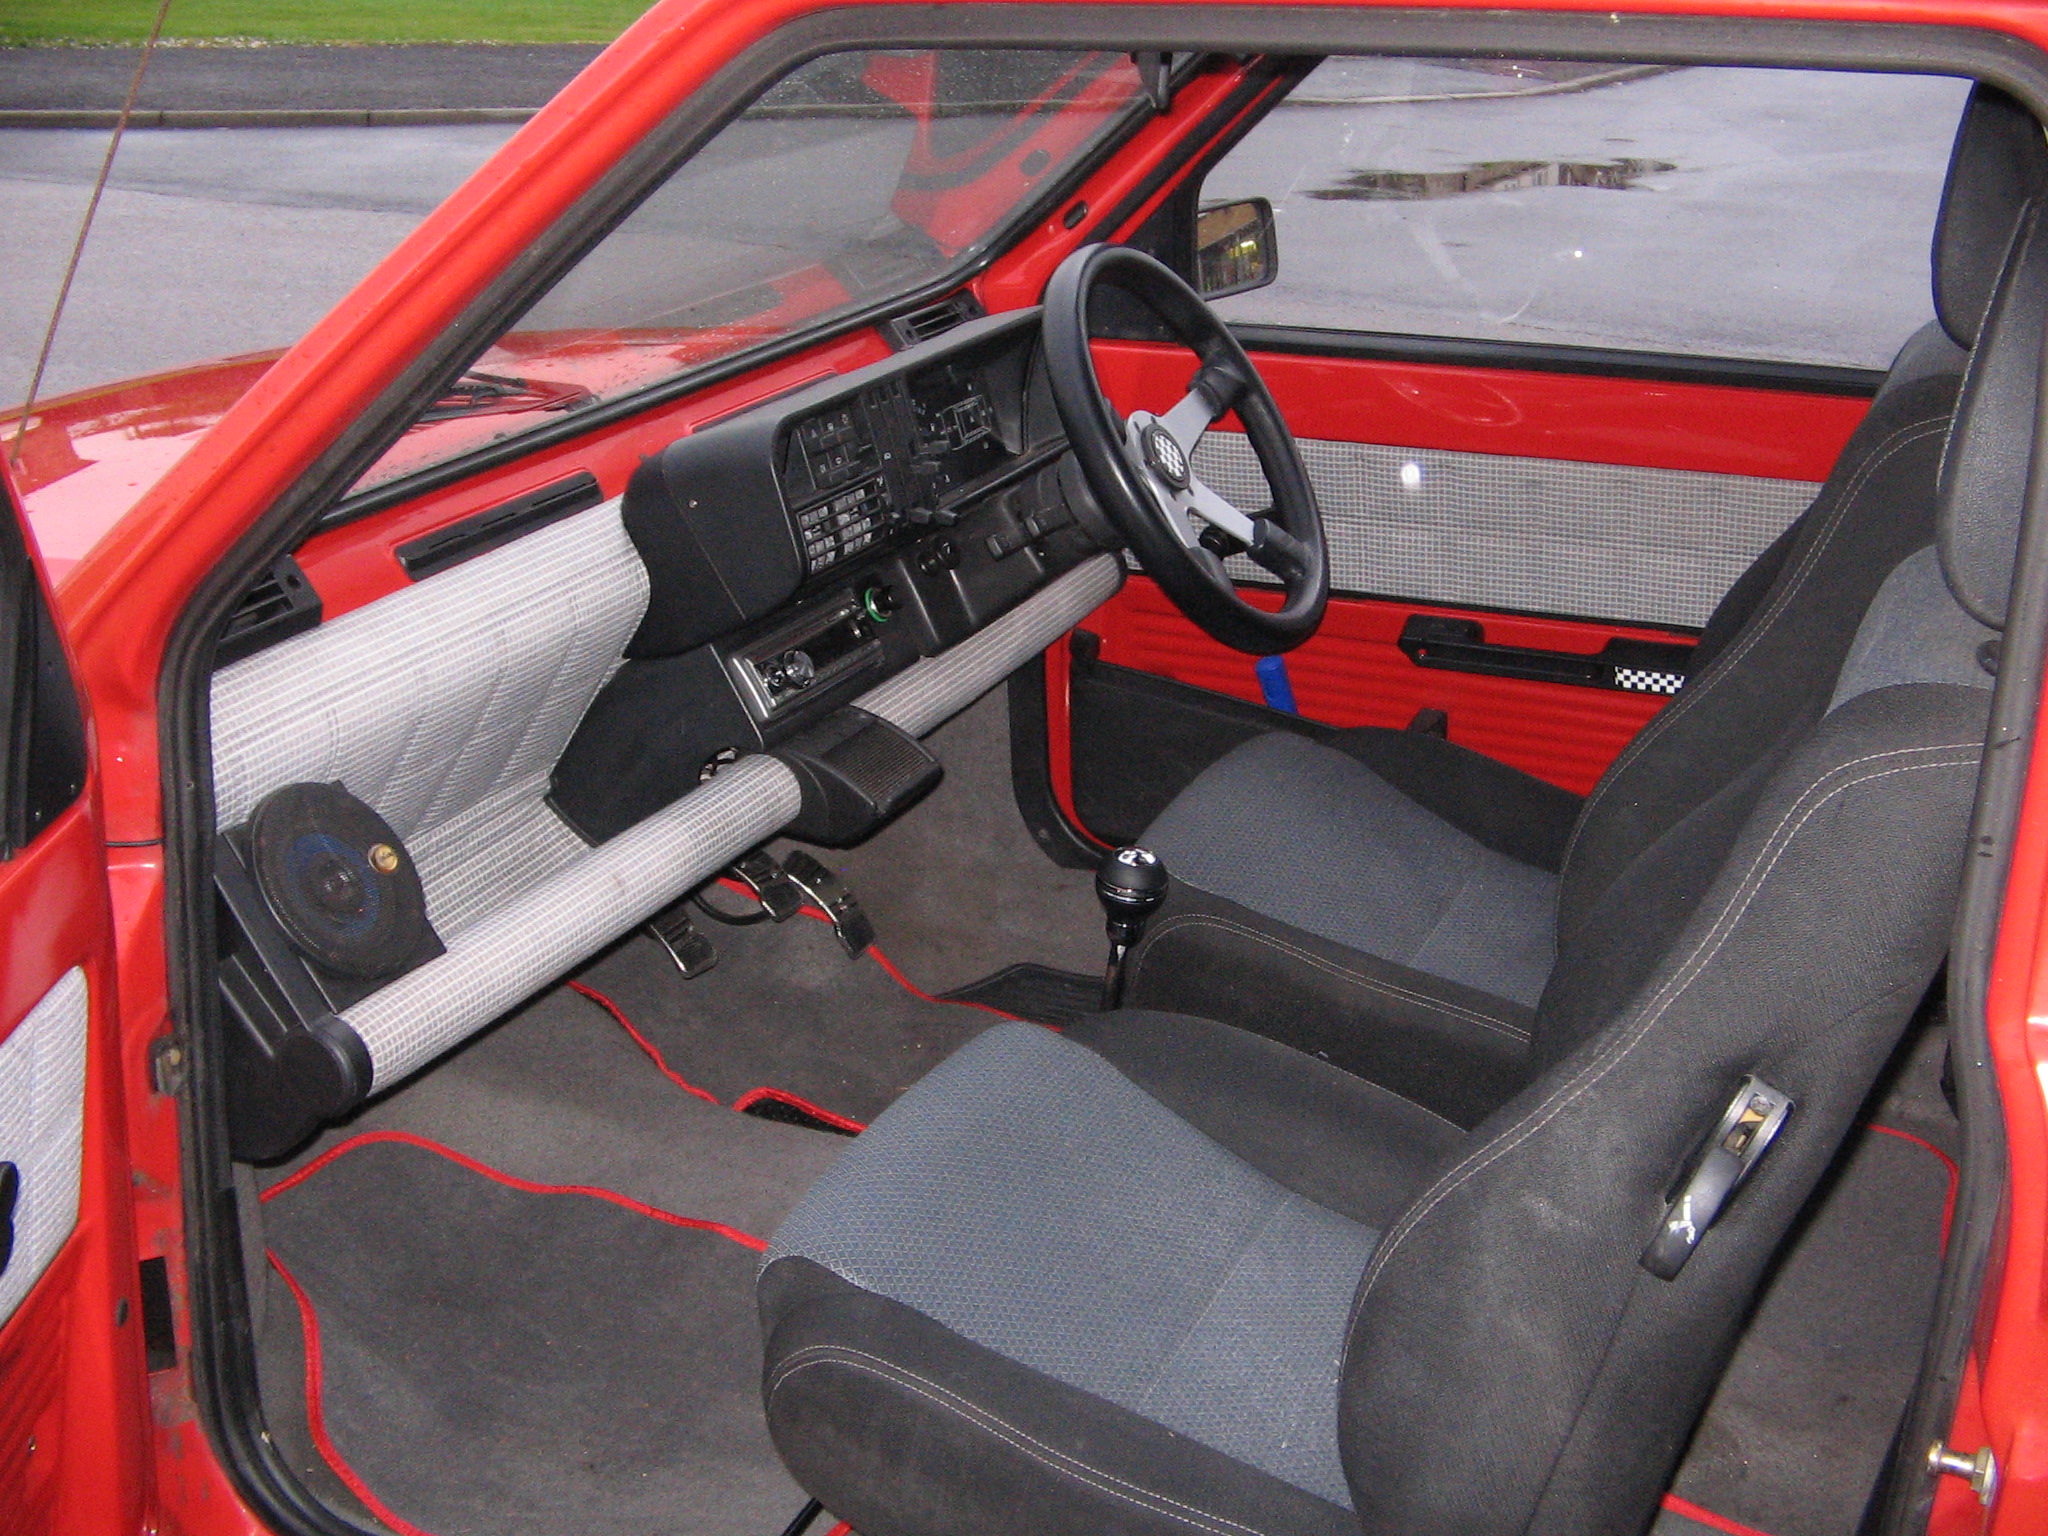
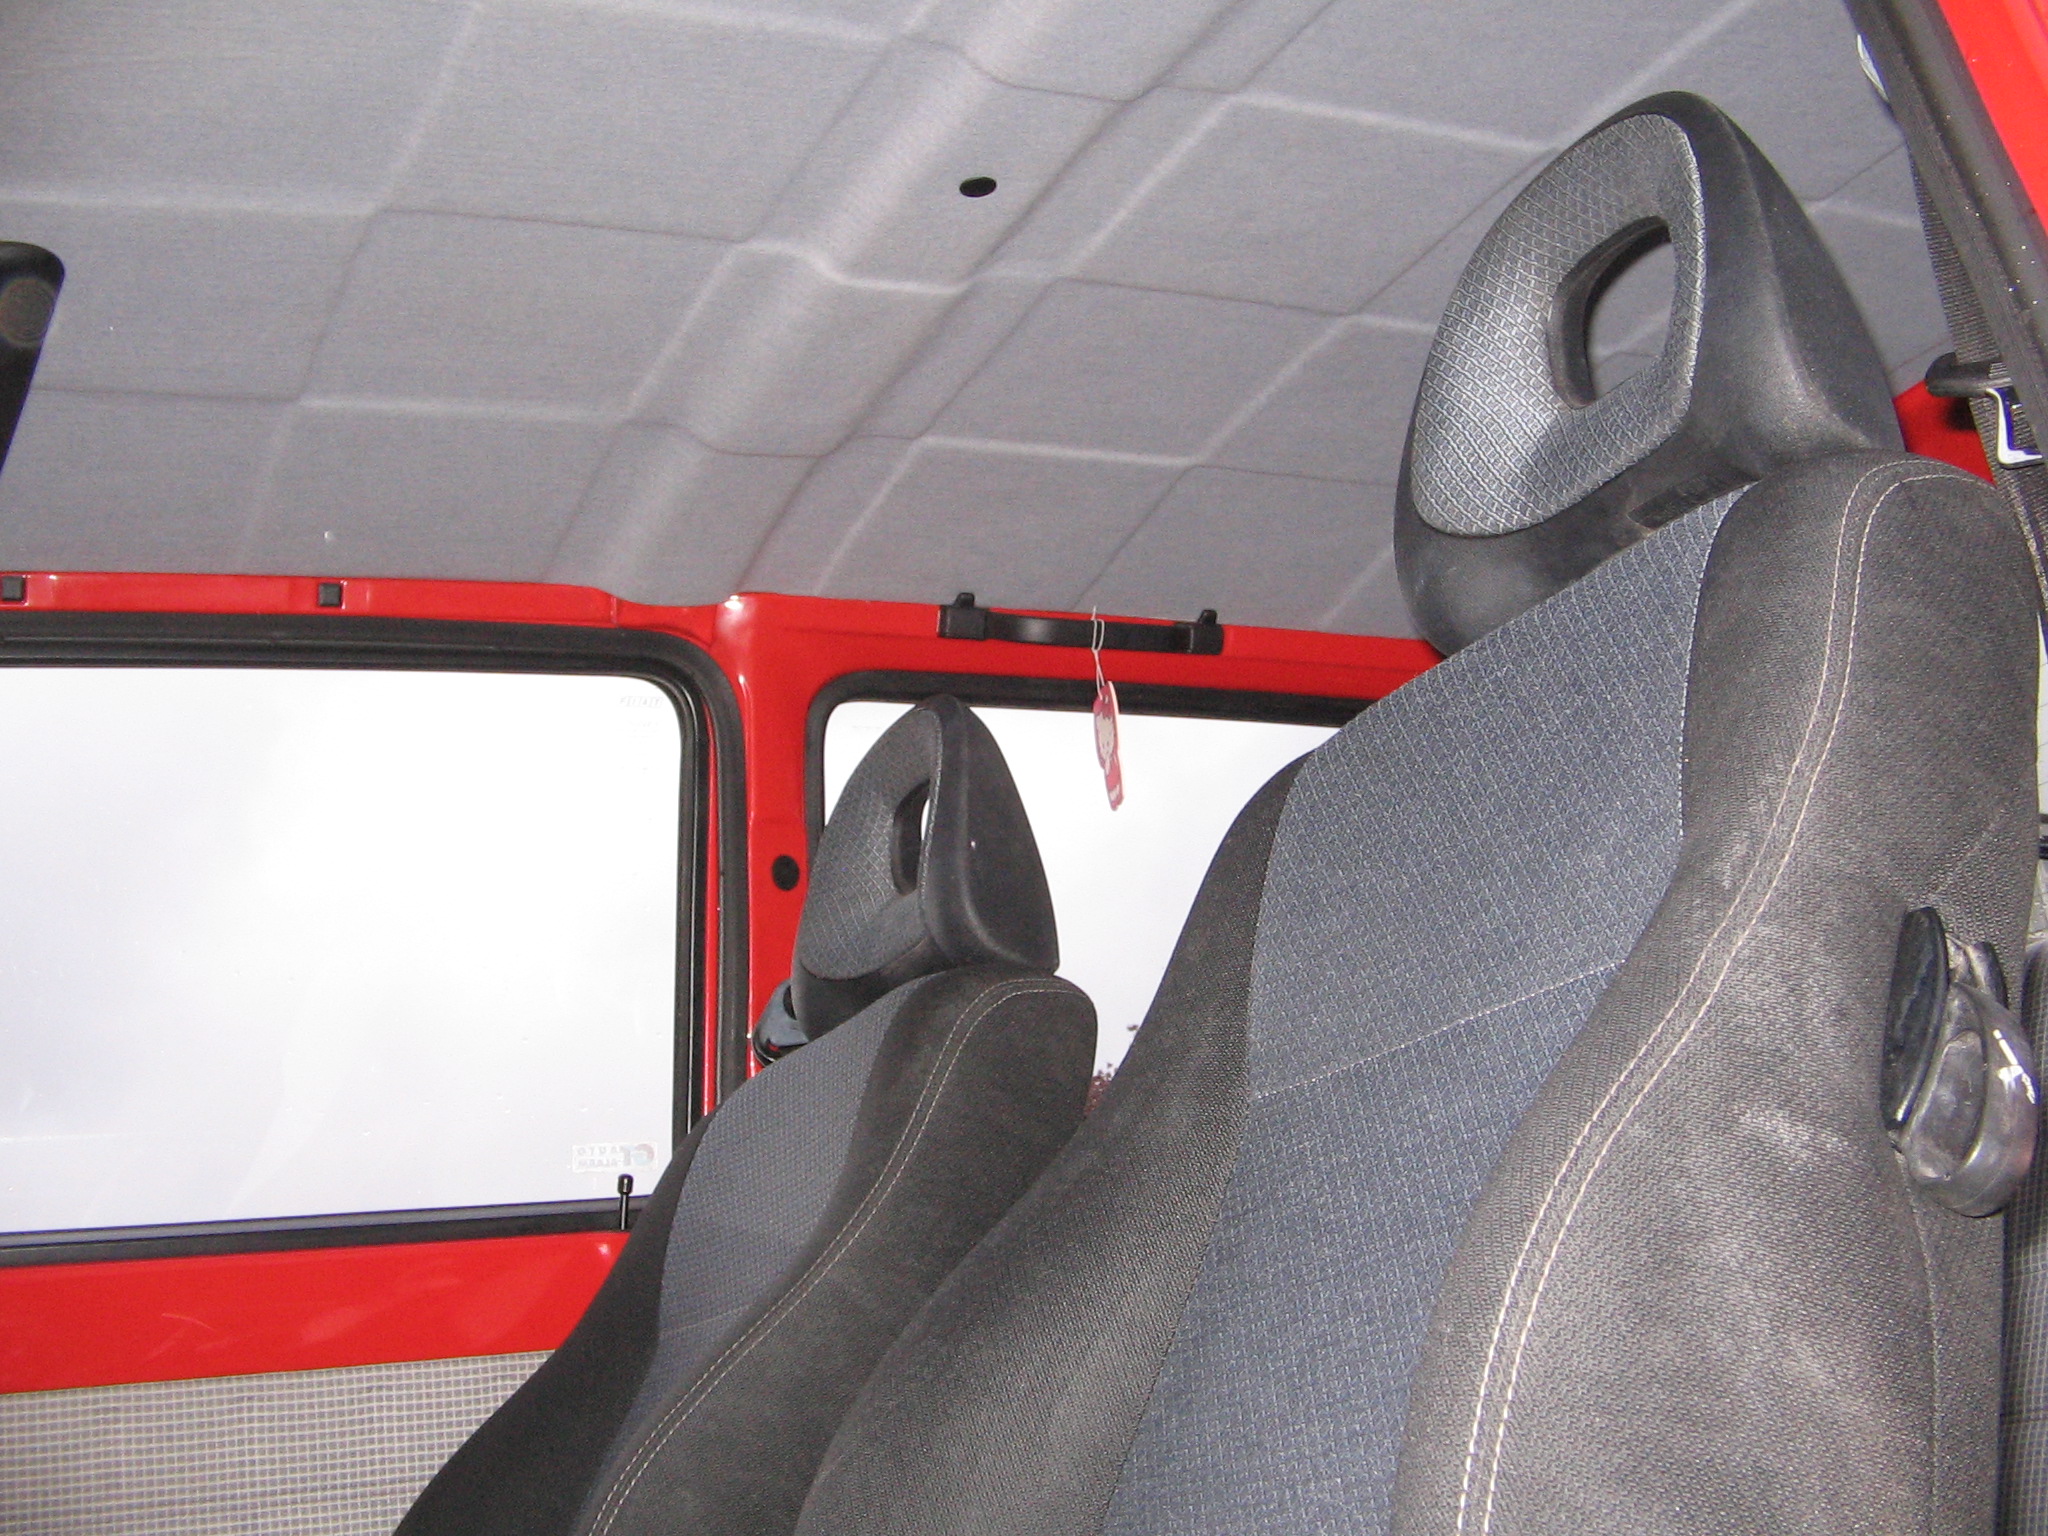
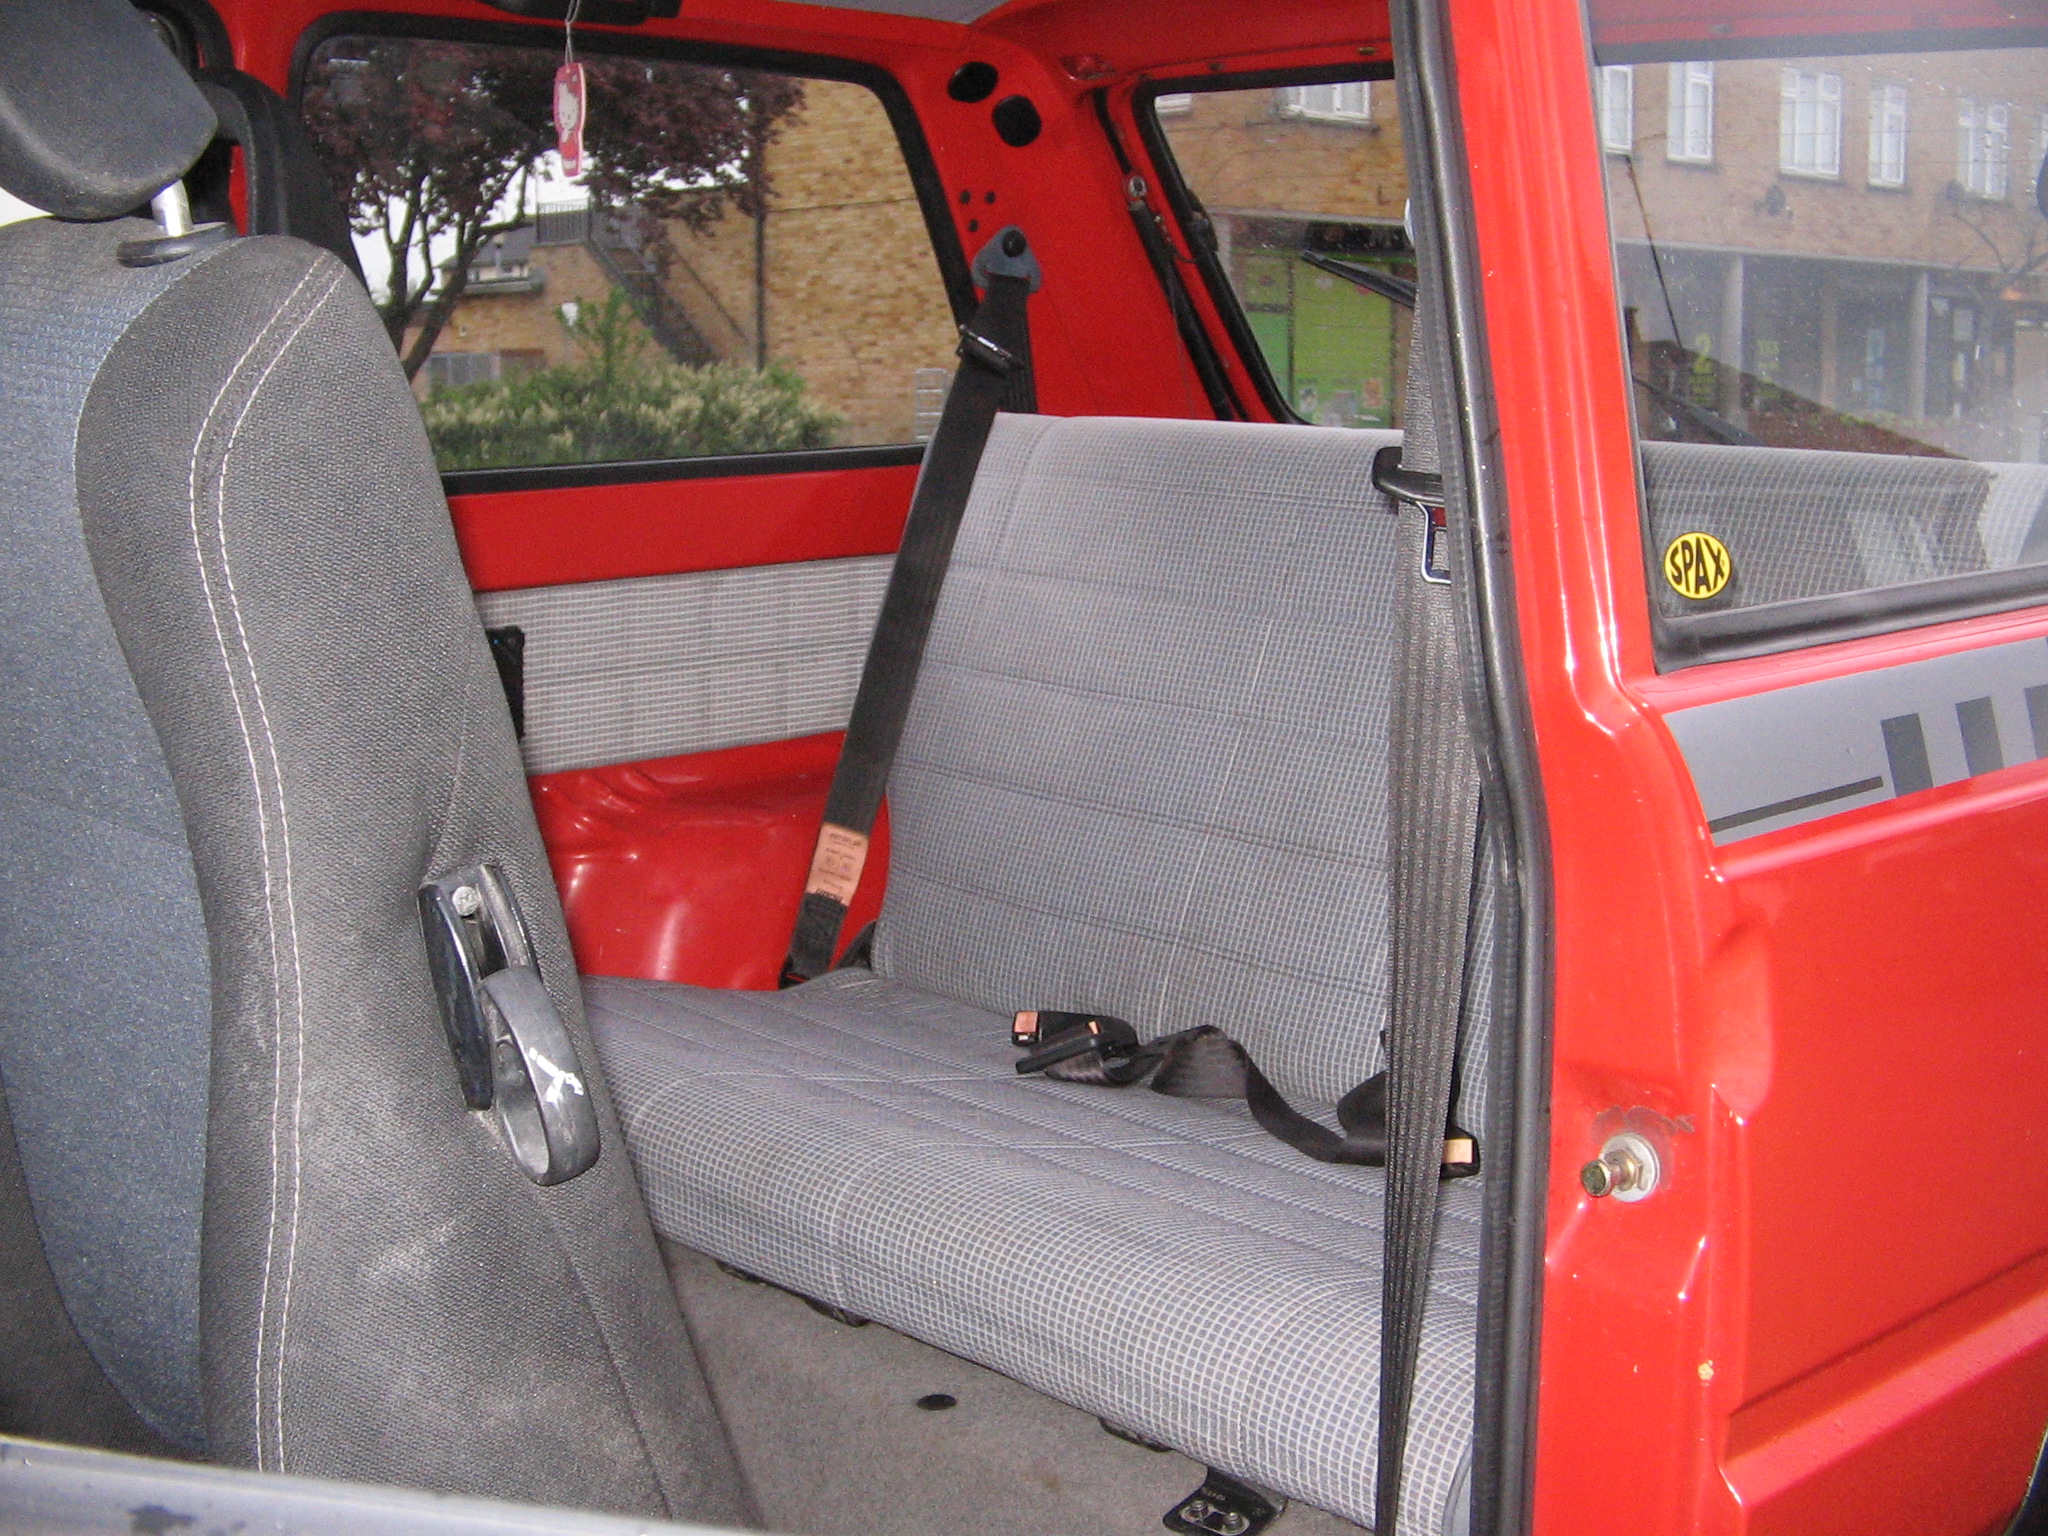
Strip interior, refit using light grey trim from another of my Pandas.
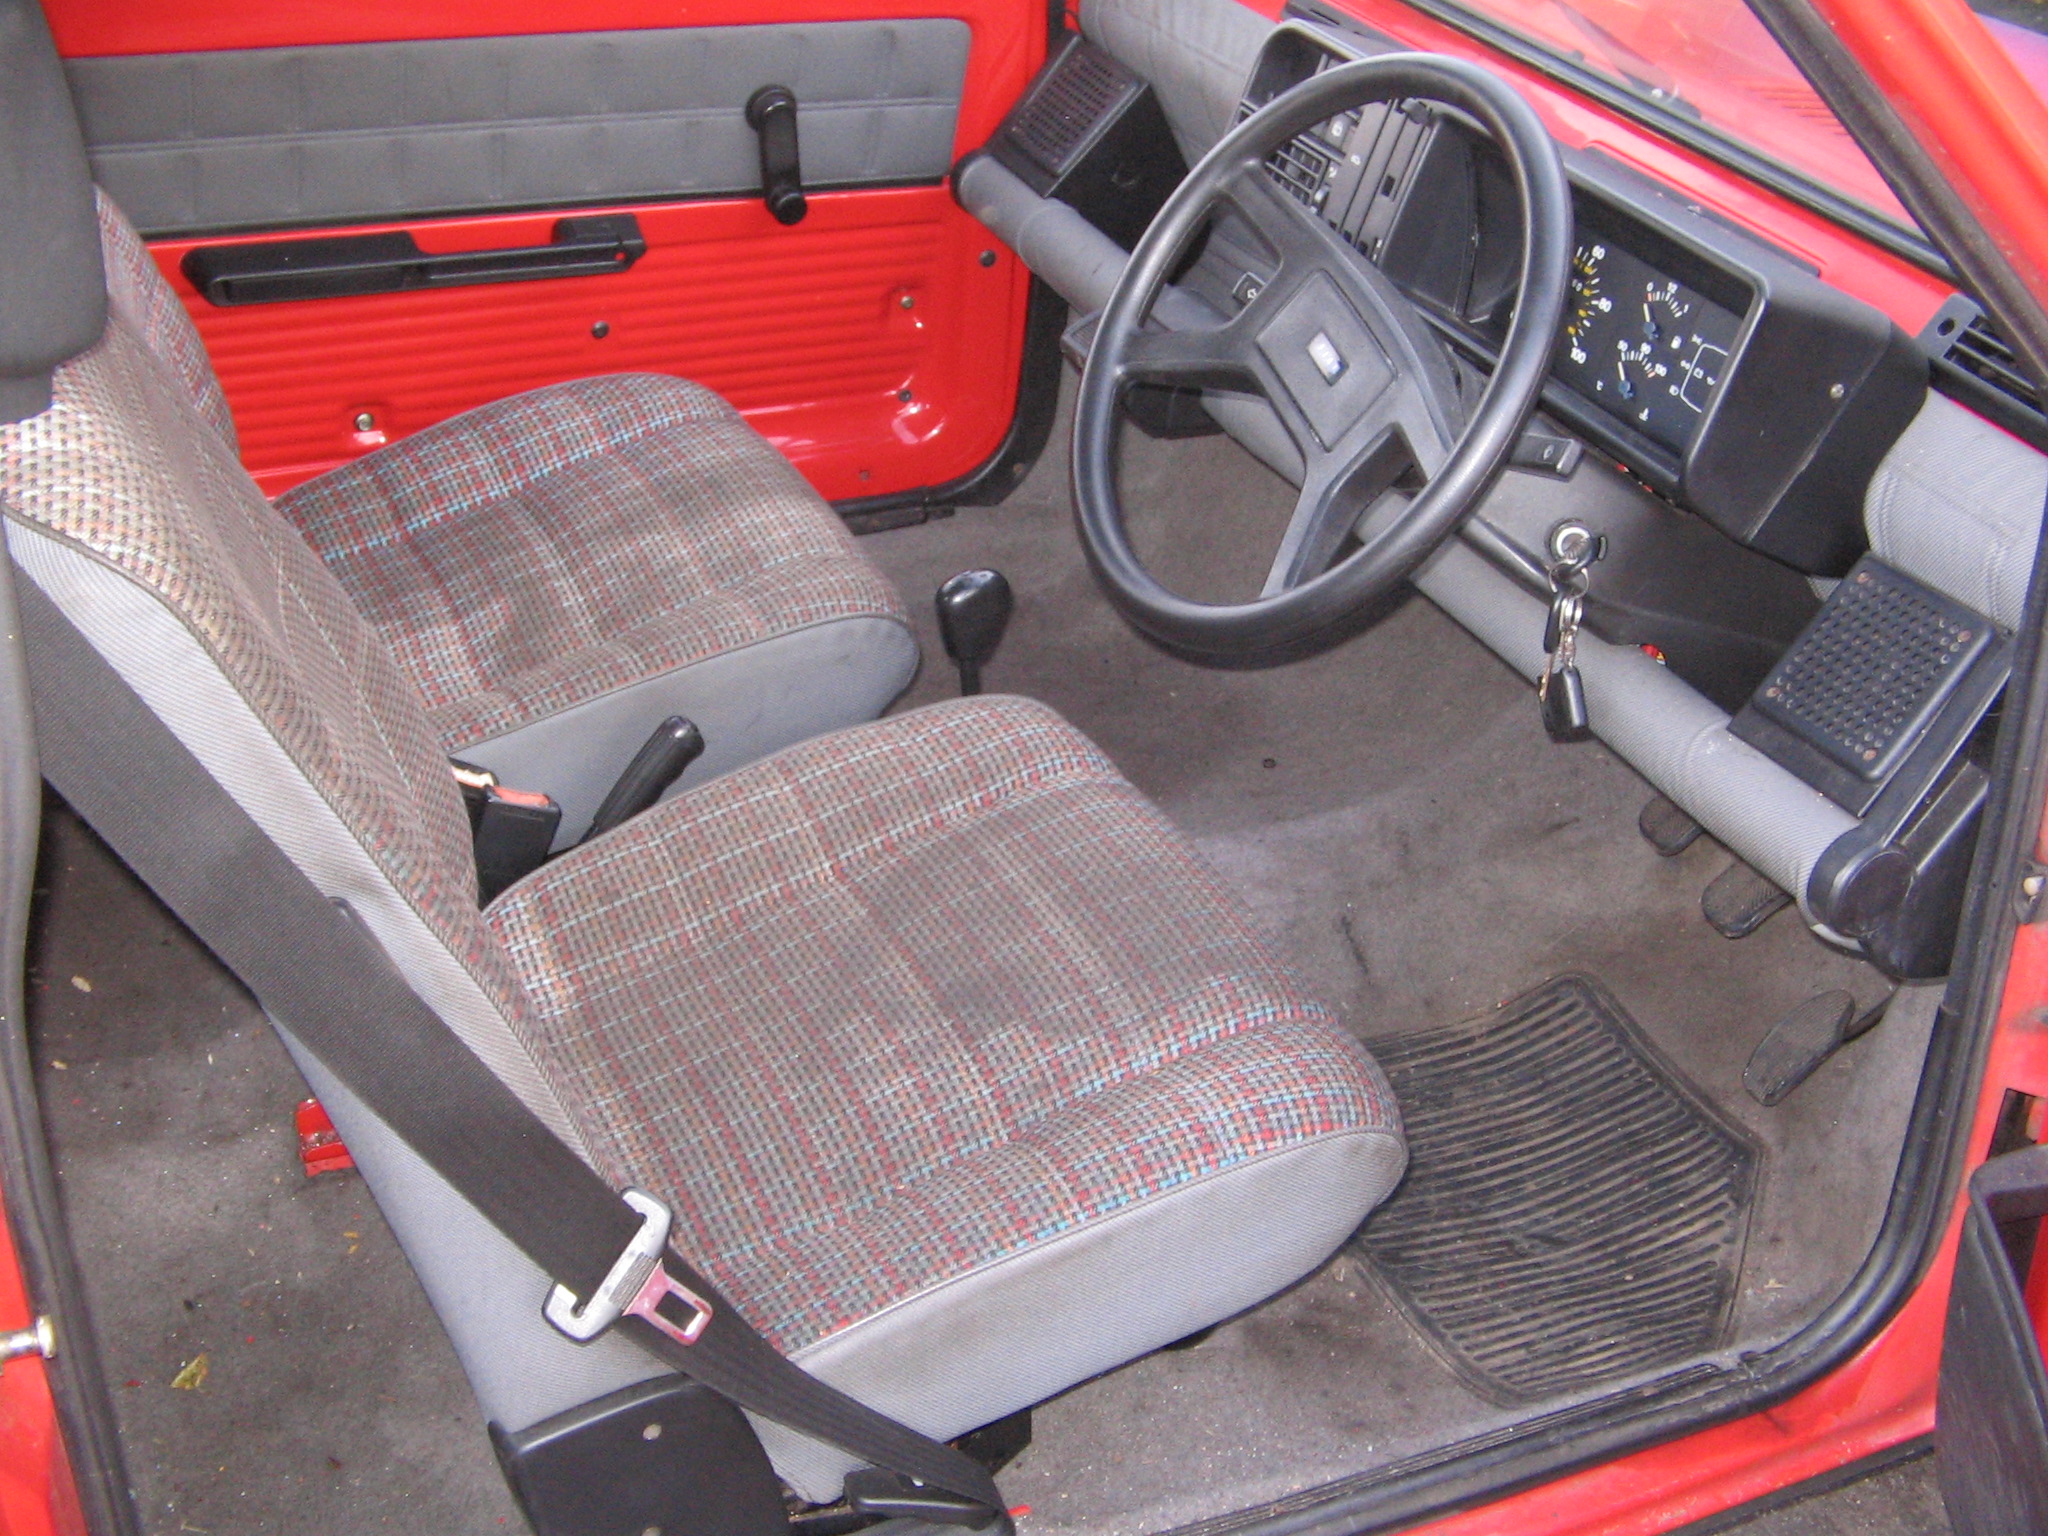
Fit Seicento Sei front seats.
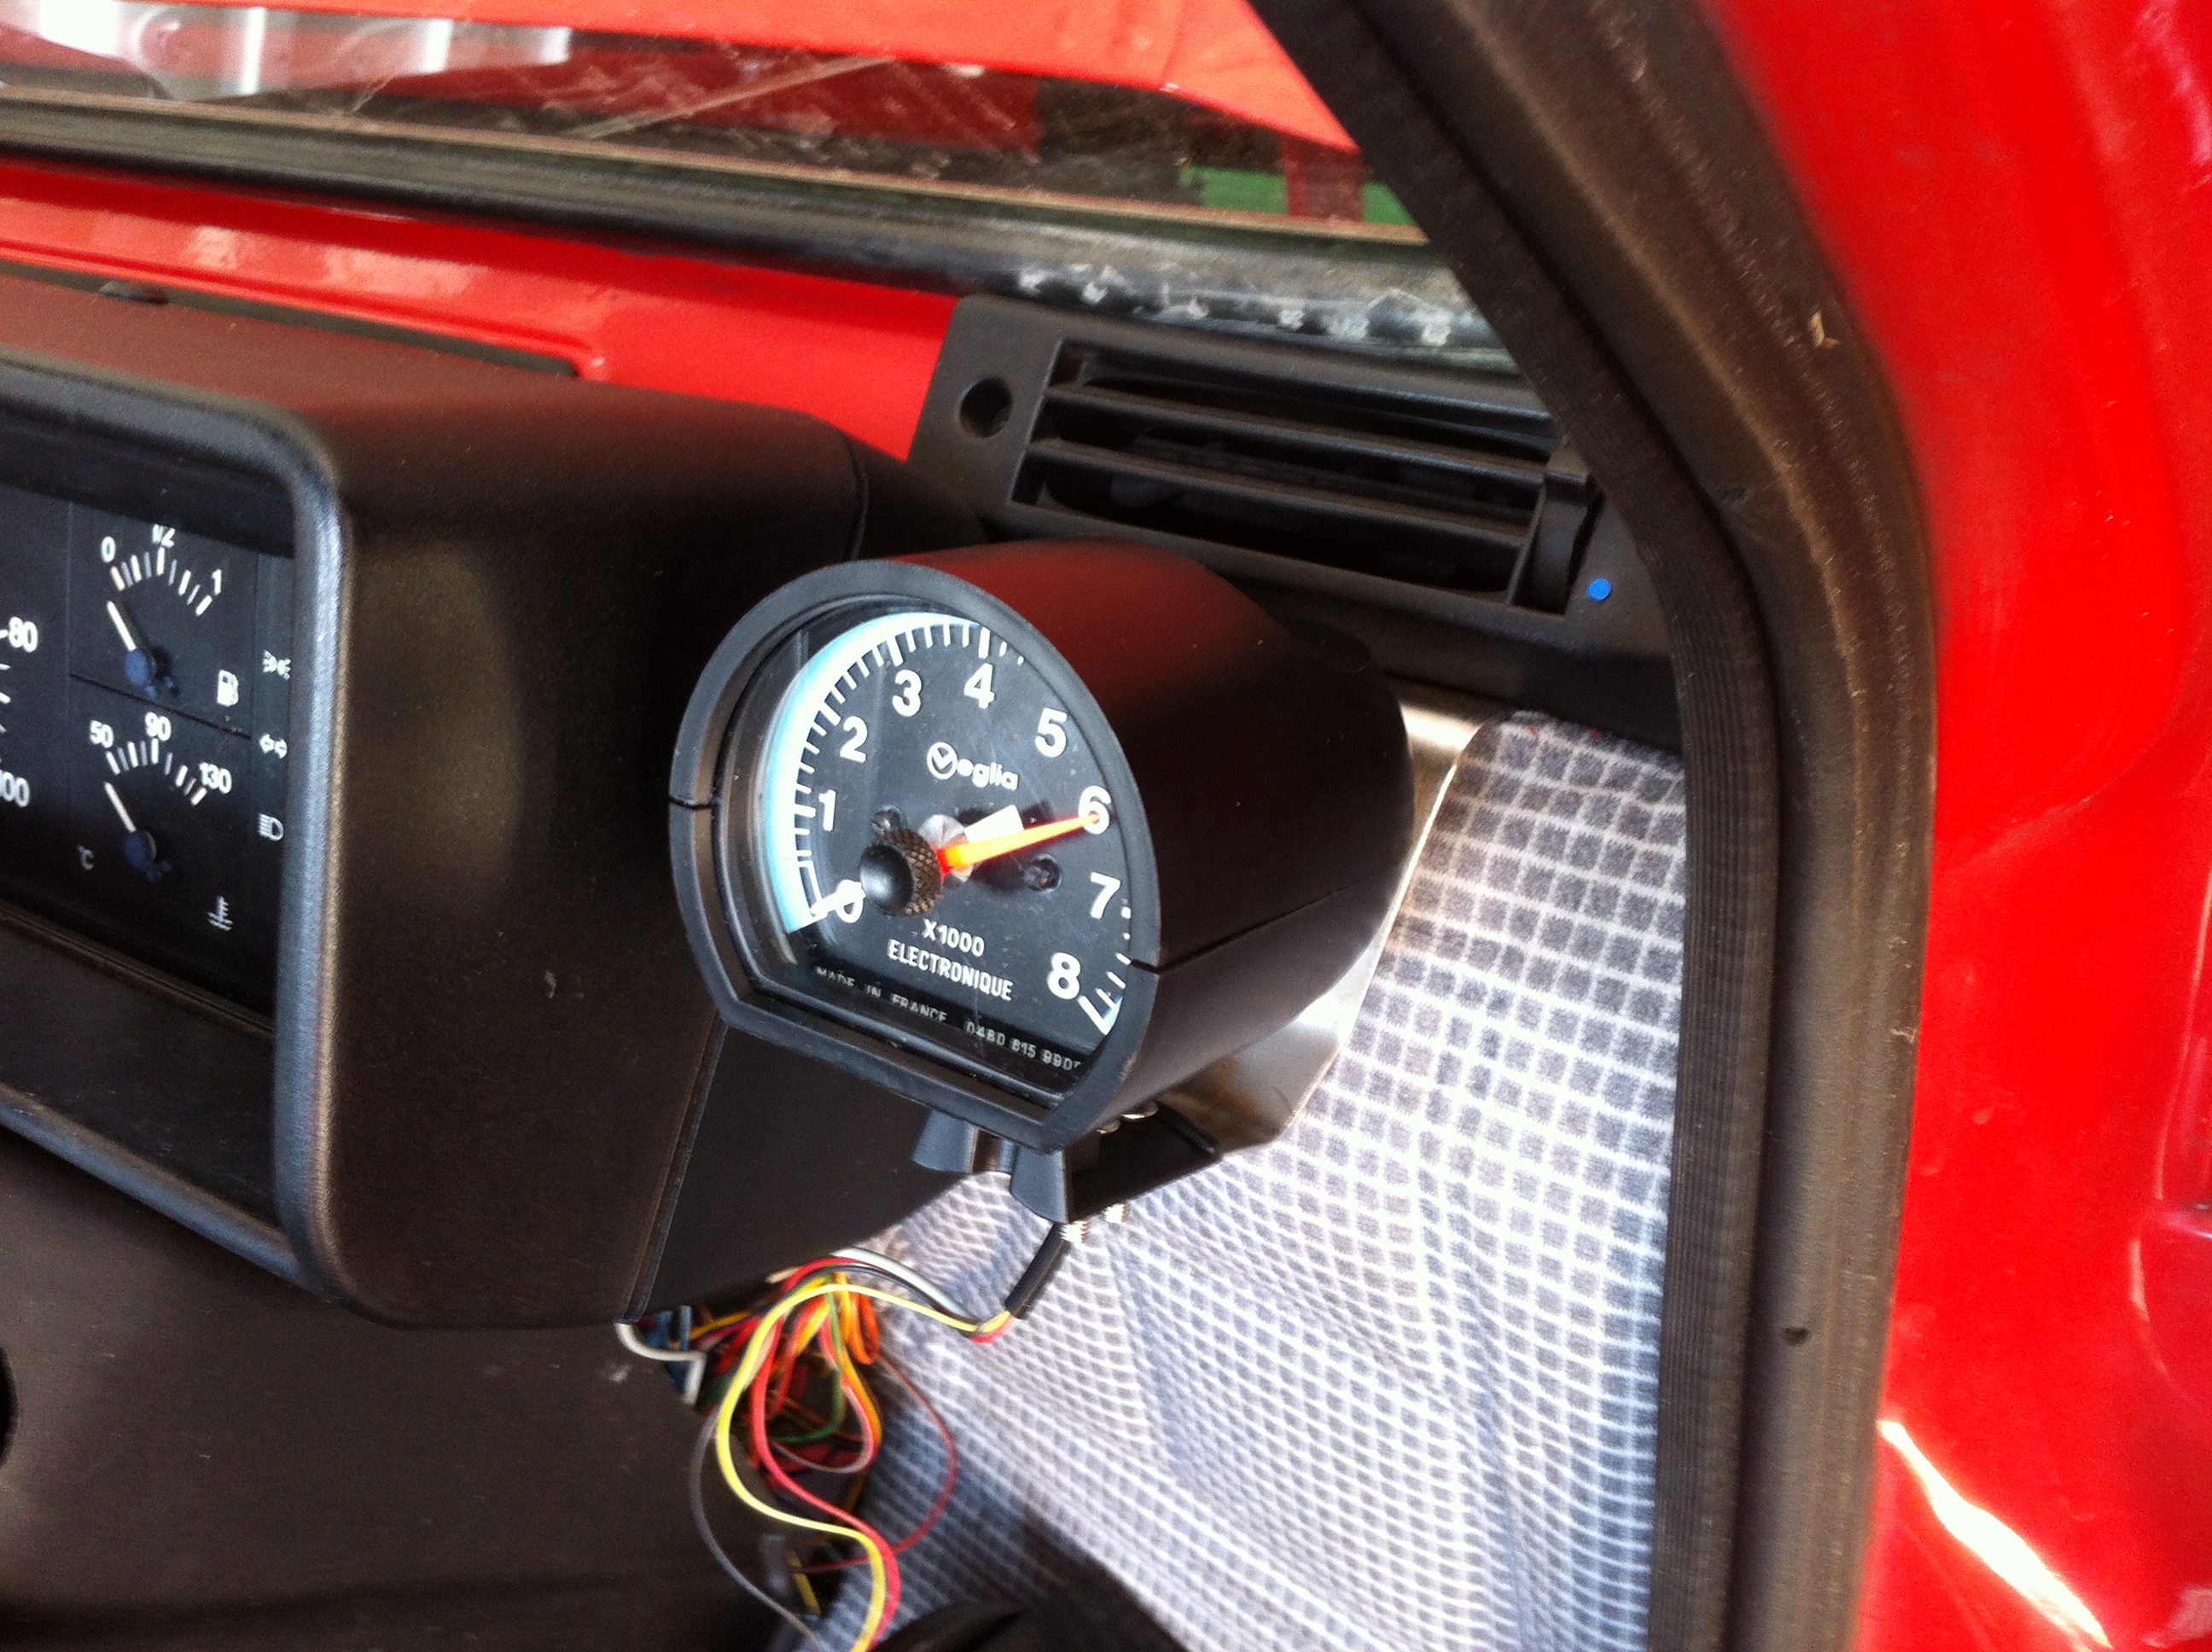
Fit sportier pedals, gearknob, steering wheel, and chequered trim to door handles and horn button, plus red/grey overmats.
Make custom roof lining to tie in with chequers theme.
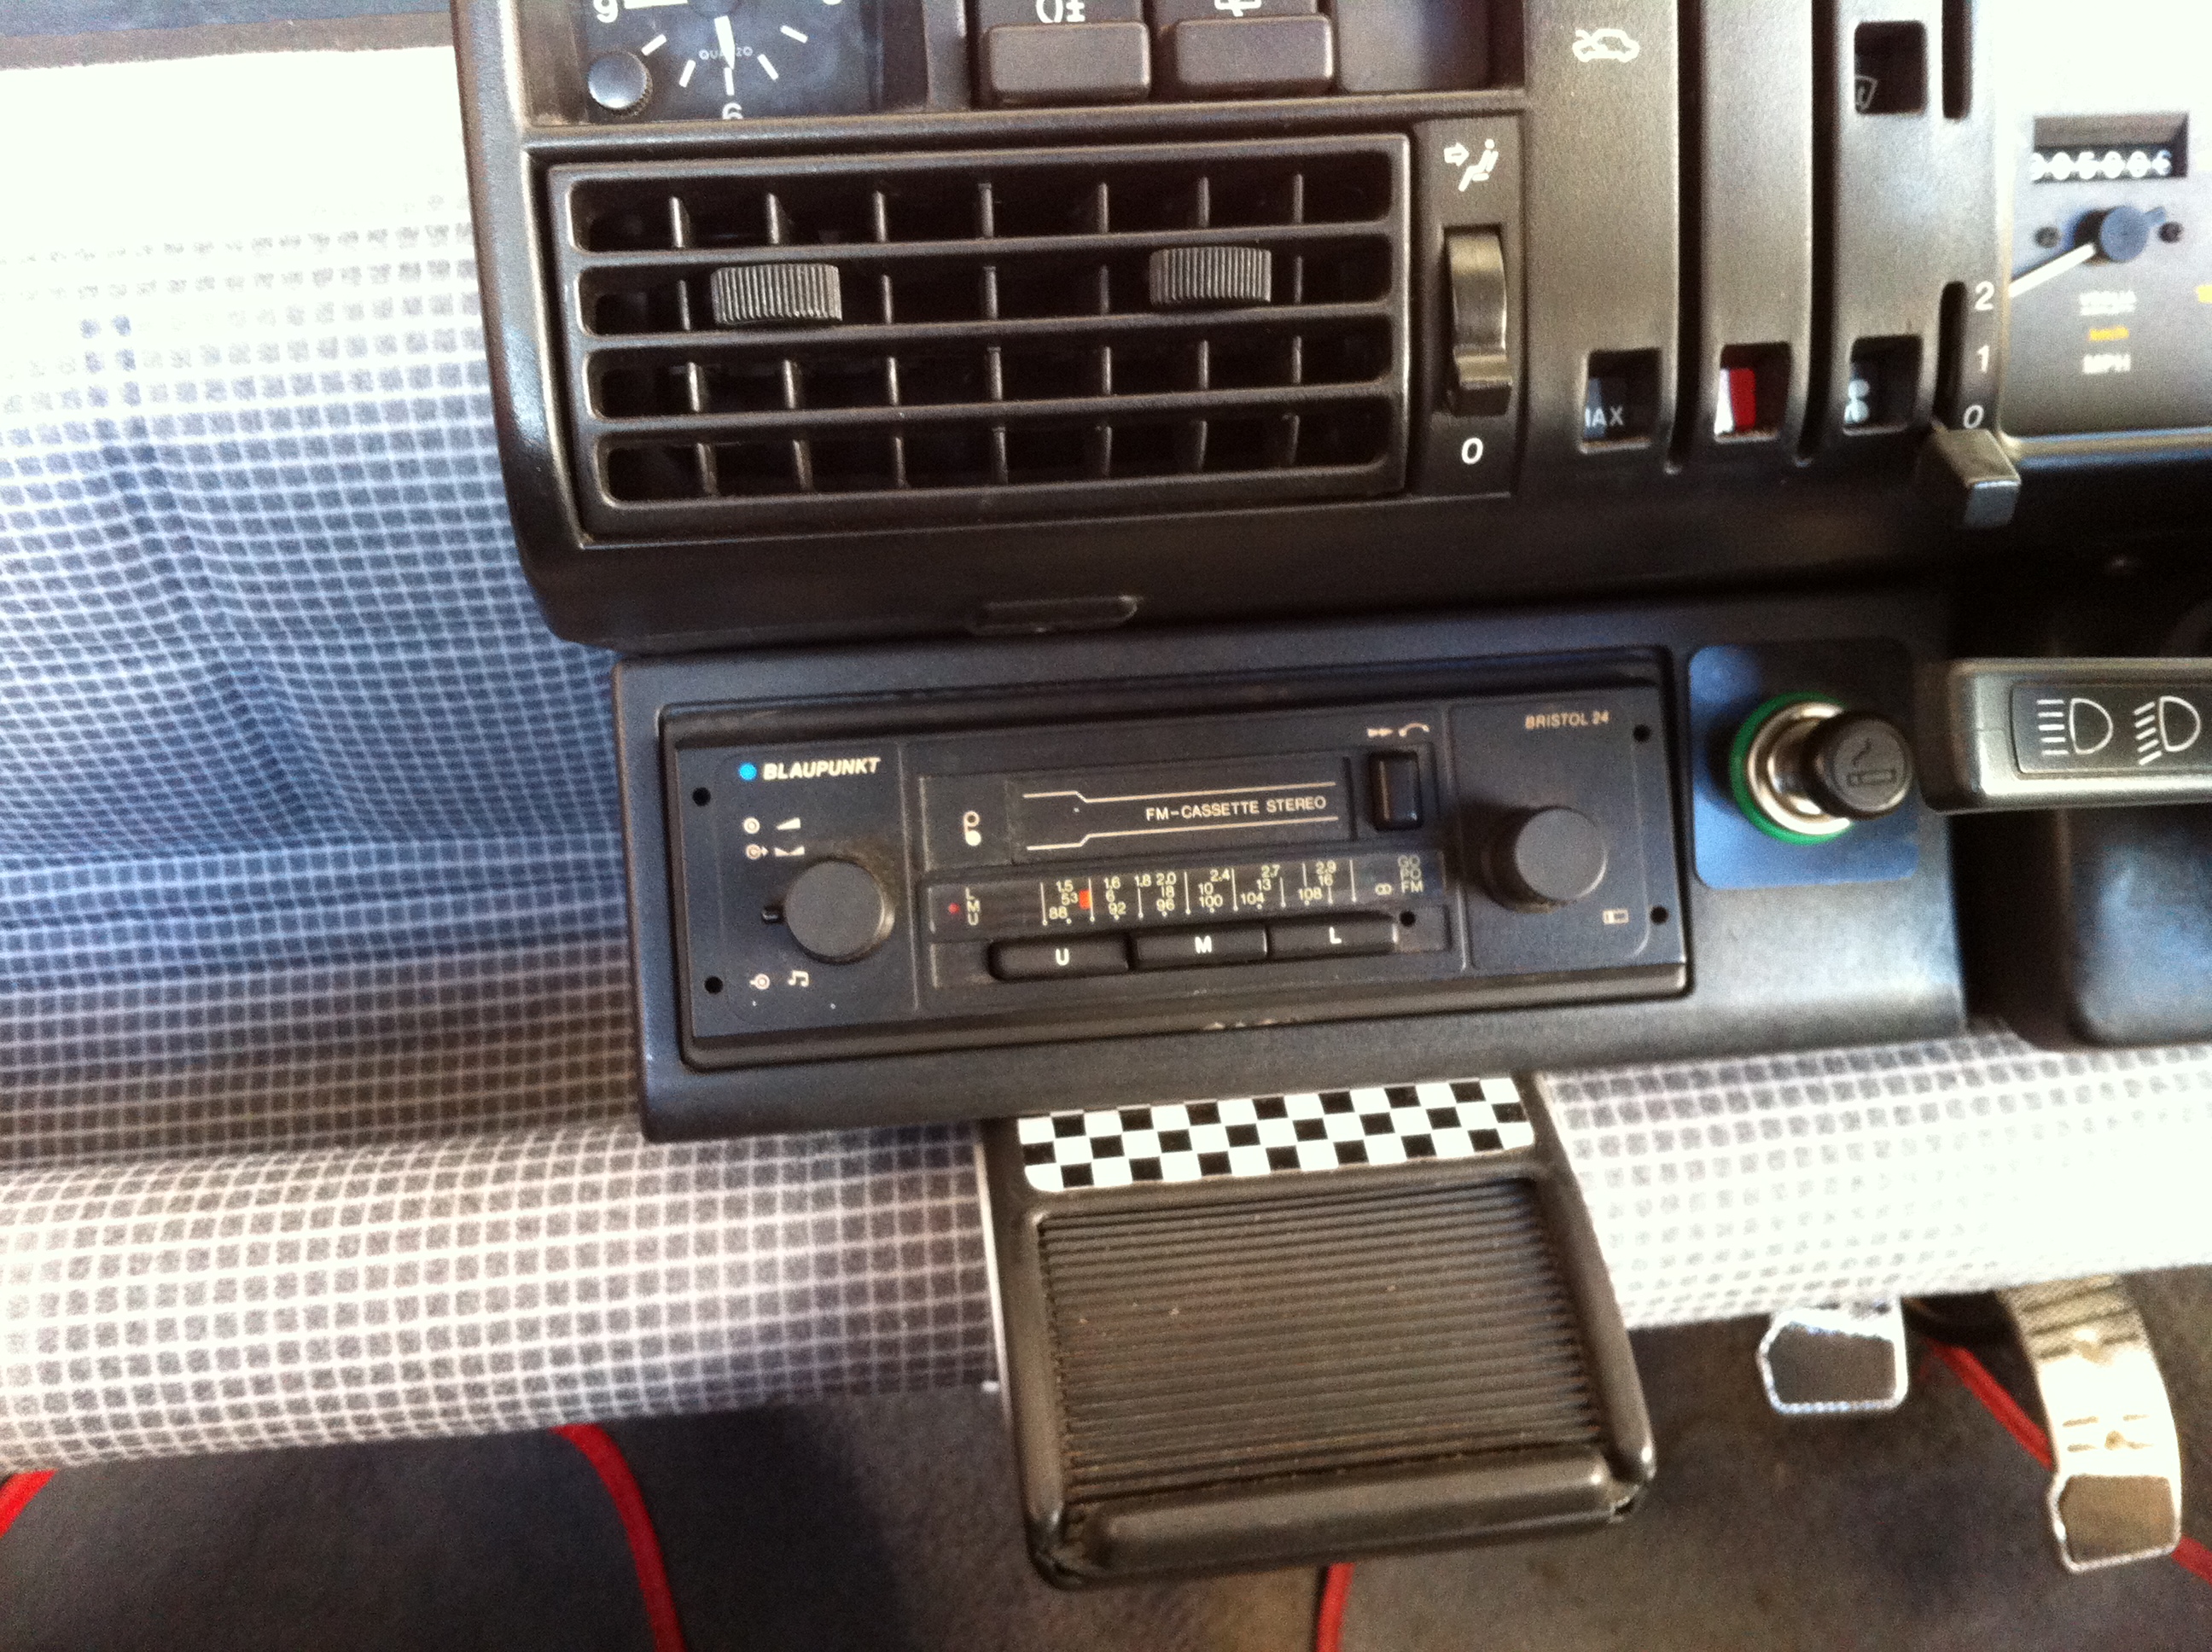
Fit radio/cd player & six speakers (2 x dash, 2 x rear side panels, 2 x rear parcel shelf ).
I think that's everything. If anyone would like to know more,full build details can be seen in these two threads which have been running since before day of purchase..
https://www.fiatforum.com/auction-watch/215832-another-red-mania-birmingham.html
https://www.fiatforum.com/panda-classic/219521-charmania-chapter-two.html
.I did lend her one of my Pandas while she waited for this one, so please don't think I made her cycle through the winter just coz Daddy wants to play
.Some pictures of the finished item.........
She's a Fiat Panda 750 Mania (Daughters name is Charmain, hence the threads title) Bought from Ebay for £103.
No tax or mot, poor performance, and no exhaust silencer, but bags of potential
. This was her the first day on my drive....First part of the plan was to get her road legal, briefly, this involved
£80 of welding to inner sills.
Replace o/s/f wheel bearing.
New tailpipe.
Re-set cam timing.
Full service and clean up.
After this little lot the total cost was about £250 and this is how she now looked............
Now for the fun stuff
.Again, briefly, this is a list of work carried out to bring her from the above picture to finished.
Go faster stripe made from cutting up a couple of viper stripe kits and making my own design.
Wheels and tyres from a 127 sport, refurbed by myself and fitted with 10mm spacers on the rear.
New standard shocks with new Spax coil springs lowering car by about 40mm.
Replace side repeaters with Rover items fitted with chrome bulbs.
Replace orange front indicators with clear ones, also with chrome bulbs.
Clean and paint suspension and brake parts as I go.
Remove gearbox, free off and lubricate clutch mechanism and gearchange linkage.
Strip interior, refit using light grey trim from another of my Pandas.
Fit Seicento Sei front seats.
Fit sportier pedals, gearknob, steering wheel, and chequered trim to door handles and horn button, plus red/grey overmats.
Make custom roof lining to tie in with chequers theme.
Fit radio/cd player & six speakers (2 x dash, 2 x rear side panels, 2 x rear parcel shelf ).
I think that's everything. If anyone would like to know more,full build details can be seen in these two threads which have been running since before day of purchase..
https://www.fiatforum.com/auction-watch/215832-another-red-mania-birmingham.html
https://www.fiatforum.com/panda-classic/219521-charmania-chapter-two.html