General Charmania - chapter two.

Currently reading:
General Charmania - chapter two.

Hi Vernon, just catching up with the Panda world.

Charmania is looking really quite loved - well done!!!(y)

Look forward to seeing more progress shortly

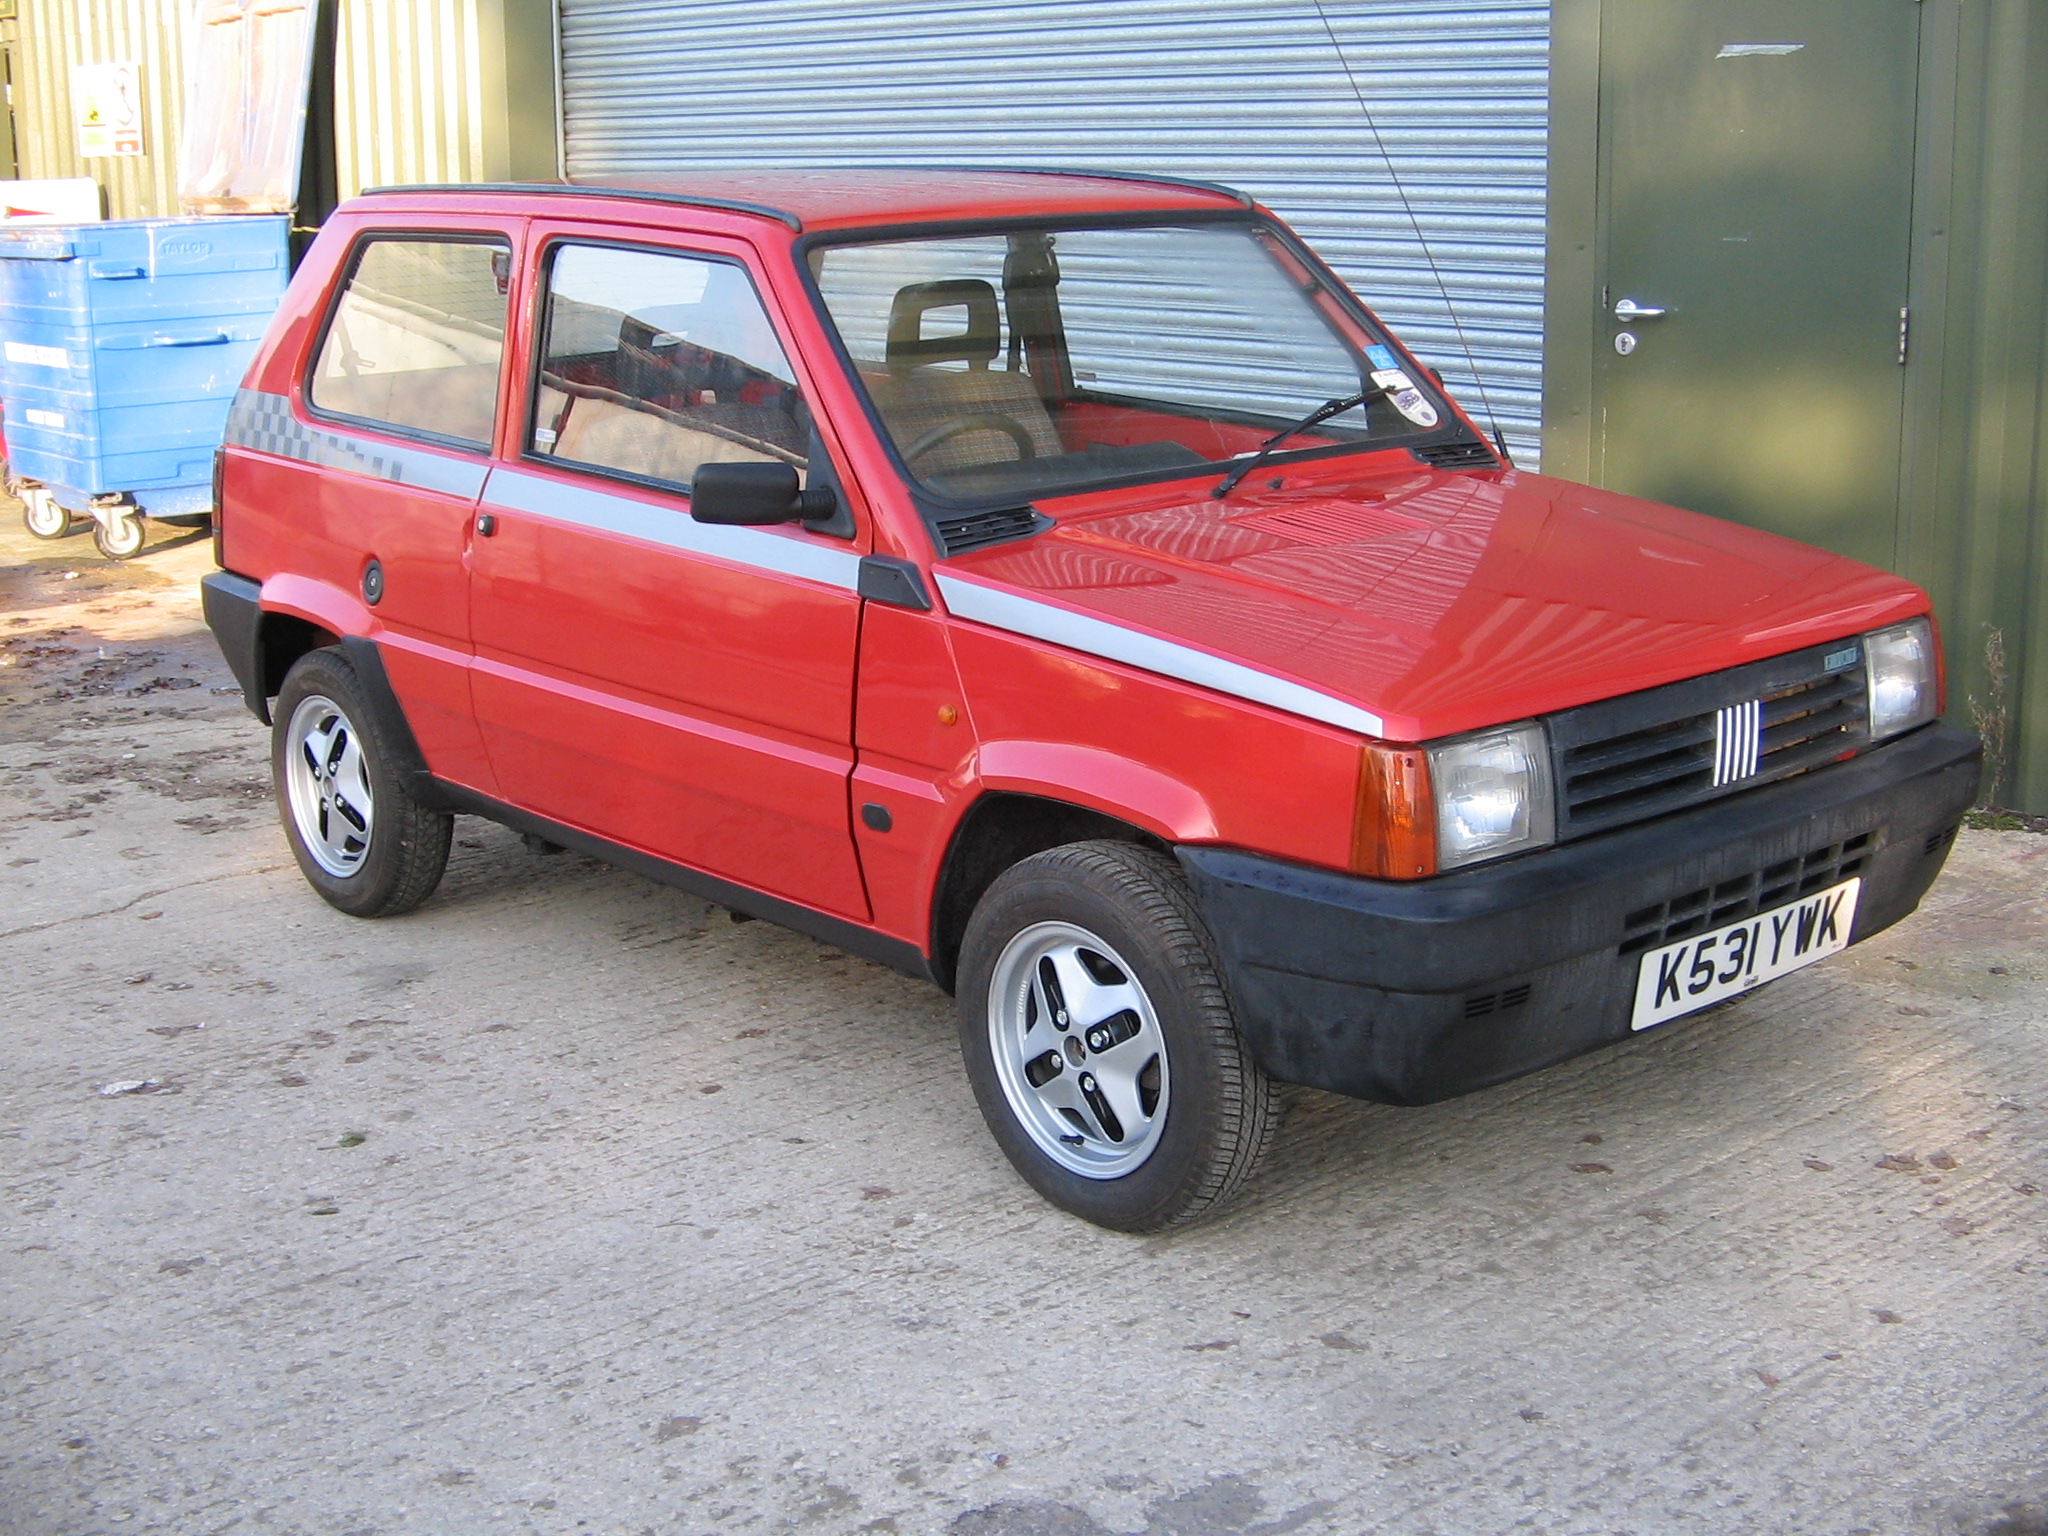
Hi Martin, yes she's certainly well loved. Recently finished the wheels so the tyres get re-fitted in the morning and put on the car. Looking forward to that as wheels always make a big difference. Considering they're over thirty years old they've come out quite well...........


Now, where did I put those centre caps I took off six months ago?

One little setback though. The dark grey pinstripe arrived and confirmed my suspition that the dark grey viper stripe I used for the chequers was the wrong colour :bang:. When I saw the viper stripes I was a bit disappointed coz they were a mid grey, not what I'd expected, but I went with it anyway as I was keen to see the end result. I've contacted the supplier and he is sending me some more viper stripes the same grey as the pinstripe, so when it arrives I'll have to make another 48 squares :(, but at least it will look as I'd originally intended.
 
Vernon, you have inspired me. Spent the last couple of hours cleaning the winter from the princess, well worthwhile looks very nice. Even got the sunroof open!!! :D

Good stuff Martin (y). All mine are the same colour as yours at the moment thanks to the frost. Charmania is being used so gets to thaw out each day, only to get on the motorway and turn white again with road salt :bang:.

Glad some of you like the wheels. Years ago I wouldn't have given them garage space! 4.5" wide! that's not an upgrade, and only 155 tyres? they're only fit for a pushchair. Yet here I am now actually choosing them over any other wheels for this car, how our tastes change with age.

Anyway, I went and had them fitted this morning, I'm pleased to say they lived up to expectations and look very retro/sporty :D.


I still need to find the centre caps, and I think I'll fit 10mm spacers on the rears, probably when I lower the suspension.

I also swapped the knackered front speakers for a pair that were in my spares car. They sound much better, but I discovered that the L/H speaker was only working intermittently because of a poor connection between the main body of the head unit and its removable front panel. The CD player doesn't work anyway so I'll swap it for another unit I have at some point while doing the interior.
 
Looks absolutely brilliant:cool: Although the first thing I thought was that it needs to be lowered:p

I really like the wheels, I take it you got them from ebay? I'll have to look out for a set.

Yeah, they'd look great on yours too! I won them about a year ago now and haven't seen any since, not that I'd been looking. I paid £12 for them including five good tyres and at the time I didn't think of it as much of a bargain, just the new bolts cost £20! what was I thinking :confused:.

I have a good tyre fitting centre that I use, they charge me £5 pounds a wheel for swapping/fitting a tyre and another £5 If I want them balanced. I did a bit of shopping around for this service prior to choosing them and found that most places don't want this kind of business so charge silly prices to put you off. This place will also remove tyres only for me for free, so I'm not paying twice if I want to refurb some wheels.

£12! Bargain! Mind you I've got a set of Cinq alloys which I got for free, they are in abit of a state though and have the wrong size tyres which is why I haven't fitted them. I'd prefer some more retro wheels anyway.

What size tyres are they? Are they 155/65? They look abit chunkier than that to me from the photo.

Your eyes do not deceive you, they're 70's.
 
looking dead smart(y) I'm quite liking that black/silver effect on the wheels at the moment, did mine earlier in the year and it just makes them more interesting.
How on earth did you persuade your car to stay clean enough to take the pics!!! mine looks horrible just now and having cleared most of the snow off it and the drive this morning ready to give it a clean, there's now about another inch lying on it again:(
Andrew.

Hi Andrew, I give it a sponge down when it starts to look rough, just with warm water, but my hands are still freezing at the end. Luckily it only takes ten minutes ;).

Kev has them on Purple haze too and think they really go.

Yeah, Purple haze is the only other car I've seen them on, apart from 127 sports of course (y). I think Fiat could be missing an opportunity by not producing them any more.
 
Well I've just driven back from Swindon, about 25 miles, on side lights. That common problem that I've read so much about has befallen Charmania. I'm talking about an overheated headlight switch of course, so I think someone has fitted better bulbs at some point.
It wasn't much of a problem in Swindon itself with street lighting, but when I hit the motorway I had to resort to holding the headlamp flash on until I found a truck to follow, not that easy as there was hardly anyone else about! Once I'd found one the windscreen then got covered in its dry spray and my washers were frozen :(
Anyway, we made it back in one piece. I think i'll make a temporary repair for now and do something more permanent when I swap the dashboard cloth for the one in Farmyard.

Not definatly linked to uprated bulbs. Regular ones will do it also.

What temp fix are you thinking of Vernon?
 
I'm thinking of connecting the wires straight through, I have the lights on most of the time during the day in this weather anyway, and it will only be for a week or two. Having said that, the switch is working again today. :)
 
I'm thinking of connecting the wires straight through, I have the lights on most of the time during the day in this weather anyway, and it will only be for a week or two. Having said that, the switch is working again today. :)

Yeah that should work ok (y)

Just don't touch them during operation, as if they're burning the switch out they will burn you!

I've a nasty mark on one of my fingers from the Sisley when I connected them directly and then decided to randomly touch them :eek:
 
Yeah that should work ok (y)

Just don't touch them during operation, as if they're burning the switch out they will burn you!

I've a nasty mark on one of my fingers from the Sisley when I connected them directly and then decided to randomly touch them :eek:

Thanks Jon, noted. I've had my fingers burned too many times already ;).
 
Well I got a little detail job out of the way today. My spares car had clear front indicator lenses which I thought would suit Charmania. Plus I'd already fitted Rover side repeaters to my 750L a few months ago, which I liked, so thought I would repeat this on Charmania too.

The clear lenses have an orange insert, but I wanted a completely clear look so I removed this and used chrome bulbs instead.


Here's the end result....


Next was to fit the Rover side repeaters. I like these because they are more Panda shaped, plus they are also clear so match the fronts. I also used chrome bulbs to avoid the fried egg look.


I had to take down the front wheel arch liners because you need to sqeeze the lugs on the back of the originals to remove them. The wiring doesn't come out very far so I cut the wires close to the light which makes it easier to crimp on some new connectors.
I bought a couple of used lights on ebay, be careful buying new, sometimes you only get the lens, which is no good as the Panda bulb holders don't fit the Rover lenses.
I had to file out the holes in the wings, so used the rubber gasket as an initial guide using it to scribe out the initial shape........


A needle file set is very useful here. A few extra bits needed filing before the light will fit, it's just a case of offering the light up to see where you need to take off a bit more. This is the final profile........


I then had to paint the bare metal edges and wait for the paint to dry. This is the hardest part as all I wanted to do was pop it in to see it finished. Watching paint dry is like watching paint dry!
I'll get a picture of the finished job in the morning when it's daylight again, roll on spring!
 
Last edited:
Back
Top