


Introduction
I don't know if you guys remember but back in january I was starting a project that involved me swapping the piston rods from 8v ones to the 16v ones, fitting a 1.4 8v grande inlet manifold, and a spicy CB cam  .
.
Well that got thrown out, and I promised you I would still do a project.
I Delivered:

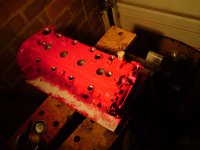
The donor engine was removed from a 2003 fiat stilo 1.2 16v with only 28k on the clock.

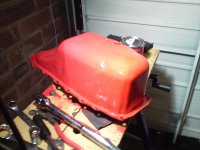
I got the engine home, stripped it down and painted it pretty much straight away (getting quite high in the garage during the winter).
Re-assembled with pistons soaking on oil for the next several months.


The next thing that was on the "to-do" list was chassis tweeks and upgrades.
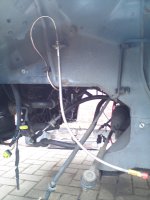
So off came all the brake lines (They were definately on their way out, so it should be on everyones checklist. Please I do advise this), radius arms, rear beam, petrol tank, handbrake cable, wishbones, front uprights, front calipers. I took everything off so that it was just a shell with windows, steering wheel and seats.
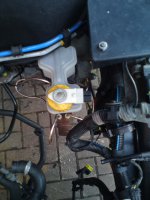
Brakelines were all replaced with 3/16 cooper nickel and shiny stainless fittings, finished off with some nice goodridge braided lines.


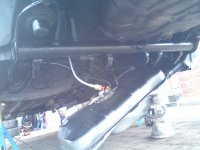
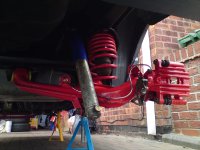
Rear beam was tidied up, painted and refitted for the new lines to be correctly routed.

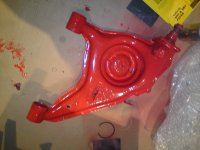
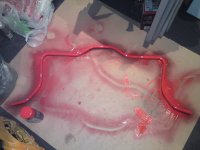
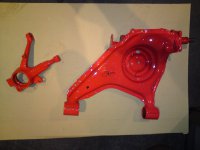
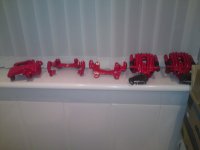
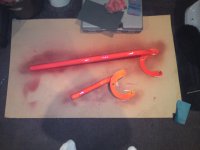
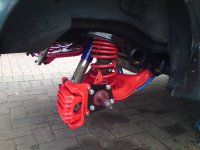
Whilst I was doing the brake lines the radius arms were also being tidied up and painted, along with anti roll bar, uprights, and my front upper strut brace.


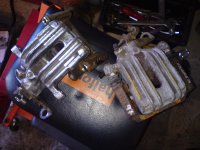
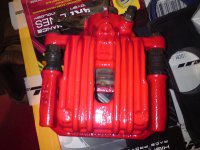
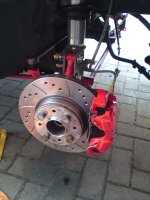
Then came a nice delivery of my marea rear calipers to go with my PGT front, they got stripped down and wirebrushed right back to the shiny stuff. (see the before and after)

Then got a lick of paint again.


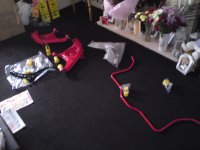
A little while went by then a nice postman came again with my fresh polski produce


A few days later another box came from good ole gazzella.

Then my mount plates arrived from Signwerx so I finally got arond to refitting all my back end.


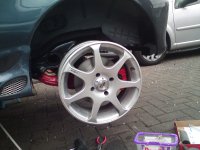
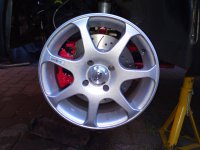
Trial fitted my wheel with the 10mm spacers from the front, Discovred that i'm in need of 15mm at the back due to rubbing on the radius arm :bang:.

And same day I got bored and re-fitted the front too. All finished off by my custom Gaz coilovers on the front, and custom Gaz dampers on the rear (Need a coil chopping out on the rear mind just so the car is nice and level).

The bushes were noticeably stiffer even off the floor, no give or flex in the material at all. I theory with some decent tyres this car should stick to the floor nicely.
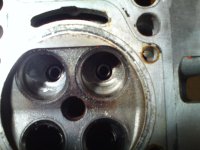
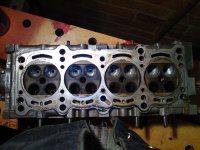
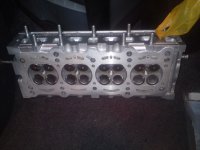
nother payday was coming up so the head got some attention in the form of a dremel, dividers were thinnned down, ridges ground out, drill marks were ground out and smoothed, and to finish off. Hand sanded all off it smooth with good ole 80 grit for the inlet, and outlet was smoothed out finer and spent a few hours polishing till bling bling.

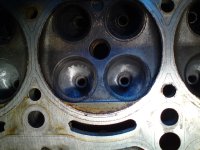
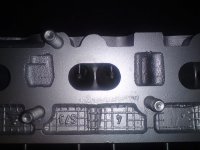
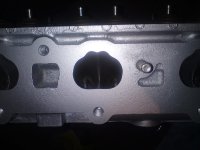
Valve hole on the right shows what it was before grinding, left shows part way through grinding.


Never got any photo's from that night of finishing it off but It will improve flow no end (I hope).
Next day it went to my local machine shop to have a couple of new guides fitted, skim, and reseat with new seals.
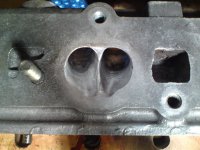
Inlet:

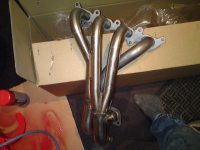
Exhaust:


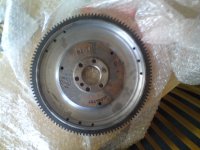
A trip to another fairly local machine shop resulted in:

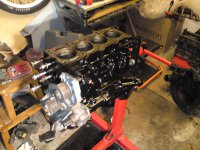
1.8KG taken off the stilo flywheel, balanced with the clutch (happy days)
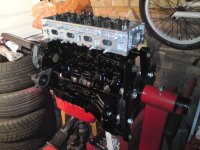
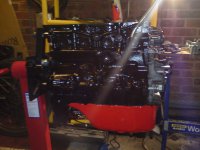
Got home that night and decided to make a hesitant start on re-fitting the head.

I've never poo'ed myself so much tightening bolts up.
Was all fitted without so much as a sqeak (followed adived and gently wiped engine oil on the bolts).
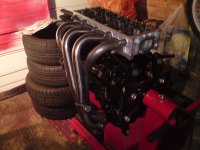
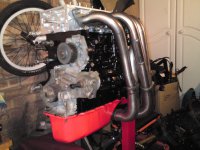
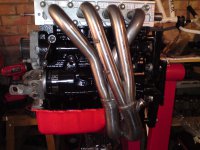
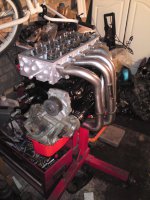
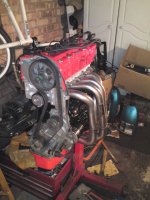
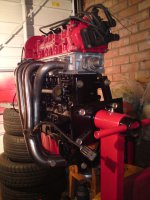
So happy after that I then fitted my manifold and oil filter.


Then began painting my head and fitted it next day along with water pump pipe from the old engine (new seal, again advise checking quite oftenly).

Timed up and ready to go in


Then postman came again. Hello drilled and grooved.

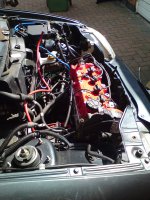
That Weekend came, so did my friends brother (whom I owe a drink) and something magical happened in a few hours.


We did manage to break my new crank sensor in the process mind :bang:.
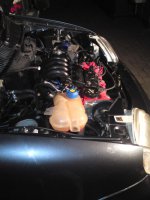
Sexy


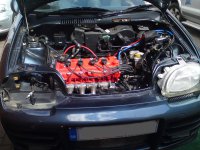
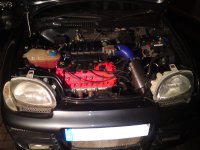
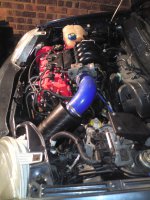
Then I struggled a little for and inlet manifold but then I managed to source one from a fiat breaker then along came Kritip to help me with the wiring (thanks again bud). Spent the last few days finishing that off and last night it fired up for the first time in 5 months.
Made some awesome bangs before hand though due to us having the coils wired backwards (oops), quick swap of the leads and it fired up first time.


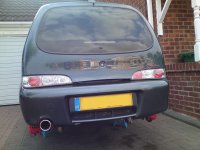
All that is left to do now is get myself a set of new tyres, get over to custom chrome in the morn and get my new front exhaust section made (yes we started the car up without and exhaust, sounded nice and loud :tempt Cov69, and kritip both were witnesses to the start up . Thanks again guys for your help.

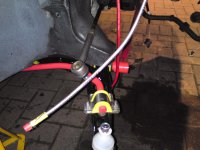
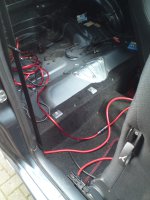
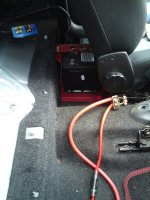
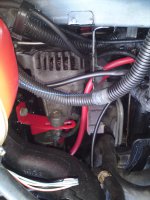
Ohh before I forget, here some pic's of the new wiring for the battery, starter, and alternator:
Hint, it's the big thick one without the fuse on it.


Here's where i'm up to, i'll update this soon.
.Well that got thrown out, and I promised you I would still do a project.
I Delivered:
The donor engine was removed from a 2003 fiat stilo 1.2 16v with only 28k on the clock.
I got the engine home, stripped it down and painted it pretty much straight away (getting quite high in the garage during the winter
).Re-assembled with pistons soaking on oil for the next several months.
The next thing that was on the "to-do" list was chassis tweeks and upgrades.
So off came all the brake lines (They were definately on their way out, so it should be on everyones checklist. Please I do advise this), radius arms, rear beam, petrol tank, handbrake cable, wishbones, front uprights, front calipers. I took everything off so that it was just a shell with windows, steering wheel and seats.
Brakelines were all replaced with 3/16 cooper nickel and shiny stainless fittings, finished off with some nice goodridge braided lines.
Rear beam was tidied up, painted and refitted for the new lines to be correctly routed.
Whilst I was doing the brake lines the radius arms were also being tidied up and painted, along with anti roll bar, uprights, and my front upper strut brace.
Then came a nice delivery of my marea rear calipers to go with my PGT front, they got stripped down and wirebrushed right back to the shiny stuff
. (see the before and after)
Then got a lick of paint again.
A little while went by then a nice postman came again with my fresh polski produce
A few days later another box came from good ole gazzella.
Then my mount plates arrived from Signwerx so I finally got arond to refitting all my back end.
Trial fitted my wheel with the 10mm spacers from the front, Discovred that i'm in need of 15mm at the back due to rubbing on the radius arm :bang:.
And same day I got bored and re-fitted the front too. All finished off by my custom Gaz coilovers on the front, and custom Gaz dampers on the rear (Need a coil chopping out on the rear mind just so the car is nice and level).
The bushes were noticeably stiffer even off the floor, no give or flex in the material at all. I theory with some decent tyres this car should stick to the floor nicely
.nother payday was coming up so the head got some attention in the form of a dremel, dividers were thinnned down, ridges ground out, drill marks were ground out and smoothed, and to finish off. Hand sanded all off it smooth with good ole 80 grit for the inlet, and outlet was smoothed out finer and spent a few hours polishing till bling bling
.
Valve hole on the right shows what it was before grinding, left shows part way through grinding.
Never got any photo's from that night of finishing it off but It will improve flow no end (I hope
).Next day it went to my local machine shop to have a couple of new guides fitted, skim, and reseat with new seals.
Inlet:
Exhaust:
A trip to another fairly local machine shop resulted in:
1.8KG taken off the stilo flywheel, balanced with the clutch (happy days
)Got home that night and decided to make a hesitant start on re-fitting the head
.
I've never poo'ed myself so much tightening bolts up.
Was all fitted without so much as a sqeak (followed adived and gently wiped engine oil on the bolts).
So happy after that I then fitted my manifold and oil filter.
Then began painting my head and fitted it next day along with water pump pipe from the old engine (new seal, again advise checking quite oftenly).
Timed up and ready to go in
Then postman came again
. Hello drilled and grooved.
That Weekend came, so did my friends brother (whom I owe a drink
) and something magical happened in a few hours.
We did manage to break my new crank sensor in the process mind :bang:.
Sexy
Then I struggled a little for and inlet manifold but then I managed to source one from a fiat breaker then along came Kritip to help me with the wiring (thanks again bud
). Spent the last few days finishing that off and last night it fired up for the first time in 5 months. Made some awesome bangs before hand though due to us having the coils wired backwards (oops), quick swap of the leads and it fired up first time
.
All that is left to do now is get myself a set of new tyres, get over to custom chrome in the morn and get my new front exhaust section made (yes we started the car up without and exhaust, sounded nice and loud :tempt
Cov69, and kritip both were witnesses to the start up . Thanks again guys for your help.
Ohh before I forget, here some pic's of the new wiring for the battery, starter, and alternator:
Hint, it's the big thick one without the fuse on it
.
Here's where i'm up to, i'll update this soon
.


