General And so it begins MK2

Currently reading:
General And so it begins MK2

Harllequin

Member
Joined
Dec 7, 2004
Messages
595
Points
132
Location
Durham
Well today didn’t get off to the start I’d hoped for.

Went to get a new wireless for the MX5, fitted said wireless to the MX5 which didn’t do what it should so had to take it out again. Kill most of the day.

Add to that waiting for parts and the need to tidy the garage day 1 = RIP.

So onto the list of things to do I think.

New clutch cable bought and ready to fit in an attempt to lighten the clutch.

Choke cable ordered as it almost needs two hands to pull it out and is non to friendly to set correctly.

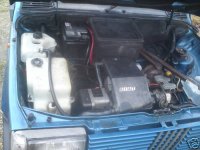
Engine mount ordered, should be here tomorrow. Need to find a place to buy the other one now.

New fuel pump ordered, again should be here tomorrow.

Nothing done to the car as such, I’ll start it tomorrow (y)

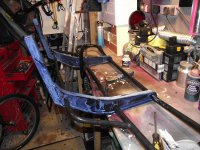
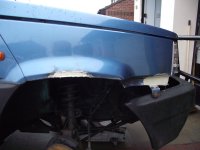
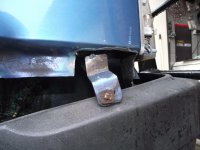
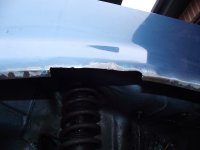
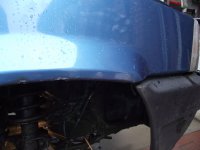
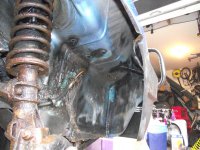
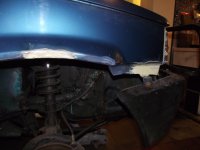
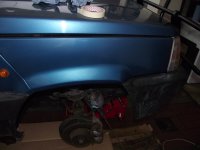
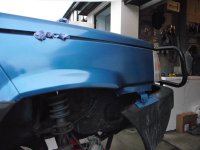
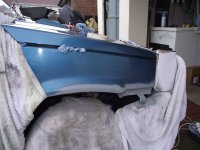
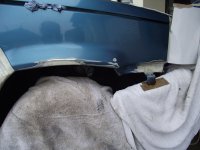
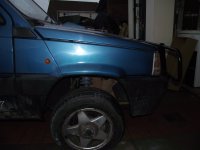
Bull bars cured of tin worm and by the morning should be ready to prep and paint with good old Smoothrite.

Pic is of the front bull bar, plastic scraped off on the rusted bits (pig of a job!)
Now sat in anti tin worm :cool:
 

Attachments

  • Bull bar anti rust web.jpg
    Bull bar anti rust web.jpg
    425.5 KB · Views: 122
:DWell, time for a coffee.

Thats the clutch cable fitted and adjusted.

Choke cable removed and waiting on the call from the shop to say they have the one I ordered in.

Various adjustments and things done in the engine bay.

Bodywork seems to have had some attention very recently, but not to my standard, so I'll be attacking it soon with the cutter and welder :cool:

I think it could likely use a set of shocks but that can wait until some come along at a reasonable price.

Now to find a replacement for the rear trim thats broken.

Oh and bull bars painted
 
Well I changed a bulb in the dash so I could see the speedo. Then the problems started!!!

Ignition on and fuel guage goes to 3/4. Put lights on and all warning lights show up and fuel guage goes to max :eek:
Long story of much testing later and its the earth from the instrument panel. Added more earths and all was fine, AKA 10am till 2pm today :bang:

Went to get the bits from the motor factors.

New choke cable fitted as is the new fuel pump.
The pump seemed ok but for what it takes to change them and what they cost I did it anyway.

Also got a new engine mounting as these seem a bit tired. Here's the thing, the parts book says its a different mounting for each side but looking at the rubber bit they seem to be the same, can anyone confirm this please?

Removed 2 of the bolts ready to fit the bull bar on the front, I'll tackle the other 2 tomorrow but at 5.30pm it was getting a bit cold to continue on.

The brake pipes have all been renewed by the look of it and new flexi pipes all fitted so thats one thing not to worry about, though I'll check the brakes anyway, likely next week end.

For the rest of the night I want another coat of paint on the bull bars ready for tomorrow and thats me done :slayer:
 
Not a bad day today at all.

Took it for a run to Machine Mart to pick up some argon/co2 mix gas for the welder.

Added detergent to the old oil (last changed December) then drained that, added flushing oil, drained that, then changed the filter and added nice new semi sinthetic oil hhmm :cool:

Fitted the engine mount to the gearbox side, now to order the one for the other side now I know they are the same (y)

Seats taken out, cleaned and covers fitted.

Carpet removed and old sound proofing junked. There has been one patch done to the passenger side bit the rest is solid :yum:

Front Bull bar fitted.

Roof rack being coated in WD40 so that later this week I can try and get it off.

Carpets to be cleaned tomorrow and then refit the lot.

Pics are not the most interesting I'm afraid.
 

Attachments

  • !BkU3OcQ!Wk~$(KGrHqIOKi4Er)63BvfpBL(IDVTHQg~~_12.jpg
    !BkU3OcQ!Wk~$(KGrHqIOKi4Er)63BvfpBL(IDVTHQg~~_12.jpg
    30.5 KB · Views: 67
  • DSCF9120.JPG
    DSCF9120.JPG
    3 MB · Views: 86
  • DSCF9121.JPG
    DSCF9121.JPG
    3.3 MB · Views: 76
  • DSCF9122.JPG
    DSCF9122.JPG
    3.7 MB · Views: 83
Last edited:
Ok front interior has now beed done.

The drivers side seat was not going back and forth too well. I discovered the bar has snapped in the middle where it attaches to the floor. A quick weld later and paint and its working great now (y) Sorry I didng get pics :mad:

Ok here we go for pics I have (y)

First is the car as was.

Next is the car stripped and all surface rust cured, no holes to be found! :eek:

Next is the car with some sound insulation / rubber stuff that feels good under the carpet.

Then we have the carpets back in after a good cleaning, we cant get that bloody blue off though :(

Then with the seats back in all nice and covered and new mats down.

Rust / agricultural smell now gone :slayer:

The back is still a work in progress so that can wait till another post :yum:
 

Attachments

  • Front with carpet cleaned.JPG
    Front with carpet cleaned.JPG
    3.2 MB · Views: 92
  • Front with under rubber.JPG
    Front with under rubber.JPG
    2.8 MB · Views: 88
  • Front Stripped and cured.JPG
    Front Stripped and cured.JPG
    3.1 MB · Views: 95
  • Inside from back stripped.JPG
    Inside from back stripped.JPG
    3 MB · Views: 117
  • Interior Start.jpg
    Interior Start.jpg
    25.8 KB · Views: 51
  • Front done.JPG
    Front done.JPG
    2.9 MB · Views: 66
Ok today I attacked the front drivers side.

I've decided to do a corner at a time, checking for tin worm and mechanical problems.

Today I found the bottom ball joint was shot so that came out.

All the rest of it mechanically was fine though (y)

As for the dreaded tin worm. I WIN!!!!! :slayer:

The first 2 shots at the amount of play there was in the bottom ball joint.

The rest or pics of tin worm war. I forgot to take a pic of the plates I welded in though :mad:

Lamp oil depletion stopped play however so I'll finish it off tomorrow.
 

Attachments

  • Drivers inner arch3.JPG
    Drivers inner arch3.JPG
    2.6 MB · Views: 46
  • Drivers inner arch2.JPG
    Drivers inner arch2.JPG
    2.5 MB · Views: 57
  • drivers inner arch1.JPG
    drivers inner arch1.JPG
    2.4 MB · Views: 42
  • Drivers lower ball joint2.JPG
    Drivers lower ball joint2.JPG
    2.7 MB · Views: 79
  • Drivers lower ball joint1.JPG
    Drivers lower ball joint1.JPG
    2.8 MB · Views: 75
  • Drivers wing filled1.JPG
    Drivers wing filled1.JPG
    2.5 MB · Views: 79
  • Drivers wing cut2.JPG
    Drivers wing cut2.JPG
    2.4 MB · Views: 45
  • Drivers wing cut1.JPG
    Drivers wing cut1.JPG
    2.3 MB · Views: 38
  • Drivers wing rust.JPG
    Drivers wing rust.JPG
    2.8 MB · Views: 78
  • Drivers inner arch4.JPG
    Drivers inner arch4.JPG
    2.5 MB · Views: 44
  • Drivers wing filled2.JPG
    Drivers wing filled2.JPG
    2.3 MB · Views: 75
Well thats the drivers side all done :)

The paint that Martin gave me with the car was a good match too!!

Pics are the car fine filled, then primed, then coloured, then lacquered, followed by the bumper lined up, after that wax oil applied, finally finished and on the ground again (y)
 

Attachments

  • Drivers side bumper lined up.JPG
    Drivers side bumper lined up.JPG
    4.3 MB · Views: 73
  • Drivers side lacquered.JPG
    Drivers side lacquered.JPG
    2.5 MB · Views: 73
  • Drivers side coloured.JPG
    Drivers side coloured.JPG
    2.5 MB · Views: 69
  • Drivers side primed.JPG
    Drivers side primed.JPG
    3.9 MB · Views: 84
  • Drivers side fine filled.JPG
    Drivers side fine filled.JPG
    3.1 MB · Views: 70
  • Front drivers waxed1.JPG
    Front drivers waxed1.JPG
    3.3 MB · Views: 77
  • Front drivers waxed2.JPG
    Front drivers waxed2.JPG
    3.4 MB · Views: 40
  • Front drivers done.JPG
    Front drivers done.JPG
    4 MB · Views: 80
Back
Top