P1000133small.jpg

Panda (Classic) 1982 Panda 45

Introduction

I'm pretty sure most of the Panda section regulars will know this car, but I thought I would post a few photos of the latest edition to my fleet.

P10003703.JPG

P1000133small.jpg


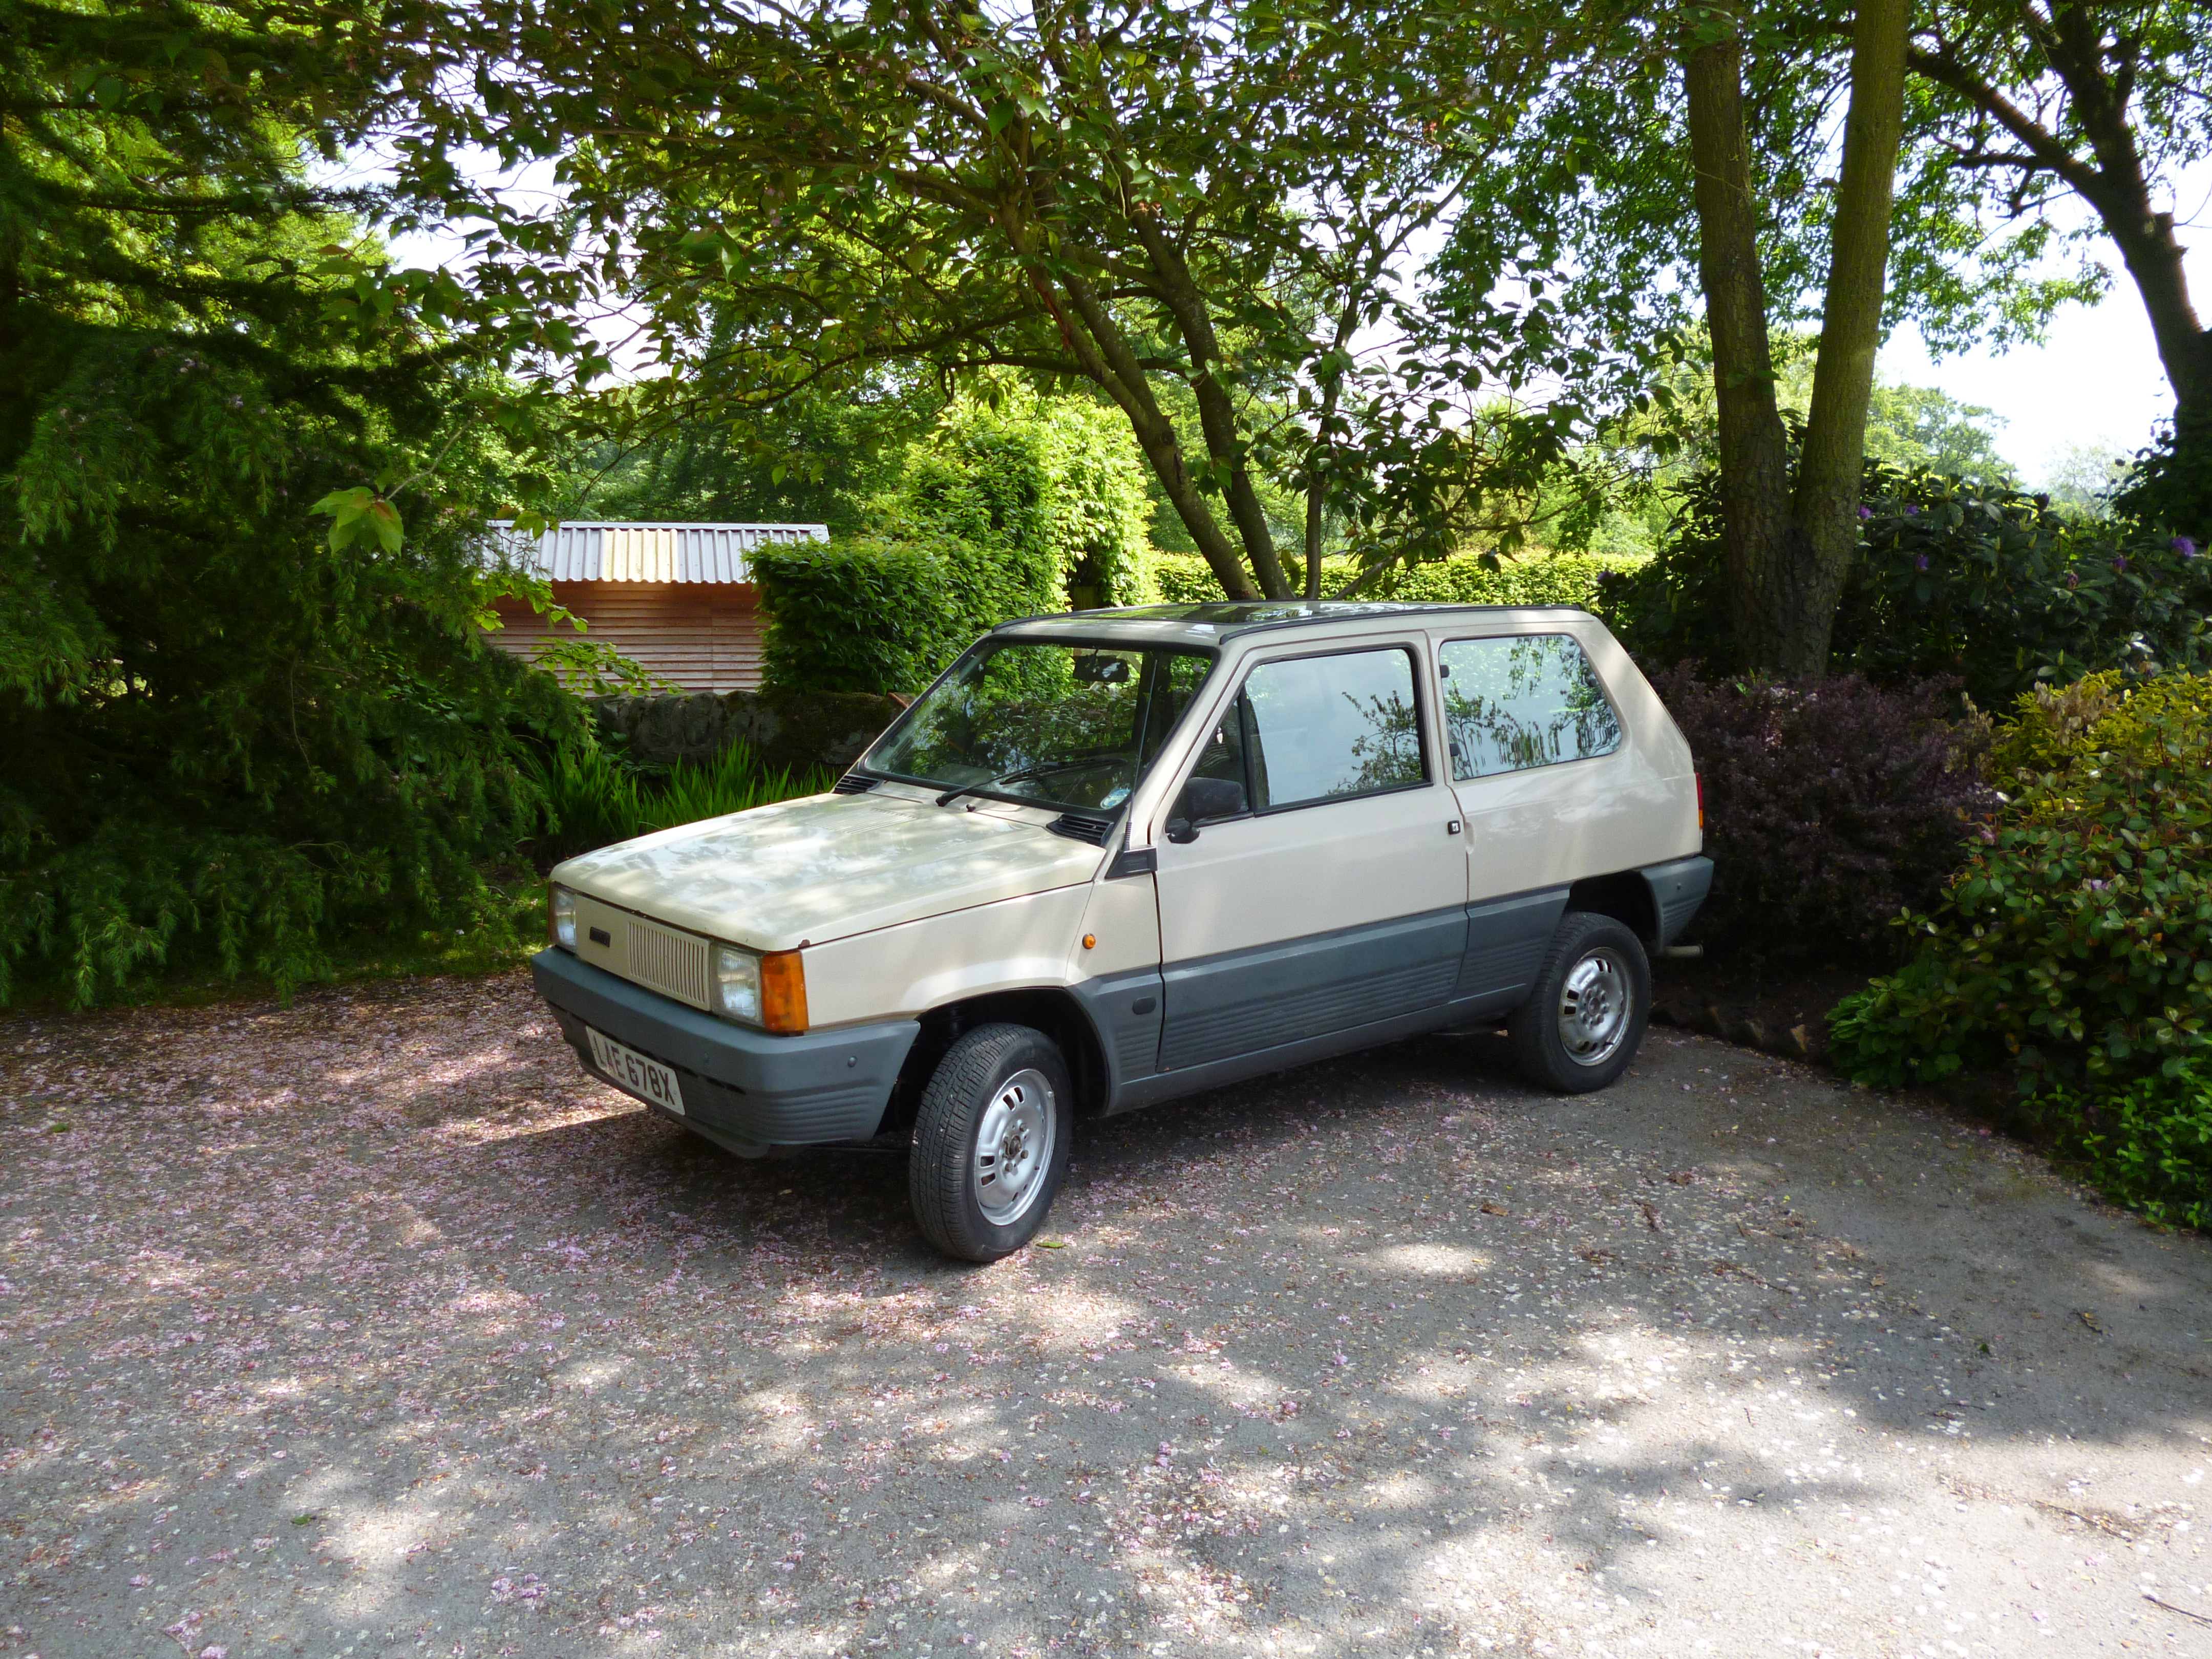
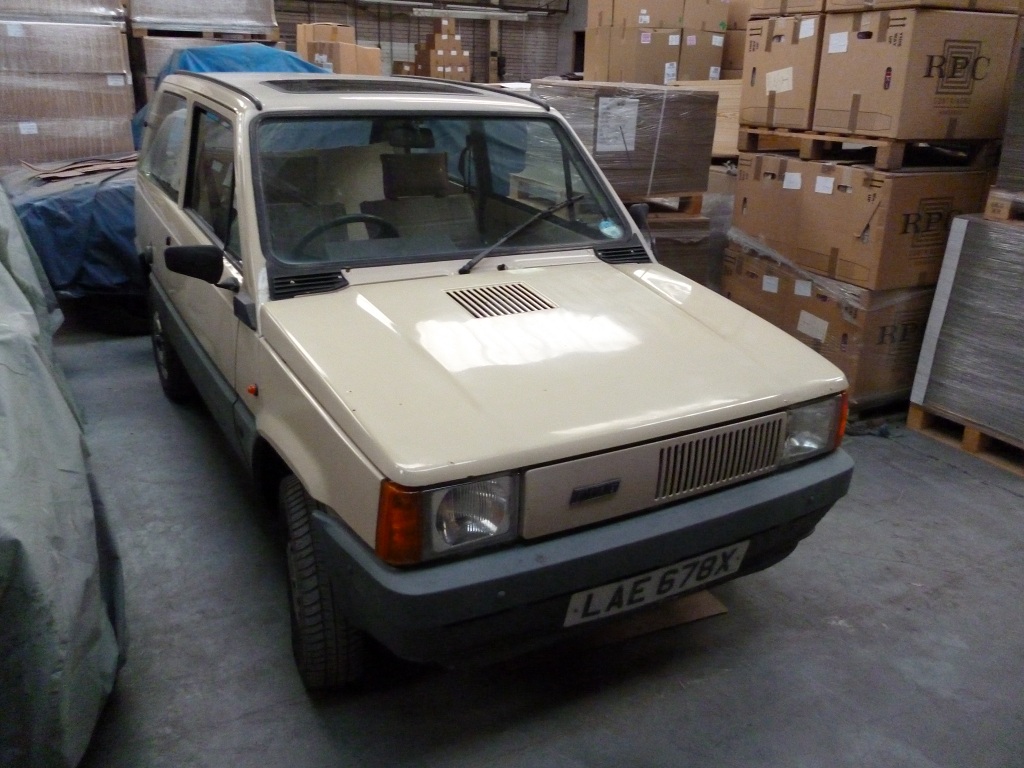
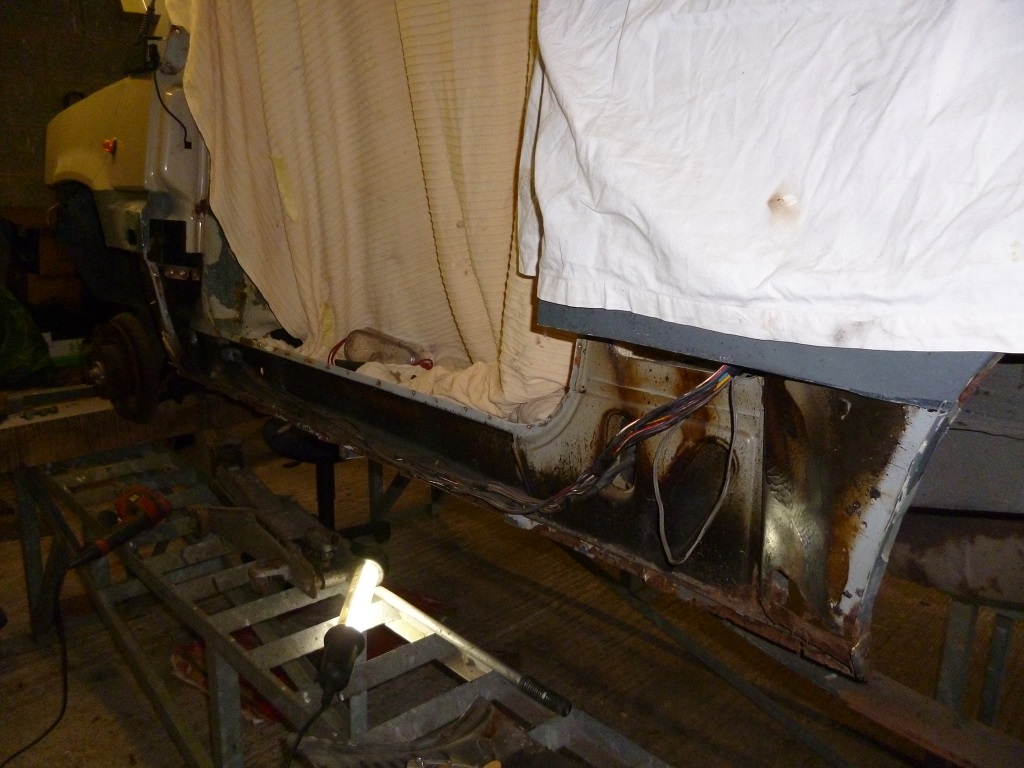
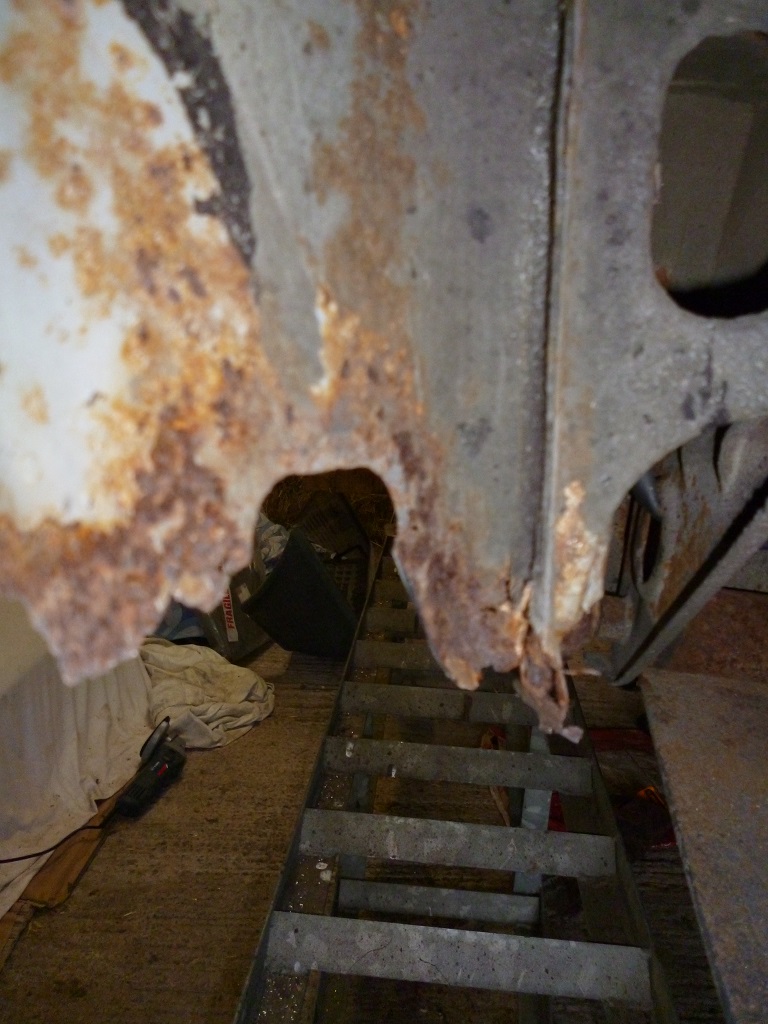
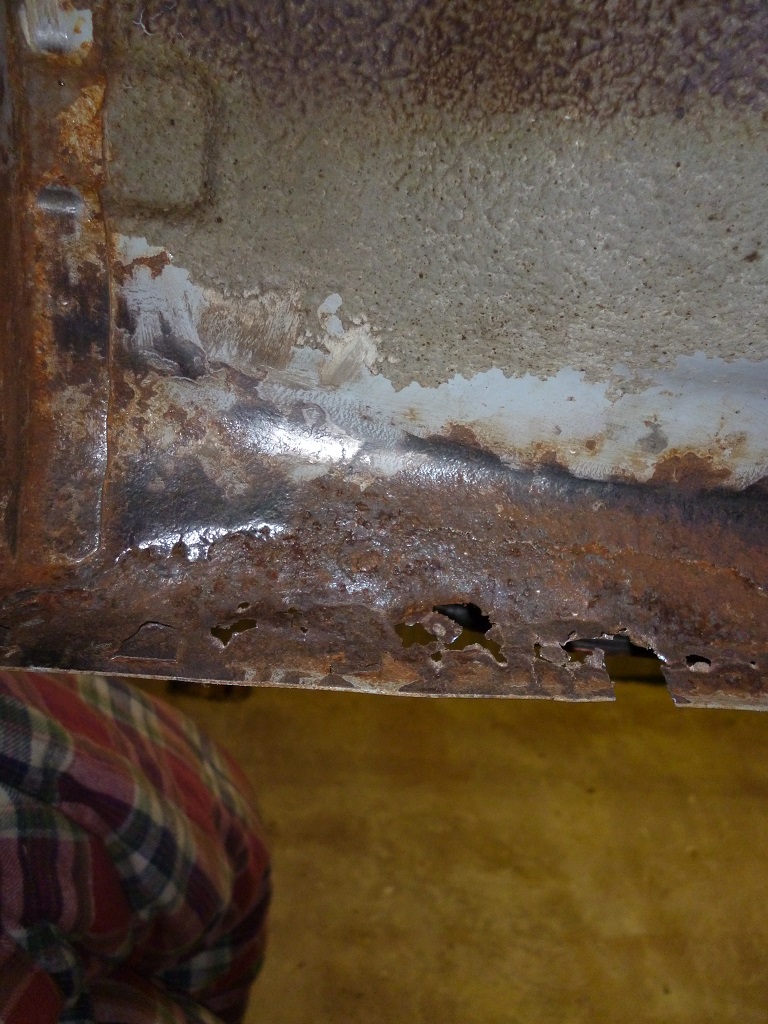
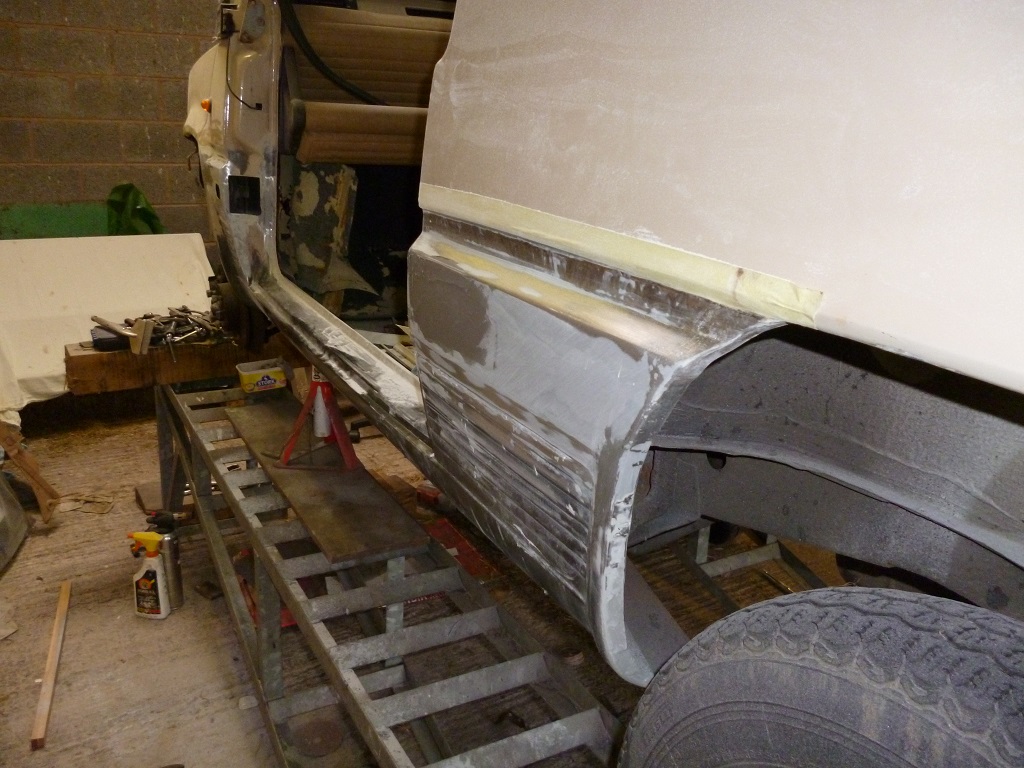
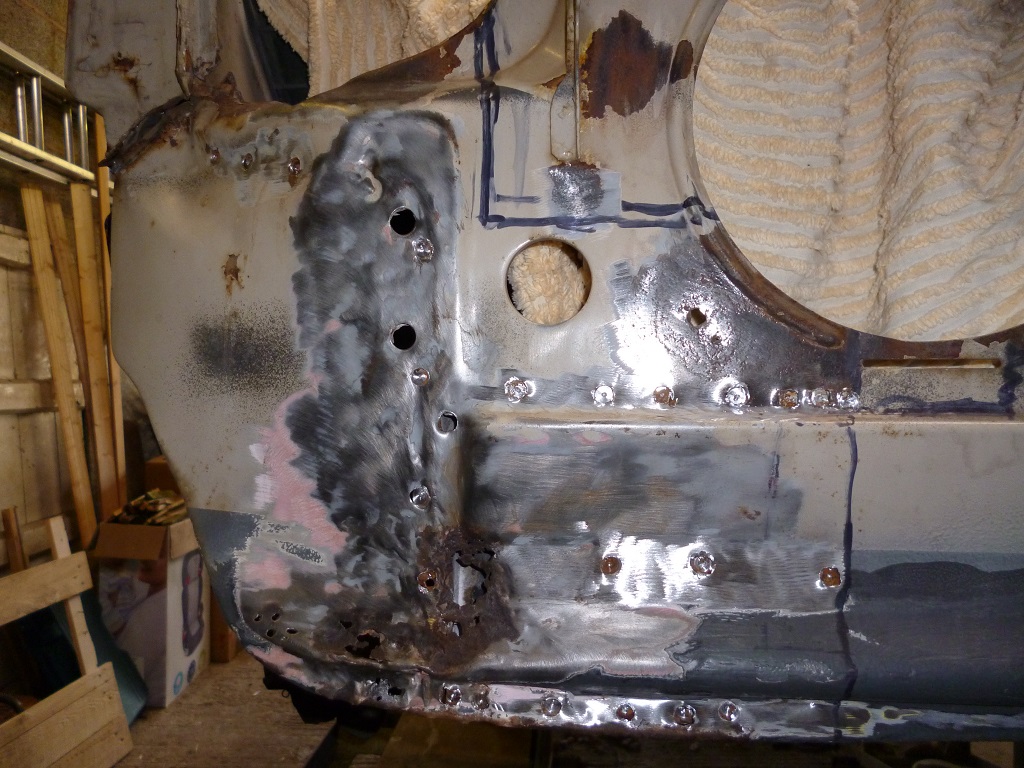
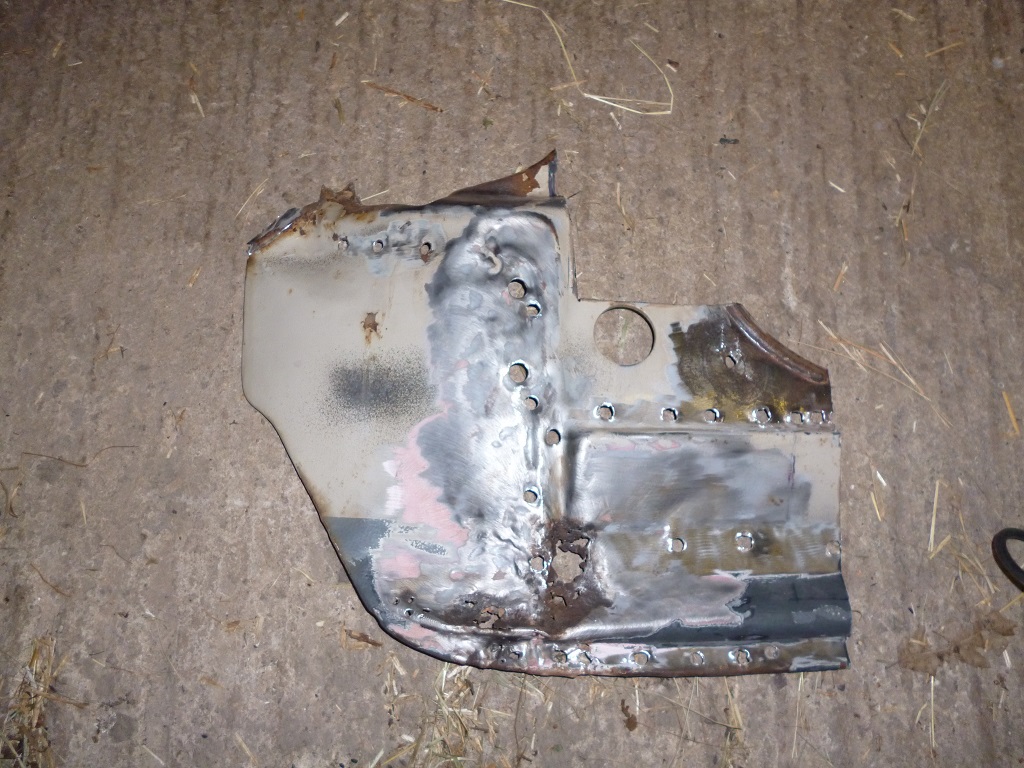
It is a early 1982 Mk1 45, previously owned by forum member Cacciatore, and is possibly the second oldest Panda left in the UK. Unfortunately it has failed its MOT on a couple of bits of welding and a few other things, but I am very impressed at how solid it is especially for a 30 year old Fiat!

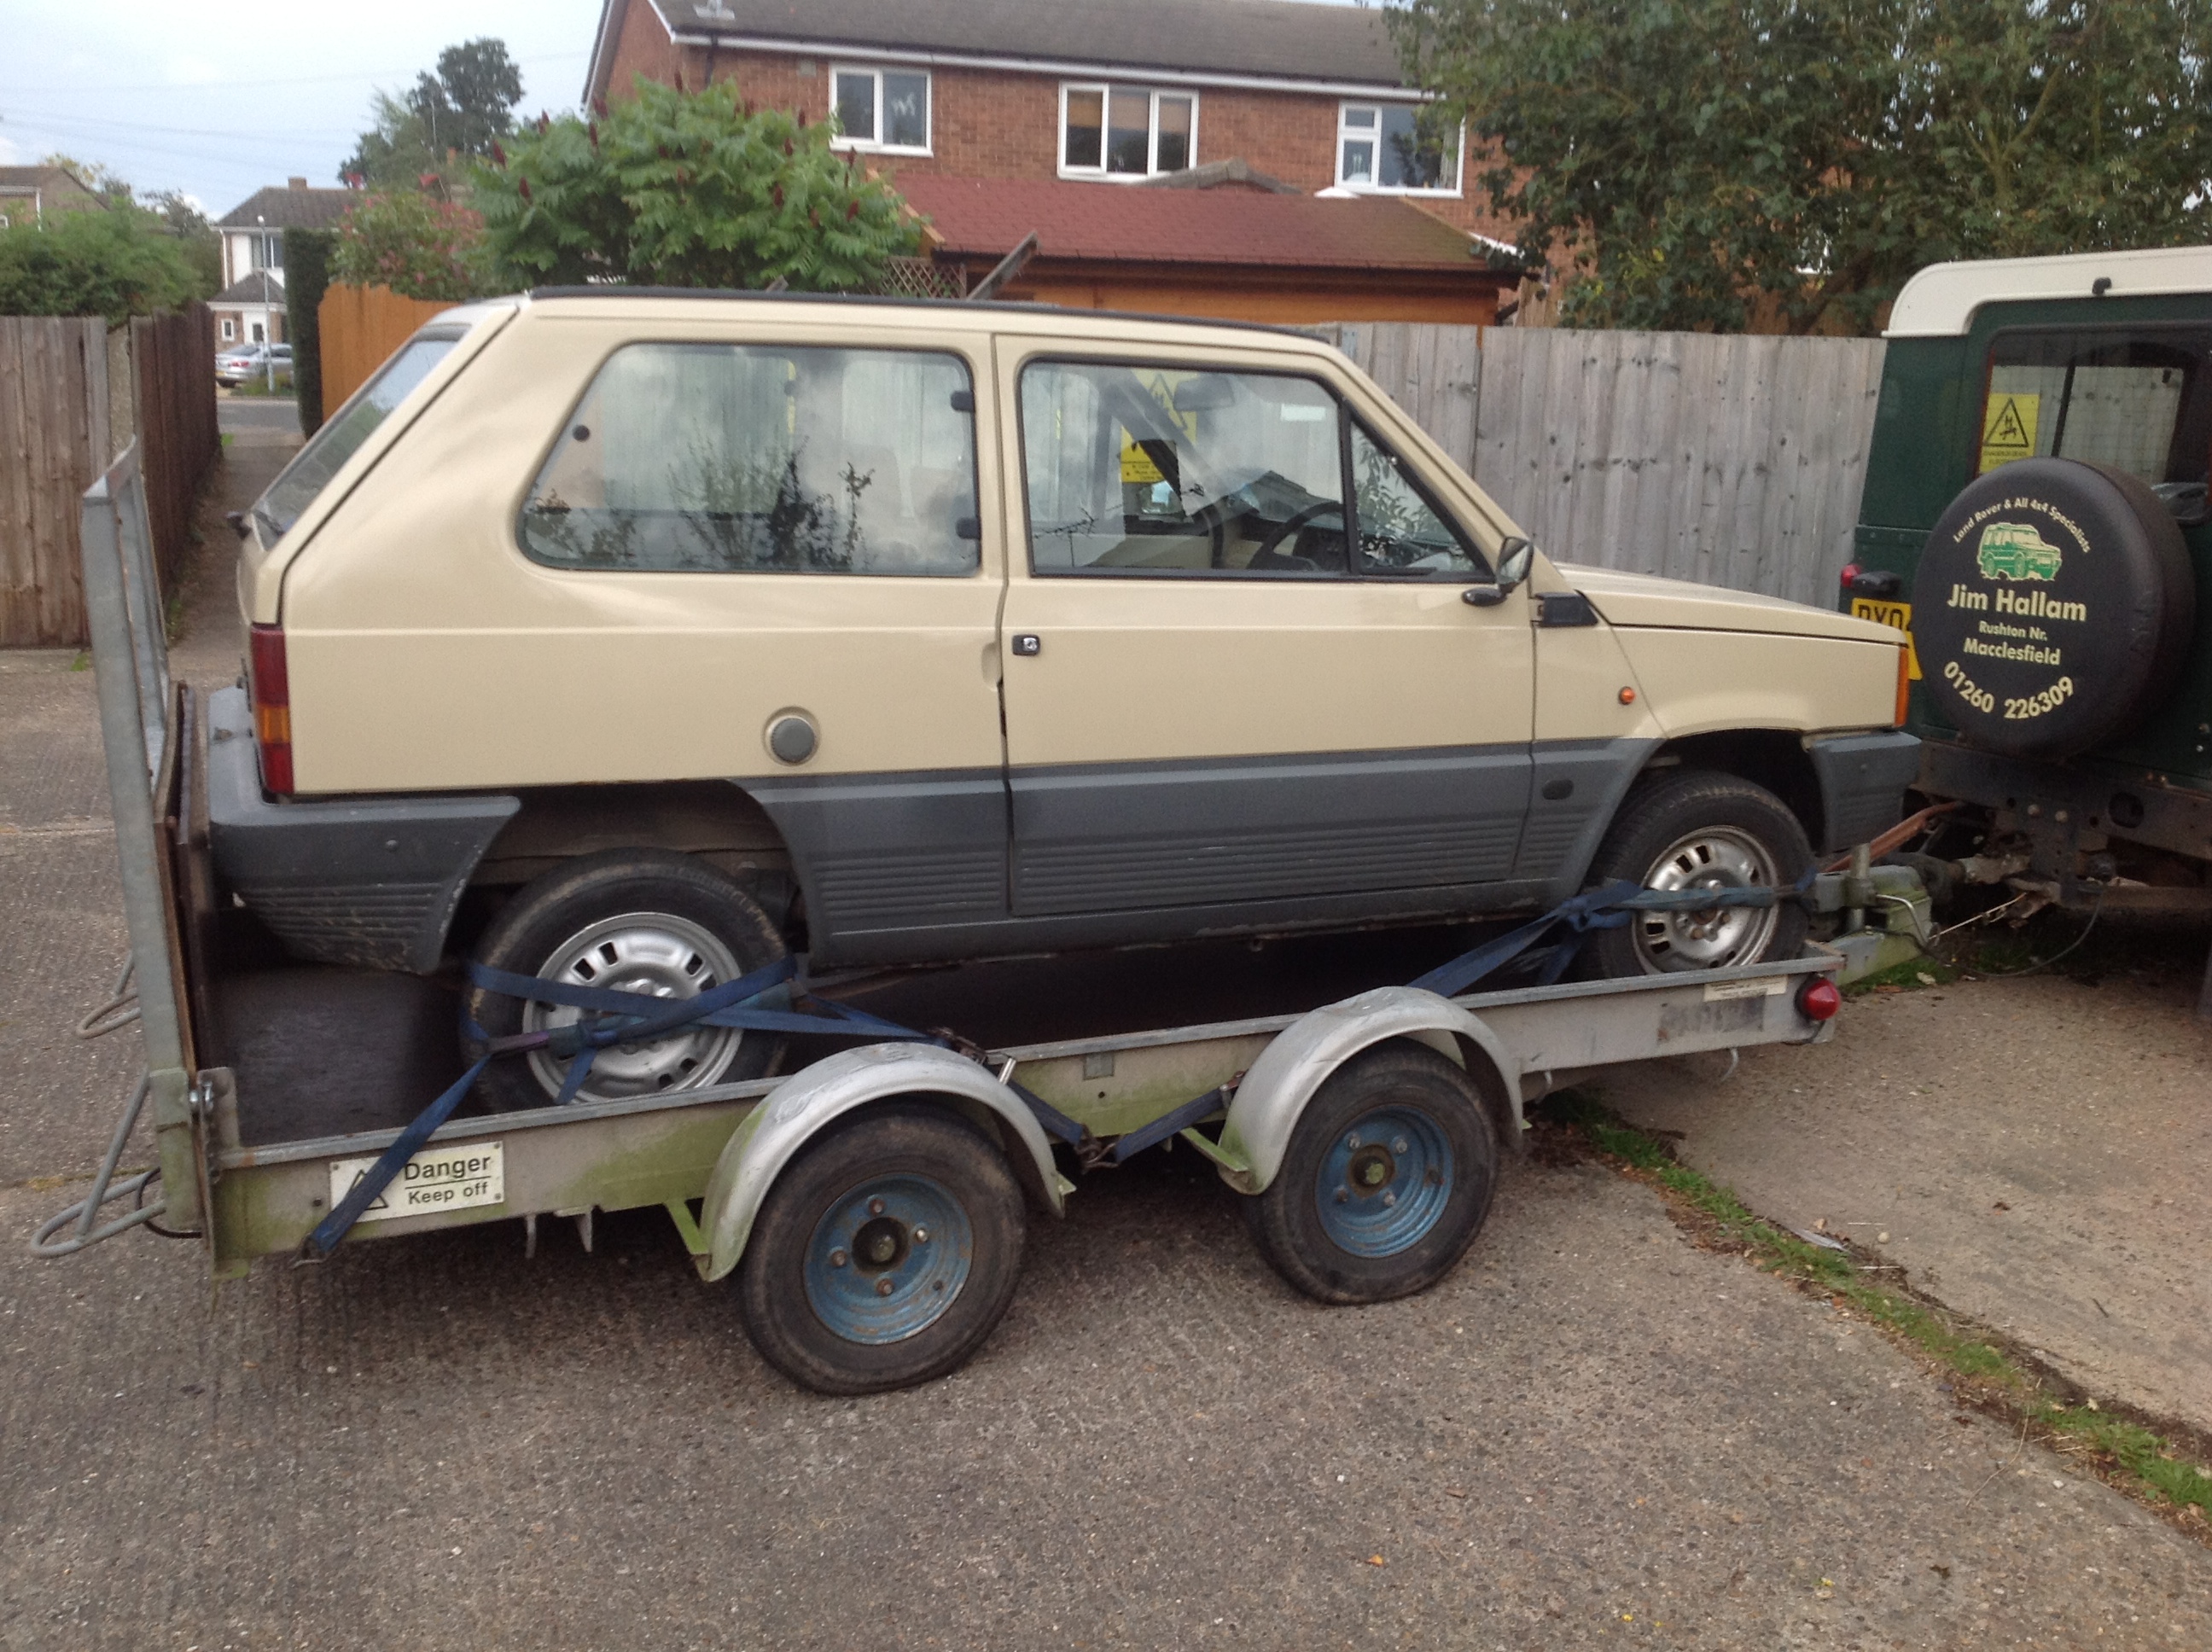
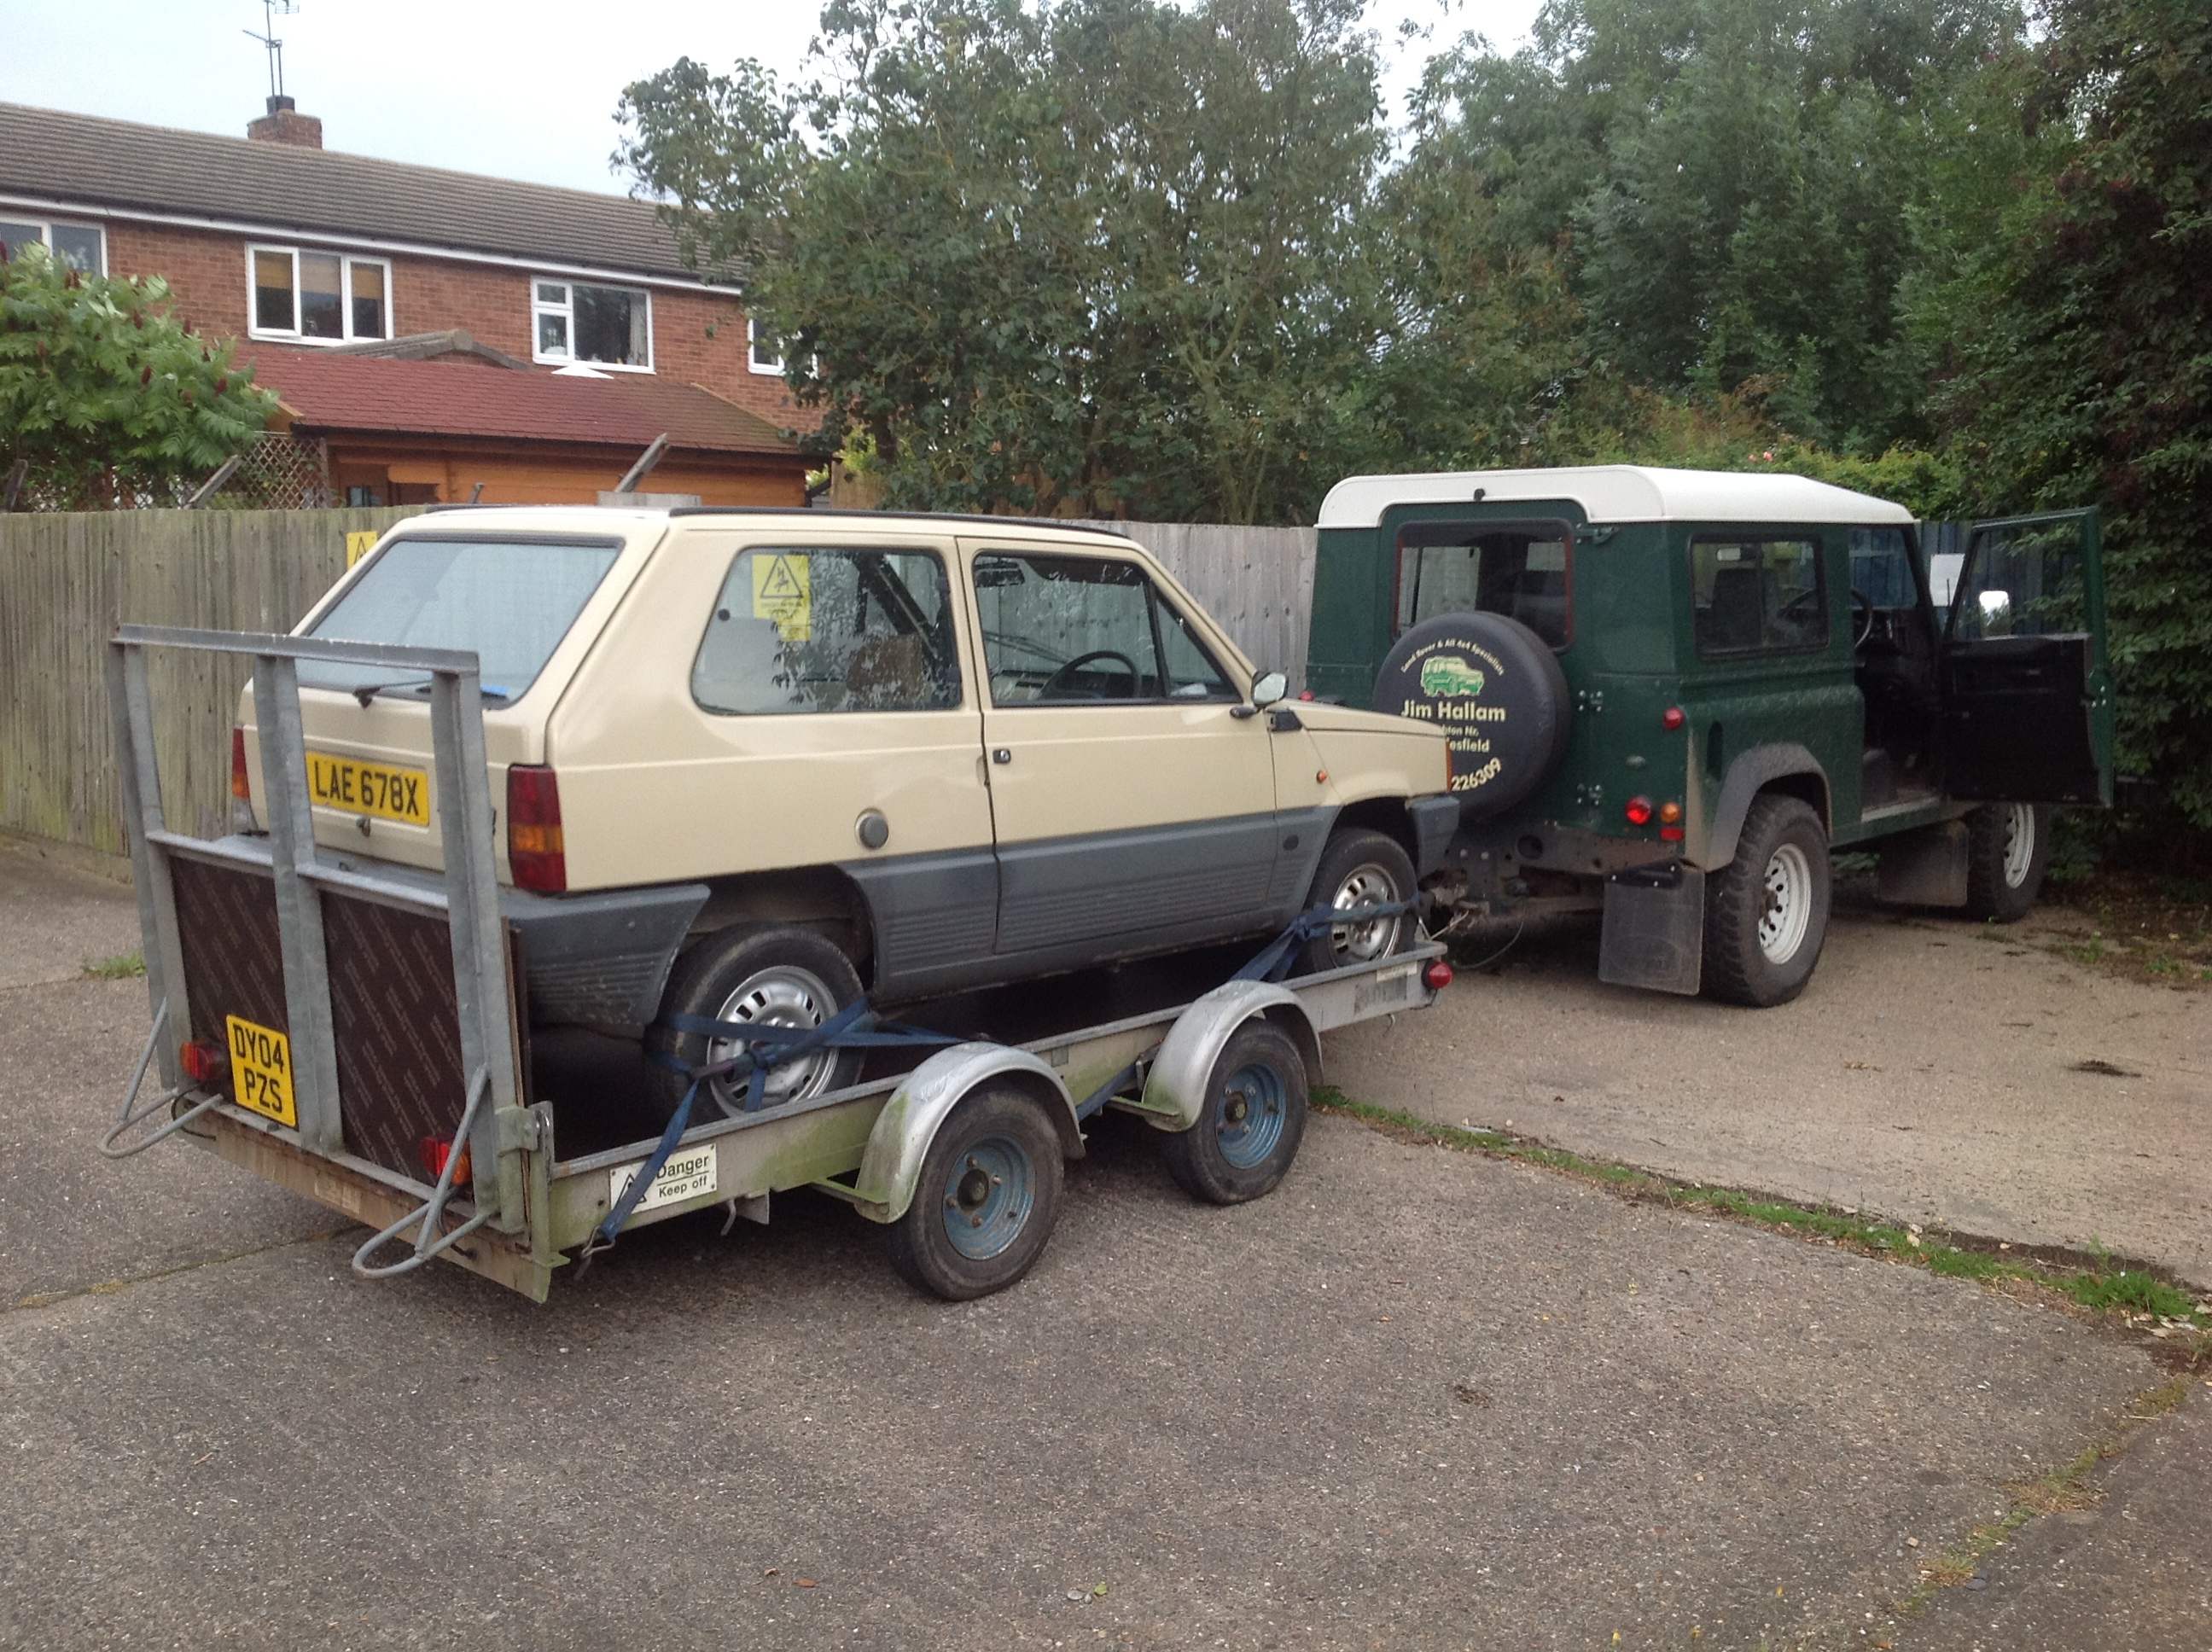
We picked it up last night and I was a bit worried it wasn't going to fit on our trailer! Luckily it did, just!
photo_25.JPG

photo_32.JPG


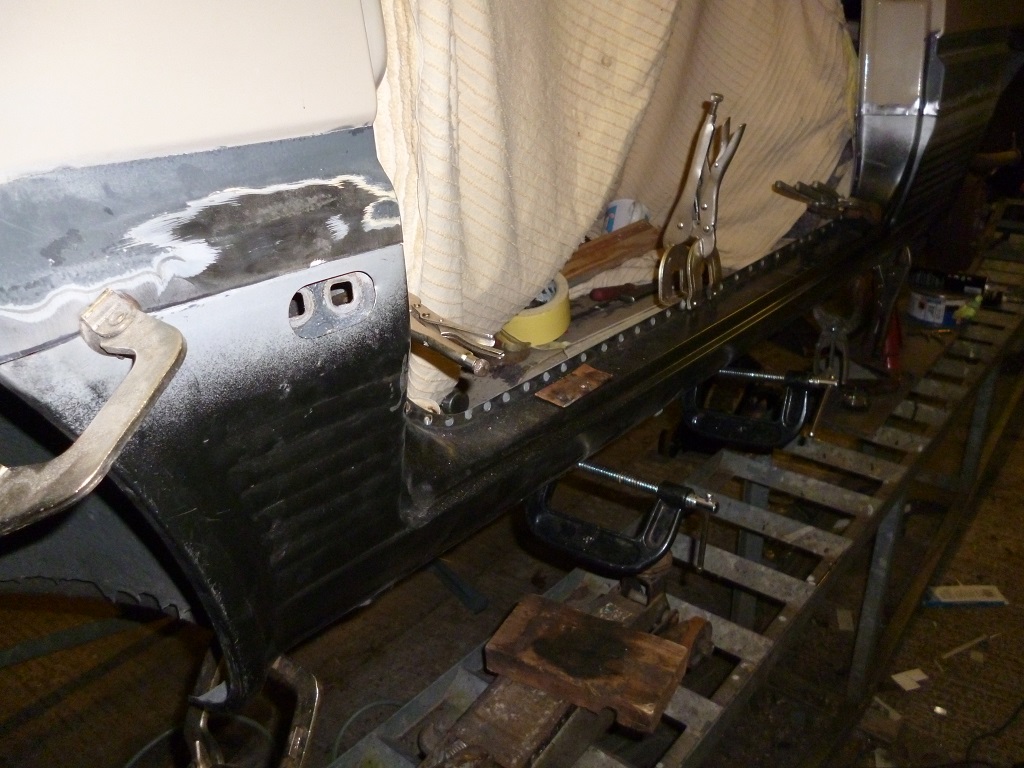
The plan is to do the MOT jobs over the winter once my Sisley is finished and then get it on the road in the spring and do a rolling restoration.
Think I will clean up the original panel first and see what I find. I can get a non genuine panel from here for alot less. From that website I think the ebay panel may be slightly different than what I need anyway.

I went on the website in that link today and it looks like they've updated thier records, only 4 items listed for the classic Panda now. :(
 
I've got a couple of new front panels if you need one Freddy, but I will have to check that they'll fit a Mk1.

I imagine any Panda front panel will fit, the only difference as far as I can see is the cut outs for the radiator, the mk1 has one round and one square, whereas mk2s have two sqaure ones. It also seems that very early mk1s have the round cut out in a slightly different place, there are some on Italian ebay which look correct, the one being sold on ebay uk is a later mk1 panel.
 
Haven't updated this for a couple of weeks, been plugging away doing the repairs to the inner sill and fitting up and welding on the new outer.

I've forgotten to take pics of the outer welded on but here are the ones from when I did remember.

This is the rear end of the sill and bottom of the inner rear arch, seems the most common spot for Pandas to rust, not really properly repairable without cutting the outer sill off, this had been badly 'repaired' for a previous MOT(n)


Luckily I had to do the exact same thing on my Sisley so it was fairly straightforward to sort.


Not very good photos but this is the the middle of the sill by the jacking point, all three skins had rotted through here, inner sill, floor and outer sill, again only properly repairable by removing the outer sill as the rot went under the centre crossmember.


Unfortunately I forgot to take photos after it was repaired and before I fitted the new outer sill:bang:

Finally the new outer sill cut and drilled ready to fit and then clamped to the car ready to weld on.


I'm still waiting on the front panel from Italy which will hopefully arrive this week so I can get that done and then I need to repair the area around one of the rear bumper brackets as it has gone abit flaky. Once the welding is done I can get on with the painting and sort the other MOT failure bits.
 
I'm taking notes :D

Looks good, some nice patch repairs in the rear wheel arch even keeping that oval hole thingy whatever that is for.(y)

I think its for waxoyling, not really neccessary but I like to make things look as original as possible.

The front panel arrived from Italy today, unfortunately it has been previously damaged which I didn't know about from the listing on eBay and has abit of surface rust on it, although it is probably almost as old as the car and was half the price of any others. Instead of replacing the whole panel I am just going to use sections of it to replace the damaged bits on the car.
 
More progress this weekend although not as much as I'd hoped.

Started to do the filler work on the sill/wing joins:


Got bored of doing that (I hate rubbing filler) so I started on the front panel, as you can see the new panel is damaged in the top corners, luckily I don't need those bits.


Instead I need the bottom corners, started with the drivers side


It has obivously had a small knock at the front at some point which has damaged either side of the panel from where the bumper has been pushed back. It had then been filled over to hide the rust. The marker pen lines are where I was cutting to.


Spot welds drilled out


And then cut out.

The bottom of the inner wing flange the front panel welds to had got abit mangled so I cut it out and welded in some freshmetal.


I then cut out the the section I needed from the new front panel and gradually trimmed it to fit the car and then drilled the holes for plug welding.


I was going to weld it on today but annoyingly my welder is playing up so I need to get that sorted first, instead I stripped the N/S front suspension down to sort the driveshaft boot and give it all a lick of paint.
 
Back
Top