Technical KriTip's 1.2 16V Sei Project

Currently reading:
Technical KriTip's 1.2 16V Sei Project

I managed to seperate the exhaust half way down, and have made a big progress now, hence having a break to post this :)

31032007.jpg

31032007(001).jpg

Out wth the old ... now it's the big push to get it all back together!

Managed to take the box off on my own and then drop the engine on my own, without a hoist!!! Took 2 trolley jacks, a lot of effort and some stupidity :D

Thats it for now, no rest for me ;)

KRistian
 
I managed to seperate the exhaust half way down, and have made a big progress now, hence having a break to post this :)


Out wth the old ... now it's the big push to get it all back together!

Managed to take the box off on my own and then drop the engine on my own, without a hoist!!! Took 2 trolley jacks, a lot of effort and some stupidity :D

Thats it for now, no rest for me ;)

That engine will never fit on the pushbike.....


KRistian

Well done mate, I'm around 4 steps behind :)
Don't let up.


View attachment 26042

Don't get any ideas.....
 
Last edited:
Well, its been a tough, bruised, scraped, dirty, bloody tiering weekend of celebrating my birthday (26, just a young un ;) ) and working on the car.

First off big thanks go out to 99sei (lucky guy with two cento's and loads of lovely working space of his own :D )!!! I picked up the tripod and hoist saturday night, and there is no way I could have magaged withough it!!!!! Not a chance at all!!! Anyone ever doing this stuff in the future, you don't need a hoist to remove, but to get back in you definatley do to get it back in!

P1010795.jpg


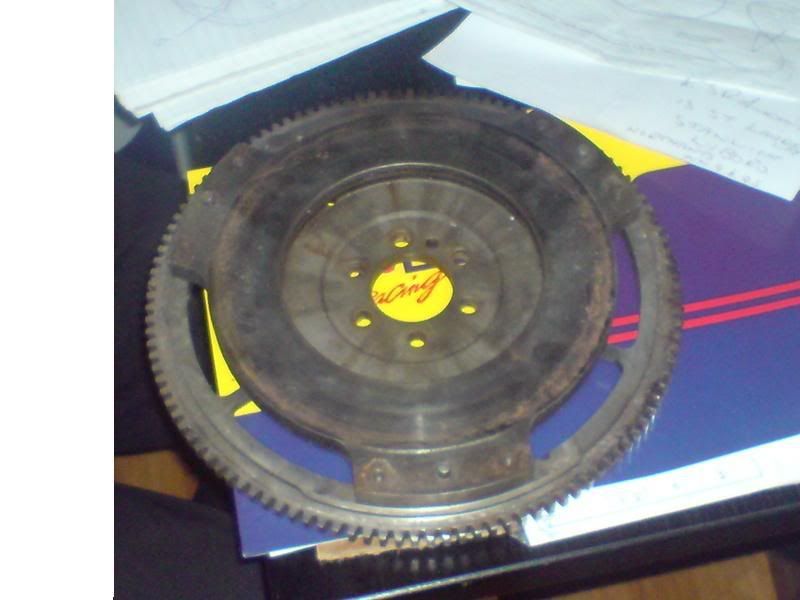
Here are the money shots :D


P1010796.jpg

P1010797.jpg

P1010798.jpg

Thanks to the lower engine braket and different flywheel covers to the Sei, th ebox was on and off three times...Was a big pain and very tiering. A also need to sort out some extra bolts to mount it on as intended.


It's all in on the mounts fitted no spacers or anything like that. Was a BIG effort to get it all back in though and broke my reversing sensor while I was at it :(n)

It all went in though but is noticably taller! I was worried the bonnet wouldn't close, however, i place it back on top, as I had to remove it, and it all looks OK (y) Clearance bleoe may be interesting though!

What is NOT so good it that the engine doesn't technically fit :eek: :eek:

I seems to sit tilted slightly forward, but thats not a bit problem, however, the folloowing are a problem :p


P1010799.jpg

P1010800.jpg

P1010801.jpg

P1010802.jpg

The cam cover is in direct contact with the body, and the headlight bolt was deformed by the head, as it was crushed on fitting.

There is VERY little clearance, ie. none, there, so I'll have to try and figure that one out!!! JR?? Whats happened to yours up front there?

Still its one milestone out the way! Tommorrow night I'm tidying a lot of the mess up, gearbox oil s over the floor, tools are everywhere and it takes ages to find what I want lol.

Need to locate some intake bolts and nuts to mount the air intake, as I don't have any, and I could also to with the TB pipeing so I can fit a (to be ordered) DMC CDA intake.

These and the exhaust setup are the two major things left to worry about now.

The OTHER major PITA I have had today, is that I fitted and did up all the mounts, and forgot to fit the alternator first!!! SO i have to drop it down and hope I have the play to get it back in!!

Hope your all enjoying my slow and painful process lolol :D

Dave, shall we call it a race :p ;) might get my arse into gear a bit more.

Cheers,

Kristian
 
Last edited:
The cam cover is in direct contact with the body, and the headlight bolt was deformed by the head, as it was crushed on fitting.

There is VERY little clearance, ie. none, there, so I'll have to try and figure that one out!!! JR?? Whats happened to yours up front there?

Just thought! think most ppl run without the camcover on the 16v's, could be wrong though...

coming on well though :D
 
You could always remove the section of the cam cover that touches if you feel fitting one is a safety issue.

Mmmm! Looking at that picture i'm getting mighty temted to do a conversion.
Might have a problem with the ABS though?
 
Last edited:
Ah, that helps a lot! I'll remove the upper section, and leave the lower section, or maybe just trim it back a bit.

I'm not worried about the saftey aspect, just don't want all road spray etc over the timing belt and tensioner.

Fingers crossed I'll get enough clearance then (y)


With regards to ABS cars, it looks like most of it will be out the way, may just need to look at the inuction outlet carefully.

The clearance on the water bottle with my additional mount also looks like and issue that can be sorted out with a saw :D

Cheers everyone :)

Kristian
 
Well, one member binned it and reported that braking was improved!
After driving a Mk2 Sei with ABS enabled & disabled I'd say the Sei's ABS is out there to do a better job than a 'school-run mummy' who freezes on the brakes when little William runs across the road without looking. For those of us who actually listen, for want of a better word, to the car, have wide tyres & use after market brake components I'd say you're best off junking it.
 
After driving a Mk2 Sei with ABS enabled & disabled I'd say the Sei's ABS is out there to do a better job than a 'school-run mummy' who freezes on the brakes when little William runs across the road without looking. For those of us who actually listen, for want of a better word, to the car, have wide tyres & use after market brake components I'd say you're best off junking it.

Junk it? I agree.. This ABS has proven many times to be more of a danger than it's worth.
The cost of wheel bearing replacement p****s me off at £65 a pop compaired to the normal £20 odd for the standard. F***k me, How much does a magnet cost?
 
He doesn't know the hilarity which was switching from 175/55R15 to 195/45R15 tyres... then came the big brakes! Honestly though it wasn't too bad on the grip-the-road-like-a-spoung 175/50R14 tyres that my car came with. Someone mentioned that the ABS ECU would need remapping with bigger brakes, I also think it needs remapping with wider tyres.
 
Thanks for digging that photo up!! Looks pretty awful in that one!!

I'm pleased to say its come a long way since that pic, although the 'tasteful' pink/blue induction hose (i'm not saying something about my sexuality with that!!) will be replaced with red soon. Also got s/s manifold to go on with sports cat next month.

Cam cover I have lying around off punto 16v as I don't like running without it incase anything gets thrown in there. Currently being bespoked aka. filed and cut to fit! You won't fit the cover straight in with no work to my knowlege! Will go on next may/june time.

As for the headlight i don't have a photo but, we used a self tapping screw to replace the nut arrangement, which frees up the necessary space, once you have done that you should be fine, I would run without camcover until u have it filed/cut to fit.

I didn't bother replacing my flywheel cover on fitment as that is my flywheel below (3.6kg) and the holes in it make a lovely whistle under acceleration! Which happily saved that job!!

MyFly.jpg


Unfortunately car has taken a back seat as my dissertation is taking over sadly :( But, come summer, it will all be finished including a long over due respray which I have been too busy to have with all the uni work!

Any questions Kristian, pm me!
 
All this feedback is great!!! The FF is no end of help (y)

Just one thing JR, how the hell is that thing balanced?!! It looks like it just has hole at the lower part! :confused: Under bonnet shot thats up to date will be nice ;)

Don't worry I'll PM you with any questions. You get the magnecore link I sent?

LAters,

Kristian
 
You just can't see the upper gap, as its covered because of the angle the photo was taken of it! I think if it was unbalanced it would have taken the bell housing with it and been in a million pieces by now! I'm suprised how sturdy it feels and its sooo incredibly light!

Whole thing was balanced along with the knife edge crank so I don't think its gonna get lighter than that :)

Havn't taken anymore pics, but will do when manifold setup goes on etc.

BTW cheers for link, got magnecors and iridiums ordered :)
 
Ah yes , I see now :eek:

Just a little update.

I ordered a BMC CDA <1.6 with 70mm outlet (the punto 1.2 16v). It comes with 70mm>60mm reducer to moutn with the punto hose, but as the TB is 70/72mm and the CDA is 70mm, and I don't hace the putno stuff anyway, I may as well get a samco hose 70mm 90 degree, and keep it the same all the way through.

Heres my question though, with the CDA, does it matter too much about placment? I guess the carbon protect the element from heat, but does the TB to CDA hose length make a difference like a normal filter induction kit?

The samco is ££ and even though i work on the estate they are made, I have to buy from a reseller, adn if i can buy less, I'll certainly do it ;)

Kristian

The length will make a difference to where the power is produced. Why not buy some alloy tube to run in between the Samco and experiment with a hacksaw? It is possible to do calculations, but generally, the longer the inlet length, the lower down the rev range max torque will be produced.

Don't Samco have a trade counter? ;)
 
I think they do have a trade counter, but I'm not trade :p

I guess it won't harm to pop in and try tomorrow anyway :D

Maybe I can't be bothered with trying different lengths, but as it's 16v I guess an long hose to bring the range a bit lower would be better, than having a short lenght, suited to far outside the capable rev range!

Cheers,

Kristian
 
Best to try and get in touch with Peter from GSr re: induction design, but its safe to say on my 16v the bmc cone sits right in front of the pass side mesh grill behind foglight! Also picks up a lovely supply of fresh cool air and is well protected from the elements.

The longer the inlet tract correctly the lower down peak torque produced to my understanding, however mine is just prototyped atm and the finished GSR article will have a reducer part way through to pressurise the airflow and create a faster gas speed! This is a better solution so Peter tells me.

If you look at the punto mk 2 sporting 1.2 16v GSR kit which i'm sure someone on the punto section could dig up, that might give you some ideas as to a nearer ideal induction setup!
 
Found this in my many 'finding parts for my project' travels. Both their intakes are good for in excess of 200 bhphttp://www.nfauto.co.uk/cbs_products_new.htm

Good Luck
Dave
 
Back
Top