General Ritmo Abarth Convertible Renovation

Currently reading:
General Ritmo Abarth Convertible Renovation

Joined
Jun 13, 2008
Messages
186
Points
133
Location
Stockholm
This story started last Sep thru an internet ad.

Found this Convertible on a Norwegian carsite.
We exchanged emails for more than 4 months and then I decieded to take the trip to Kristiansand to pick the car up.
The trip lasted for 28 hrs, non-stop driving, with a car on the trailer.
The roads in Norway is NOT what you would expect

Still have nightmares from this trip. ;)

So better than late I will tell the story.
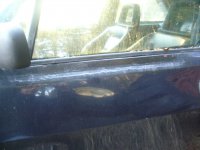
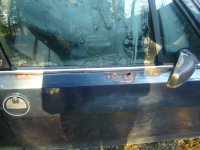
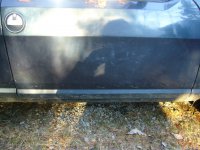
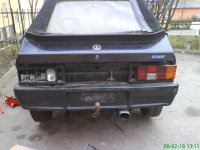
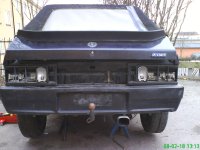
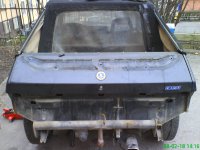
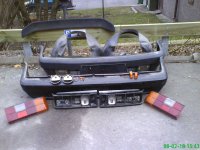
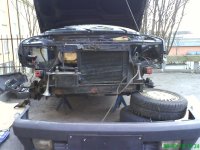
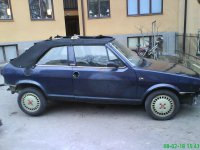
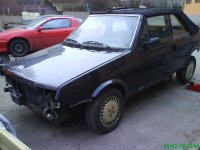
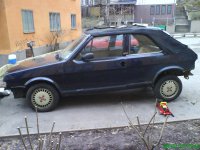
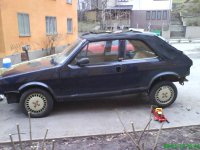
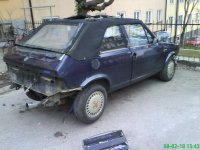
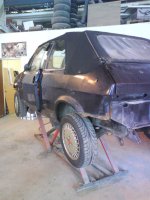
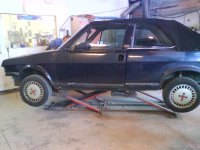
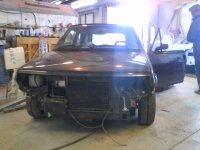
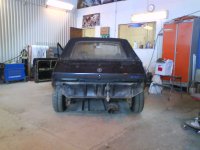
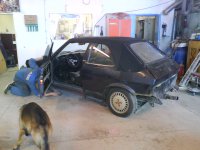
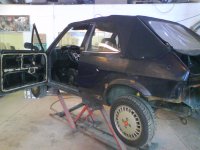
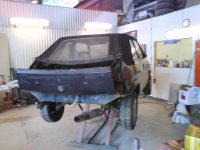
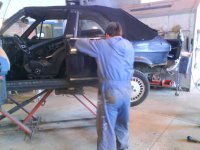
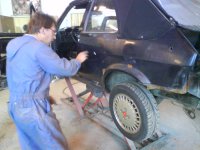
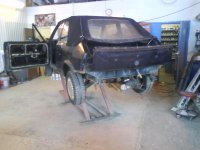
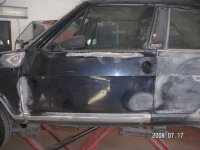
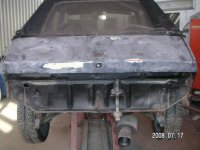
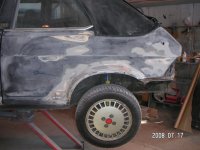
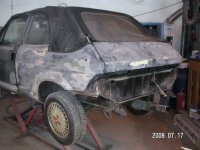
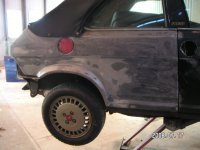
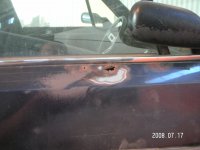
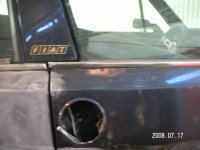
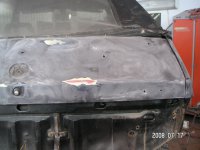
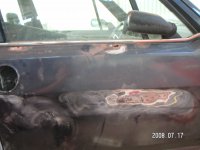
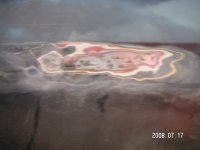
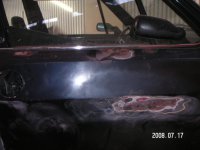
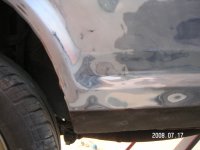
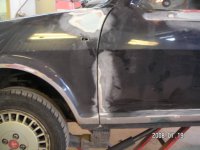
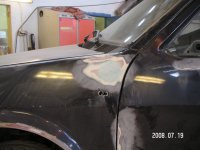
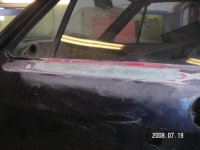
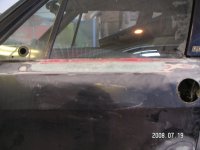
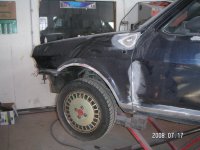
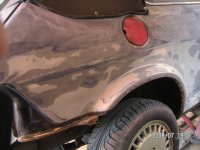
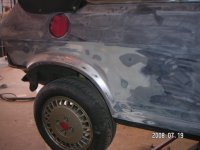
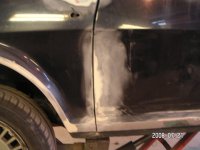
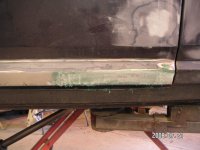
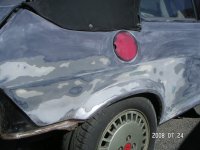
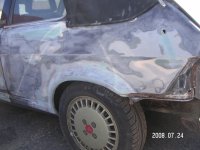
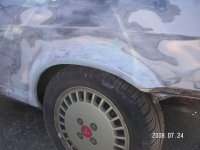
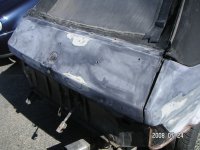
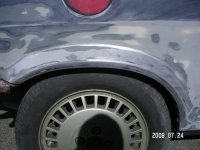
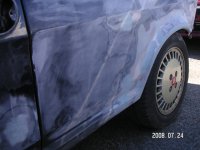
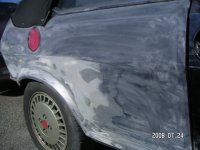
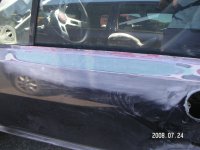
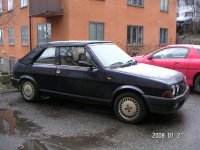
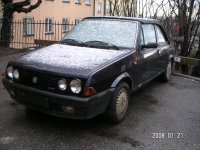
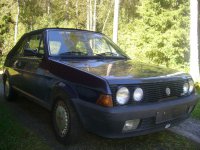
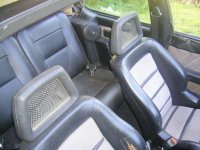
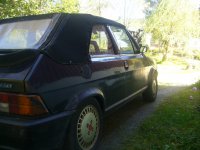
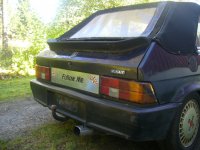
This is the car.

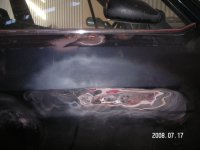
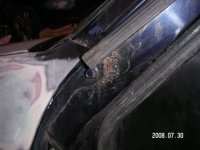
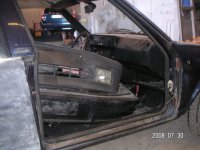
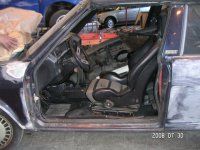
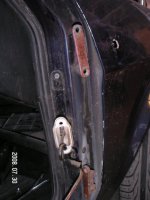
It's a 1983 Convertible which has been totally rebuildt to an 130TC.
Everything has been moved from an 130 to this one.
 

Attachments

  • PICT5312.JPG
    PICT5312.JPG
    636.4 KB · Views: 105
  • PICT5314.JPG
    PICT5314.JPG
    646.4 KB · Views: 118
  • fiat front.jpg
    fiat front.jpg
    280.7 KB · Views: 329
  • Baksäte.jpg
    Baksäte.jpg
    245.6 KB · Views: 94
  • Baksida höger.jpg
    Baksida höger.jpg
    232.7 KB · Views: 51
  • Bak höger.jpg
    Bak höger.jpg
    248.8 KB · Views: 84
Last edited:
The car had some rustspots, but gladly not any major, serious ones.

The passengerdoor has rustbubbles on the center.
Aswell as 3 "real" holes on the upperpart.
The driver door has been fixed before.
The car has been fixed on the left side, just infront of the rear wheelarch.
Underneath the car is very solid.
 

Attachments

  • Förardörr under ruta.jpg
    Förardörr under ruta.jpg
    211.6 KB · Views: 65
  • Rosthål hö dörr.jpg
    Rosthål hö dörr.jpg
    221.8 KB · Views: 59
  • Rostbubblor hö.jpg
    Rostbubblor hö.jpg
    233.9 KB · Views: 79
  • Bakhjul.jpg
    Bakhjul.jpg
    258.3 KB · Views: 65
Since I'm not one for welding and paintwork, and got someone who is very good. I decieded to dismantle/strip the car and send it off.
I did this in Feb & March of this year.
Took the car down to my friend and left it there.
 

Attachments

  • DSC00143.JPG
    DSC00143.JPG
    205.3 KB · Views: 75
  • DSC00144.JPG
    DSC00144.JPG
    209 KB · Views: 84
  • DSC00149.JPG
    DSC00149.JPG
    207.1 KB · Views: 121
  • DSC00150.JPG
    DSC00150.JPG
    250.9 KB · Views: 75
  • DSC00140.JPG
    DSC00140.JPG
    246.2 KB · Views: 76
So this summer will be a one I remember. This is my first projekt.
In the end of June the car was wheeled into the garage to start the renovation.

My goal with this is to take it slowly, not rush.
Also it's cheaper that way, when Ingemar have time to deal with the car he will do that.
Firstly a small probs, the exhaust was hanging so could not lift the car up, but was solved with some wooden planks and then the car was lifted up.
Was quiet emotional to see the car there, being ready for a good overhaul.
I knew from Ingemar before, a colleuge did take the car indoor to have a look at it, underneath aswell.. and did not find anything major.
 

Attachments

  • DSC00230.JPG
    DSC00230.JPG
    304.6 KB · Views: 63
  • DSC00229.JPG
    DSC00229.JPG
    297.8 KB · Views: 64
  • DSC00228.JPG
    DSC00228.JPG
    280 KB · Views: 104
  • DSC00227.JPG
    DSC00227.JPG
    275.6 KB · Views: 101
  • DSC00226.JPG
    DSC00226.JPG
    291.9 KB · Views: 40
One thing that I started laughing at was when Ingemar brought out his "best" friend - The knife.
Started attacking the bodywork.. just to see how much and how serious some of the rust spots are.
 

Attachments

  • DSC00235.JPG
    DSC00235.JPG
    305.2 KB · Views: 49
  • DSC00238.JPG
    DSC00238.JPG
    271.5 KB · Views: 65
  • DSC00233.JPG
    DSC00233.JPG
    317.9 KB · Views: 44
  • DSC00234.JPG
    DSC00234.JPG
    310 KB · Views: 53
  • DSC00236.JPG
    DSC00236.JPG
    265.1 KB · Views: 46
These pics just shows what was done in the first 2-3 days of taking the car inside.
The left wheelarch I know wasn't really bad, but there has been an earlier fixing which wasn't done to a 100% satisfaction.
The driver & front left arch also needed some TLC.

As I said the first few days was quite amazing, to see the change.
 

Attachments

  • PICT6266.JPG
    PICT6266.JPG
    707.1 KB · Views: 42
  • PICT6265.JPG
    PICT6265.JPG
    710.1 KB · Views: 72
  • PICT6268.JPG
    PICT6268.JPG
    693.6 KB · Views: 67
  • PICT6264.JPG
    PICT6264.JPG
    696.8 KB · Views: 49
  • PICT6267.JPG
    PICT6267.JPG
    696.2 KB · Views: 49
More pics from the first few days.

Here's also what I consider to be the worst rust on the car.
The pax seat.
Ingemar told me, the best thing would be to change the door.
However it's not easy, since there's only a handful Convertibles left on the Swedish market.
The rust on the centre of the door would be easy to fix, however it's right where the collisionbarrier is on the inside.
We are trying to work around this problem.
There's also that the doors on the Ritmo is not 100% flat, so in order to get it look well is not the easiest thing.
 

Attachments

  • PICT6270.JPG
    PICT6270.JPG
    651.5 KB · Views: 59
  • PICT6273.JPG
    PICT6273.JPG
    618.6 KB · Views: 55
  • PICT6275.JPG
    PICT6275.JPG
    656.7 KB · Views: 58
  • PICT6278.JPG
    PICT6278.JPG
    636.9 KB · Views: 36
  • PICT6277.JPG
    PICT6277.JPG
    610 KB · Views: 36
Left side of the car:

right in front of the wheelarch is where the other fixing of the bodywork has been made. All the way up to the pax window.
You could see the overlapping of the body, I thought from the beginning this was a crack in the body.. but to my surprise it was not.
The tailgate is made of glasfibre as far as I know, but still needed to be looked at. Especially where the emblema had been.
 

Attachments

  • PICT6292.JPG
    PICT6292.JPG
    627.9 KB · Views: 36
  • PICT6291.JPG
    PICT6291.JPG
    620.4 KB · Views: 146
  • PICT6290.JPG
    PICT6290.JPG
    623.1 KB · Views: 66
  • PICT6289.JPG
    PICT6289.JPG
    643.5 KB · Views: 60
  • PICT6288.JPG
    PICT6288.JPG
    671 KB · Views: 43
More pics of the pax door.

Looks a lot worse than it is.
Also a pic of the right wheelarch
 

Attachments

  • PICT6297.JPG
    PICT6297.JPG
    629.5 KB · Views: 95
  • PICT6293.JPG
    PICT6293.JPG
    654.5 KB · Views: 39
  • PICT6296.JPG
    PICT6296.JPG
    648.5 KB · Views: 35
  • PICT6298.JPG
    PICT6298.JPG
    626.2 KB · Views: 35
  • PICT6294.JPG
    PICT6294.JPG
    666.1 KB · Views: 60
The drivers door had been fixed before.
When it was done they had used tin.
What Ingemar did was he sanded it down abit, then use a hammer and carefully knacked the bodywork.. in order to get the surface as even as possible... then use glasfibre ontop.. and afterwards flattend out the surface once again.

On the front wing was also an old welding, which turned out to be an old antenna fitting.
 

Attachments

  • PICT6317.JPG
    PICT6317.JPG
    674.6 KB · Views: 60
  • PICT6311.JPG
    PICT6311.JPG
    640.7 KB · Views: 50
  • PICT6300.JPG
    PICT6300.JPG
    663.8 KB · Views: 64
  • PICT6299.JPG
    PICT6299.JPG
    663.2 KB · Views: 70
  • PICT6266.JPG
    PICT6266.JPG
    707.1 KB · Views: 39
Last edited:
Left & right wheelarch:

The left one needed more TLC, so was sanded down and glasfibre was applied was sanded down to get the perfect surface.

The right one didn't need so much attention.

We have called the car the year of the rings.. this was we started to count the coats of paint that has been used to paint the car.

Think we counted 12 of them.. like how you can count the years on a tree.

Pic 3: you can see the rings ;) :D
 

Attachments

  • PICT6308.JPG
    PICT6308.JPG
    651.9 KB · Views: 60
  • PICT6306.JPG
    PICT6306.JPG
    727.8 KB · Views: 56
  • PICT6304.JPG
    PICT6304.JPG
    654.5 KB · Views: 57
  • PICT6303.JPG
    PICT6303.JPG
    657.8 KB · Views: 37
  • PICT6302.JPG
    PICT6302.JPG
    714.9 KB · Views: 68
Last edited:
The area where the bumper are fitted ontop the car is in need for replacing. This will be done when the car has had it's first coat of paint.

The idea is to paint it black first, this is to make sure all the surfaces are in perfect condition.. just the way we want it.
 

Attachments

  • PICT6328.JPG
    PICT6328.JPG
    630.4 KB · Views: 112
  • PICT6321.JPG
    PICT6321.JPG
    616 KB · Views: 63
  • PICT6322.JPG
    PICT6322.JPG
    630.4 KB · Views: 44
  • PICT6327.JPG
    PICT6327.JPG
    639.2 KB · Views: 67
So we're coming close to the end result of what's meant to be.
The glasfibre has been sanded down.
Even the "rings" are gone.
Just need to get further down, close to total stripping of the color.
 

Attachments

  • PICT6339-1.JPG
    PICT6339-1.JPG
    648.2 KB · Views: 47
  • PICT6338.JPG
    PICT6338.JPG
    651 KB · Views: 92
  • PICT6337.JPG
    PICT6337.JPG
    658.1 KB · Views: 55
  • PICT6336-1.JPG
    PICT6336-1.JPG
    641.2 KB · Views: 53
closer to perfection :D
 

Attachments

  • PICT6349.JPG
    PICT6349.JPG
    635.6 KB · Views: 76
  • PICT6353-1.JPG
    PICT6353-1.JPG
    664.9 KB · Views: 34
  • PICT6342-1.JPG
    PICT6342-1.JPG
    642.6 KB · Views: 38
  • PICT6347-1.JPG
    PICT6347-1.JPG
    671.9 KB · Views: 39
  • PICT6350.JPG
    PICT6350.JPG
    649 KB · Views: 34
24 July 08.

Finally I'm now ahead on this forum.. from now on I can tell you how all is progressing as it happens.

These pics were taken, now the car is waiting for the first coat of paint.
As I mentioned before, it will be in black to be able to see if the surface is uneven.

After this we'll move on to the next stage in the renovation.
 

Attachments

  • PICT6359.JPG
    PICT6359.JPG
    633.4 KB · Views: 29
  • PICT6356.JPG
    PICT6356.JPG
    608.9 KB · Views: 45
  • PICT6355.JPG
    PICT6355.JPG
    620.4 KB · Views: 19
  • PICT6357.JPG
    PICT6357.JPG
    607.6 KB · Views: 42
  • PICT6360.JPG
    PICT6360.JPG
    625.5 KB · Views: 45
Last 5 pics from 24 July
 

Attachments

  • PICT6362.JPG
    PICT6362.JPG
    610.1 KB · Views: 22
  • PICT6363.JPG
    PICT6363.JPG
    648.6 KB · Views: 42
  • PICT6364.JPG
    PICT6364.JPG
    626.4 KB · Views: 47
  • PICT6361.JPG
    PICT6361.JPG
    613.8 KB · Views: 21
  • PICT6365.JPG
    PICT6365.JPG
    634.3 KB · Views: 25
Things are slowly moving forward now.
Got other things to do.
However the doors has been removed in order to carry on more hunt for rust. Sadly there was some found when the door was removed.
But won't be a problem :D
 

Attachments

  • rost.jpg
    rost.jpg
    41.3 KB · Views: 50
  • rost dörrstolpe.jpg
    rost dörrstolpe.jpg
    38.9 KB · Views: 38
  • paxsida.jpg
    paxsida.jpg
    44.7 KB · Views: 24
  • förarsida.jpg
    förarsida.jpg
    52.5 KB · Views: 50
  • hö gångjärn.jpg
    hö gångjärn.jpg
    39.4 KB · Views: 28
Yes fantastic work your doing and great to see someone taking the time to document it all.

Can I ask though why you haven't removed the roof to check all the metal underneath or do you intend doing this at another stage. I ask because I haven't started to my car yet and intend to strip it to the shell for it's restoration. I'm wondering how big a job it is to remaove the roof.

Good work (y)
 
Back
Top