Technical Maintenance Twinair

Currently reading:
Technical Maintenance Twinair

helhond

New member
Joined
Sep 26, 2018
Messages
17
Points
3
Hi,

I just finished (big) maintenance of our own Panda 169, and to save my old folks some money, I will also do the maintenance of their Panda 312 2015 Twinair 0.9 80hp:
- Oil change (0W30 ACEA C2) and oil filter
- Engine flush prior before change with Forté.
- Spark plugs
- Air filter
- Interior filter
- Brake fluid new/flush
- Transmission oil (75W85)
- Twinair module filter

As the oil filter is an insert type of filter, should the filter just be hand tight, just as a regular oil filter?

The same question about the Twinair module filter? Hand tight or torque to Nm?

Any other advice to check/replace while being there?

Thx in advance.
 
Last edited:
Tomorrow I will start with the maintenance, I couldn't find the right torque for the Twinair module filter. (Had some busy weeks)

Any one got it for me?

And how to remove the cap of the TwinAir module filter?
I only find this picture, but cant see how it should come off.

 
I got mine off with just a 1/4 inch socket extension bar.

Well I had my filter out for a check.
It wasn't anywhere near as bad as the one above, but then again my engine only has 18K on it and oil is changed every 7500 miles.

It's not that hard to get at, it's obvious by where and how it's fitted it is meant to be accessed.

Tools.
10mm socket and a small extension bar.
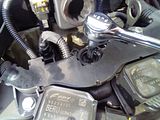
Some way of removing the cap in the cam cover, I used the extension bar of a 1/4 in socket set. (cam cover and filter cap are different on mine then the images I originally posted in the Ebay link)
15mm socket (fairly thin walled)
Magnet
Clic R pliers.


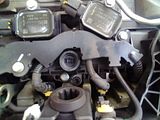
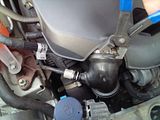
Remove the engine cover/airbox by flicking open the Clic R clip on the pipe to the turbo and undoing the three 10mm bolts (two on the cover and one on the air intake pipe to slam panel)


The cam cover and filter cap are different on mine to the ones I have seen on other images.
It appears to be some sort of hard plastic, along with the filter cap rather than the alloy one I've seen images of.


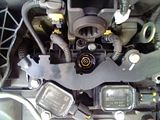
My cap has a large slot cut into it and has a couple of arrow markers stamped it to it that align with marks on the cover.


A 1/4 socket extension just fits into the slot and the cap opens by turning the cap 1/3 turn anti clockwise, it's not a screw fit, just a couple of tabs underneath holding it on, like a oil filler cap fitting.


Now the filter's head is exposed.


15mm thin walled socket is needed to fit in the hole and loosen it, it's not tight, just nipped up.
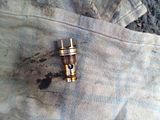
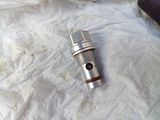
The body of the filter is alloy, but the centre (pressure relief valve?) is steel so a magnet will just about grab it to lift it out.


Dirty?
Not too bad, though there was quite a bit of gunk stuck up inside.


Cleaned, I used some carb cleaner, first squirted from out to inside to flush the gunk out the bottom.


Refitting is just working backward.
Screw the filter back in and refit the cap so the two arrows line up.

Make sure when you refit the engine cover/air box that you push the turbo pipe back in fully.
There is a small notch in the pipe that lines up with a bump in the stub on the aibox.

Clic R pliers are needed to fit the clip back in place.
 
Thx everybody,

Yesterday my old folks came over and I did all the maintenance.

Everything went quite well, the two spark plugs was really easy. Had some troubles with my own Panda 169, but the 312 is easy to do.
The Twinair module filter came really clean out of the module, but we replaced it anyways with a new one.

The interior filter is a living hell to do, almost same place like the 169 but even more tighter place... Why did they engineered it like that...

We also fixed a little rattle of the boot lid (this was a loose screw of the license plate).

Then the last thing I couldn't find or fix is that the dashboard keeps giving the alarm light that the boot lid is still open? Although the boot lid is fully closed, hard or soft closing of it, it doesn't change the situation. Also additional pushing of the boot lid doesn't work.

Does anyone know what the issue might be?
Bad micro switch or something? Electrical wiring?


Second thing, was the transmission fill and drain plug.
The fill cap was easy to locate, I don't know why but I just loosen the bolt in the blue as I was thinking this was the drain plug. (Only until the bolt came out I figured out that I had loosened the wrong bolt/plug.)
So I just placed it back again.
And found the right drain plug at the other side of the transmission.

Anyone know what this bolt (internally) holds/fixates?


Afterwards I regret that I did not take any pictures during maintenance.
 
Last edited:
There appear to be (or at least there were in the previous model) two switches contained within the boot latch itself, one of which operates the boot illumination and the other reports that the bootlid is not fully closed.

You can 'fool' it by pressing the latch closed while the door remains open - use a screwdriver or a round biro and press it into the 'hook' you can see when the latch is open. It will click round to close the latch around the pen or screwdriver, in two stages. If the warning goes out then, the solution is to adjust the position of the metal loop that the latch closes onto at the edge of the boot. You can loosen the two screws that hold it (just enough to allow it to move a bit -- not too far as it will then be hard to gauge where to put it back to when tightening the screws) and move it - most likely 'out' slightly further, towards the back of the car,
 
Thx everybody,


The interior filter is a living hell to do, almost same place like the 169 but even more tighter place... Why did they engineered it like that...


Anyone know what this bolt (internally) holds/fixates?


First off, I presume your car is LHD?
Try replacing a cabin filter on a RHD car!
The steering column and pedals get in the way, so much so you can hardly get at the lower cover screw, let alone feed the new filter into the hole.
It's a bleeder of a job (you end up with bleeding hands and arms)

I think that bolt might be something like a detent.
There's usually some form of spring loaded catch that stops it slipping out of gear.
 
Thx everybody, when my old folks will be here again we will give the micro switch a better look and will try to adjust if possible, and the switch is still working.


Yes the car is LHD, and I can imaging that with the steering column and pedals its even more impossible to do.

About the transmission bolt, removal and re-tightening could do no harm then?
 
Back
Top