Technical Removing the entire dashboard

Currently reading:
Technical Removing the entire dashboard

Joined
Jun 29, 2014
Messages
56
Points
75
Does anyone know the way/sequence to remove the entire dashboard without breaking it? I haven' dared to start in case I bust the clips etc.
It's a 1999 JTD105
 
It's pretty easy. You have to disconnect the "textile" area from the rest and lift it up.

You start on the driver side:
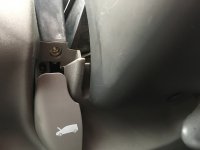
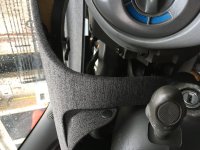
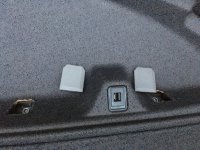
- 2 plastic clips near the steering wheel, on the platic surrounding it
- 2 screws left and right of the steering wheel, at the knee level
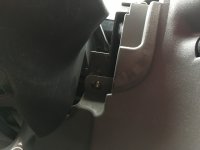
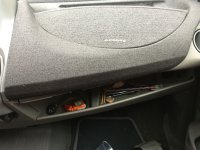
- remove the lid of the glove box on the driver's side: 2 small visible screws and then pull (hard)
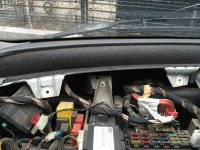
This will give you access to the last two screws. Undo them.
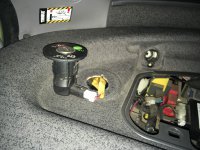
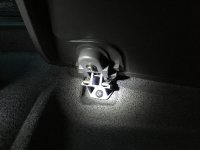
- with a flat screwdriver pop up the airbag switch in the glove box and disconnect the wires
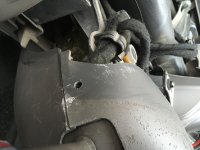
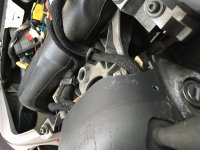
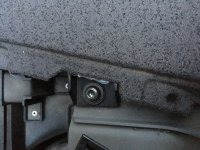
Now all you have to do is lift up the top of the dashboard (driver's side).
Forgot to mention that all the screws are torx, same size, except for the glovebox lid which is smaller.

Later I will post some photos and continue with the passenger side.
 
Last edited:
Some images
 

Attachments

  • IMG_1214.JPG
    IMG_1214.JPG
    2.9 MB · Views: 128
  • IMG_1183.JPG
    IMG_1183.JPG
    1.6 MB · Views: 119
  • IMG_1184.JPG
    IMG_1184.JPG
    2 MB · Views: 111
  • IMG_1185.JPG
    IMG_1185.JPG
    2 MB · Views: 114
  • IMG_1186.JPG
    IMG_1186.JPG
    2 MB · Views: 118
  • IMG_1187.JPG
    IMG_1187.JPG
    2.7 MB · Views: 125
  • IMG_1188.JPG
    IMG_1188.JPG
    2.2 MB · Views: 121
As for the passanger side, you start with 3 screws on the knee level, 2 of them right under the edge of the textile part and one hidden under a plastic near the door.
 

Attachments

  • IMG_1203.JPG
    IMG_1203.JPG
    2.8 MB · Views: 85
  • IMG_1202.JPG
    IMG_1202.JPG
    2.1 MB · Views: 90
You continue with the storage compartiment: there are 4 screws:
- 2 under the brackets that hold the lid (remove the lid by unscrewing its 2 small screws then pull hard)
- 2 screws on the opposite side covered by 2 plastic squares.

And then I think there is one more screw visible near the center console.

All the pictures are from my LHD car, for a RHD you shoul imagine the images flipped.
 

Attachments

  • IMG_1213.JPG
    IMG_1213.JPG
    2.3 MB · Views: 69
  • IMG_1212.JPG
    IMG_1212.JPG
    2.5 MB · Views: 68
  • IMG_1208.JPG
    IMG_1208.JPG
    3.2 MB · Views: 67
  • IMG_1205.JPG
    IMG_1205.JPG
    3.4 MB · Views: 68
  • IMG_1204.JPG
    IMG_1204.JPG
    2.9 MB · Views: 78
Absolutely fantastic and, as all my 3 cars are LHD, no need for excited flipping!!
Thank you very much indeed.:slayer:
Just as a corollary, did anything break when you removed/put it back?;)
All the best,
Mike
 
Yes, you have to be careful with the righ side panel when you put it back.
I broke the plastic parts that sit right on the edge, near the knees. Then glue them back with a glue gun. Then broke them again while trying tu put the whole thing back. And again...
In fact it's easy but you have to whatch carefully how they fit together, not like me :)
 
good
I have the air conditioning commutator broken, did you change it?
When I operate it does not work any speed, just turn on the air conditioning compressor.
Greetings and thank you
I am writing from Spain
 
yes
But I could disassemble the switch, clean it and sand the contacts and it worked.
I saved € 120. it's going perfect
Greetings
 
Back
Top