

DISCLAIMER: I accept no liability for any damage or injury you may cause to your vehicle or yourself by following this guide. This guide is provided for information purposes based on what worked for the author. Your car may be slightly different so please use your common sense!
So like me you have got fed up with your old gear gaiter. Perhaps the poor quality has caught up with it like mine or maybe you just can't stand the cheap vinyl any longer.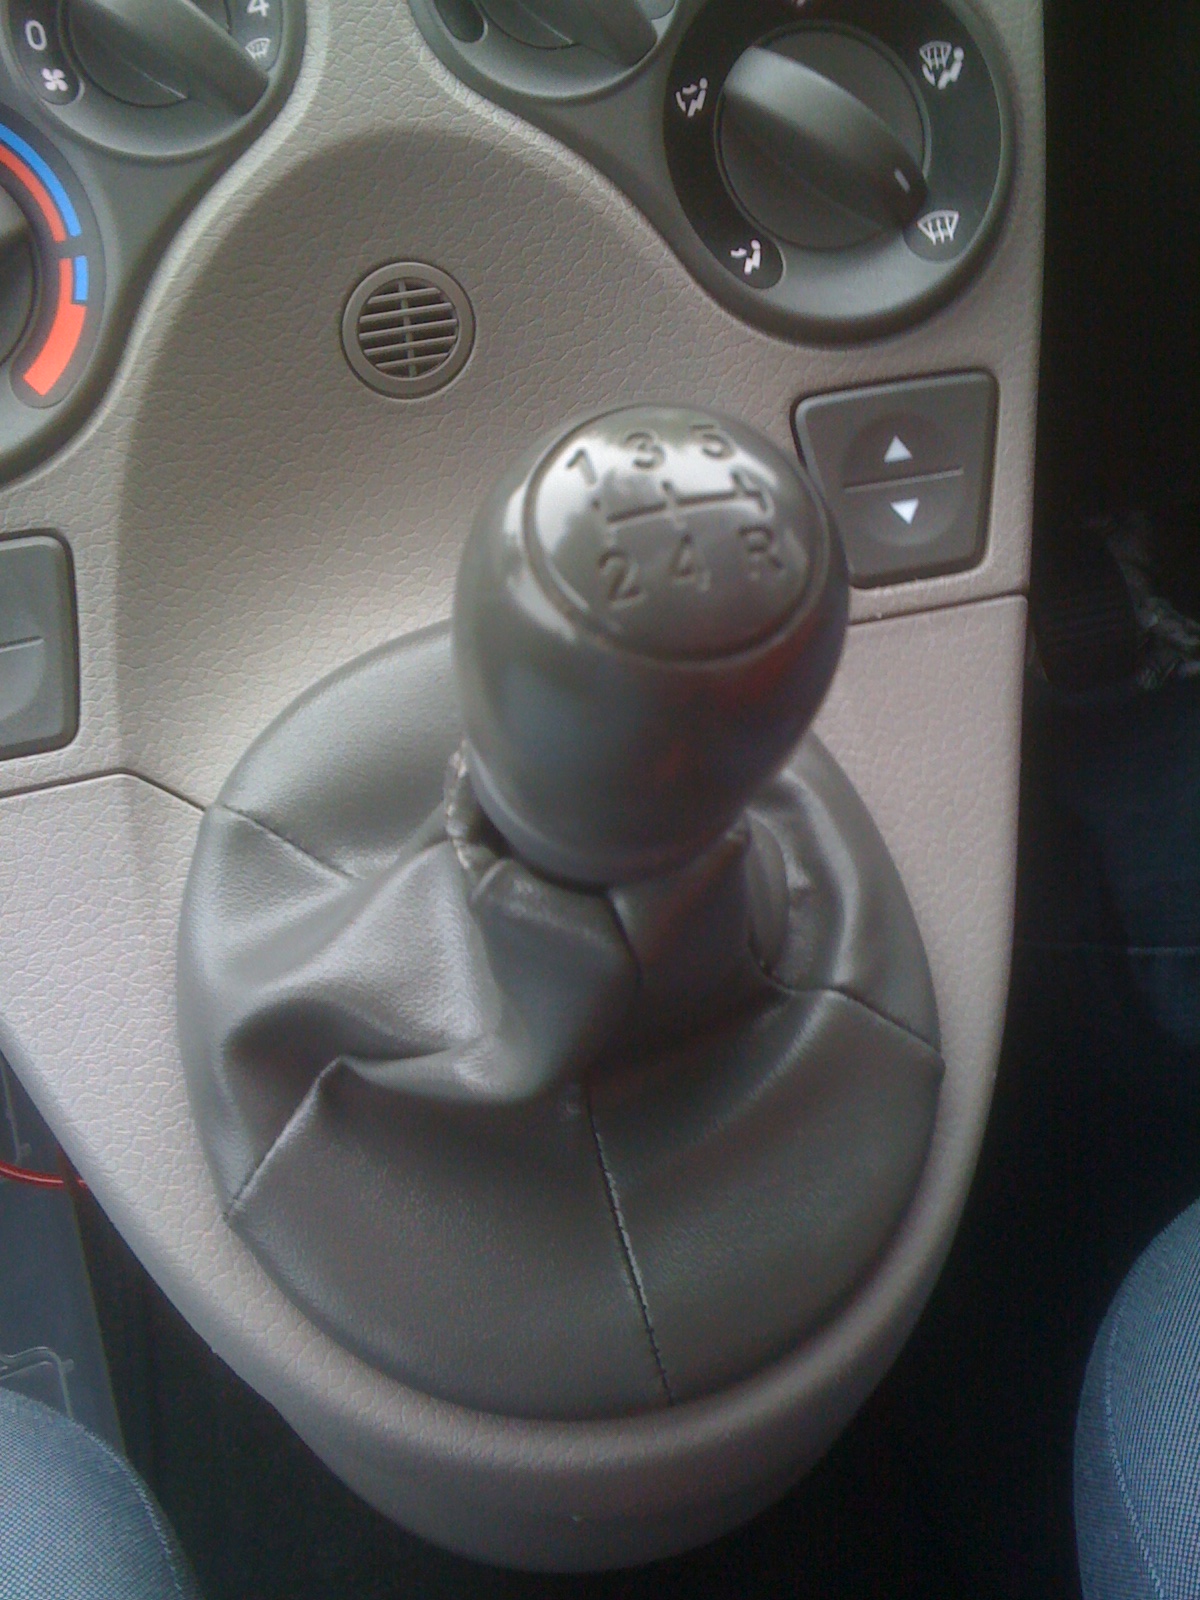
In this guide I will show you how I changed the gaiter on my 06 Panda active to a nice Italian leather one (smells better too).
So what will you need?
* new gaiter (I got mine here).
* scissors.
* Elastic from the sewing supplies section (try and get this as broad as possible. They sell it in Tesco and Asda for repairing things. Try ebay if you dont want to be seen hanging around the sewing section, eg this).
* Needle and thread (if your a bloke steal this from your Mum, Wife, GF).
* A cable tie.
* [optional] Grease (I used lithium based)
* [optional] knowledge of Polish swear words (particularly useful when you stab yourself with the needle.)
This is my first guide, so apologies if it isnt clear. If you have any problems drop a comment and I will fix it ASAP.
So like me you have got fed up with your old gear gaiter. Perhaps the poor quality has caught up with it like mine or maybe you just can't stand the cheap vinyl any longer.

In this guide I will show you how I changed the gaiter on my 06 Panda active to a nice Italian leather one (smells better too).
So what will you need?
* new gaiter (I got mine here).
* scissors.
* Elastic from the sewing supplies section (try and get this as broad as possible. They sell it in Tesco and Asda for repairing things. Try ebay if you dont want to be seen hanging around the sewing section, eg this).
* Needle and thread (if your a bloke steal this from your Mum, Wife, GF).
* A cable tie.
* [optional] Grease (I used lithium based)
* [optional] knowledge of Polish swear words (particularly useful when you stab yourself with the needle.)
This is my first guide, so apologies if it isnt clear. If you have any problems drop a comment and I will fix it ASAP.
Removing the old gaiter
Removing the old gaiter
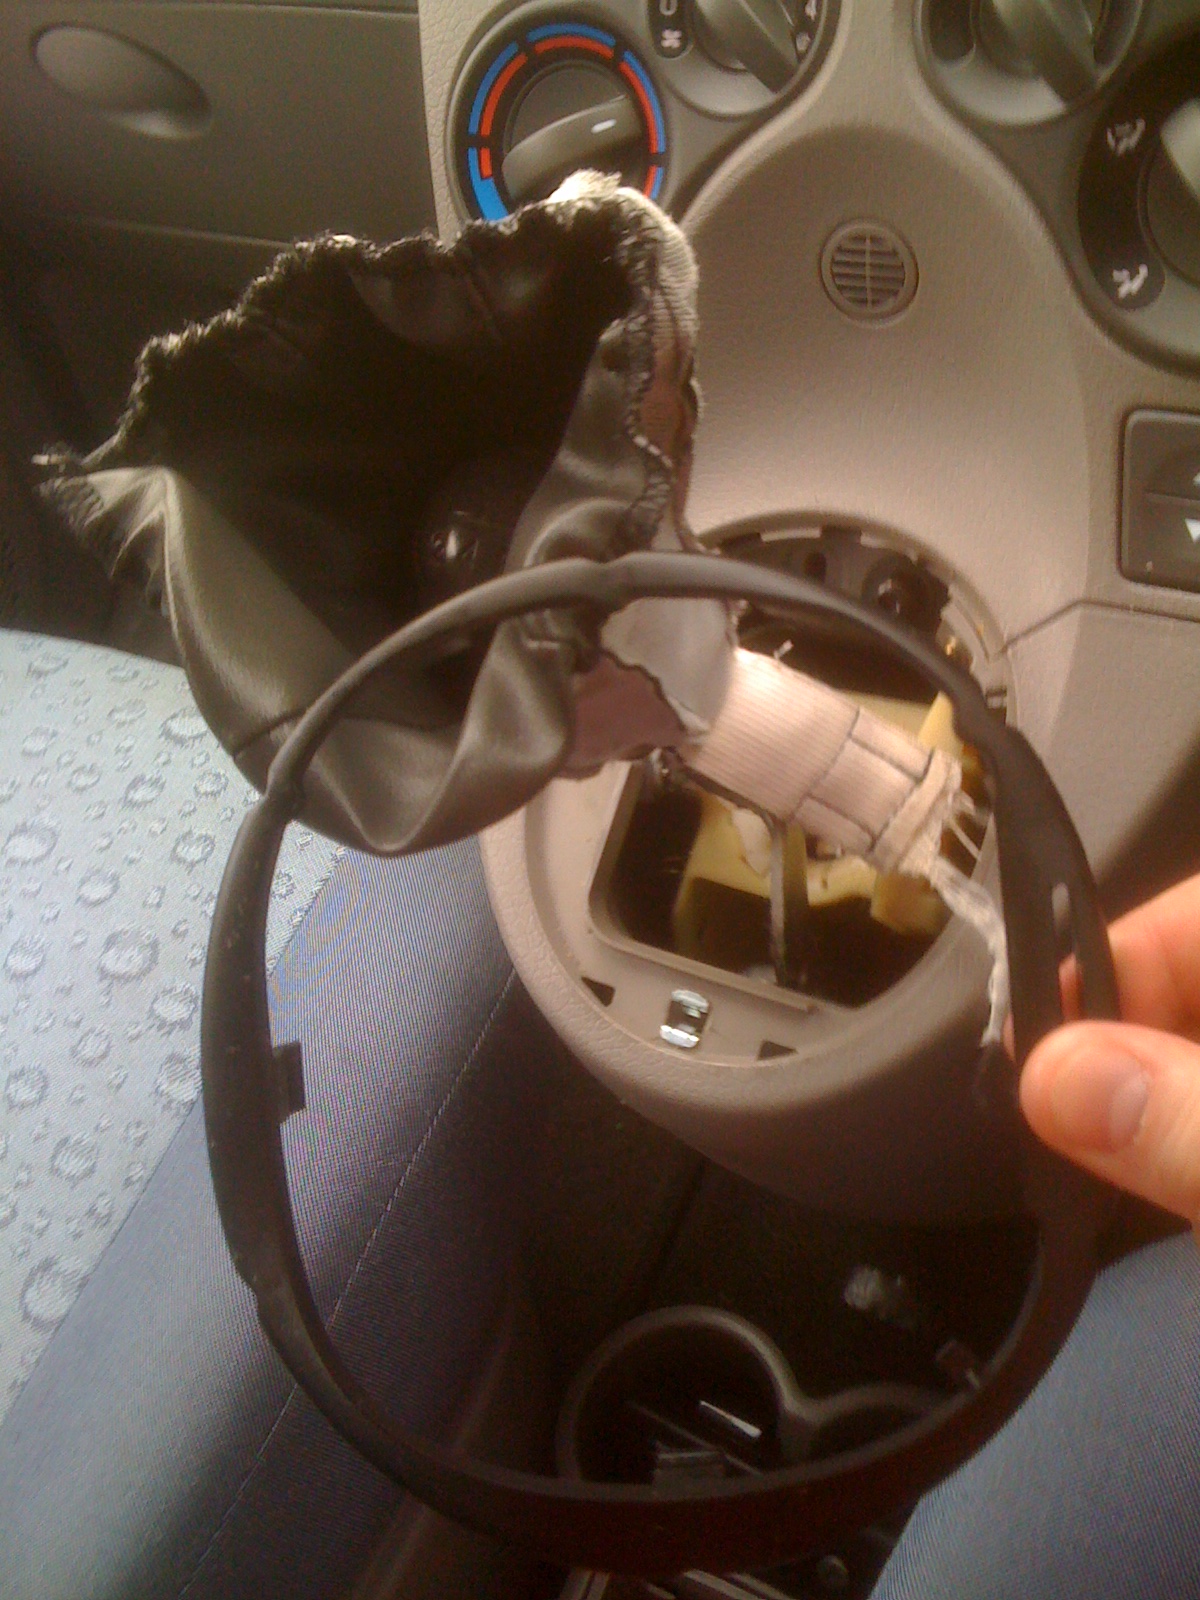
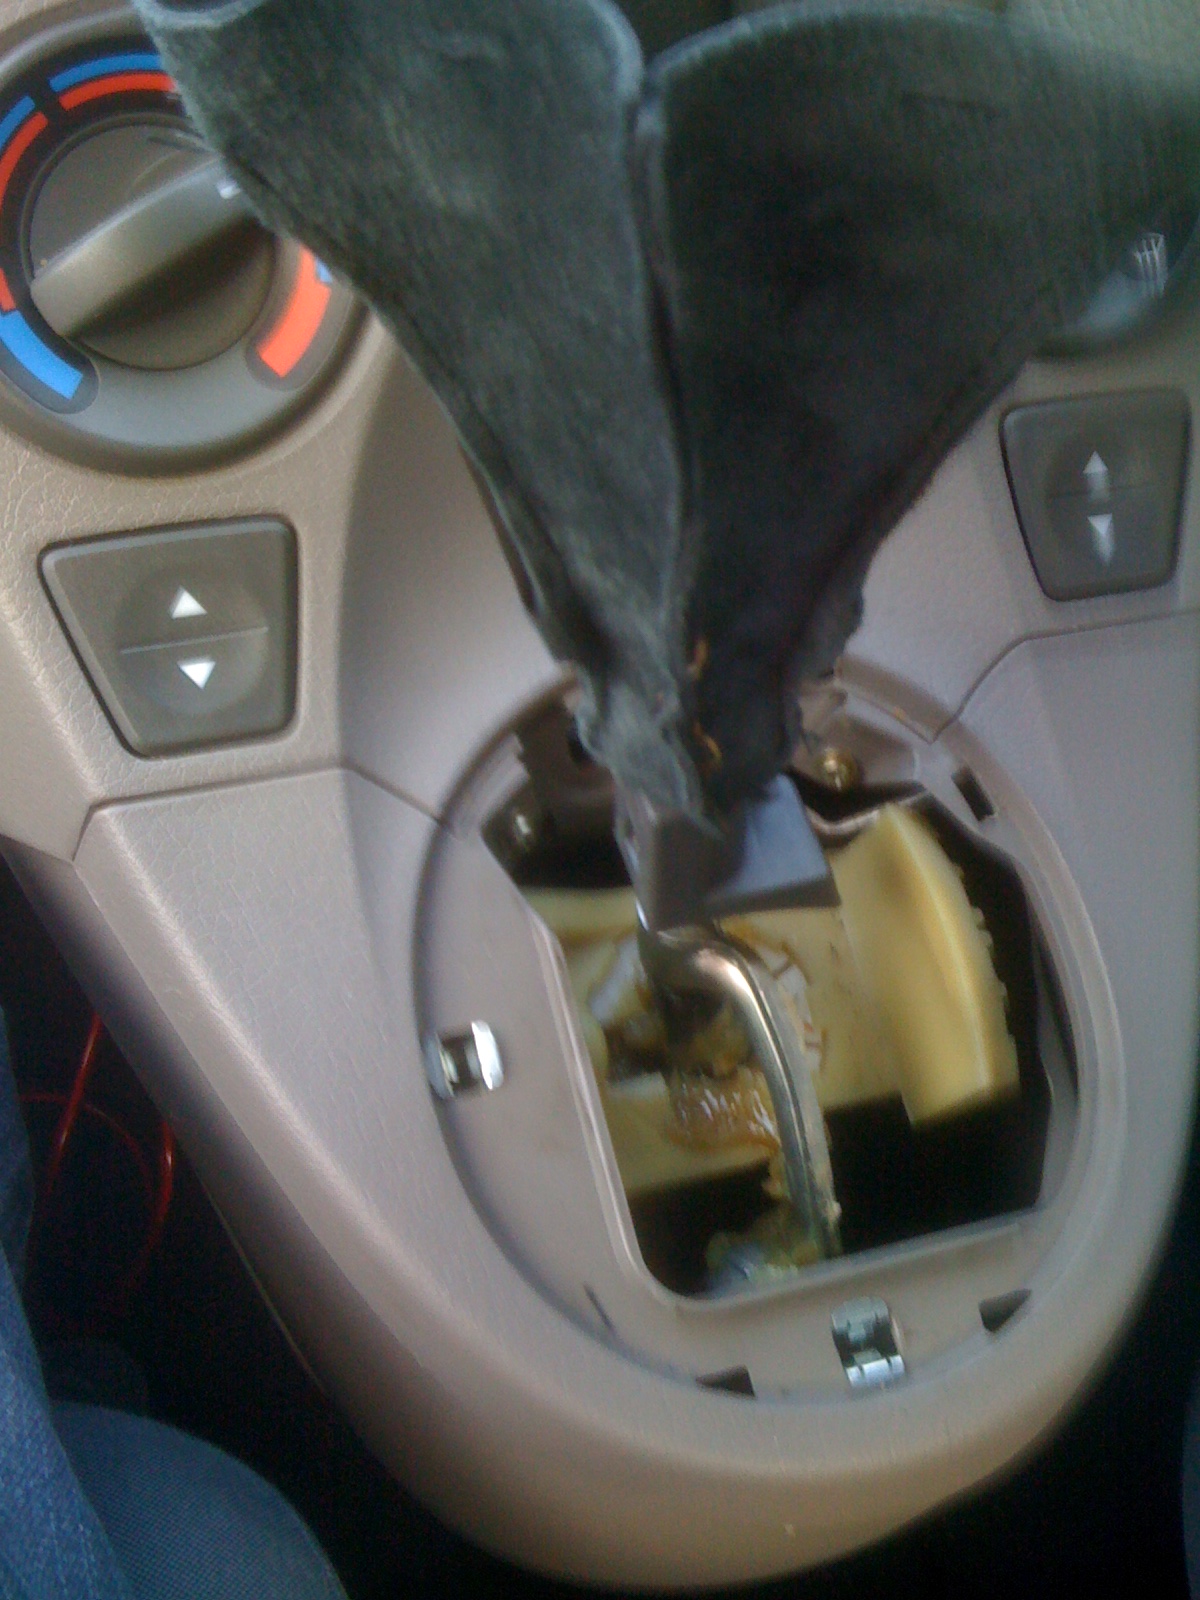
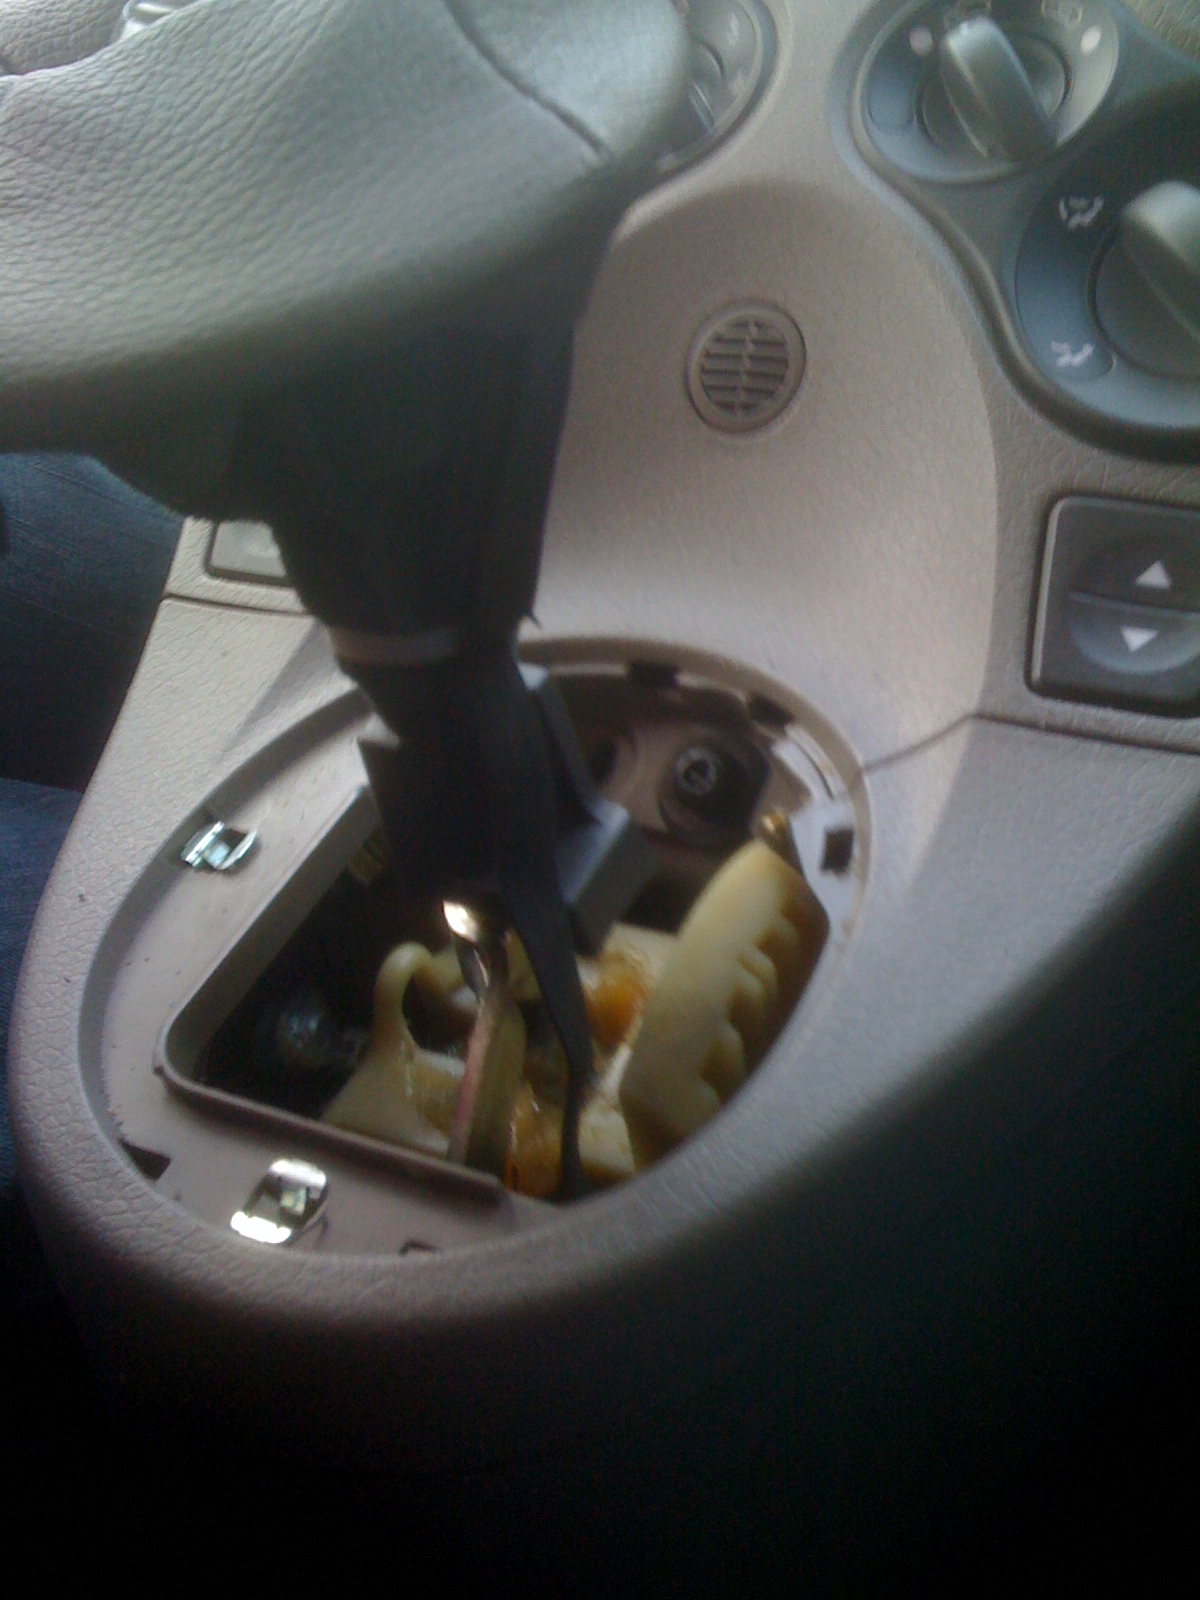
The factory fit item is held on by a cable tie at the top and a plastic ring at the bottom (yes really, a cable tie). Start by removing the plastic ring at the bottom by lifting up from below the gaiter where it ends and meets the dash. I was able to do this with my fingers but you may need a flat screwdriver.
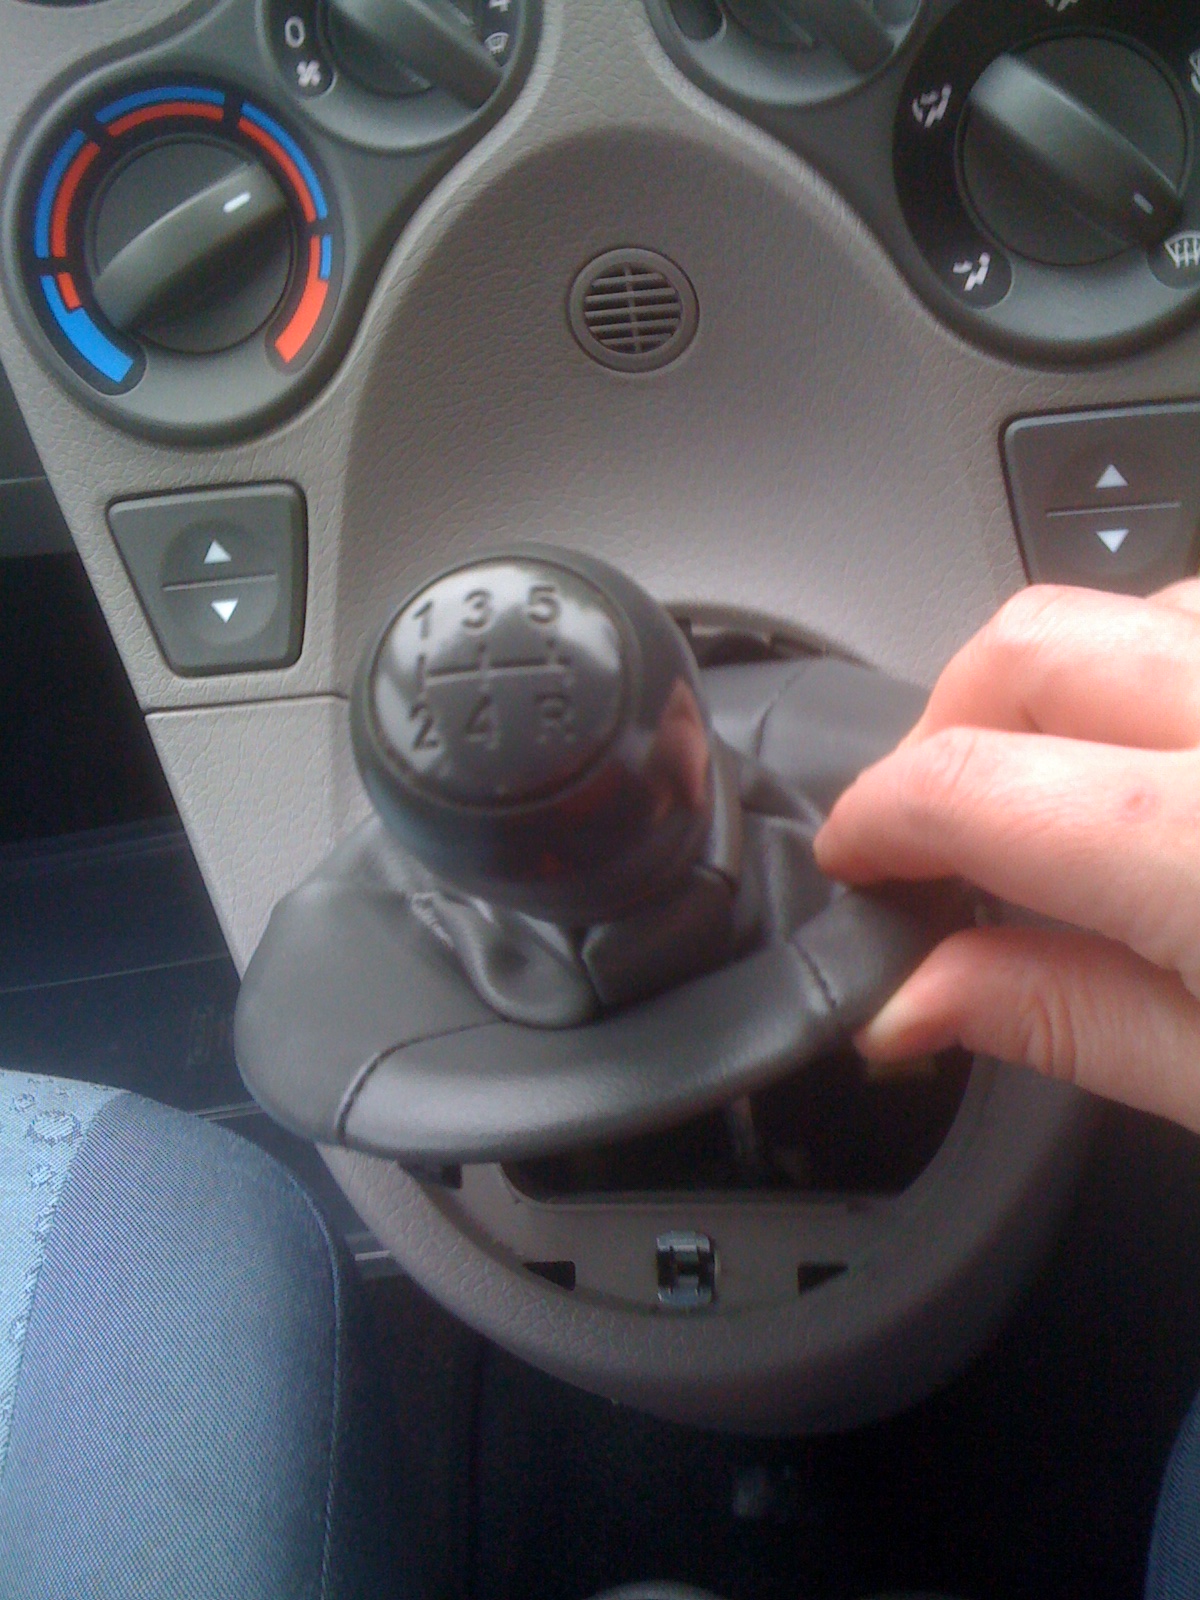
and pull it right up level with the top of the gear knob.

and towards you
You should be able to see the cable tie holding it in place at the top of the lever just below the lift reverse. You will also see the elastic that pulls the gaiter back down with the lift reverse (mine is very very worn after 40k miles and so I will replace it later in this guide).
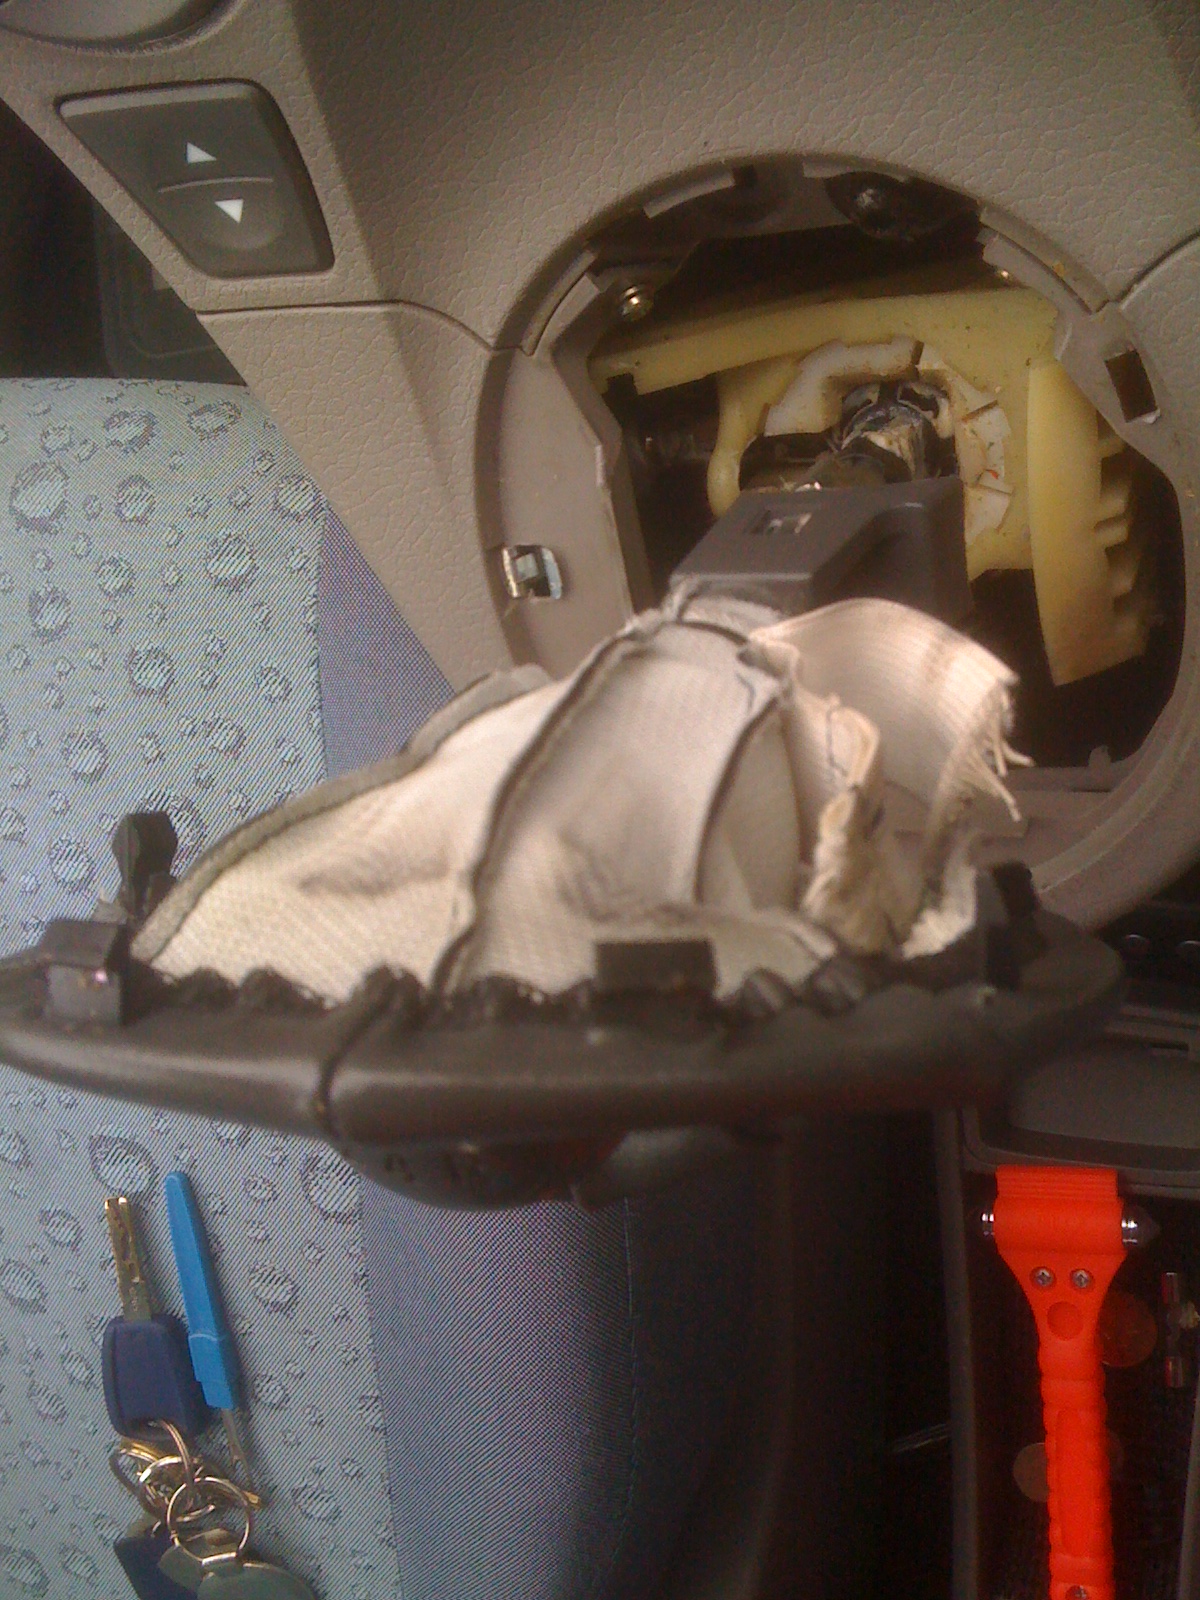
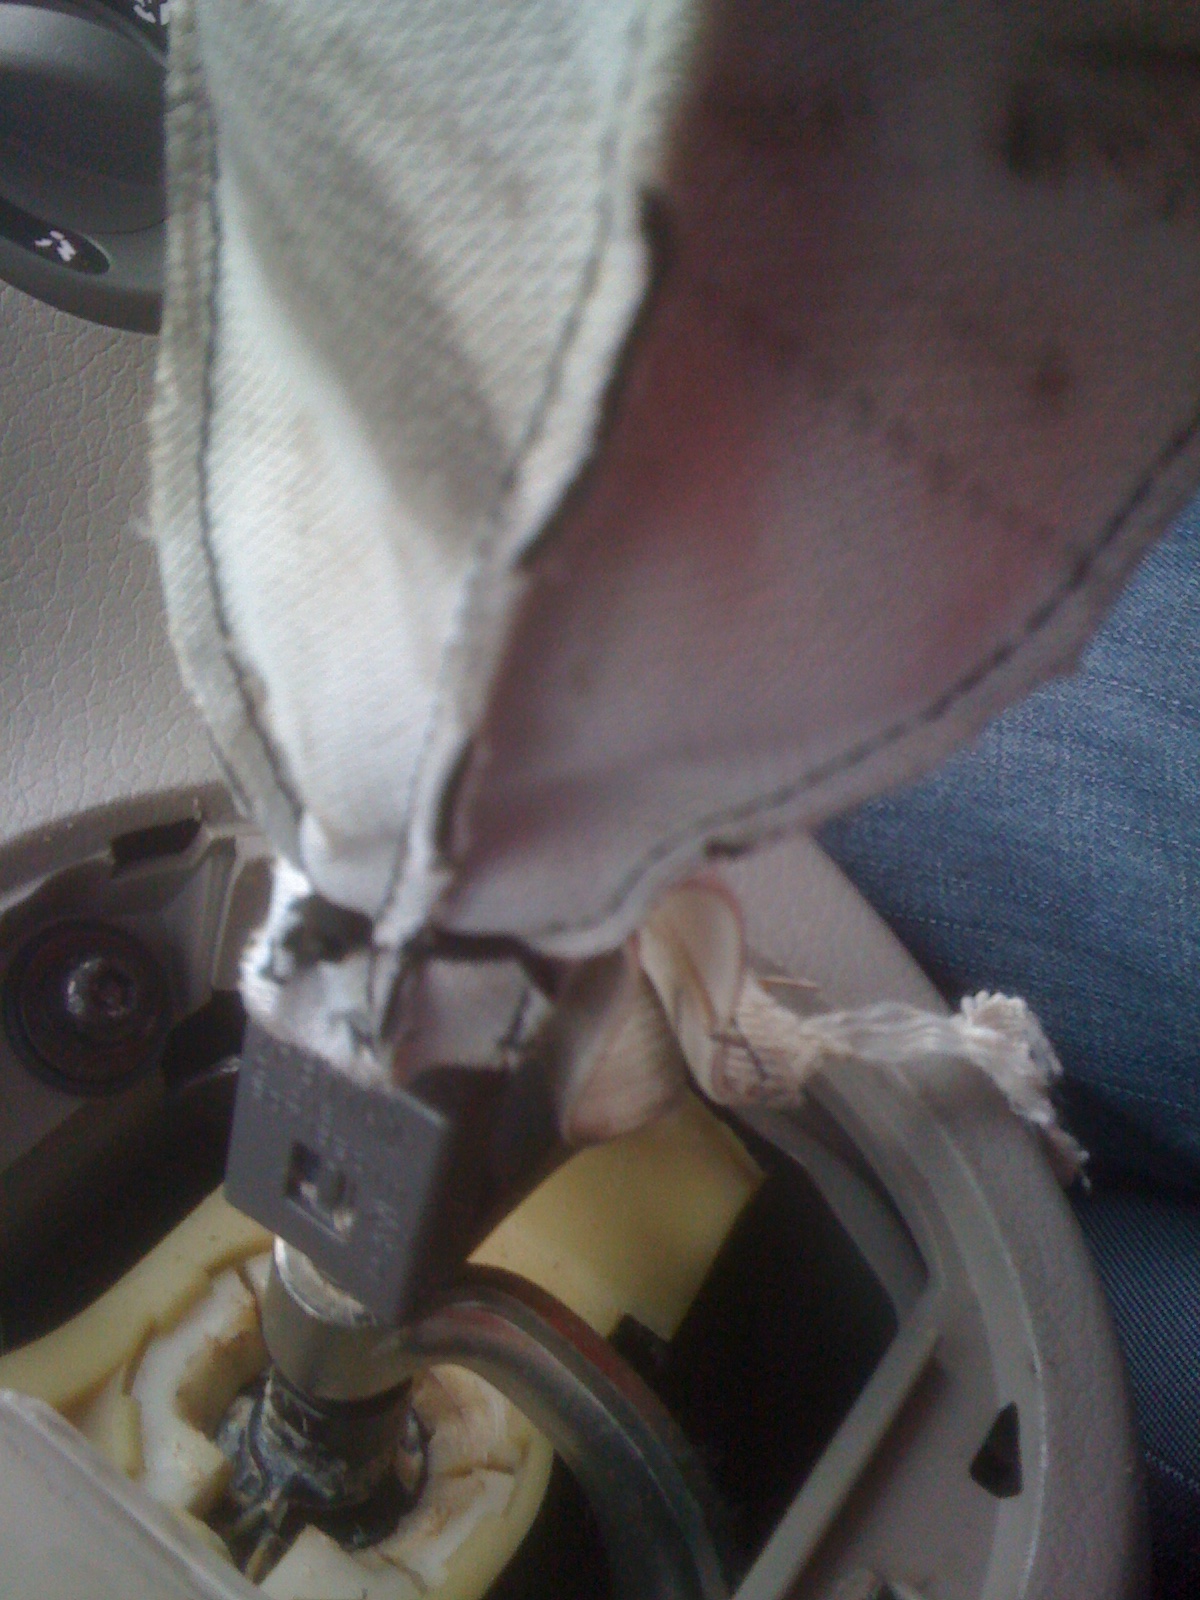
Unhook the bottom of the gaiter from the tabs on the plastic ring. Dont forget the "odd" small one which you can see at the bottom right in this picture. You will also have to cut the elastic from the plastic ring (or in my case it snapped with a quick yank as it was so worn, I wonder if they got this from a polish Y-Front factory???)
and then cut the cable tie.
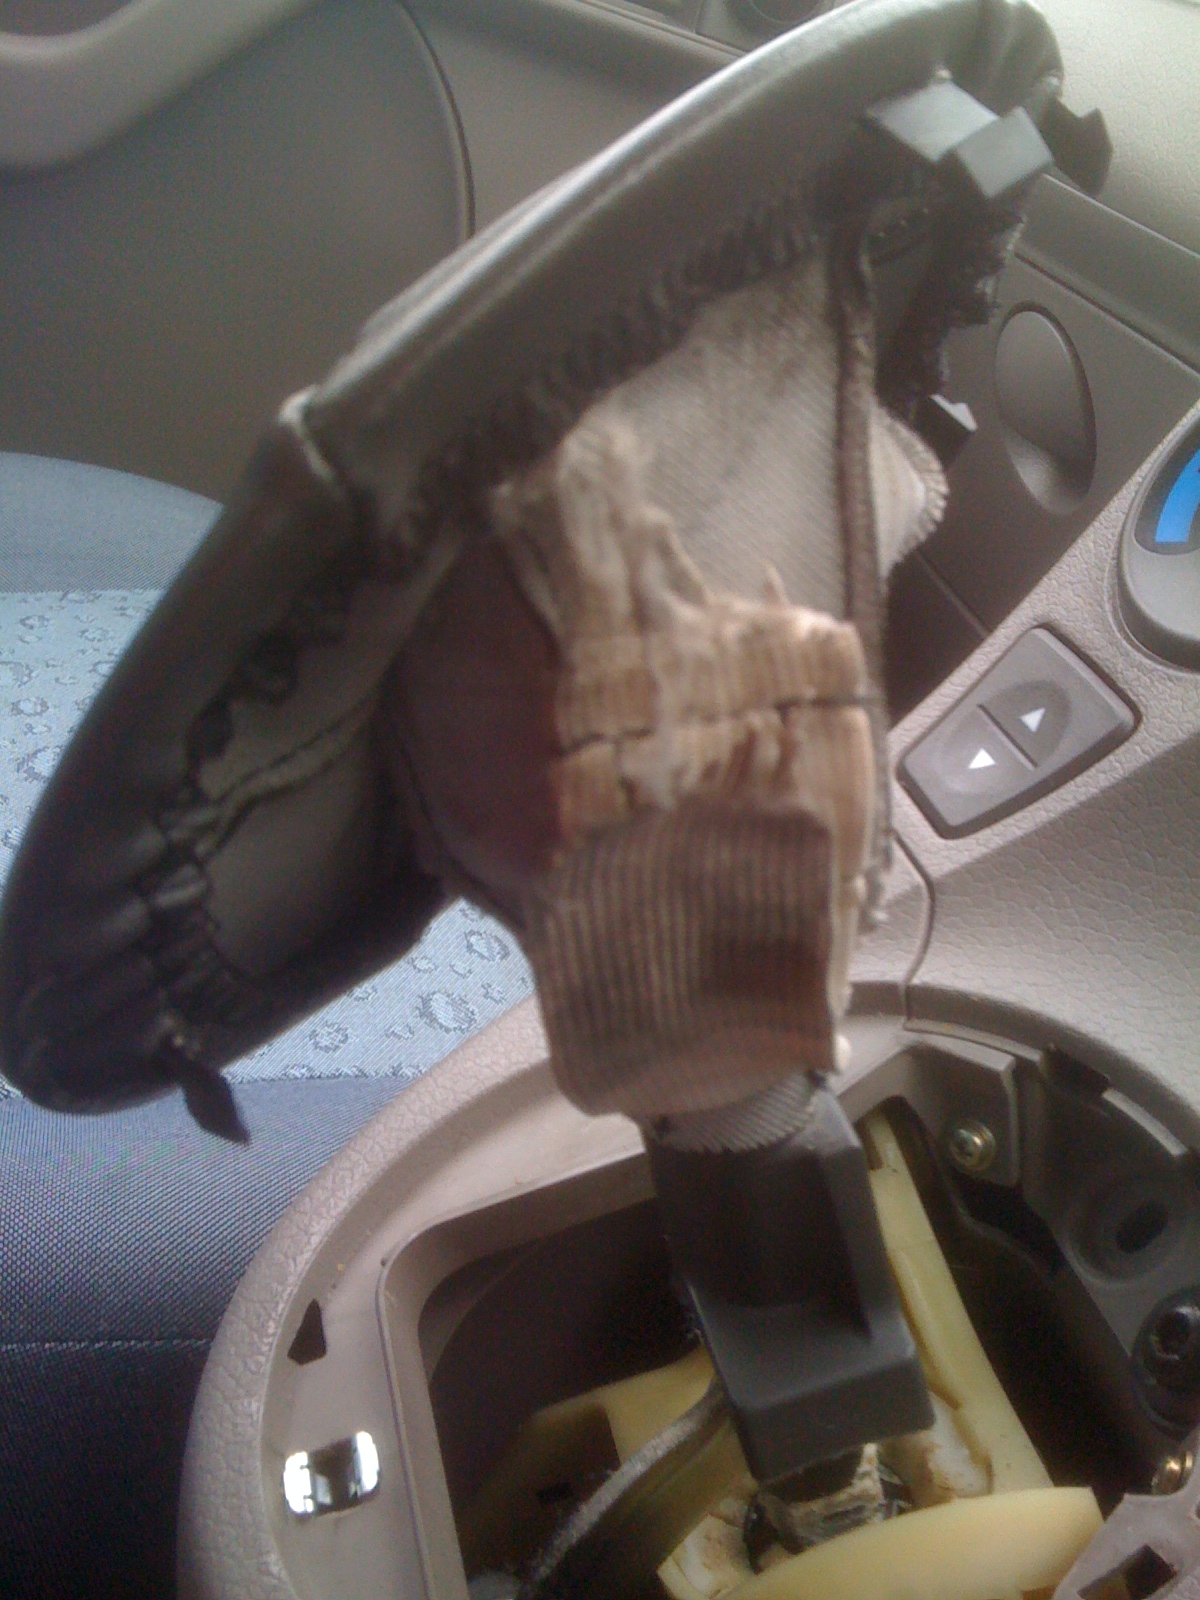
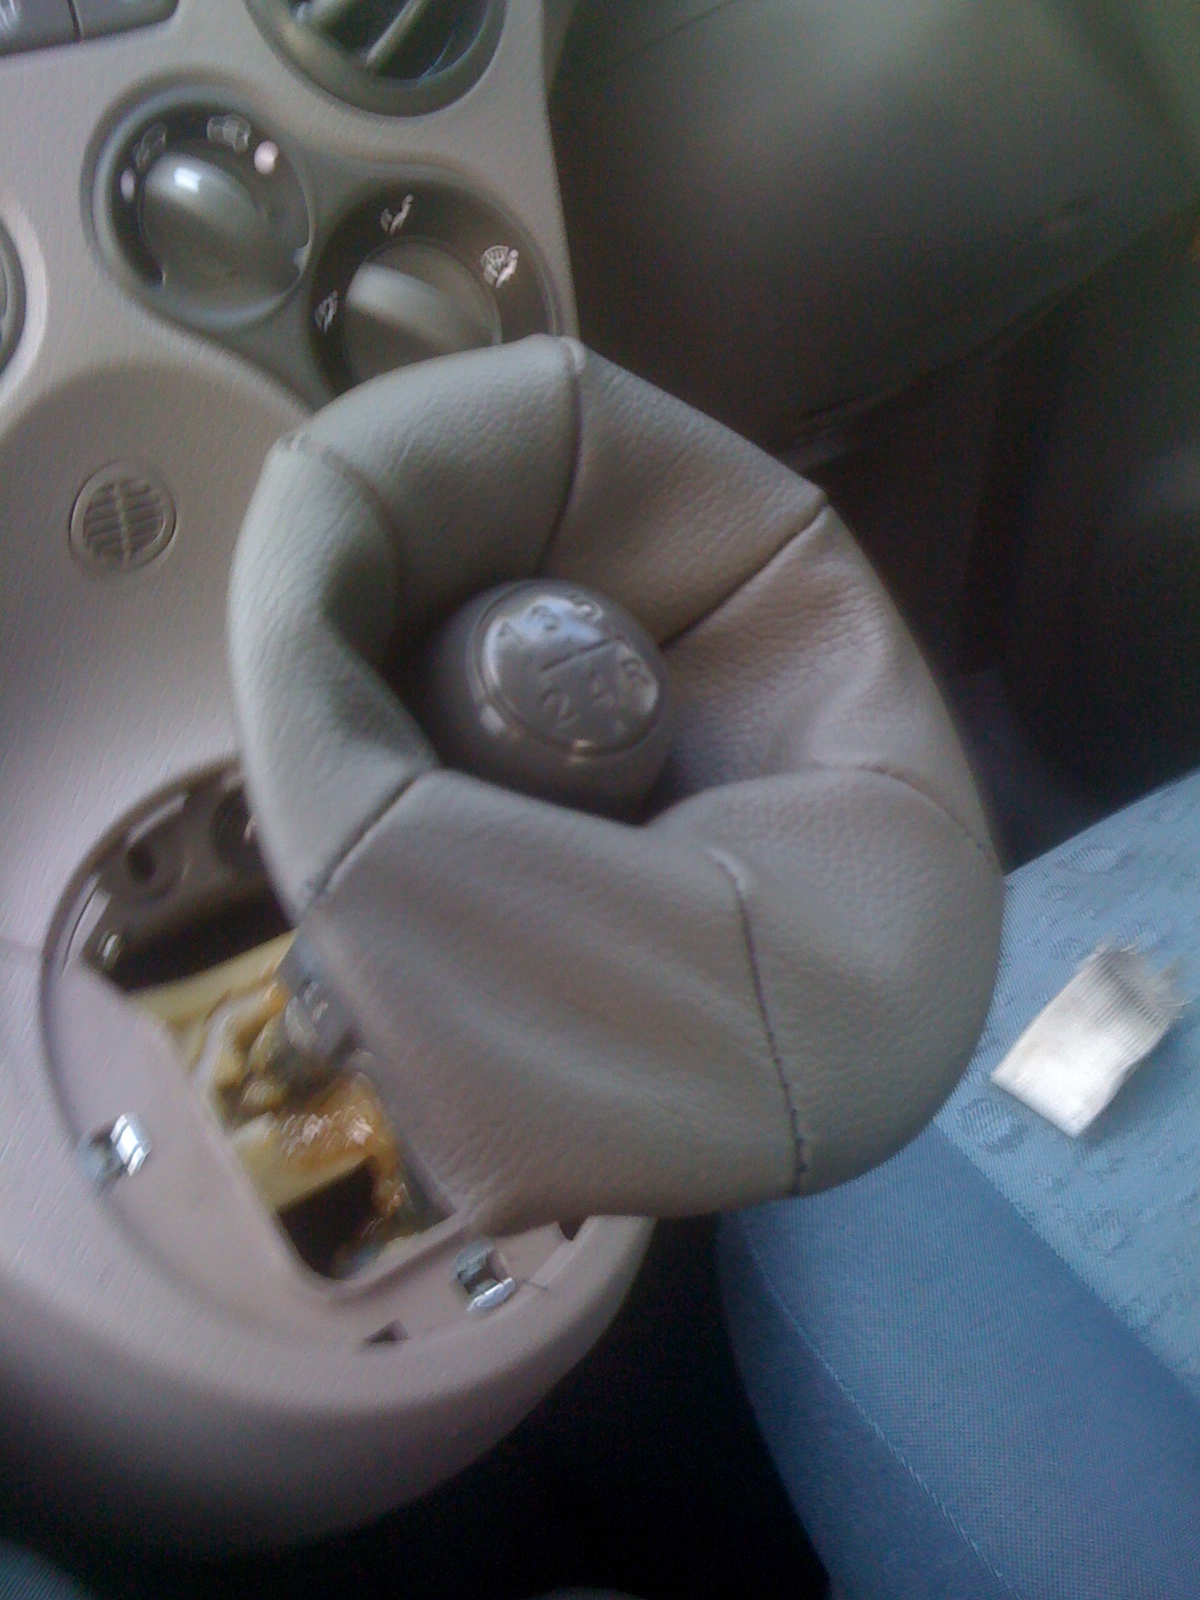
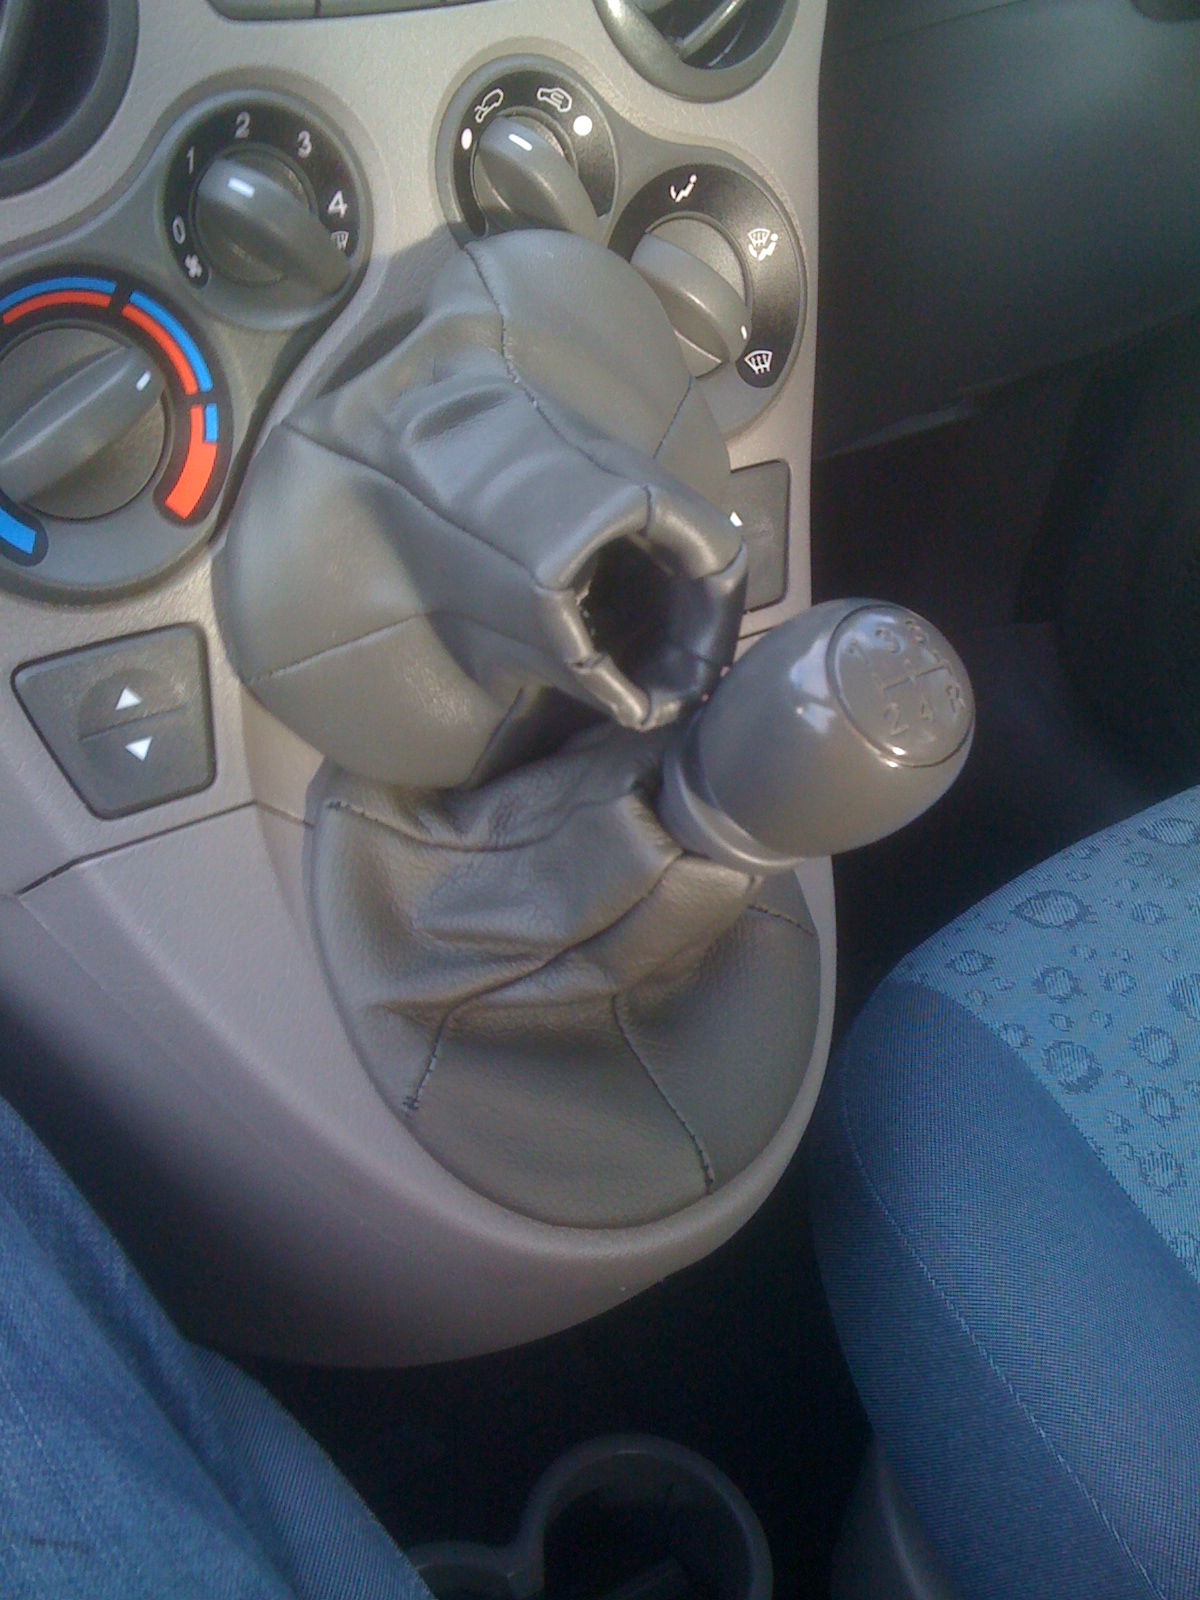
The gaiter should just pull over the knob with a bit of effort. If not you will have to pull out some of the stitches. You will then have something like this!
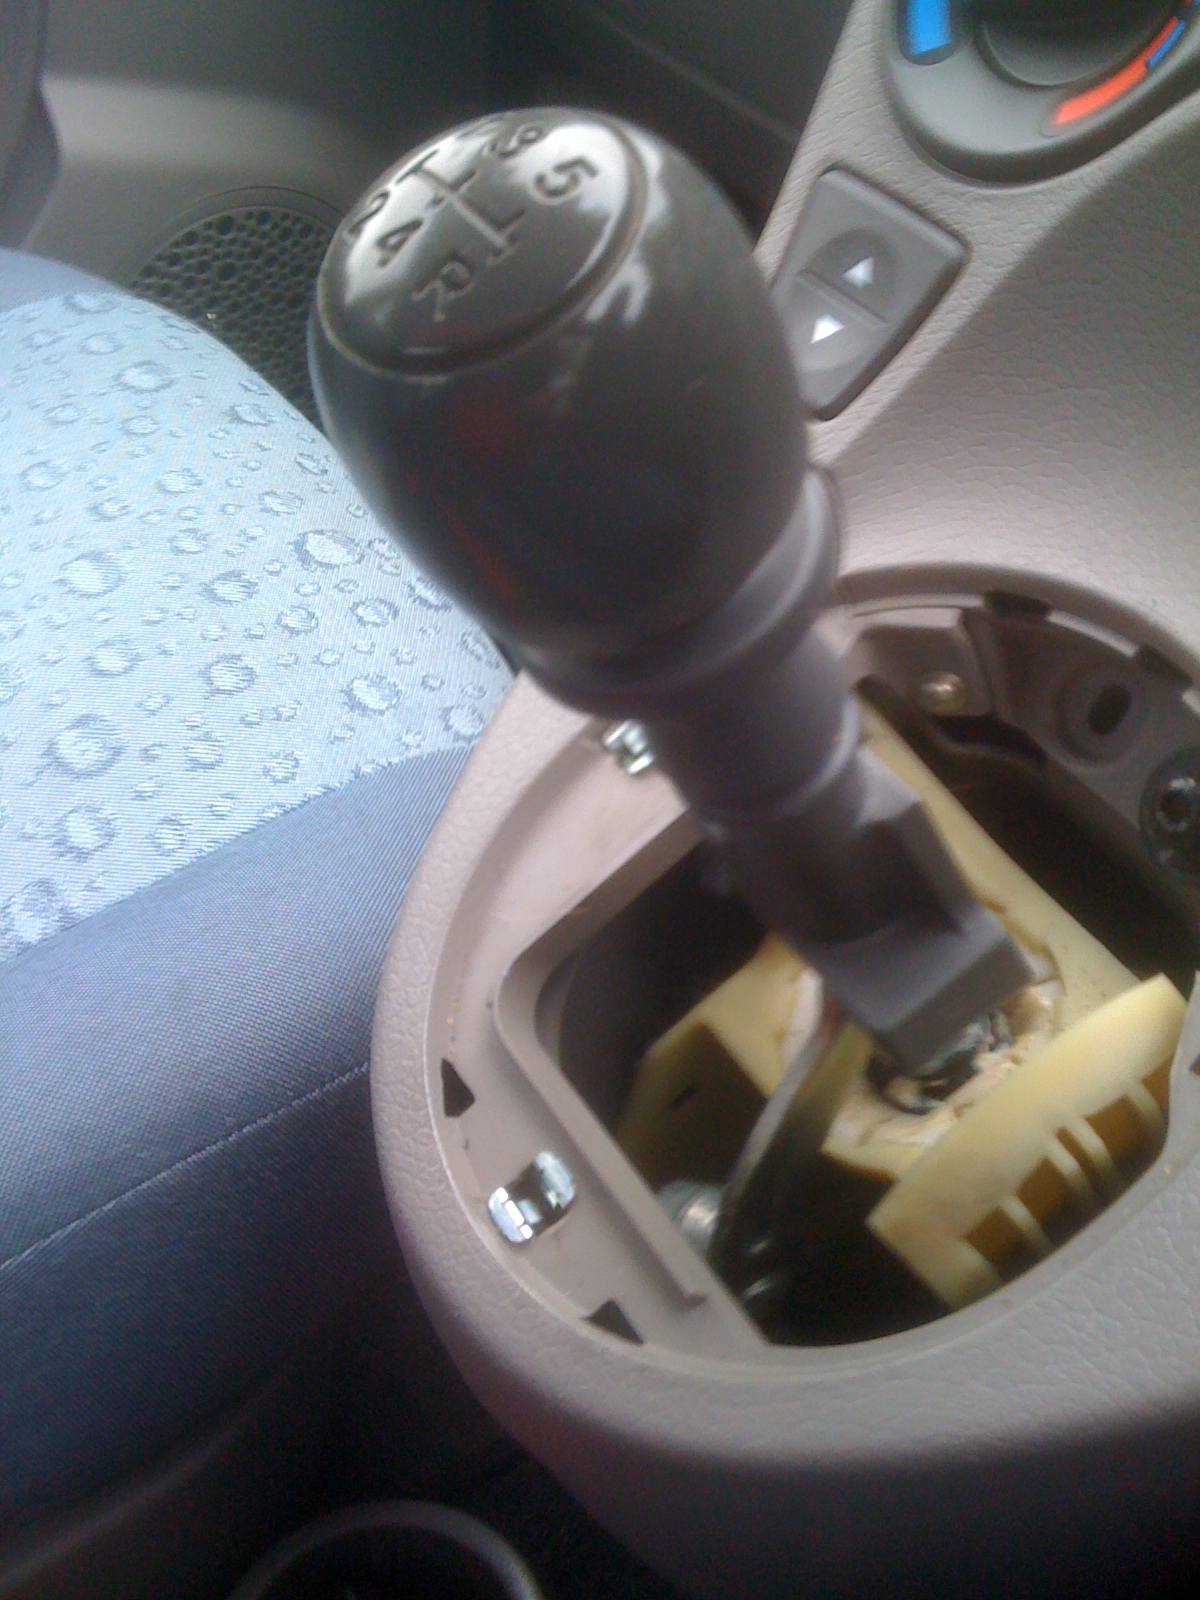
Now is a good time to grease the joints in the linkage to the gear box. I used a lithium based grease on the nylon ball in the centre and the other ball joints I could easily reach. It has made my gear change a lot less clunky!
Preparing the new Gaiter
Preparing the new Gaiter
So on to the new gaiter. I chose to stay with grey but this is a genuine leather item purchased from jf boots on ebay. They claim they are probably the best gaiters in the world. Dont know about that but they are much better than Fiats
") !
!You will need to turn your new gaiter inside out.
and possibly unpick some of the stiches at the top as I had to as the gaiter was a tighter fit than the Fiat item. If you can get away with just slipping the gaiter over the knob it would be much easier and you can skip the trickiest step! The main seam was on the short side of mine which goes to the back and so if you make a mess of it. Hopefully yours is the same (i imagine all those from the supplier I used would be)

Fitting the new gaiter
Fitting the new gaiter
Now turn the gaiter back the way it was intended and slide it down over the gear knob. Now turn it around so the "unpicked" part is nearest to you. Now pull the gaiter inside out and sew up the part where you unpicked the stiches (this is the hardest part). I used a strong brown thread but black would have been better.
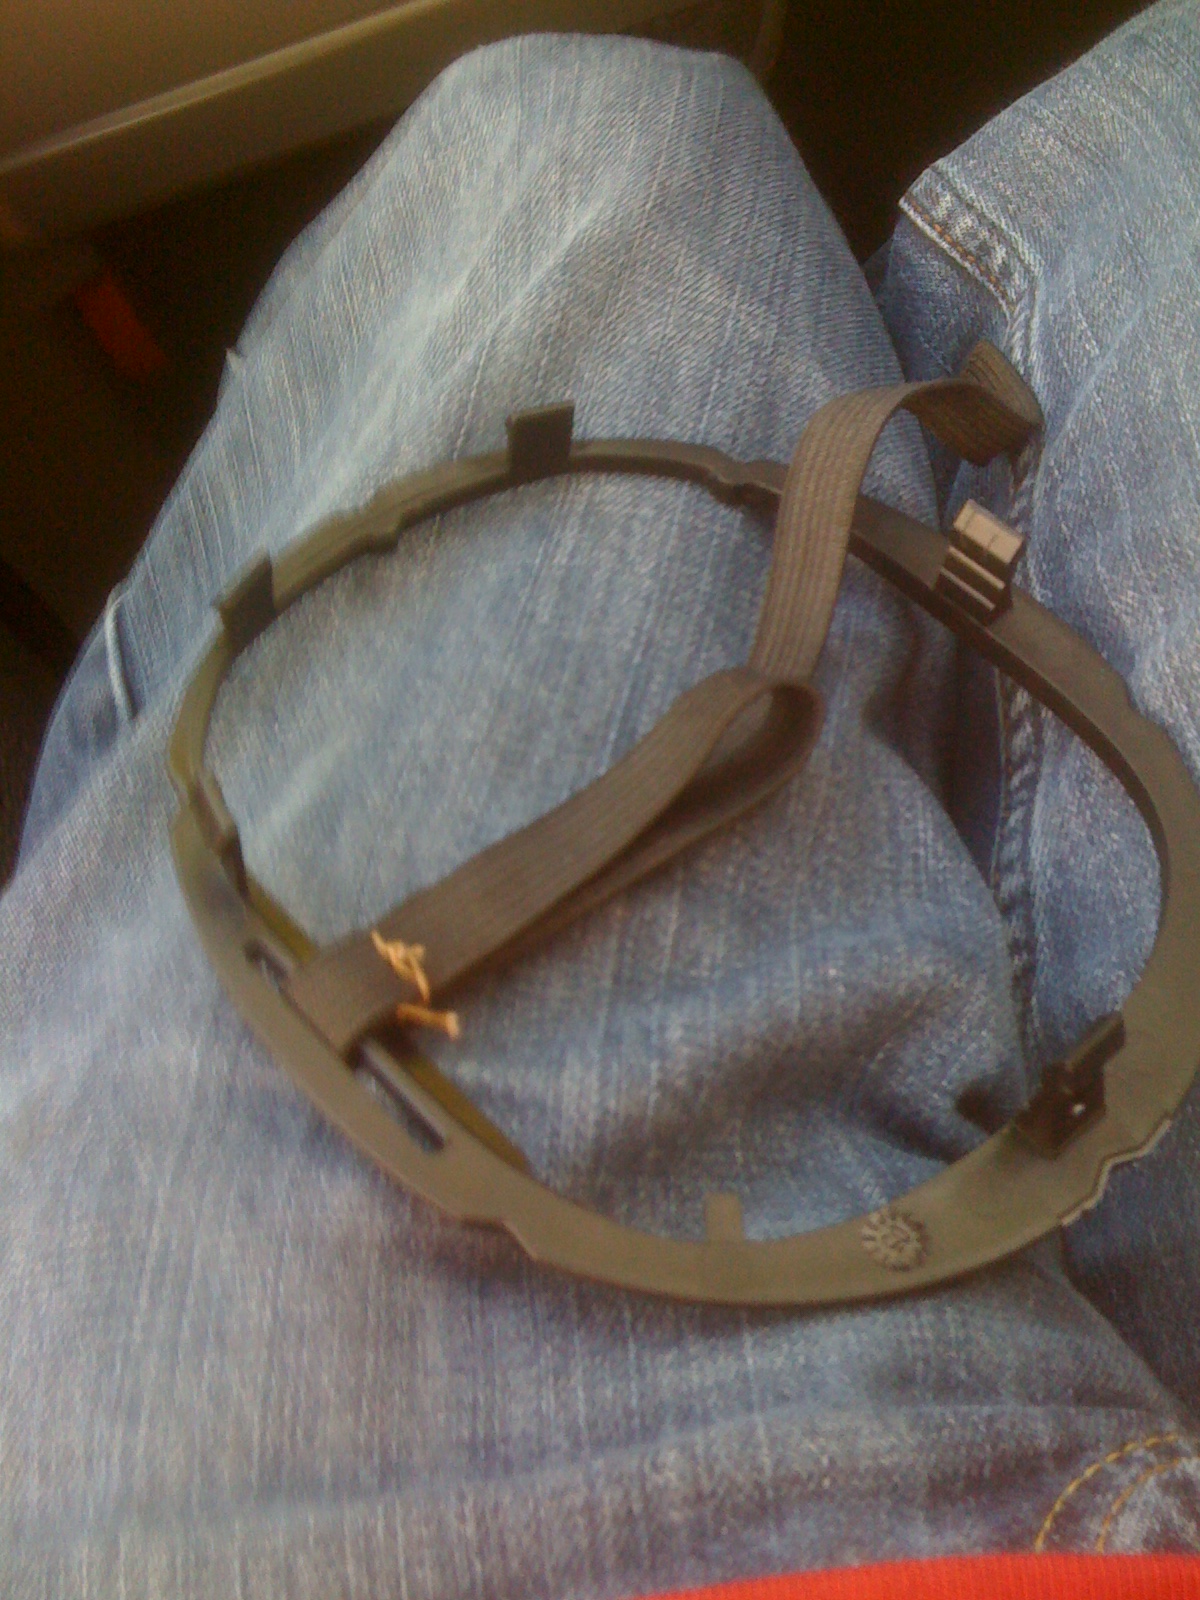
Now you need your new elastic and cable tie. Measure the amount of elastic you will need by comparing your new elastic to the size of the "loop" of the old elastic. As I was using reasonably thin elastic I doubled mine over. Loop the elastic over the part of the plastic ring where you removed the old elastic and sew it so it forms a permanent loop
Now for the second most tricky bit. You need to refit the plastic ring to the new gaiter. My replacement gaiter was not elasticated like the original at the bottom so this was a bit tricky as it too time for the leather to stretch around all of the clips.
You need to slide the plastic ring over the knob with the clips facing down and the side with the elastic attached facing the drivers window (RHD). Make sure your gaiter is facing the right way, ie. the short side towards the engine and the long side towards the rear of the car. Now one by one hook the gaiter over the hooks using the pre-cut holes. Dont forget the odd one. The last hook will be a challenge but stick with it.
Next get your cable tie and insert it through the loop in the elastic. Now find the groove at the bottom of the lift reverse where the cable tie sits and loop the cable tie around it (but dont tighten it just yet, ignore the excess piece of elastic hanging down in this pic).
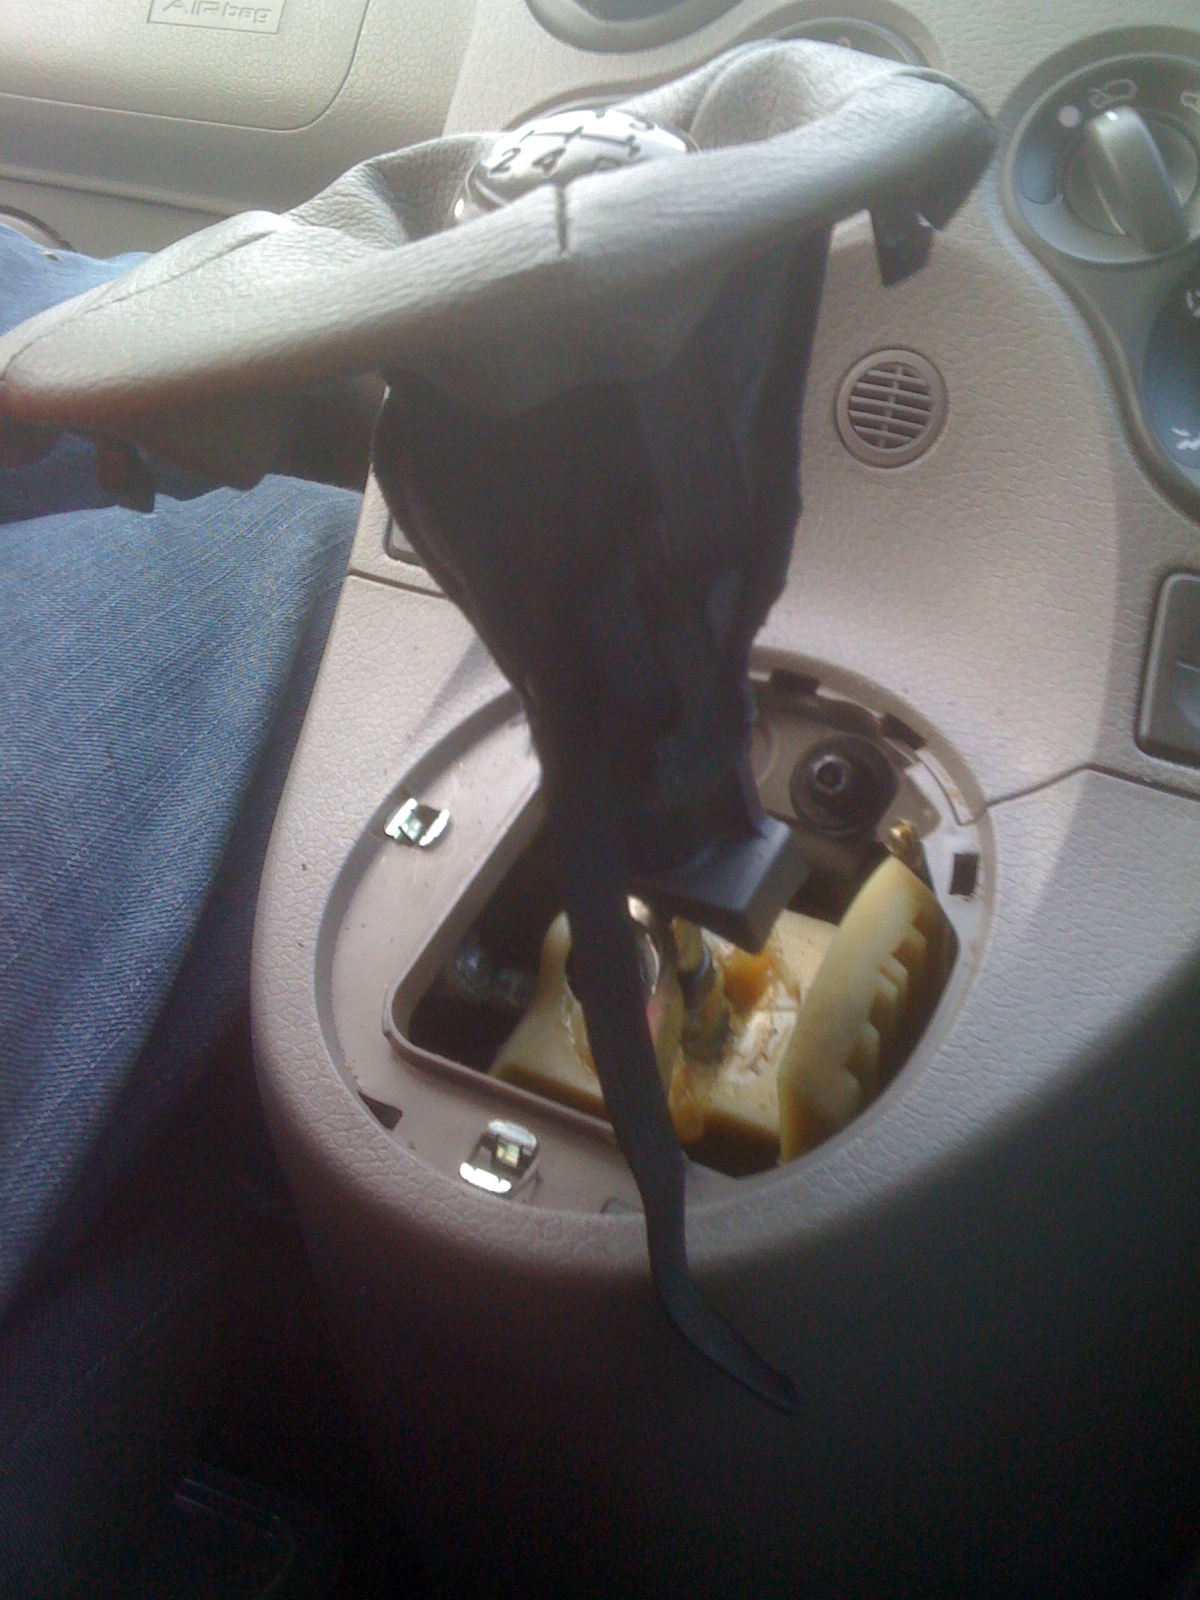
Make sure you pull the top of the gaiter down over this groove a few mm. Now tighten your cable tie as tight as you can and cut of the end (you can make out the elastic with the cable tie through it better in this pic. Again ignore the excess hanging down, this was there incase it wasnt "springy" enough so I could strengthen the loop).

Now for the moment of truth! Pull the plastic ring down whilst manipulating the "fold" at the top of the gaiter with your fingers to make it neat. Now carefully clip the ring back in place on the dashboard making sure the gaiter fits under the ring neatly.
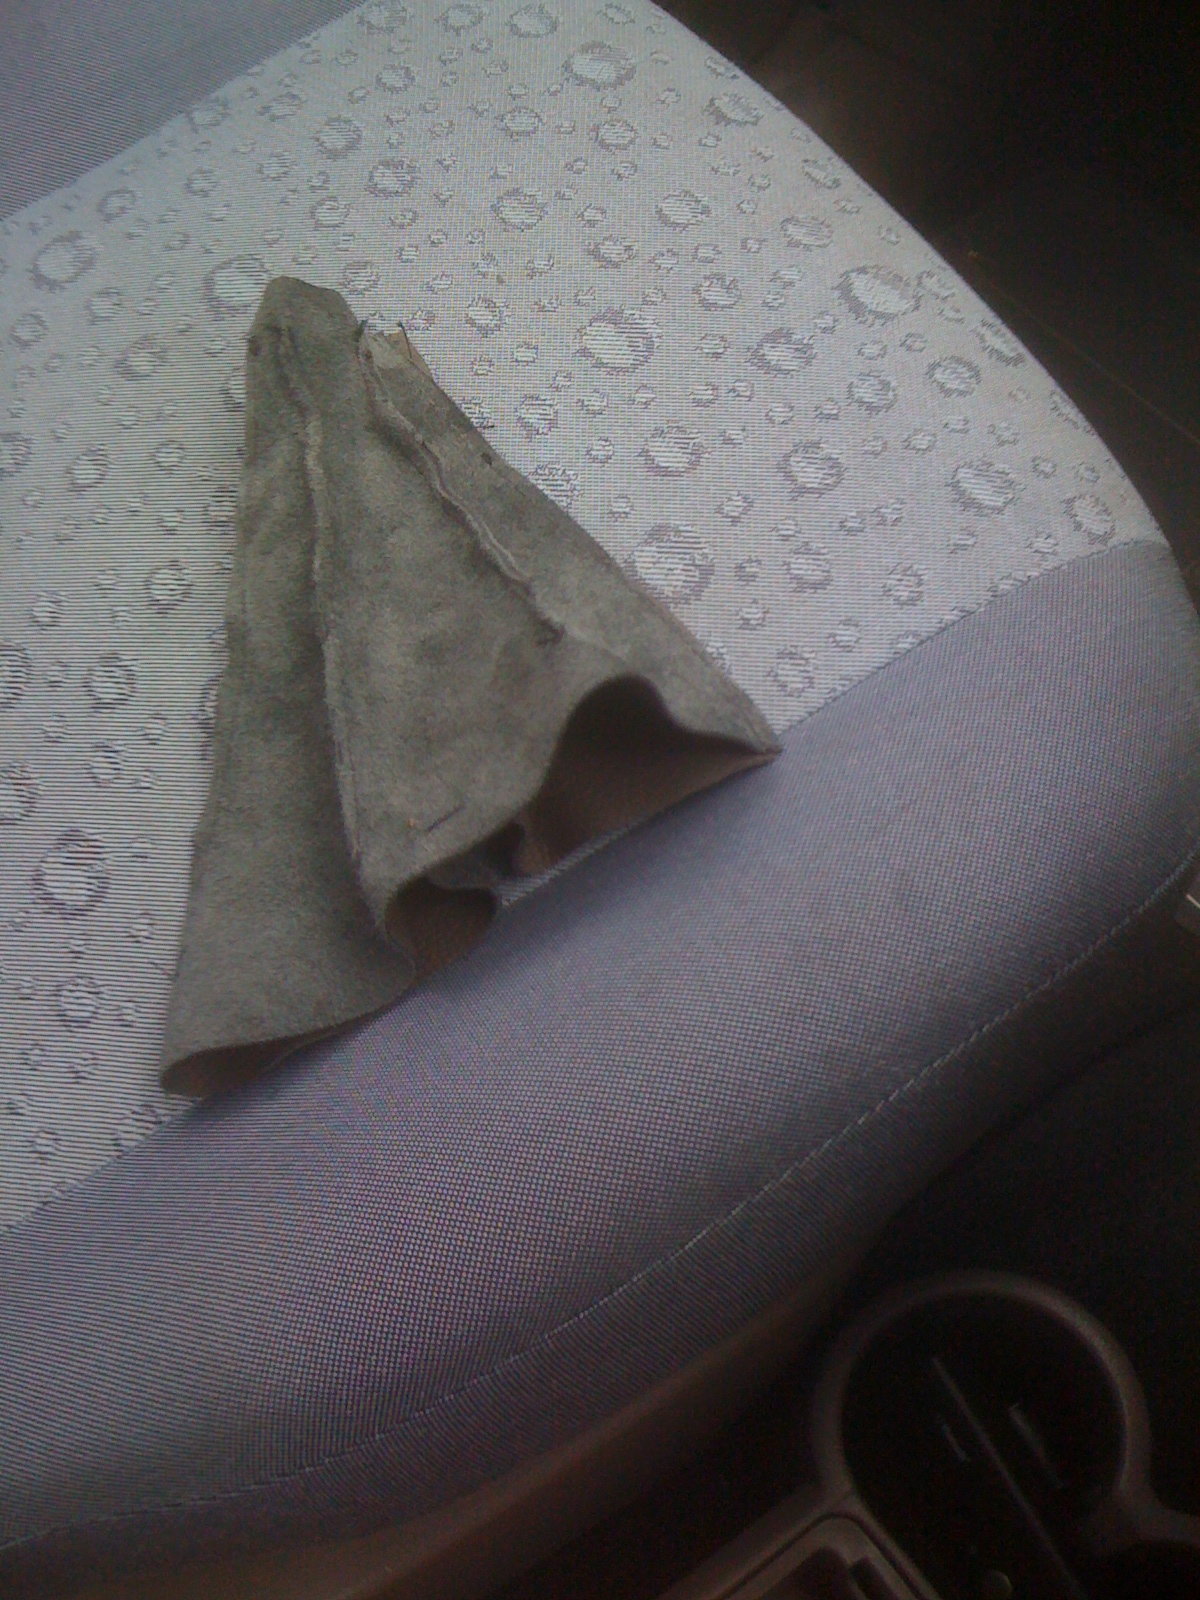
And your done! The final pic shows the old and new gaiters together
Please leave any feedback, comments, or suggestions below