Hello, some of you know me - I've been on and off the forums for some years now, I've owned my 1.6 active from new on an 03 plate and recently bought the wife a 1.6 dynamic MW on a 53 plate. Anyway my car had hit the belt change time and Fiat had quoted me an estimate of £750 per car to do this job, i figured that it would and is more cost effective to do the job myself.
This is a rough guide to how i changed the belt on my car, I will include any information I can remember or feel is important, but i wont take any sort of responsibility for people who damage their engines etc. this is a rough guide done my an owner, I'm not in the motor trade so some practices maybe wrong in a true mechanics eye - but I've done it and my car is back on the road.
CONTINUE AT YOUR OWN RISK
OK so your still here
First of all.....
If your not mechanically minded DON'T even attempt to do this job. Its not for the every day diy mechanic - you will need to know how the engines work (even I had some issues but i will go into them later).
The main thing with this is to check check and check again. The last thing you will want to do is put a valve though a piston.
Tools Needed.
Special first...
Also new aux belt and compressor belt (if applicable to your car).
You may also want to change the water pump, on the 1.6 its actually on the aux belt not on the cam belt - i didn't on mine (only because i forgot to get sealer) but i have purchased one and it was only £22 from Euro car parts.
I don't want to insult anyone's intelligence so I wont go into removing wheels and jacking, and tbh if you need a guide to do those then you really shouldn't be attempting this job.
This is a rough guide to how i changed the belt on my car, I will include any information I can remember or feel is important, but i wont take any sort of responsibility for people who damage their engines etc. this is a rough guide done my an owner, I'm not in the motor trade so some practices maybe wrong in a true mechanics eye - but I've done it and my car is back on the road.
CONTINUE AT YOUR OWN RISK
OK so your still here
First of all.....
If your not mechanically minded DON'T even attempt to do this job. Its not for the every day diy mechanic - you will need to know how the engines work (even I had some issues but i will go into them later).
The main thing with this is to check check and check again. The last thing you will want to do is put a valve though a piston.
Tools Needed.
Special first...
- Correct Cam Locking tool (essential) - cost me £150 (made by Sealey)
- Crank Locking tool - £20 - this is also made by Sealey, but the one they recommend wouldn't fit until I took an angle grinder to it. - this job would have been impossible without this tool
- 36mm socket to remove crank bolt.
- 22mm DEEP socket - this is to remove the fixed tensioner.
- Axel stands + jack.
- Good quality tool kit - socket set with normal size will be fine - some kits come without 15mm I've noticed and this is one size that is used often with the Stilo so get one.
- Alum key set / or alum socket (unsure of the sizes).
- Tippex
- A long thin gardening stick (you will see later).
- Lots of patience and plasters.
Also new aux belt and compressor belt (if applicable to your car).
You may also want to change the water pump, on the 1.6 its actually on the aux belt not on the cam belt - i didn't on mine (only because i forgot to get sealer) but i have purchased one and it was only £22 from Euro car parts.
I don't want to insult anyone's intelligence so I wont go into removing wheels and jacking, and tbh if you need a guide to do those then you really shouldn't be attempting this job.
Strip Down
OK I'm going to assume you know have your O/S wheel off, car jacked up and secure on an axle stand, wheel arch plastic removed, engine cover off and battery disconnected? (Note to Multiwagon owners, open the boot before battery disconnect and make sure you don't close it with anything you may need whilst doing the job).
OK now your ready to get dirty.
1. You now need to get the end caps off your cam shafts to lock them in position.
Next to your battery you will see Two rectangle plugs with red clips that are connected to a ECU (I think) - before removing them use your Tippex and mark one or the other, i marked my left one with "L".
If you look on the front you will see the red clip has grip marks on, if you press that gently in and lift they should come free, if not spray a little amount of wd40 on the hinge (only a little though).
Place these plugs out of the way, you can cover them with some masking tape for piece of mind.
Now you have the engine management ECU bear remove all the 10mm bolts that hold it in place and put it to one side, there are a couple of pipe holders on there which you can unclip or remove the bolts - which ever take your fancy. PUT THE ECU SOMEWHERE SAFE!!!!!!!
You will now be left with the ECU housing - this is a bit fiddly - i found that using a socket and angled ring spanner was the trick here. There are 4 11mm nuts holding it in position, remove these but hold on to the nuts (no pun intended).
You should now have your cam end caps visible,
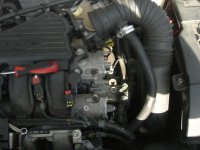
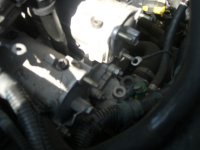
there are two bolts in the middle of the caps with wires. they are 13mm remove them and move aside.
there should now be a few more 11mm bots left remove them. You may find the caps don't want to move after all the bolts are out, don't worry this is normal they just need a little coaxing. With a small flat screwdriver pry gently around the edges until it pops free
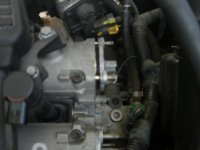
now mark the first one you remove - inlet or exhaust, the inlet is the front one and exhaust is the rear.
Phew you now removed the end caps, we need to move over to the other side of the engine.
Remove the Number 1 spark plug (obviously remove coil pack first)
Setting Timing
Now take your 36mm socket and turn the crank CLOCKWISE!!! until your just of TDC
this is a good idea where TDC is - take note this is NOT TDC - but easy way to find it, the "DOT" is of diag and the bottom part of the crank pulley is in-line with the RPM counter.
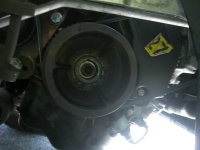
OK that's done - get a friend or a very long extension for your socket so you can see the engine bay whilst turning the crank.
Now the long stick - poke it into the spark plug hole and then place one of the cam end caps over it so the stick can glide up and down inside the hole.
Now very gently turn the crank so the piston is TDC - the "DOT" will be at the top -
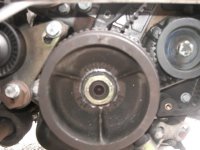
you will also notice your stick will move, when you have achieved TDC the stick will stop then start to move back down, when the stick stops stop there and mark your stick with some Tipex (makes it easer to see it moving then).
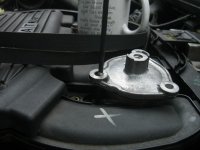
now get your cam locking kit out and place one of the plates onto the end of the cam.
They are marked Inlet and EXH make sure you put the correct one on the correct cam. If they don't line up you are on the wrong stroke and will need to rotate the crank by 360 degrees, if its just off then you will need to move the crank slightly until they sit in the cam like this-
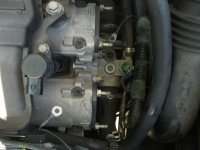
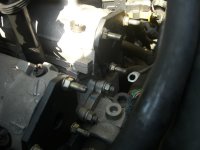
Now use the nuts you removed (11mm) to secure the plates in position.
Congrats you have just set your cams to their timed position!! wasn't that money you spent on that kit worth it lol.
Crank Pulley
Now the FUN bit......
The crank pulley on the 1.6 is strange tbh, fiat decided to use a monster sized nut to hold the pulley on. To remove this bolt you need a flywheel lock and plenty of Ready Brek - to say it was tight is an understatement.
OK. you will need to climb under your car and remove the flywheel cover on the gearbox, this is usually held in by 3 10mm bolts (or in my case only 2 - lost one when i rebuilt the box - another story).
Now the flywheel lock i got didn't fit correctly - so i took an angle grinder to the thing to make it fit-
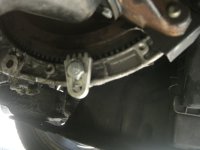
off topic-
OK before anyone says anything yes i know i have cv grease there and a minor oil leak - doing this job i saw that one of the gators had came free and had to repack it with grease before closing it up. as for the oil leak its been there for years and I've never been able to find the source
OK back to the point.
this will lock the crank in position, you should be TDC on your crank and timed up on the cams at this point. now you need to remove that horrible nut holding the crank in position - i feel for you !!!
done .... good hard wasn't it!!
you will now need to lift the pulley away, be careful not to damage your rev sensor or the sump, a large screwdriver was suffice in my case. You could loosen the aux belt but as the compressor belt has to be removed anyway and is not adjustable you may as well just pull it off in one.
once you have your pulley off check it for damage or in my case i had a lovely little tar stone in mine, no wonder why my aux belt was almost in two
discard the old belts!
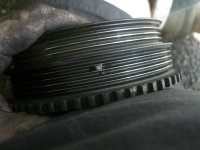
Belt cover & Engine mounts
trolley jack time,
if you have some wood or even an old pillow this will be helpful.
Place your jack under the sump (cam belt end) and jack it up so its taking the weight of the O/S engine mount.
You will now need to remove the three 18mm nylock nuts on the mount as shown here -
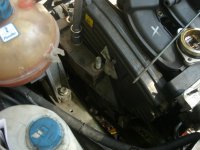
now the coolant res (2 10mm bolts)
You now have the big lump of metal detached from the engine lets lose it, there are 3 bolts on this all of them are 15mm, one of them lives under the coolants home and the other two are in plain site.
There is now only one part left to remove, this is on the engine itself, you may need to jack the engine up slightly to gain access to the nut, there are also two LONG bolts as well. remove them and you will still find it is connected to the cover.
Get the correct size alum key for the cover and look for the bolt at the back of the mount, hint its around the top towards the back of the engine.
Once removed you can then lose that part of the mount.
Now the cover can be easily removed from the engine removing all the alum headed bolts.
Cam belt Removal
You can now see your cam belt in all its fine glory.
Before you proceed any further mark your cam sprockets and belt with some Tippex -
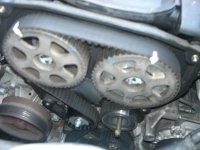
now you can remove the old belt. the way i done it was to release the moving tensioner (the black one on the left hand side) 12mm nut, and pulled it off, this allowed the rest of the belt to slide off easily.
Fitting new belt
you now need to remove the fixed tensioner, this you will need a DEEP 22mm socket for, this is what you have to remove -
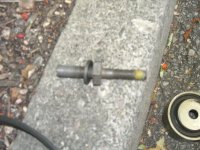
once out put the new one straight in and tighten it right up.
now put the new moving tensioner but DON'T TIGHTEN, there are grooves ion the base make sure they line up.
Now compare the new belt with the old belt to make sure they are the same, and there is no damage on the new one.
If you're happy, put the new belt on in this order-
- crank
- oil pump
- fixed tensioner
- cam sprockets
- moving tensioner.
Now count the amount of teeth you marked up on the old belt, and compare them to the new one, one tooth out your wrong and need to pull it off again. This has to be 100% on the mark so make sure its correct.
The belt should now be ready to go after you have tightened it up.
There is a special tool in the cam locking kit to do this - you bolt it into one of the holes used to mount the engine mount (the last big lump of metal with the annoying alum bolt in) just above the moving tensioner.
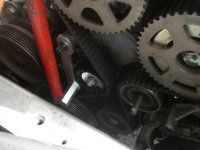
as you can see in that pic i was adjusting it, be careful here, there is a slot at the bottom of the tensioner that the tool sits in, don't rest it against the outside of the runner, it will slot in and then you will need to adjust it to full tension - lock it into place with the 12mm bolt.
You will now need to remove the crank locking tool and the cam locking tools and stick from cylinder 1 if you haven't already done so
If you are feeling weak now you can also remove all the spark plugs, BUT make sure the are is clear of any debris, nuts n bolts - otherwise you will end up having to strip your head off to remove anything that falls in if you notice - or you may not notice and write of your engine!!.
It's time to check your work - well manually anyway.
Refit your crank pulley and nut
Use your 36mm socket and turn the engine over CLOCKWISE 4x (watch that little dot), when your at 4x you should be back to your timed position.
you can now put the cam tools back on and see that they match up, also put your stick into cylinder 1 and make sure its TDC.
If all ok then you will need to adjust that tensioner to the correct settings,
there is a spy whole with an arrow and a dot, the arrow needs to be in-line with the little dot to be at the correct tension
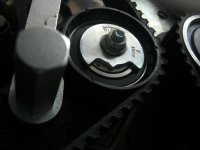
that pic shows it over tightened (sorry i forgot to take a pic with the correct tension).
Remove the locking tools again, and turn the engine over by hand as many times as you feel is necessary, check they are in correct position as many times as you need to for piece of mind, i done mine 20.
All done now for the rebuild!!.
Rebuild
I'm not gonna go on too much about the rebuild as anyone that has come this far is more than capable of doing it without any more guidance.
just one thing i really need to add is the aux belts need to go on AFTER the covers and engine side mount has been re attached.
The bolts for the aux belt are 15mm, loosen the bolts off (two of them before it will move) put on the new belt then tighten the belt like this-
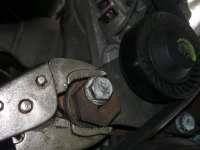
The compressor belt is a bit more of a pig, its a stretchy belt so get it around the crank and then over the top of the compressor pulley, using the crank bolt turn the engine by hand until the belt is completely on.
All finished!
Well here is my old belt
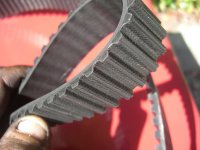
As you can see its not actually that bad, it probably would have been fine for a bit longer, BUT this wont mean that yours will be the same. I do a lot of motorway driving and am a very cautious driver - if your car has been stop start all the time tearing around everywhere then your belts will be in poorer shape.
My car now feels slightly better, not much in it maybe its more placebo effect - but its nice not hearing the noisy bearing at lower speeds when under load.
When i first started her i heard loud banging from the engine, i honestly thought i had done it wrong i had checked everything over 10x - what it was in my case was a bit of injector knock that quickly quietened and stopped - if you have done everything correctly then don't worry.
Hope that is helpful for some,
Roy


