Handbrake cable change.
Thanks to Davren and Deckchair for information prior to this job.
Tools you need:
- A powerful ratchet 1/2" with small sizes, or preferred tool.
- Jack and axlestands if not in a garage.
- Screwdrivers.
- WD-40.
- Pliers.

1. Jack up the car, remove the rear wheels and place the car on axle stands. Don't work under the car with the jack supporting the car.
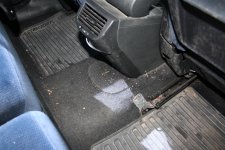
2. Handbrake cables must be slackened completely to be removed. This guide will also show the dismantling of the rear handrest to gain extra access and show how the cables are attached. The tightening nut is below the furry shield here. It pops right up.
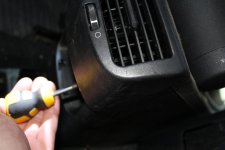
3. Remove the ashtray to reveal two screws. Pull the vent off upwards.
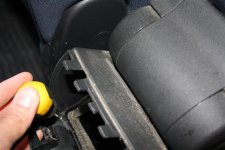
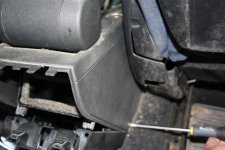
4. Remove 4 screws holding the rear part of the console. Take off the console.
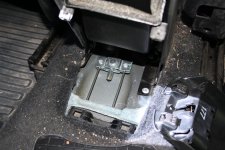
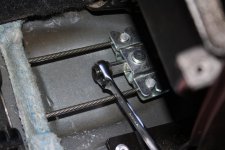
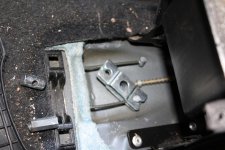
5. This shows the wire assembly. Use a 10 mm socket to remove the long nut. This way you can completely dismantle the assembly to see how it works.
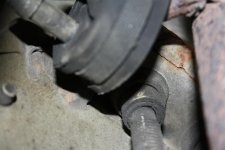
6. Push the wires' tubes out of the floor - from the inside, it's clipped in place. The plastic might brake as it's become fragile over the years. Nothing to worry about as they are to be thrown away anyway.
7. Unhook the wires' ends from the calipers. Each wire might be secured with a cabletie, so just cut it off.
8. Working from under the car, notice the cables' routes from start to end.
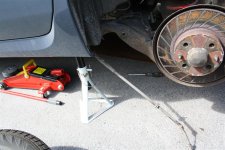
9. The right one is fairly easy. Push the new cable into the left hole in the floor, unclip one clip from the existing left cable, and clip the new cable into that. Working rearwards, you will end up at the caliper. Just leave the end of the wire unattached. Throw away the used wire.
10. The left one is slightly trickier, as you must remove an aluminum cover/shield and partly a plastic cover/shield to get to a couple of clips for attaching / removing the handbrake cable. To lower the aluminum cover to gain acces, the plastic cover must first be rotated out of the way. Use an 8 mm socket to remove two of the three nuts (they look like a sorcerer's hat) from the plastic tray. Don't remove the outermost, as you can rotate the plastic shield around this axis and out of the way. This will make room for access to the bolts that hold the aluminum shield in place. No need to completely remove it. Unbolt two 10 mm bolts, and unscrew the two securing metal clips - they are threaded and you will need a ponted plier to remove them. Unfortunately it was quite difficult to take pictures under there, but you will understand when you see them. When these 4 fastenings are removed, the shield will drop down on the exhaust and be somewhat bendable. Trace your new cable from the outside and in over the alumium shield and push it through the floor (to the handbrake area). Open the clips from the old cable and insert the new one. Pull out and remove the old cable. After you are done, bolt both undertrays in position. If parts of the aluminum shield got damaged, use a large washer to secure it with the nuts - I had to do that.
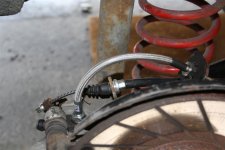
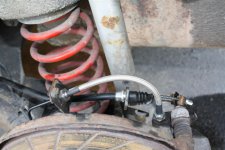
11. Insert both wire ends in the caliper, and secure them with cable ties. Put on your 17" summer tire, and put the 15" away until winter. Tighten the handbrake bolt, and refit the centre console if dismantled. How much to tighten, and if there is a correct way of "bedding in" the cables, please provide it as a comment to the guide.
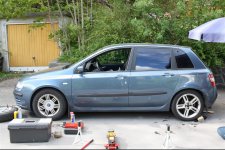
Thanks to Davren and Deckchair for information prior to this job.
Tools you need:
- A powerful ratchet 1/2" with small sizes, or preferred tool.
- Jack and axlestands if not in a garage.
- Screwdrivers.
- WD-40.
- Pliers.

1. Jack up the car, remove the rear wheels and place the car on axle stands. Don't work under the car with the jack supporting the car.

2. Handbrake cables must be slackened completely to be removed. This guide will also show the dismantling of the rear handrest to gain extra access and show how the cables are attached. The tightening nut is below the furry shield here. It pops right up.

3. Remove the ashtray to reveal two screws. Pull the vent off upwards.


4. Remove 4 screws holding the rear part of the console. Take off the console.


5. This shows the wire assembly. Use a 10 mm socket to remove the long nut. This way you can completely dismantle the assembly to see how it works.

6. Push the wires' tubes out of the floor - from the inside, it's clipped in place. The plastic might brake as it's become fragile over the years. Nothing to worry about as they are to be thrown away anyway.
7. Unhook the wires' ends from the calipers. Each wire might be secured with a cabletie, so just cut it off.
8. Working from under the car, notice the cables' routes from start to end.

9. The right one is fairly easy. Push the new cable into the left hole in the floor, unclip one clip from the existing left cable, and clip the new cable into that. Working rearwards, you will end up at the caliper. Just leave the end of the wire unattached. Throw away the used wire.
10. The left one is slightly trickier, as you must remove an aluminum cover/shield and partly a plastic cover/shield to get to a couple of clips for attaching / removing the handbrake cable. To lower the aluminum cover to gain acces, the plastic cover must first be rotated out of the way. Use an 8 mm socket to remove two of the three nuts (they look like a sorcerer's hat) from the plastic tray. Don't remove the outermost, as you can rotate the plastic shield around this axis and out of the way. This will make room for access to the bolts that hold the aluminum shield in place. No need to completely remove it. Unbolt two 10 mm bolts, and unscrew the two securing metal clips - they are threaded and you will need a ponted plier to remove them. Unfortunately it was quite difficult to take pictures under there, but you will understand when you see them. When these 4 fastenings are removed, the shield will drop down on the exhaust and be somewhat bendable. Trace your new cable from the outside and in over the alumium shield and push it through the floor (to the handbrake area). Open the clips from the old cable and insert the new one. Pull out and remove the old cable. After you are done, bolt both undertrays in position. If parts of the aluminum shield got damaged, use a large washer to secure it with the nuts - I had to do that.


11. Insert both wire ends in the caliper, and secure them with cable ties. Put on your 17" summer tire, and put the 15" away until winter. Tighten the handbrake bolt, and refit the centre console if dismantled. How much to tighten, and if there is a correct way of "bedding in" the cables, please provide it as a comment to the guide.


