Technical Fuel warning light

Currently reading:
Technical Fuel warning light

a classic car with a fuel gauge (and four cylinders and brakes) that works - it's called an MGB

It's not called anything British (or Italian) but that's why we love 'em (y)
 
Richard,

oh the one liners I could throw back.....

For someone who does not have a Fiat you spend a lot of time here so I suspect you have a secret longing to own one. Don't fight it, resistance is futile. (See what I did there with an electrical joke?)

Loved your docs for the Dynamo / Alternator and as I noted before, anything that helps us with our wiring is a bonus.

Look forward to your next installment.

Regards

Joe R
 
I've slightly refined the idea. As Joe states, there isn't too much in the way of real estate, but then there isn't a huge amount of room between the two vents. The photos below will show the layout I'd like to go with, with the addition of a couple of extra switches and buttons for hazards and the washer motor.

Although I've not included it on the mock-up, I intend to have a binnacle or border around the panel, which will protrude out from the panel face.

The gauge panel will sit further forward than it is in the photos. I just stuck it to the glove tray to get an idea of how easy it will be to see the gauges. I've got to say that, aside from the clock which is slightly obscured by the steering wheel, it's very easy to see all the gauges.

Still not sure whether to go with magnolia, white or black dial faces though.

Funny, but I seem to get a lot more attention, particularly from women, driving the 500 than I do when driving the MGB. Not that this was the reason I bought it...

IMG_4632_zps7184f0ab.jpg

IMG_4633_zps14ce8c32.jpg

IMG_4636_zps7d1001b6.jpg

IMG_4635_zpsaa152aea.jpg


Matt
 
Last edited:
Attention from women? For a 500 I think the phrase is 'chick magnet'. For an MG they have something similar, I think its 'granny magnet'....

Anyway, keep up the design work, mock ups are the best thing sometimes. Do the smaller gauges have an inbuilt warning lights? Given they are tucked away a little, is it possible to have a single common warning light that is in your face that alerts you to look for a specific issue?

Regards

Joe R
 
Good question Joe. I'm not sure the gauges do have any inbuilt warning lights, however I've not settled yet on which gauges I'm going to buy.

I would assume the two key warning lights would be oil pressure and low fuel - hopefully both of which can remain wired into the main speedo.
 
Hi Matt;
Your idea, and mock-up, for an instrument cluster is most interesting--did you manage to find the 'telemetrix' instruments on the Speedy-Cables site?
One thought; ---if the picture including the steering wheel is your 'view', then I would suggest that the 2 'oil-management' gauges are put to the right of the cluster. I am sure that I have seen (individual) instrument holders that are angled, thereby improving your vision. Just an idea:)
 
Tom,

I've still not been able to find the instruments on the Speedy Cables website. Whenever I click on the 'New Instruments' link, the page which loads has options to various ranges, but I cannot click on any of the links.

I had considered fixing the instruments at an angle, but to be honest I'm not entirely sure how I'd fabricate the brackets. To be honest, the view at the moment seems ok. I know what you mean about the oil gauges. I'm temped to place them on the right-hand side of the panel as they are more crucial (especially when I finally upgrade the engine to a 695).

Matt
 
I've been away (again) and haven't had a chance to participate for a couple of days. I'm currently home again for quite a while now and am keen to get involved in any capacity, watt ever it takes (three more bad electrical puns).

The panel looks very interesting - particularly if it comes with an electrical diagram. For a reasonable price, you may find an instant market here.

As to the chick magnet thing - I inadvertently tried the three day growth a while ago but instead of looking cool, I just looked homeless :D

Chris
 
Quite frankly I'm shocked at how bad these electrical puns are. If I had the authority I'd charge the lot of you!

I popped round to see the folks this afternoon under the pretence of Mother's Day to have a chat with Dad about the instruments. He's started work on the wiring diagram. I've now mocked up a template out of 1/2 inch plywood, which l'll drill to see how the instruments fit. Chris, what's the diameter of your tachometer? I know they're 80mm, but what size hole would I actually need?

Once I've drilled the holes and sourced a cheap tachometer for mockup purposes, I'll see if the panel is large enough to accommodate all the gauges. I guess I will be able to use 50mm and 80mm hole saws to create the holes for the gauges - unless anyone has a better idea?

I'm also going to use the template to route out several pieces of MDF to build the mould which the binnacle/case will be formed around. I'm going to have a go at oven heating acrylic and seeing if I can successfully form it around the mold. The acrylic would then be covered in foam and vinyl.

I'll keep you posted with my progress.
Matt
 
Chris, what's the diameter of your tachometer? I know they're 80mm, but what size hole would I actually need?

Matt,

My minor gauges are 52mm and the tacho is 80mm as you suggest. I have another mounting backplate and the holes are 1mm larger so that may guide you.

As to the electrical puns, some are quite funny and not at all re-volt-ing. So much so, that I find it difficult conducting myself around the house because I'm laughing so much my head hertz.

I'm off ohm now, catch you all later.

Chris
 
Hi Matt;
From my own experience with hole-cutters and wood, I reckon an 80mm cutter will give you enough clearance, when the hole is cleaned-up, to slip the tacho in/out. With regard to your smaller instruments, a 50mm cutter will require some work with a rasp to open up the hole to give the 52mm instruments clearance. However, have a word with the upholsterer as to how he is planning to cover the panel as he may want a certain clearance round the instruments to enable him to 'tuck' the covering cloth--could save a lot of work at a later date. Thought of making the panal in Alluminium? machine-turned, it could look great and attaching fixing brackets might be easier (just weld them on) Whatever way you go, all the best, keep us in the picture.
(Did you notice that I have made a big effort to not have any electrical puns in this article?)
 
(Did you notice that I have made a big effort to not have any electrical puns in this article?)

Very good, a welcome switch - the bad puns obviously didn't phase you because your advice is, as usual, well grounded.

So wire we continuing this thread - because we are all getting a charge out of it.

Sorry :yuck:

Chris
 
Thanks for the measurements Chris.

Tom, I assumed you could only get hole saws in 50mm diameters, but after some research I realise you can also get 52mm hole saws. I'll measure the diameter of my gauges with a vernier caliper to see what will be the best fit.

Although the case will be made from acrylic wrapped in foam and vinyl, I plan on making the panel out of mild steel, which will be sprayed the same colour as the rest of the dash.

I had also put quite a bit of thought into how I could ensure the panel would still fit once the case was wrapped in foam and vinyl. I'll speak to the upholsterer regarding thicknesses (I assume 2-3mm). I'll then wrap the mold in foam to this thickness before molding the acrylic, to ensure that the panel fits once the case has been covered, as well as ensuring there is enough of a gap around the gauges.

Tom, I appreciate your 'resistance' in using any more electrical puns (no more I promise!)

Matt
 
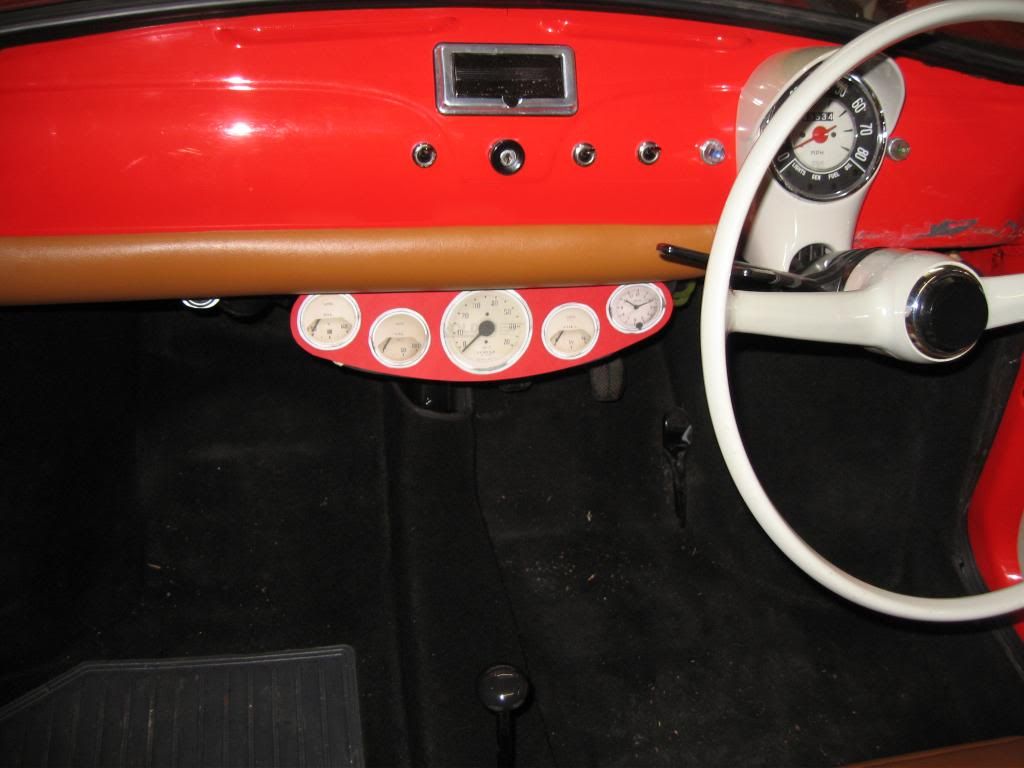
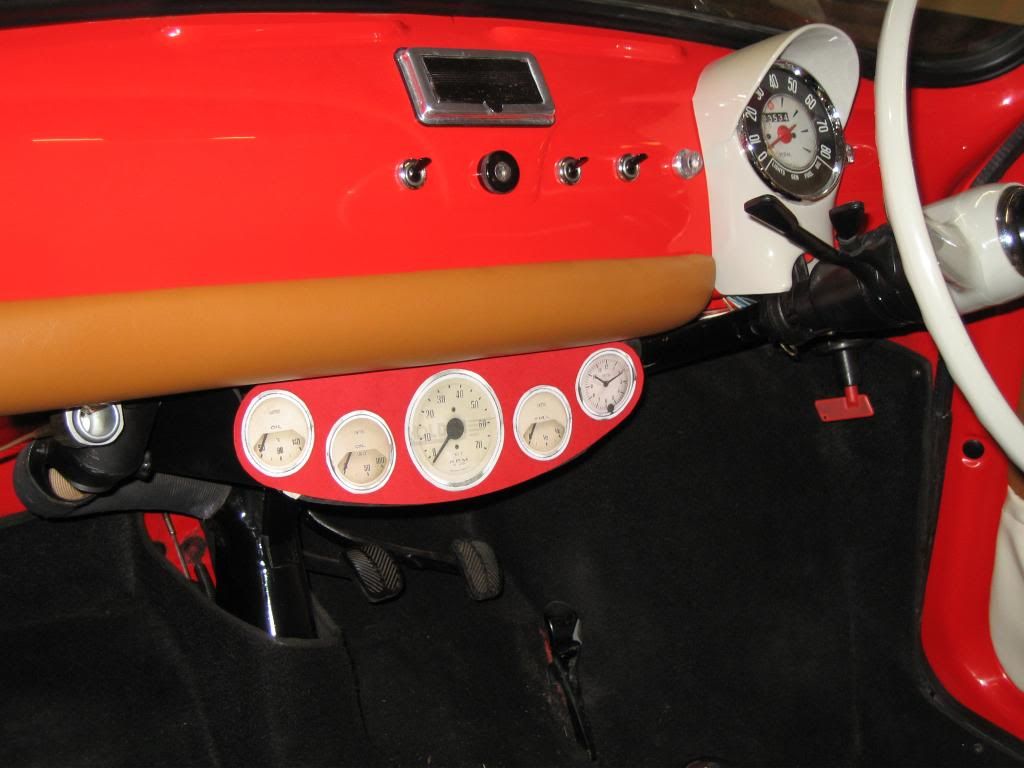
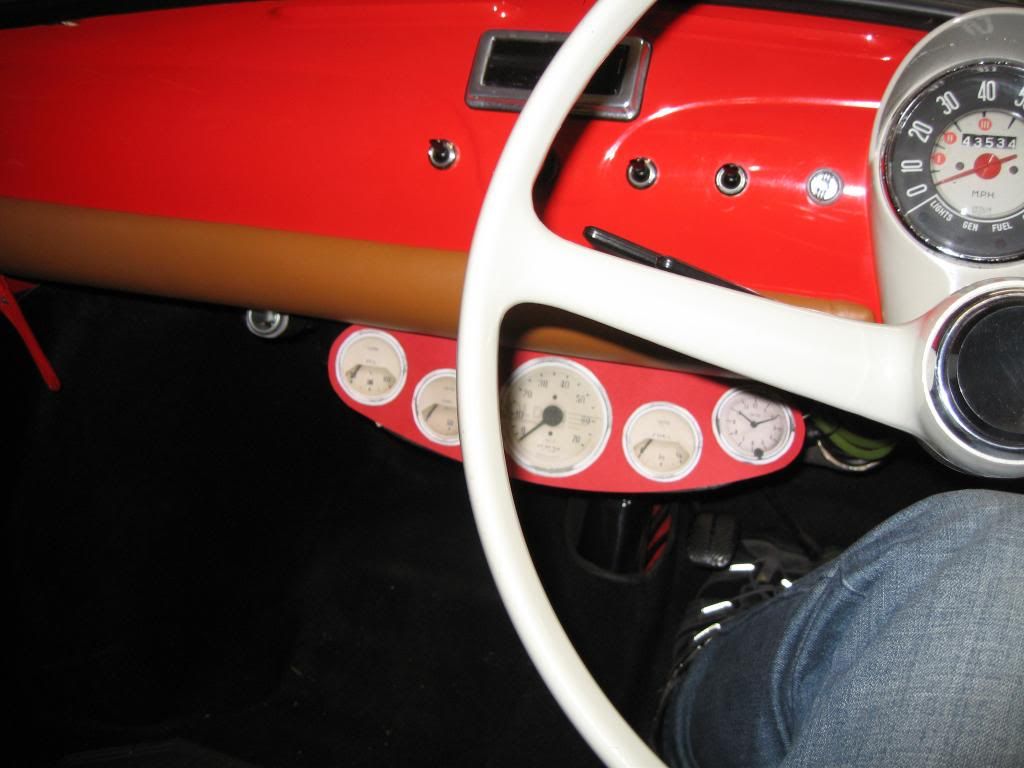
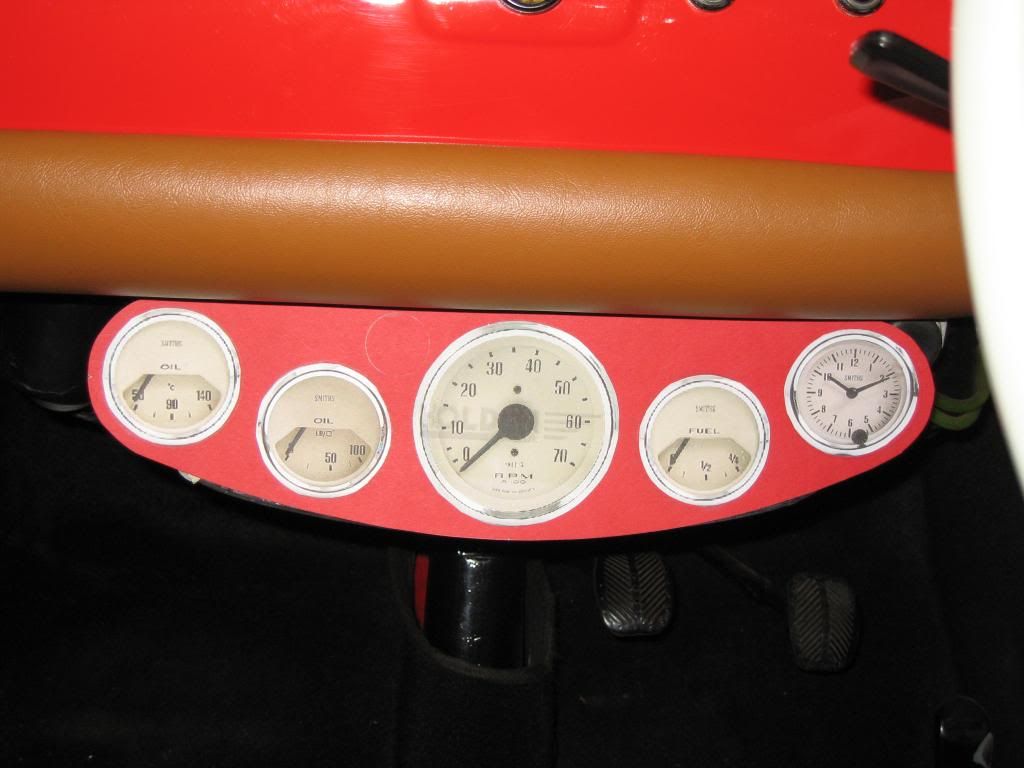
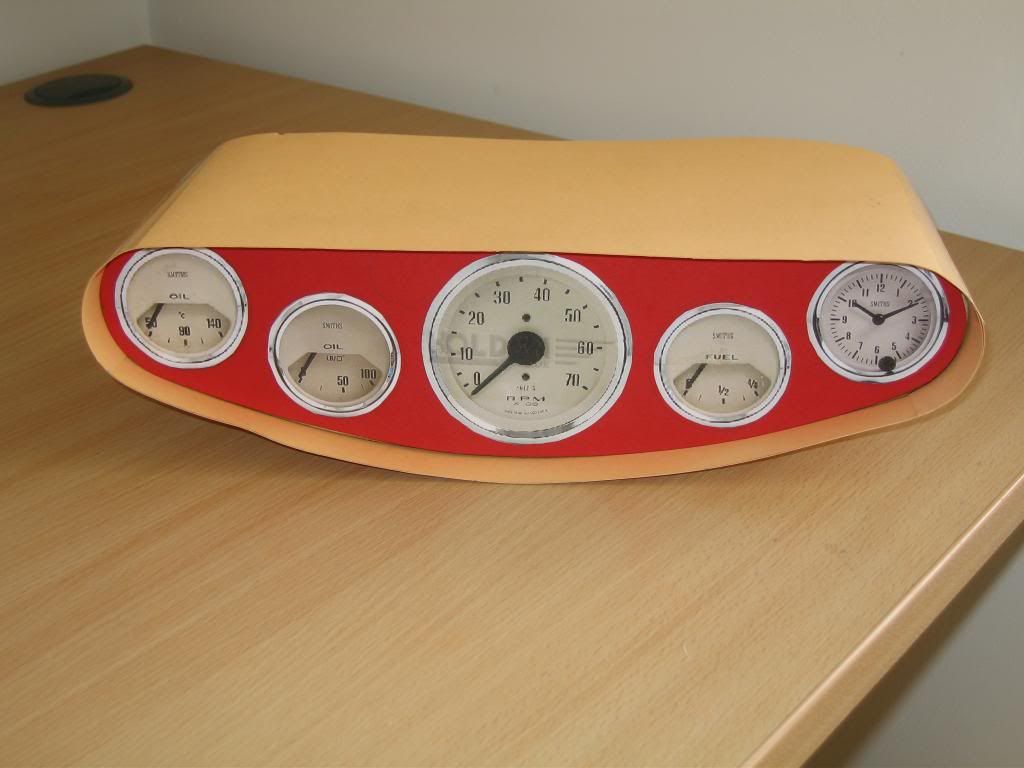
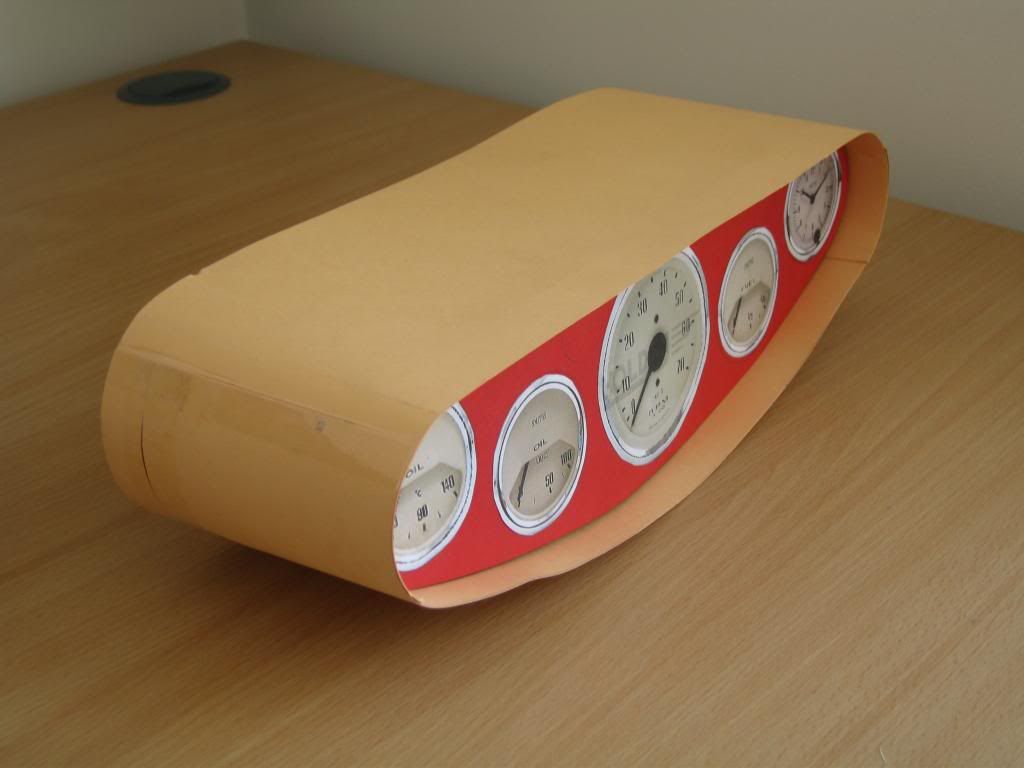
I've mocked up what the panel will look like inserted into the case:

IMG_4637_zps56340c48.jpg

IMG_4638_zpsa85144a8.jpg


The idea is that the red panel, which houses the gauges, will be made out of steel and sprayed the same colour as the dash. The case (the peach-coloured card) will be made out of either acrylic or steel (whichever seems to be the easiest to fabricate) and then wrapped in foam and vinyl.

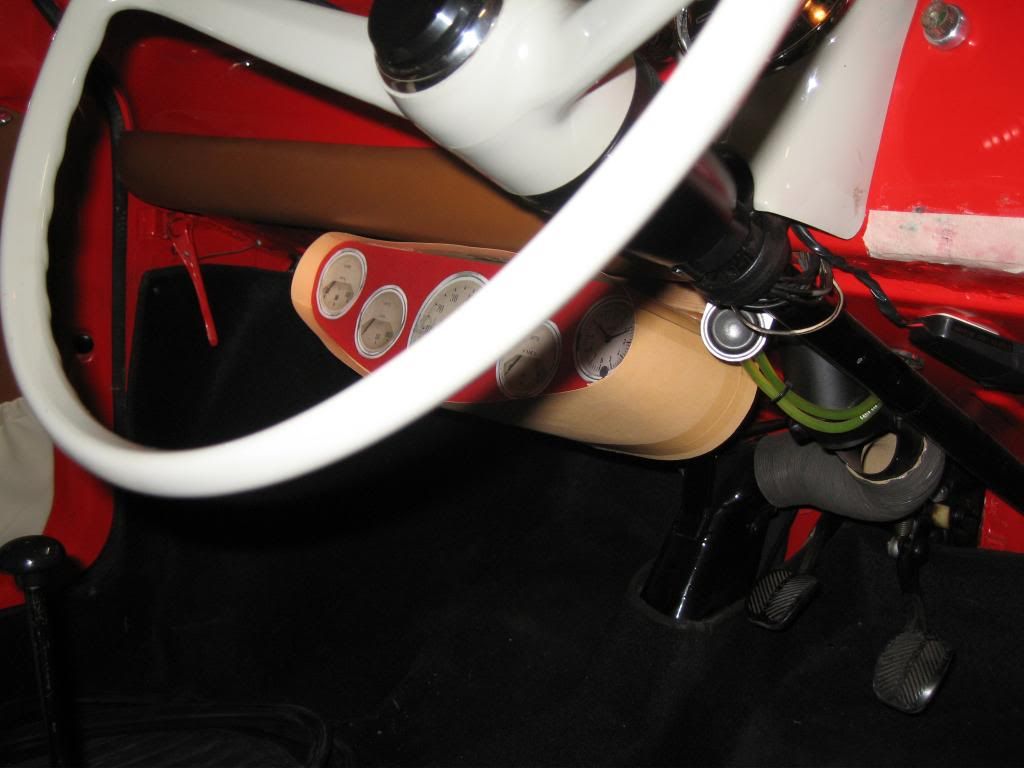
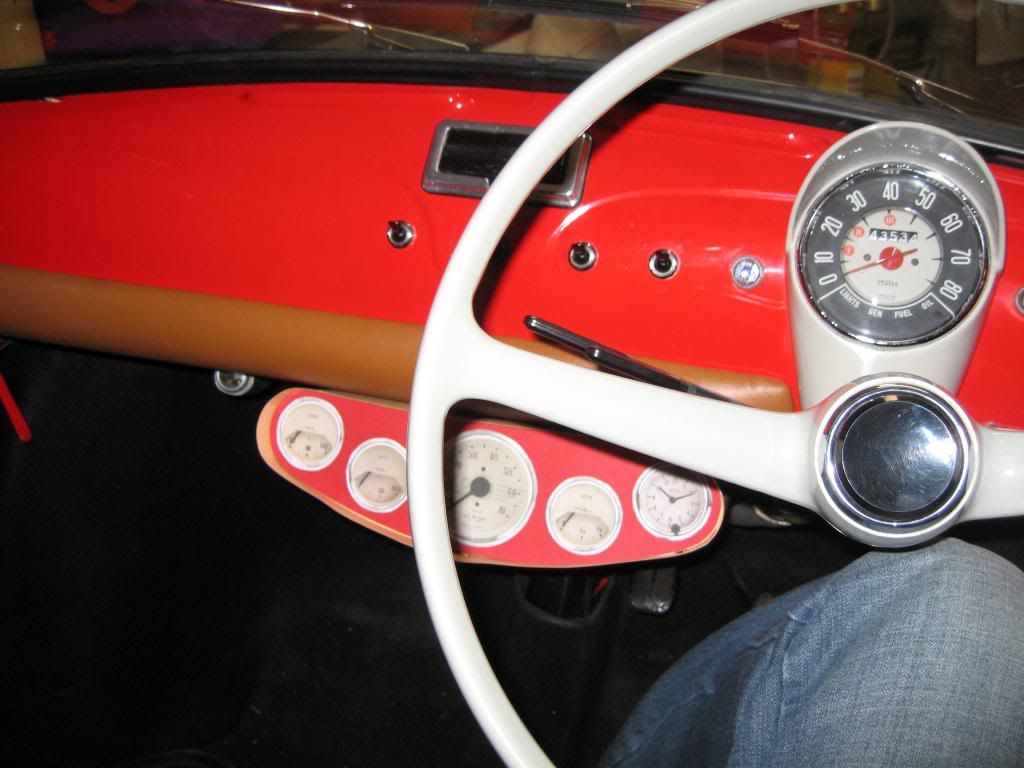
I seem to have hit a bit of a snag. I wanted to put the mockup in situ in the car to see how it would look. To do this I needed to remove the glove tray. No problem I thought, it'll be a 10 minute job (experience should have told me it's never a 10 minute job!). I managed to remove the four retaining nuts and washers, even though they were a pig to get to, with the heating ducts and washer button in the way. After removing them, I was hoping I could simply remove the tray. It would appear that the previous owner fitted the tray, then fitted the heating ducts afterwards, as the tray edge is trapped under the heating duct bracket. I decided to loosen the bracket, only to find the nut is buried behind the fuel tank. I also can't move the washer button out of the way as the bracket is attached to the dash behind the knee pad.

It looks like I'll have to do the following:

- move the fuel tank
- slacken the duct bracket
- remove the dash knee pads (I need to fit the other pad, so I'll need to remove the washer arms and motor)
- remove the washer button
- remove the glove tray

Simple really! I guess I know what I'm doing this weekend...

Matt
 
Last edited:
Thanks Chris, I really appreciate the sentiment. I've got Friday off work, so I've got a weekend of fettling, tinkering and swearing to look forward to!

Hopefully others will find what I'm doing useful.

Matt
 
I decided to spend some more time working on this tonight. I removed the knee pad and washer button and was then able to 'persuade' the glove tray out of the way (no bambinos were harmed during the removal of the tray!). I'll now be able to use the holes in the tray to sketch out a mounting bracket.

I used some scrap timber to make a temporary bracket for my card mockup to see what it would look like in situ:

IMG_4641_zps45ac2916.jpg

IMG_4640_zps1fe0f6bd.jpg

IMG_4639_zps7433686d.jpg


It seems to fit in the space nicely. It doesn't foul on the vents and you can get to the bolts used before by the glove tray to mount the panel. The view from the driver's seat is good too.

I now need to work out if real gauges will fit in the panel. If they do, I'll make the mould for the case.

Matt
 
Last edited:
Back
Top