littlemouse
New member
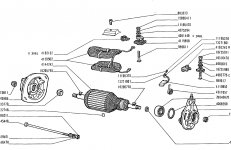
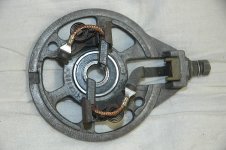
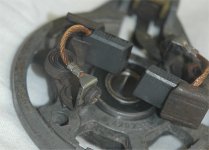
Just got some new brushes for the dynamo, can anyone tell me what's involved in replacing them.
Thanks Claudio
Thanks Claudio


")

 .
.Cant believe the amount of work required just to get the dynamo out, the strange thing is that i decided to delay the job until after a local classic car show and having put the pully back on and recoconnected the 2 wires the dynamo now seems to be working and the dash light goes out on start up
Claudio


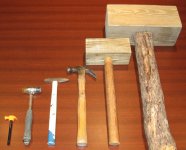
I have a selection of tools for a job like this ...
Chris