General New guy old Uno overhauling the creaky bits 56k

Currently reading:
General New guy old Uno overhauling the creaky bits 56k

Hyperspace

New member
Joined
May 20, 2010
Messages
186
Points
28
Hi there, a few years ago I bought a little 1100 Fire from a guy that needed money for studies. He discounted me the costs of a full suspension overhaul wich was something like R3500 back then. I don;t realy remember what all was fixed but I do know it included a steering rack.

Its never realy had much go though, we had a 95 special edition fire before and that was greased lighting compared. Nevertheles its been reliable despite getting almost no TLC or maintenance except when it was required to do the odd mechanical repair. (I'm a broke disability pensioner, not just lazy)

This year it realy started showing its age, and allthough I got used to ALWAYS haveing to drive with some choke, it started working on my tits.


I have started overhauling things I think I can manage.

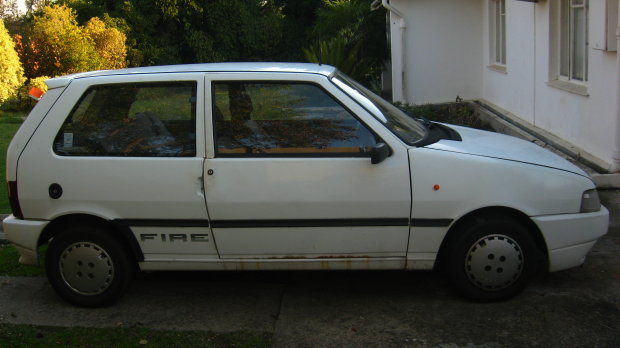
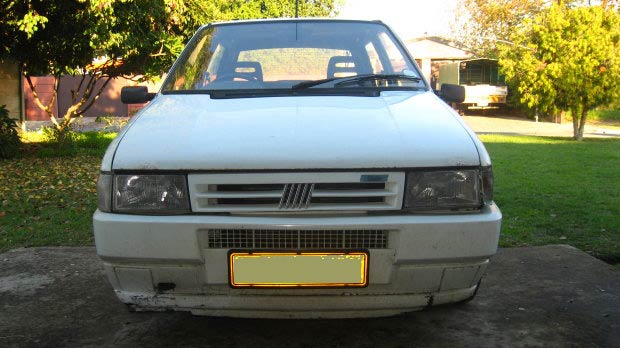
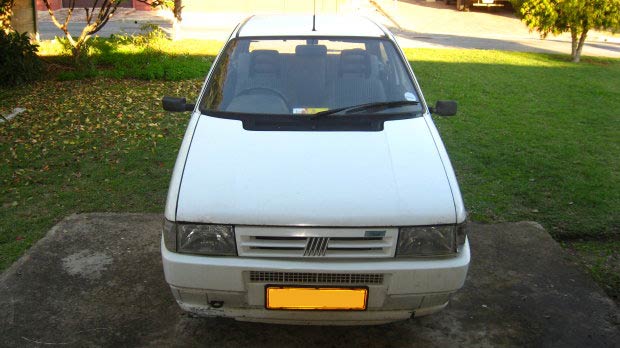
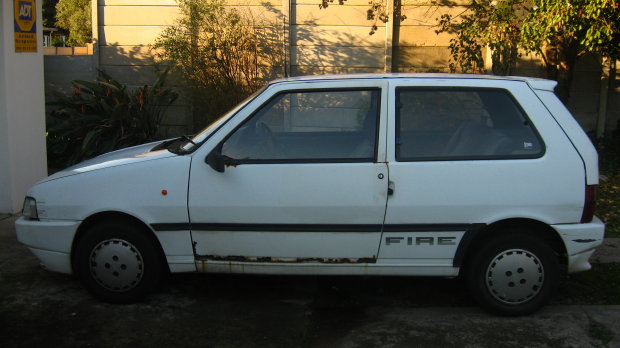
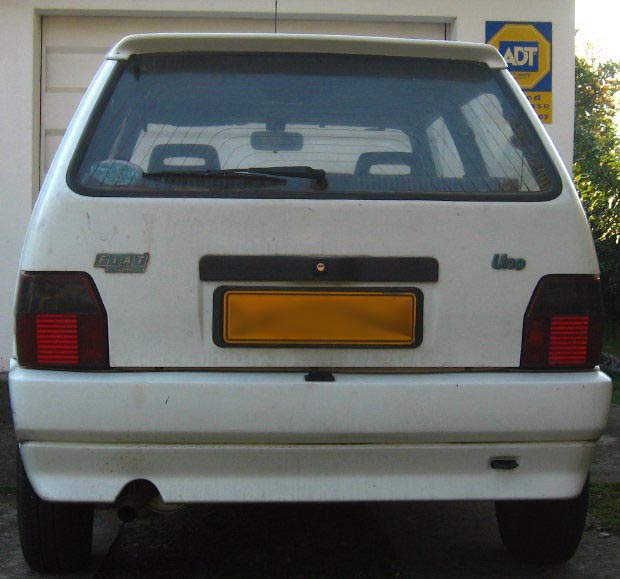
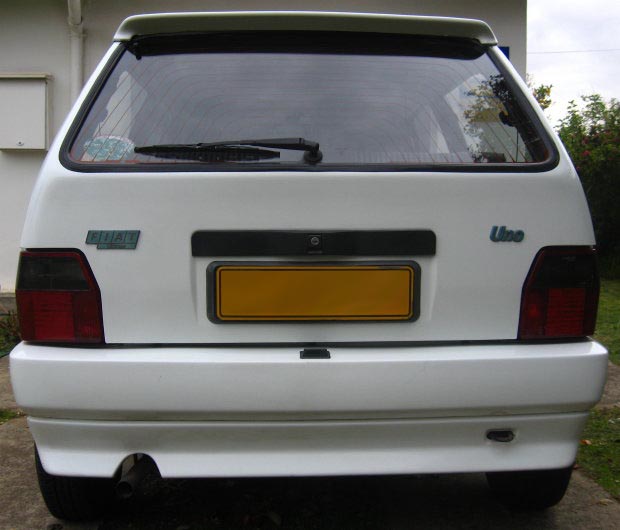
First a description of the car, White fire 1100, with body colour spoiler and bumpers, actualy still looks pretty hipappart from a bumper thats sagging due to a broken mounting (got it like that, it just sagged more over the years)

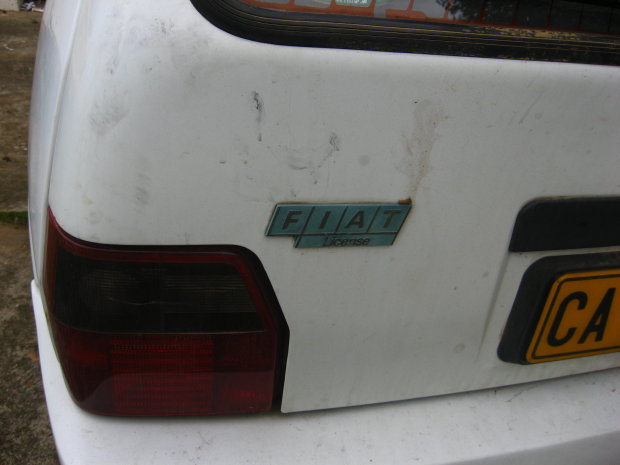
it has an engine market Fiat Lancia B469, which I can't realy find any info on, and everything seems a little diffirent to the Hayes manual I found on this site, but not too extremely.
IMG_3707.jpg

IMG_3700.jpg

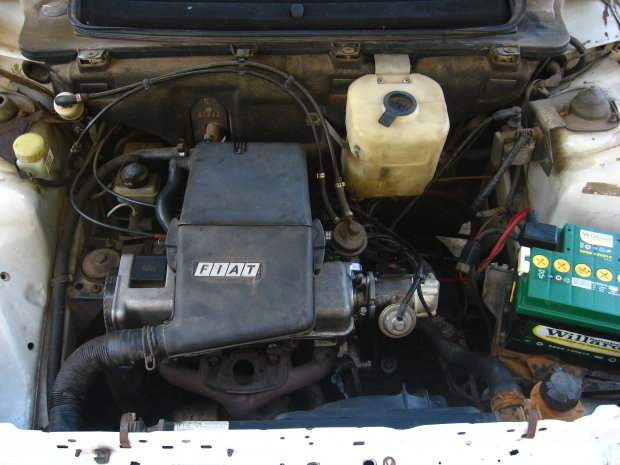
I assume its a 96 as there is a 96 stamped on the front of the engine.

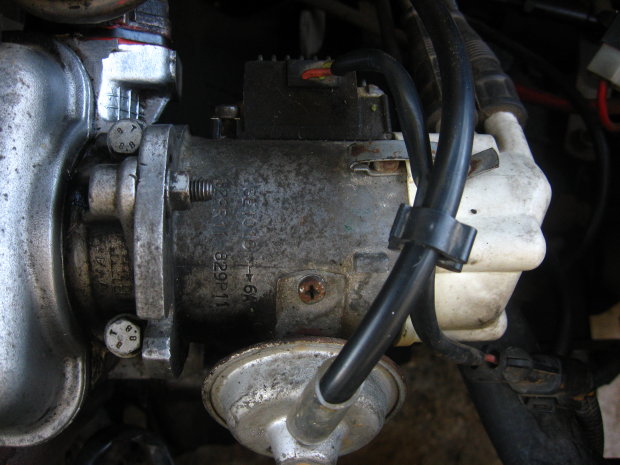
It is aspirated by a Weber 32 TLF 27 which I saw is pretty covered in black sticky stuff... no doubt in need of some love again. No leaks, I had a kit put in the carb way back when I got it.

Vacuum advance also seem to be shot, but I found a source for a cheap replacement today as opposed to the place that told me yesterday you don't get it loose, and that a new distributor with one on would cost R800
I cleaned off most of the oil that leaked through the worn distributor seal.
IMG_3726.jpg


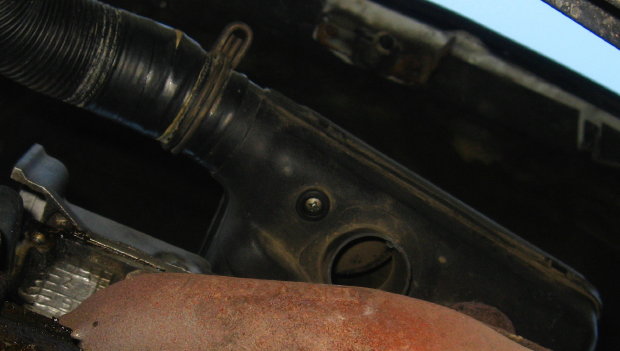
Yesterday I read on here about the hot/cold air valve in the air intake box, and went to hunt mine down, sure seemed sticky, so I oiled and cleaned it out a little until it could move much easier, and replaced...
Heeeh its ideling and running without choke!!!! but still not too strongly.
I replaced the GUD AG806 airfilter while I was in there, cost R72.

So thats a definate first place I suggest anyone with a sluggish old uno to go look, the valve behind the airfilter.

Something else I managed to repair was a dim headlight, it seems a recurring problem with this Uno. The fix is simple though, just use a small file to clean the wire crimps that connect to the lightbulb, they corrode, and act like resistors.

A few weeks ago the car overheated on a short run to town, and I took it to the garage, where they replaced the thermostat and the switch at the bottom of the radiator.... but I saw they never flushed the rusty crapola out of the radiator. I got some flush and antifreeze will attempt to clean it out tommorrow, I noticed my heater was also not working this morning.... probably related.

So far I managed to replace the clutch master and put a kit into the slave. clutch is releasing properly now.

Appart from the coolant system the oil also needs a swap and the engine a good cleaning solution... I'd rather not say how many kilos was done on that oil... I guess a new oil filter is not optional for that but it will have to wait until after I solved the main problem (yes there are even more).

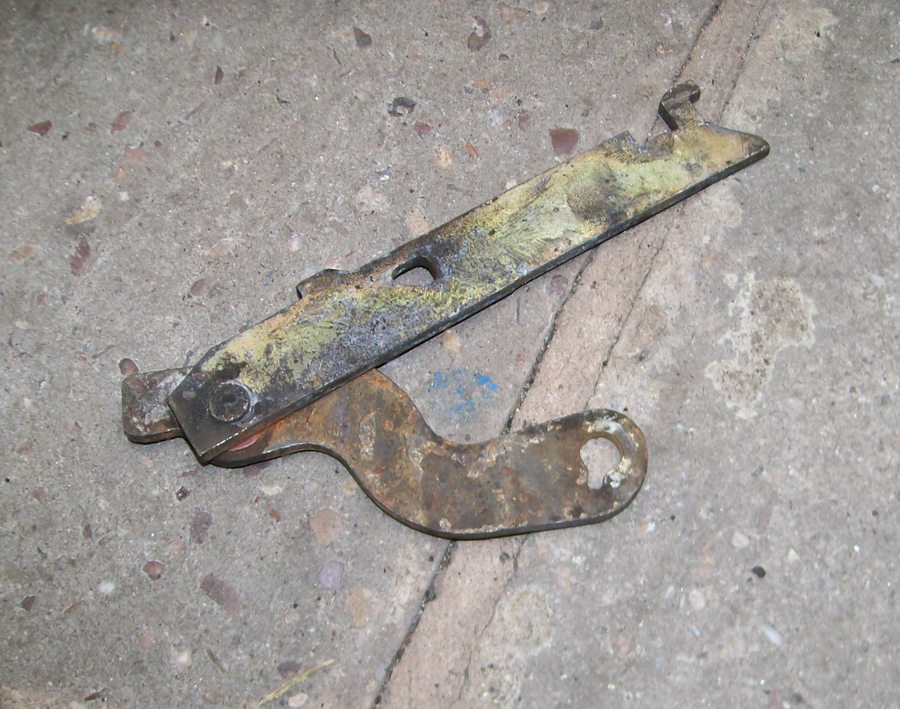
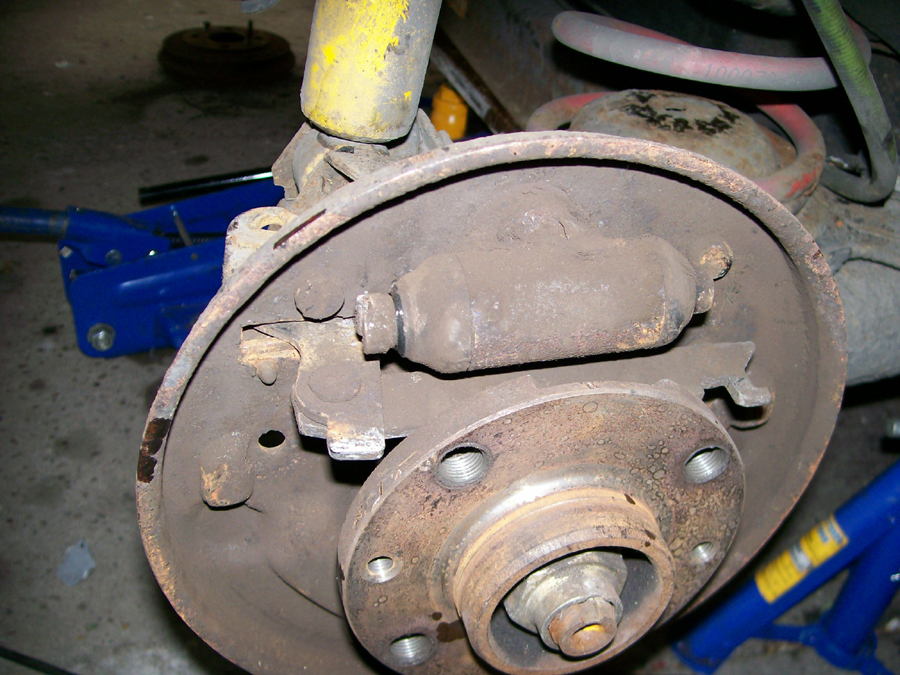
Other things requiring attention, is parking brake, wery weak, although no play as asuch in the cable, I saw a thread today pointing out how the arms at the back gunk up with crud, and need a cleaning, its probably that.

Courtesy light in roof keeps blowing its fuse.

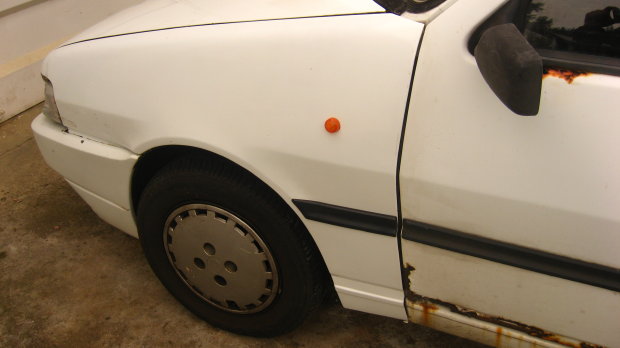
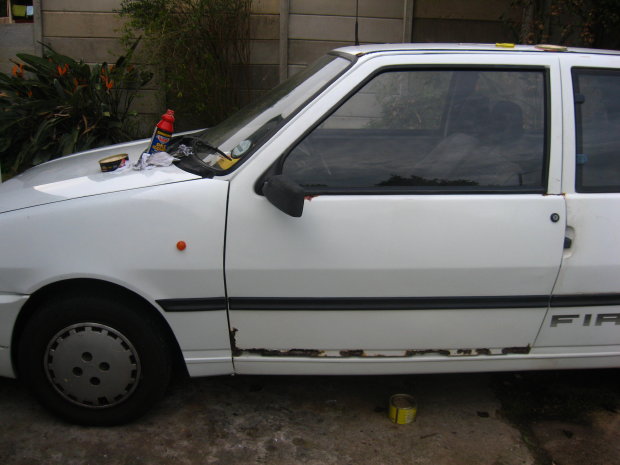
Some rust spots, many in passenger door.

But my main new problem is a rattely groaning knocking sound kind of like a big wooden boat would make. eminating from the driver side front wheel when I turn right (right hand drive) and a lesser one from the other side when I turn left. I have been informed that this is the sound of something to do with CV joints.... lol, give me computers to fix anyday.

I inspected the bottom with a camera (easier on the back) and the sound that sounds the worst doesnt seem to have any obvious leaks.
IMG_3717.jpg


the passenger side has like this big grease ring around the CV boot.
IMG_3720.jpg


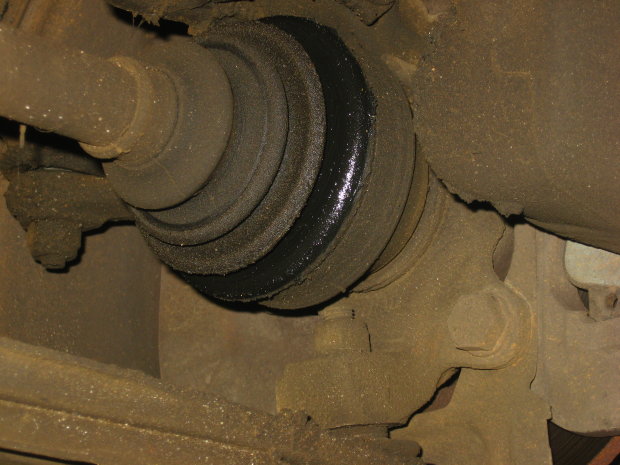
I guess both sides' whatever needs replacing... I guess its not just the rubber boot they swap out?


If you can pitch in with any suggestions to some of the problems or things to look out for it would be greatly appreciated... I'm not particularly skilled at cars appart from souping up an old toyota when I was still young and didn't believe things can go wrong... hell I even stripped and rebuild a carburettor, and come from many generations of similraly inclined men.
 
Welcome to the forum :wave:

I think groaning noises could be the strut top mountings.

CV joint boot needs replacing - have fun...! Clean out the old grease and replace with new while you're there. I find metal band clamps more satisfactory than cable ties on CV boots.

Are you sure that's an 1108cc engine - looks like a 999cc engine to me (the black plastic rather than blue) - might explain why it feels a bit down on power? :eek:

-Alex
 
Erm, no the driver side that makes the most noise does not seem to have oil dripping out, the boot is ageing though and showing small cracks.

Dunno if Fiat released any 1litre Uno's over here, especialy back in the 90's.
Anyhow it was sold to me as a 1100. At least it says fire on the doors or I'd be totaly without a clue. ...erm which black plastic? There is supposed to be a blue cover over the cam belt but the idiot at my previous garage broke the screw tabs off, I sourced some new covers yesterday, will probably get them next week. I see a number in the valve cover or manifold that says 7596615, googleing it comes up with some 1.2L Fiats...

I don't care for speed much anymore... I used to have a souped up 2 litre high compression toyota corona when I was still a kid.... had balanced engine, cut flywheel the works... I don't need that kind of performance any more. I just want a vehicle that can safely keep up with the speed of traffic.

On the plate where the engine number and stuff goes it says 1175... could that be the displacement? Damn, went to look it up now... seems that is the weight of the car... grandma is big boned :p

Anyhow its still running alot better than usual... and I'd say its at like 75% of its potential... (I'm a glass is half empty kind of guy). Also I'd normaly have finished the amount of fuel I put in this week, yet I have like a quarter tank left still... thats a nice bonus.

Does anyone have a link to or ENGLISH copy of the Weber 32 TLF 27 carburettor manual?
I read some generic weber manuals last night explaining how to tune the carburettor in and determine if it has the correct jets etc....

Does anyone know how much compression tests go for? also can the feul pump presure be measured by a garage?

I'll take some more pics today when I try and coax the crud out of my radiator and heater. I know it should be acid cleaned idealy, but thats not a financial option for me now... I'd much rather get a fixed front bumper.
 
Last edited:
Raait, found the registration papers which says its 160A3.000 which would make it a 1108cc. sigh of relief.

index.62.gif

where does that pipe on the nipple to the left go?
I have no pipe connected there... only the nipple...
 
Last edited:
That pipe goes to the base of the carburettor as far as I can recall.

Sorry, I wasn't suggesting that the CV boot needing replacement was the cause of the groaning noise - just that it needs doing ;)

In England and NZ, the air filter housing (both parts) are blue plastic for the 1108cc (like the cambelt cover you mentioned).

I still think it's worth checking the top strut mounts (there's a needle roller bearing in there which may have seized and the strut might be swivelling on the rubber mount), though it's a bit of work to compress the springs and undo the top nut, etc.

-Alex
 
Awesome I'll check the weber to find the unconnected pipe at the bottom...

The wife and I decided to take it in for the CV joints to our local HI-Q branch, they do shock and silencer fitments etc... plus that way I can dump the cost of the new hardware on the RCS card.

I'll go look up the strut mounts now, as I'm not familiar with which exact part that is... so that I can make sure they check it.

I think the covers were probably made black in mine to make it pretty, as I said its a white model with colour coded bumpers and spoiler, yet its not a special edition...

IMG_3769.jpg


IMG_3770.jpg


IMG_3774.jpg


IMG_3775.jpg


By the time I got it it was all show and no go.
 
Sorry for posting so much but you guys got me car obsessed again... I'm a page 75 of the Uno forum, reading from end to end, and I feel like allready know some of you guys.

Anyhow, back to the underperforming princess. Looking at countless pictures of Uno's etc, I suddenly noticed I dont have the silver hot air tube that goes between the manifold and the Airfilter box just above it.... Would that be part of the problem?

You can see the connector on the manifold in the second photo on this page.
I also found a picture of where the other tube should go to on the carb... I'll have to buy some tube first... but hope it is worth it. I spent all afternoon with precleaner scrubbing crap out of the hood.

I also flused the radiator again and put actual antifreeze in... lol I'm oldschool plus I thought it was only for places that froze... silly me.


vvillier_1084873341_photo_17.jpg

This pic shows the silver pipe.

kfakfa_1084570043_uno_017.jpg

This one shows the other little missing pipe.

Boy those blue airfilter boxes are fugly.
 
Last edited:
Anyhow, back to the underperforming princess. Looking at countless pictures of Uno's etc, I suddenly noticed I dont have the silver hot air tube that goes between the manifold and the Airfilter box just above it.... Would that be part of the problem?

All the silver pipe does is to direct hot air from the manifold into the airbox via a thermostatic flap. The idea is to regulate the incoming air temperature plus speed up engine warming and reduce the risk of carb icing (with models so equipped) in cold temperatures. The thermostatic flap can fail over time, though depending on the ambient air temperature this may or may not have much of an effect.

You can see the connector on the manifold in the second photo on this page.
I also found a picture of where the other tube should go to on the carb... I'll have to buy some tube first... but hope it is worth it. I spent all afternoon with precleaner scrubbing crap out of the hood.

The pipe in question directs some of the engine breather fumes back into the inlet manifold, with the majority going straight back into the airbox where it mixes with incoming air before fed back into the carburettor/ throttle body. The idea is to re-cycle engine breather gasses and reduce emissions. Without the small pipe connected to the base of the carburettor you run the risk of running a slightly weak mixture. Some people, myself included on my old 45S Uno, simply disconnected the main breather pipe from the rocker cover to airbox and fed it into a catch tank. The airbox connector needs to be blanked off if you do this. The idea then is that you don't get blow by gases re-entering the induction and you get a purer air/ fuel mixture.

I also flused the radiator again and put actual antifreeze in... lol I'm oldschool plus I thought it was only for places that froze... silly me.

It's anti-freeze AND corrosion inhibitor ;) Essential for engines that have part or all aluminium construction to prevent the alloy furring up in the water ways. It's still also beneficial for engines of cast iron construction too and as per all the instructions it should be used all year round. (y)

Boy those blue airfilter boxes are fugly.

Good thing you've never seen a 750 (750cc) FIRE Panda then - their airboxes and cam covers are bright green!
 
IMG_3714b.jpg

My car is quite a cow till it warms up a bit.
Looking at this pic I see the valve is open by default, I guess to get the hot air in there. But what worries me is that it is basicaly like a hole in the air box, and things always choose the path of least resistance... leaving us with a grey area between when car is cold and when car is hot enough to close the valve.... which it would have a hard tiime doing without temperature feedback from the manifold.

So, as is I take it my valve never closes... I did service it this week, it was pretty stuck I guess from disuse. Oiled it up and it seems fine, allthough I havent done the hairdryer test.

Shame ja, I'll look after the cooling system better now... Its basicaly got reasonably new everything, the radiator was cleaned and the waterpump replaced about 4 years ago, maybe less, and the thermostat and switch in March of this year.
 
Ok today I hunted for the missing manifold pipe, no luck so far, might check a spares place in the neighbouring villiage on Wednesday for that.

I found the little tube on the bottom of the carb, It was brittle and too short to reattach. I went to buy 2m of 5mm inner diameter fuel hose, made a replacement for that short tube, and then made new vacuum advance tube too while I was at it. The 5mm tube is a perfect fit. I probably have enough left to make annother vacuum advance tube... :) Now I just need a working vacuum advance, LOL.

I also took the courtesy light swithces out of the door and cleaned them and the spade connecters off well, and gave them a squirt of Kontakt60, a high quality contact cleaner. Finaly replaced the courtesy lamp fuse and hey, this time it didn't blow again, and it was still working just now when we got home.

The broken sunvisor was taken off, then I snipped open the top seam above the place where it meets the arm. the mechanism is pretty straight forward, just a tube with a long spring in the form of a tadpole that grabs the arm in the centre, the arm has two flat sides, which accounts for it clicking up and down. The problem is that the spring breaks where it bends. I positioned the two pieces of the spring as they should be and drilled a 2.5mm hole throug the flat bit where the two sides start meeting each other on the tadpole's tail, then tapped it with an M3 thread and put a short M3 screw and nut through to pull the thing into its proper shape and provide some clamping force to the arm, you slide the spring back into its slot, put the arm through, and voila!!!, now I just need some plack duct tape to seal the cut on the seam, not that its terribly visible. Neccesity is the mother of invention.

I also changed the feul filter, looking into the other one its basicaly black :(

Car is going realy well, but to get the correct responsiveness I still needed to use some choke, basicaly just a few mm to make the choke light come on. Even my wife commented on it tonight. It definatly not slouching as badly as before.

What have YOU done with your Uno today?
 
Last edited:
Time to make grandma look nicer
IMG_3767.jpg


IMG_3785.jpg


After some scrubbing and grinding.
IMG_38063.jpg


The key area looked wretched and scratched.
IMG_3786.jpg


IMG_38042.jpg


IMG_38122.jpg


Lol only had energy for one door and fender. :p
 
Last edited:
Lol only had energy for one door and fender. :p

Great work! :)

I wonder if that rust at the base of the window frame (B-pillar) is the result of a crack in the steel... in which case you might need some welding (they often crack in the quarter panel at the same point - I mean, just behind the door at the base of the rear-side window frame).

Sounds like you're making great progress on those other details as well - what have I done with my Uno today - I leaned on the tailgate, to squeeze around the back of the garage :eek:.

I'm sure when you get that vacuum advance and set the timing to 5 degrees (with vacuum advance disconnected), then reconnect (to give ~15 degrees), you'll find it starts and runs much more sweetly. The basic idea behind it is that the vacuum advance drops away when the engine is under load, so you get good torque without pinking/pre-ignition, but when the engine is not under load, the advance winds up quite high for smoothness.

I'm looking forward to seeing what you do with the rust holes...! :eek: You must live in Cape Town or Durban, I never saw a single rusty Uno in Johannesburg. Perhaps that means there's lots of rust-free white doors in wrecker's yards?

-Alex
 
Last edited:
Yeah It spent most of the time from 93 till last year, about 10 minutes outside cape town. I didn't expect it to come out so nicely, granted I had to use rubbing compound. But hell, The paint is nearly 15 years old, not much to loose.

The passenger door is definately a gonner because of all that rust. I believe they are not too expensive... lets just hope I can find a white one when the time comes. That break at the base of the pillar is because these cars don't have proper door handles, so people close them by the frame... I often have to speak sternly to my wife over it.

My side is also cracked there but not as badly.

I'm more worried about the holes in the roof next to the black trim strips.


I still can't find a replacement manifold to airbox tube :(
And the knocking at the wheels still need solving.
 
It seems after a day or two, the muscles don't even burn that much, although my hands still hurt... No buffing machine :(

IMG_3768b.jpg


IMG_38192.jpg


And after a few hours rubbing, precleaning and sealing

IMG_3839b.jpg


IMG_38351.jpg


Great improvement from matt white that gave off on your clothes...

You'd have to agree she's one of the sexier Uno's out there :p.
With a shape and trim level as current and in style today as it was in 1996.
 
Last edited:
What a transformation! :eek:

I'm especially impressed with how shiny the bumper came up.
It's crying out for a nice, shiny exhaust tip (not too large) wouldn't you say? :p

Lovely detailing work on the tailgate and I guess you polished the glass, too.

I wonder if you can buy new badges easily from a dealer over there. When they were new they were a nice dark blue with chrome. The FIAT 'License' badge is unique to South Africa, of course.

I always like the shape of the Mk2 rear end, especially in white, and funnily enough because there are so few on the roads over here, it always makes me remember my work trips to South Africa. The Mk2 Uno looks especially great parked next to a Mk1 Golf (even the recent 2004 'Citi' version with clear/red tailights), and with a Mazda bakkie parked on the other side. ;)

Yeah, repairing rusty doors is something I'm feeling like giving up on - nowadays it's worth the money to buy a rust-free one, even if it needs painting. It's so difficult to weld in patches without causing distortion that, against the Uno's flat surfaces, takes hours and HOURS of filling and sanding to rectify...

-Alex
 
Last edited:
Strange how things work out sometimes.
Today I thought I'd make use of the winter sun to work outside and check one of the rear brakes, to see if I can find the problem with the weak handbrake. HAH what do I find when Itake off my wheel? A big fat metal nail in it... I'd rather find it now than have to change tyres next to the road... or worse.

Anyhow, I cleaned up the wheel well and its looking good, no rust!

IMG_3857b.jpg


I cant realy see much on the rear brake though, I didn't know if it was ok for an idiot to take off the front plate on the brake to see what is inside :p
The outside looks reasonnably clean, You can see the range of motion by looking at where the white paint on the lever stops.... is that ok?

I can push the lever towards the cable with my hand and it seems to move reasonably easy, but it only has like half an inch of play... I realy don't know what is normal... still have to check the other side to see how they compare.

IMG_3852_1.jpg


IMG_3860.jpg
 
Last edited:
Heh, quiet day here in Uno land.
This morning I had the nail removed from the tire, and they didn't even charge me a cent, then again, when these buggers DO charge, its a ripoff.

Didn't get much else done today, except fixing the rear window washer jet. Turns out there is a little one way valve, that got clogged, just under the bottle. I did open it and clean it ou but it seams to be leaking out the centre now, so I just ripped it out. I also cleaned out the rear jet with a piece of wire from a large resistor lead. Heheh I never knew I could activate the rear wiper with the wiper control on the steering wheel, I was always hunting for the wiper switch in the centre consol, which is tough at night as it is not backlit. One would think you'd have explored all of your car in eight years. :) At least now every control and button etc. on the dash works 100%. Wish I had a clock in though. Bah just remembered I forgot to get a replacement lighter.

On a sidenote, I had the car inspected on Friday for the sound when I turned. When I got there it stopped makeing any noise, no matter what we tried. The guy jacked the car up on the lift and manipulated the wheels ect. and said the CVs where a little dry. So, I guess they are good until the uncle who lives up the street returns from holiday. He is one of those home mechanics whith a meticulous tool layout that whould embarras most garages. Apparently he'd help me replace it for a 6-pack or two. I realy want to do as much of it as possible myself. Just need the reasurance of a trained hand in case I have parts left after reassembly... :p
 
Last edited:
fixing the rear window washer jet. Turns out there is a little one way valve, that got clogged, just under the bottle. I did open it and clean it ou but it seams to be leaking out the centre now, so I just ripped it out.


Been there, done that. :D


Welcome to the forum by the way.
 
Good news on the rust frone :)

are the pics taken with the handbrake on? the springs on the ends of the handbrake cables look they are under a bit of tension.

get someone to pull on the handbrake on and off as you look at how much the lever that the thandbrake cables fix to move.. not on a hill though or you'll get run over.

if they don't move much, or near an equal amount I'd suspect the pivot on these leavers has rust in it which stops it moving freely, then totaly freezes them. they need to come off and be freed off which invloves removing the drums and shoes..

something like this
100_2402.JPG


100_2381.JPG
 
Back
Top