General New guy old Uno overhauling the creaky bits 56k

Currently reading:
General New guy old Uno overhauling the creaky bits 56k

Awesome, Louie, do you have a link to the thread those pics are from, I know I saw them on here before, but could not find it again.

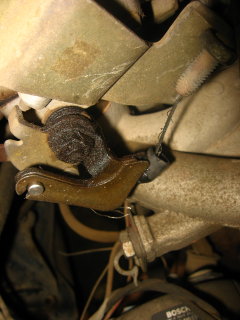
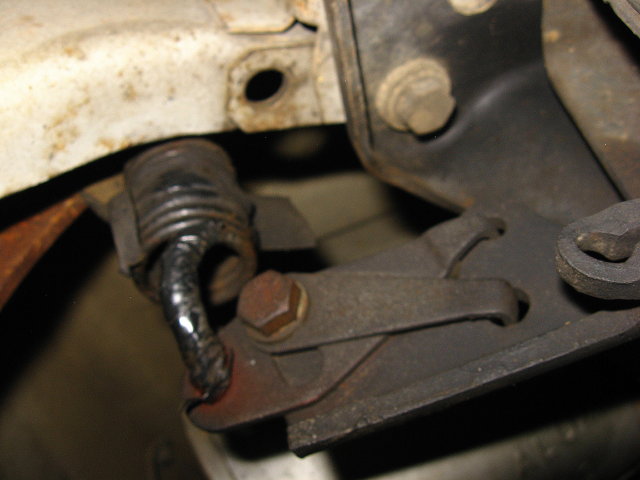
PS, the pic was wit the handbrake engaged, Not that I've ever tested the break cable on any other car, but the whole cable tension struck me as kinda low. The mechanism did seem to respond to being pushed by hand, but without seeing the other side I could not determine if it was traveling far enough.

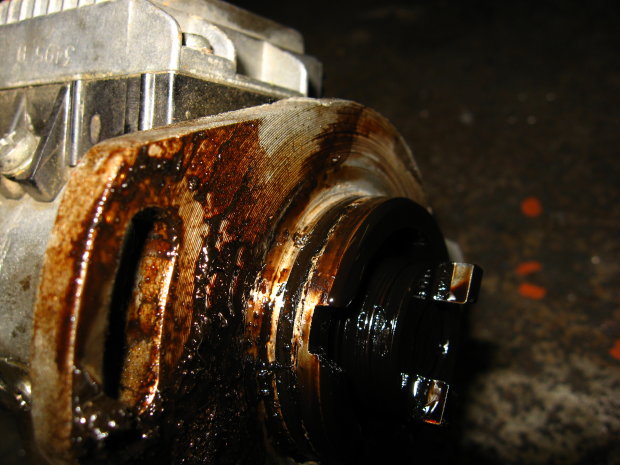
Looks like a nice and dirty job, I luv those. I'm a bit daunted at removeing the rear brake shoes, but I guess if I never try I'll never learn.

I like to work alone, I get very impatient with unhandy helpers underfoot. I'd probably just train a camera on a tripod on the joint, and pull the handbrake myself :)

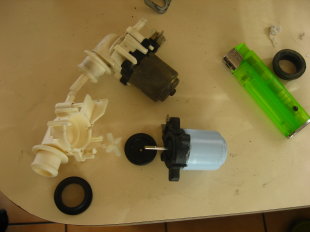
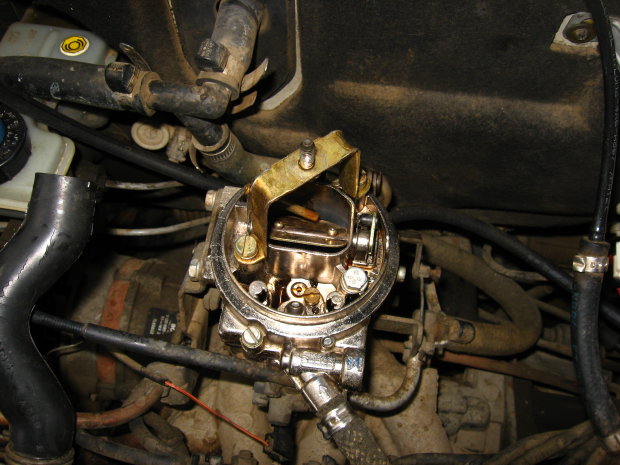
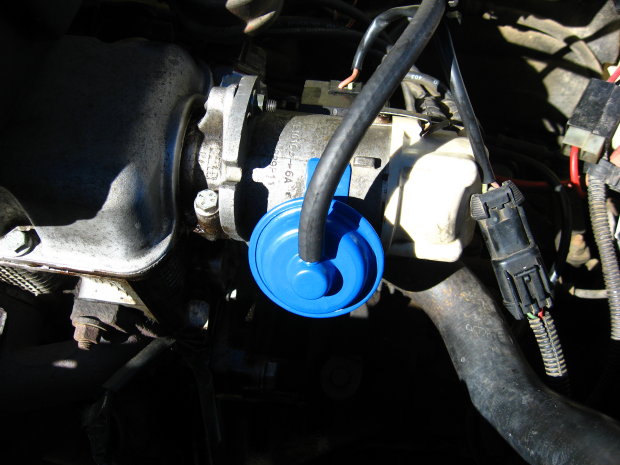
Hi Ucof, lol, I couldn't realy see the point to haveing the valve there appart from maybe haveing to pull the switch a few seconds longer to refill the last bit of pipe.
 
Last edited:
used the pics in these threads https://www.fiatforum.com/search.php?searchid=4457857

pics are in my gallery to show the existence of later type uno brake shoes really, but I was inspired after reading this a few years ago from good old fixit..

https://www.fiatforum.com/cinquecento-seicento/1819-cinq-sei-handbrake-issues.html

same issue the Uno handbrake suffers on both early and late drum setup (y)

Did Emma's seicento again on Friday night (y)

there is a whole art to removing and refitting shoes as you have the springs to contend with - nasty buggers
 
Last edited:
Thanks man, my back is not going to allow me the liberty of working down there today.

I decided to clean something else up, the horrible looking washer waterbottle. Opened up and cleaned out the motors while I was at it, and greased the neccesary bits. :)

IMG_3862_1.jpg

Nice and dirty, You can see what it looked like in the car on the first page.

IMG_3871.jpg
IMG_3876_1.jpg

A little reassembly layout for anyone who forgets what goes where.

IMG_3880_1.jpg
IMG_3878.jpg

Ready to go back on the car

IMG_3884_1.jpg
IMG_3886_1.jpg

Awesomeness.
 
Last edited:
Ok took the car to a wheel allignment place today, the guy there looked at it a bit and said, replace CV joint boot, and tie rod ends before bringing the car back.

:( Sigh so its gonna cost even more. They don't do any repairs, which is why I took it there for a 3rd party opinion.

I found a nice thread on replaceing the rod ends in the Panda section, It looks very much the same, for the most part.
https://www.fiatforum.com/panda-classic/45578-tie-rod-replacement-steering.html

Anyway, so I took the car home to investigate further and cleaned up one side before sunset. I cant realy see anything looking bad or feeling particularly loose, but I did notice there is a bush at the tip of the control arm right at the wheel. It is pretty bad looking and torn on one side, the picture is actualy hiding its state as I washed everything in the wheel arch to get it clean enough to work on.

IMG_3902.jpg

It seems the bush is cheap, but how hard is it to replace, seeing that we will be taking off the CV's and tie rods ends anyway?
Is it supposed to look so bent?

P.S. the top side looks good.
IMG_3898.jpg
 
Anyway, so I took the car home to investigate further and cleaned up one side before sunset. I cant realy see anything looking bad or feeling particularly loose, but I did notice there is a bush at the tip of the control arm right at the wheel. It is pretty bad looking and torn on one side, the picture is actualy hiding its state as I washed everything in the wheel arch to get it clean enough to work on.

It seems the bush is cheap, but how hard is it to replace, seeing that we will be taking off the CV's and tie rods ends anyway?

That's not a 'bush' you're talking about, it is in fact the TCA (track control arm) ball joint. The little rubber gaiter on it is supposed to hold in grease for lubrication purposes. However, if the gaiter splits the grease leaks out and dirt gets in eventually causing premature wear of the ball joint.

They can be replaced but they are a right royal pain in the bum to remove from the TCA as they are a pressed in interference fit. You really need a press or a very strong vice to get them out. You also need to check the state of the TCA itself as they aren't made of particular thick metal and can rust badly. It's not unusual for the ball joint end of the arm to break off completely because the arm had been so weakened by rust... :eek: In the UK there are quite a few complete and new TCAs that come up on Ebay at prices making it more sensible to change the entire arm itself rather than just the ball joint.

Is it supposed to look so bent?

Yes. It's a ball joint so it's designed to swivel at quite an angle ;)
 
The control arms look realy good, maybe a smidge of faint surface rust here and there but nothing that 5 minutes of cleaning up and sealing couldn't prevent rusting for the next 15 years.

I suspect they may have been replaced when I innitialy had the suspension overhauled when I bought it... It literaly went to the suspension place, they took it for its roadworthy certificate and delivered it, so I wasn't too involved.... The luxury of good employment at the time.

There are a couple of videos on youtube showing how to replace the bearing, I can see for starters that mine isn't performing badly....compared to their broken ones.
The uno does eem to have a very big plug though.

Lol, in one of the youtube vids, the guy lowers the jack forceing the the weight of the car to push the bearing in against a support block at the bottom. Was not a Uno though, and the bearing seemed much smaller. But I had to take my hat off to this dude ding that jub without a single specialised tool. Just a hammer an old spring steel truck tortion arm to pivot the bearing out, and a steel block to support it going back.

[nomedia="http://www.youtube.com/watch?v=DnWPROb9ZPA&feature=related"]YouTube- How to replace a pressed in ball joint[/nomedia] Hardcore, not for sensitive engineers.

But I am worried about what you said about oil leaking out, as it feels very soft and pretty much empty. I'll ask the mechanic uncle today, he said I could bring the car this morning. Fixing cars is all he does every day, lucky bugger. Why do mechannics always look so depressed?
 
Last edited:
IMG_3916.jpg

Ok, so I did a first preliminary cleaning of the carburettor. Man, was it looking dirty.
I wonder if it is because it ran without that tube between the carb and the airbox, or the broken advance, or both, or something worse........

IMG_3922.jpg

TA DA!!!!!!!!!

Sadly the rest of it looks in need of maintenance...

IMG_3921.jpg

Frayed accelerator cable, hell the front nut was loose and riding on the cable

IMG_3920.jpg

Big bend in the choke cable, I should have taken it more from the side, but trust me, it looks like ET's finger.

Look who has a new hot air intake tube.
IMG_39061.jpg
 
Last edited:
Lol, the can did it all, I just sprayed the pooh out of it, and wicked up as much of the gooey juice as I could. I'm sure it is still plenty dirty inside. Not to mention the accelerator AND choke cable both probably needing adjustment.

Sadly I forgot to take my camera with yesterday, but the uncle up the road and i stripped off and cleaned the CV joints yesterday. They didn't realy look too bad, and we just swapped them left to right and visa versa. Lol, the one CV said, non reversable, the uncle said that is Italian, for buy more stuff, and so we reversed it anyway. Seems to have worked. The side with the grease ring around it's CV joint fell out when we loosened the cotrol arm from the caliper housing. Turns out the circlip came undone inside, and then when we just wiggled the driveshaft, that fell out too... :/ Luckily all seems well now in that department. Its a realy dirty job and it was nice to have an experienced hand to show me the ropes. I also think the old guy enjoyed haveing someone take an interest in what he does.

Today I managed to get a brand new vacuum advance for only R110 (just shy of 10 pounds), we are going to install that tommorrow and check the timing and idle settings.

I also went to a panelbeater and got a quote to repair the rust in the ceiling and respray those spots for R1200 (about GBP110). I will have the rust a tthe footwell sorted out after, but first need the leaks stopped I think as we are in the midst of winter and we live in a winter rainfall zone.
 
Last edited:
OK, today we ripped off the old funky vacuum advance. And put the new one on.
I noticed the old one seems much better made, and is almost a sealed unit once screwed on. Whereas there are a few small gaps between the saucer and clamp parts on the new unit.
IMG_3927.jpg


IMG_3930.jpg

The distributor seal shows typical origin for Uno oil leak... We applied some gasket sealing stuff of some kind.

IMG_3931.jpg

I used some nice ford blue on the new advance, as I hate how the galvanised stuff tarnishes.

And voila
IMG_3932b.jpg


Then we adjusted the timings and stuff according to the manual. Well we got the first setting for 3 degrees right, but the other two timings seems to hang about 4 degrees above the specified range. The uncle said its because the distributor is old and the springs getting weaker inside.

The car is purring now, and the front tires actualy gave a small squeel as I pulled away in my normal style... this time with the car responding in the affirmative.
 
Last edited:
Sorry for just dropping in, I'm impressd with your work so far!!
I'm also from south africa, van n dorpie genaamd Vanderbijlpark. Lol anyway, i drive the 1992 5-door uno fire (1100), fitted with a uno pacer (1400) engine:D. As with your little uno, my car was also neglected for a couple of years. Got it for R10 000, and car wasn't running at all. After spendin some more money on the car(R15 000):bang:, bodywork and suspension still needs to be done, along with a few minor problems.. Keep up the good work(y), Uno's are reliable cars, and somehow tend to stick to you.:worship:
 
Don't be sorry, thanks for posting!
Ya, lol I've been keeping a spreadsheet for the last while, it gets scary, but how can you put a price on love. I love the look of the Uno, drives like **** it does, I never feel safe in an Uno much above 100k an hour. But I love cruising in the smooth economic style it brings. I guess if I had an oridinary bland Uno I'd be less attached to it. Looking at car auctions etc in my price bracket I can't seem to find a single car that has the visual savy of our babies. I'd love to try a turbo though...
Actualy haveing thoughts of selling mine when its all fixed up and trading up.

However I first need to find out how the turbo's consumption is.
 
Tackled that brake again today with the newfound knowledge of how to get the outer shell off. would be nice if someone would BOLD the MAKE SURE HANDBRAKE IS RELEASED bit. I was ready to give up, when I remembered reading something about that. :p

IMG_3938.jpg


Well first thing I noticed was a green streak of dripping brake fluid dripping from one end of the caliper.

IMG_3934.jpg


Also there is alot of play between the handbrake lever and the brake shoe. It seems to have been worn a bit. It would not surprise me if this part is even more broken when I remove the shoes, which I thought to leave on till I can get a kit or whatever you guys suggest to fix the brakes. Believe it or not, those are the shoes I bought the car with in 2003. :p

Next I recorded the motion of the mechanism.
First I test by stepping on the brake pedal a few times. The left shoe makes a slight atempt at pushing out, and the right one does even less.

Then I tested the handbrake, significant motion of the lever can be seen before it even touches the brake and then it only manages to move one shoe a little bit... atualy more than stepping on the brakes does...

Youtube clip [nomedia="http://www.youtube.com/watch?v=EQPVr4rmy4Q"]YouTube- Defective rear brakes, Uno fire[/nomedia]
 
Last edited:
Ok, me and the mechanic guy tackled the breaks today.
first the wheels were taken off as well as the hubs and dustcaps to make work easier (possible?).
Then we cleaned the areas out well after removing the brake shoes to prevent contamination.
Then we rehoned the bore of the piston with a flexable tool that goes on a dril. it has 3 small stones that pushes to the outside and spins like a drill bit. We got a very good finish as there was little wear inside the pistons. It did cost us physicaly takeing the rubbers to the autoparts shop before we got the right stuff. The first kit came with ROUND O-rings which could never stop a sideways force.

The actual brake shoes had minimal wear and in patches we could still see the factory marks on it, however those big round things were seized up a little, which is why the whole handbrake mechanism was fubar. They were given some penetrating oil, then the shoes clamped in a vice and the round thing moved around with a screwdriver until it had full range of motion again.
Followed by roughing the pad surface with some rough sanding paper. Then everthing was reassemebled and we blead the brakes, the brake fluid in that last bit of rear hose was pitch black allready. Then we adjusted the handbrake. I haven't tested it much but pulling in on my driveway I pulled up the handbrake and I can clearly see one tire mark... its a little wet, so I'm not gonna push it. But, I think its gonna brake sweet now. I think alot of my perception of the driving has to do with the pram brakes it has always had. You realy need to start decelerating long before you wanted to stop.
 
Last edited:
Hi there. I am trying to fix the source of the anoying springlike groan I get from the rear when cornering and when there is much body roll.
It would appear to be comming form the area of the break proportioning valve's spring assembly. My rear breaks still aren't that great and I doubt I could lock them up without the handbrake, after we fixed that broken piston on the other side.

Observing the unit I see it has some masking tape on which is comming off, I suspect this is a noise reducing effort, and I can see that the spring could possible scrape agaisnt the car shell under corners as the spring appears to be totaly unsprung with maybe 2 or so mm play. Is this normal?

If it is, it seems I should be able to remove the nut that holds the two little arms the spring is connected to, and take it off to rewrap. And just reasemble using the dust print as a guideline.????

IMG_3962b.jpg
 
Last edited:
You'll notice that the spring operating arm has a 10mm-head pinchbolt - loosen that, and you can adjust the position of the arm.

There is a proper process for the setting of that spring - the Haynes manual covers it well - basically, involving a large weight in the back and a small weight attached to the spring operating arm.

Here's what I would do. Remove the tape from the spring and apply some grease instead. With the car in a resting position (on its wheels), loosen the pinchbolt and adjust the arm so that the spring is just under tension.

This compensates for the wear (that slotted hole was originally just a hole) and, in my experience, is about the right setting for adequate rear brake effort. The tighter the spring, the more rear brake effort. You don't want to overdo it (you don't want the rear brakes locking before the fronts), but take the slack out of the spring and it should be OK.

However, this won't make any difference to the handbrake performance. Sorry to say this, but I don't like the sound of the work you did to the rear shoes :eek: The self-adjusters (round spring-loaded platforms that support the shoe 2/3rds of the way along) should be very stiff to move and not oiled/greased in any way. If you have freed them off, they will allow the shoe to retract too far under the force of the springs (they should maintain the shoe position near the drum). I reckon you should next try a new set of shoes (they're cheap enough) as they should come with new self-adjusters already fitted.

I have experienced bad friction materials in rear Uno shoes. Nothing would help, except new shoes, and then the brakes worked fine.

-Alex
 
Hi Alex, well I think the main culprit in the break system has been found, I just saw my master cylinder is pissing breakfluid at the junction to the servo.
IMG_3995.jpg


I think the old guy did a great job on the rear breaks, and yes it literaly requires clamping them in a big desk vice and manipulating the self adjusters with a large screwdriver through the hole, until they started moveing again. Also the pad material looks pretty good and has been roughed up manualy.

IMG_3983b.jpg

I actualy stuck some grease in those noise spring hooks yesterday as well as taping some foam padding in a tube around the spring to prevent it rubbing the body... Its a bit better but not as good as rewinding the tape around the junction poiints on the spring ends would have been. Sadly the spring was under tension again by the time I went to go and take it off... which is why I settled for the grease and tube. Its not 100% better, but quite an improvement leading me to think I'm on the right track. I can actualy hear the rear shocks are also causeing some of the noise. Wonder if they are even 3 years old.... I do minimal kilo's per month.

Not much more to report on at this stage except for some minor rust removal.
IMG_3818.jpg


IMG_3979.jpg


IMG_3941.jpg


IMG_3953.jpg


IMG_39901.jpg


IMG_3951.jpg


IMG_3978.jpg


I didn't use any putty, or make much effort as it is under the hood..., I did scrub out the rust to the metal as far as I could, then used a rust remover, washed and dried that off then a hammerite rust cureing primer, followed by rattlecan white :p.

IMG_39821.jpg
 
Last edited:
Back
Top