rogerowen
New member
Rebuilding O/S rear brakes incl new back plate, shoes, cylinder and all the fittings. Old ones just fell to bits (totally rusty). Can anyone point me to a diagramme to show how the fitting kit works?


Thanks, Other side has no fittings either! Found a picture to show me where the pins and pin clips go. Shoes seem to have an adjustable sprung socket that fits on a rod on the back plate. I'm guessing that you hammer this around so the shoe contacts the slave cylinder and the linings are in enough to get the dtum back on. Must be self adjusting?You have a guide fitted to the other wheel! Don't take them both apart at once.

That's great, thanks. My computer is asking for a programme to open the files (.rar)? I'll google it and see.try here
https://www.fiatforum.com/downloads.php?do=cat&id=7
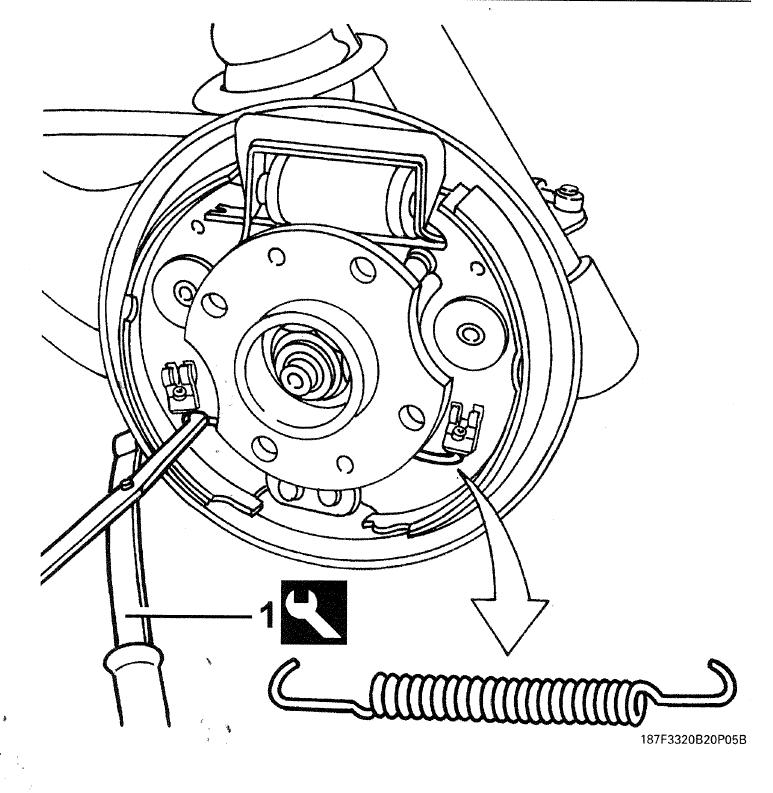
the lower spring always looks upside down to me.
They are the silver discs on the shoes - When I first offered up the shoes they were miles away from the cylinder - so they obviously run in a slot and need to be shifted somehow - hammer (light) was the only way I could see of moving them. Maybe rather than a slot it's a bigger hole as you seem to be able th shift it up and down as well - which is good because one shoe was too low at the cylinder.No hammering!
I've no idea what this socket you're talking about might be. The bar thingy is likely to be the handbrake elbow.
Disconnect the handbrake before you start. Attempting this without a manual (or an intact assembly, or photos) is lunacy.

And a diagram from the Seicento Technical Manual -- which you really, really, ought to download,

The strange thing wrapped round the slave cylinder is a FIAT special tool to stop the pistons falling out (you can use a tie wrap), the prier thingies are another special tool for putting the springs back.