OP
OP

smahaley
Established member
update: new crossmember installed!


Progress, something to hang those wishbones from.View attachment 483747
update: new crossmember installed!


ha ha!! Yes indeed - all I have left to do on the front end is fabricate the collar for pressing the last bushings in on the lower arms.. then on go the new shocks and my lovely sanded and painted springs…Progress, something to hang your hopes on...
, that's a big step forward .
Thanks, @124BC1 - I look forward to checking into the steering and appreciate the guidance.Well done,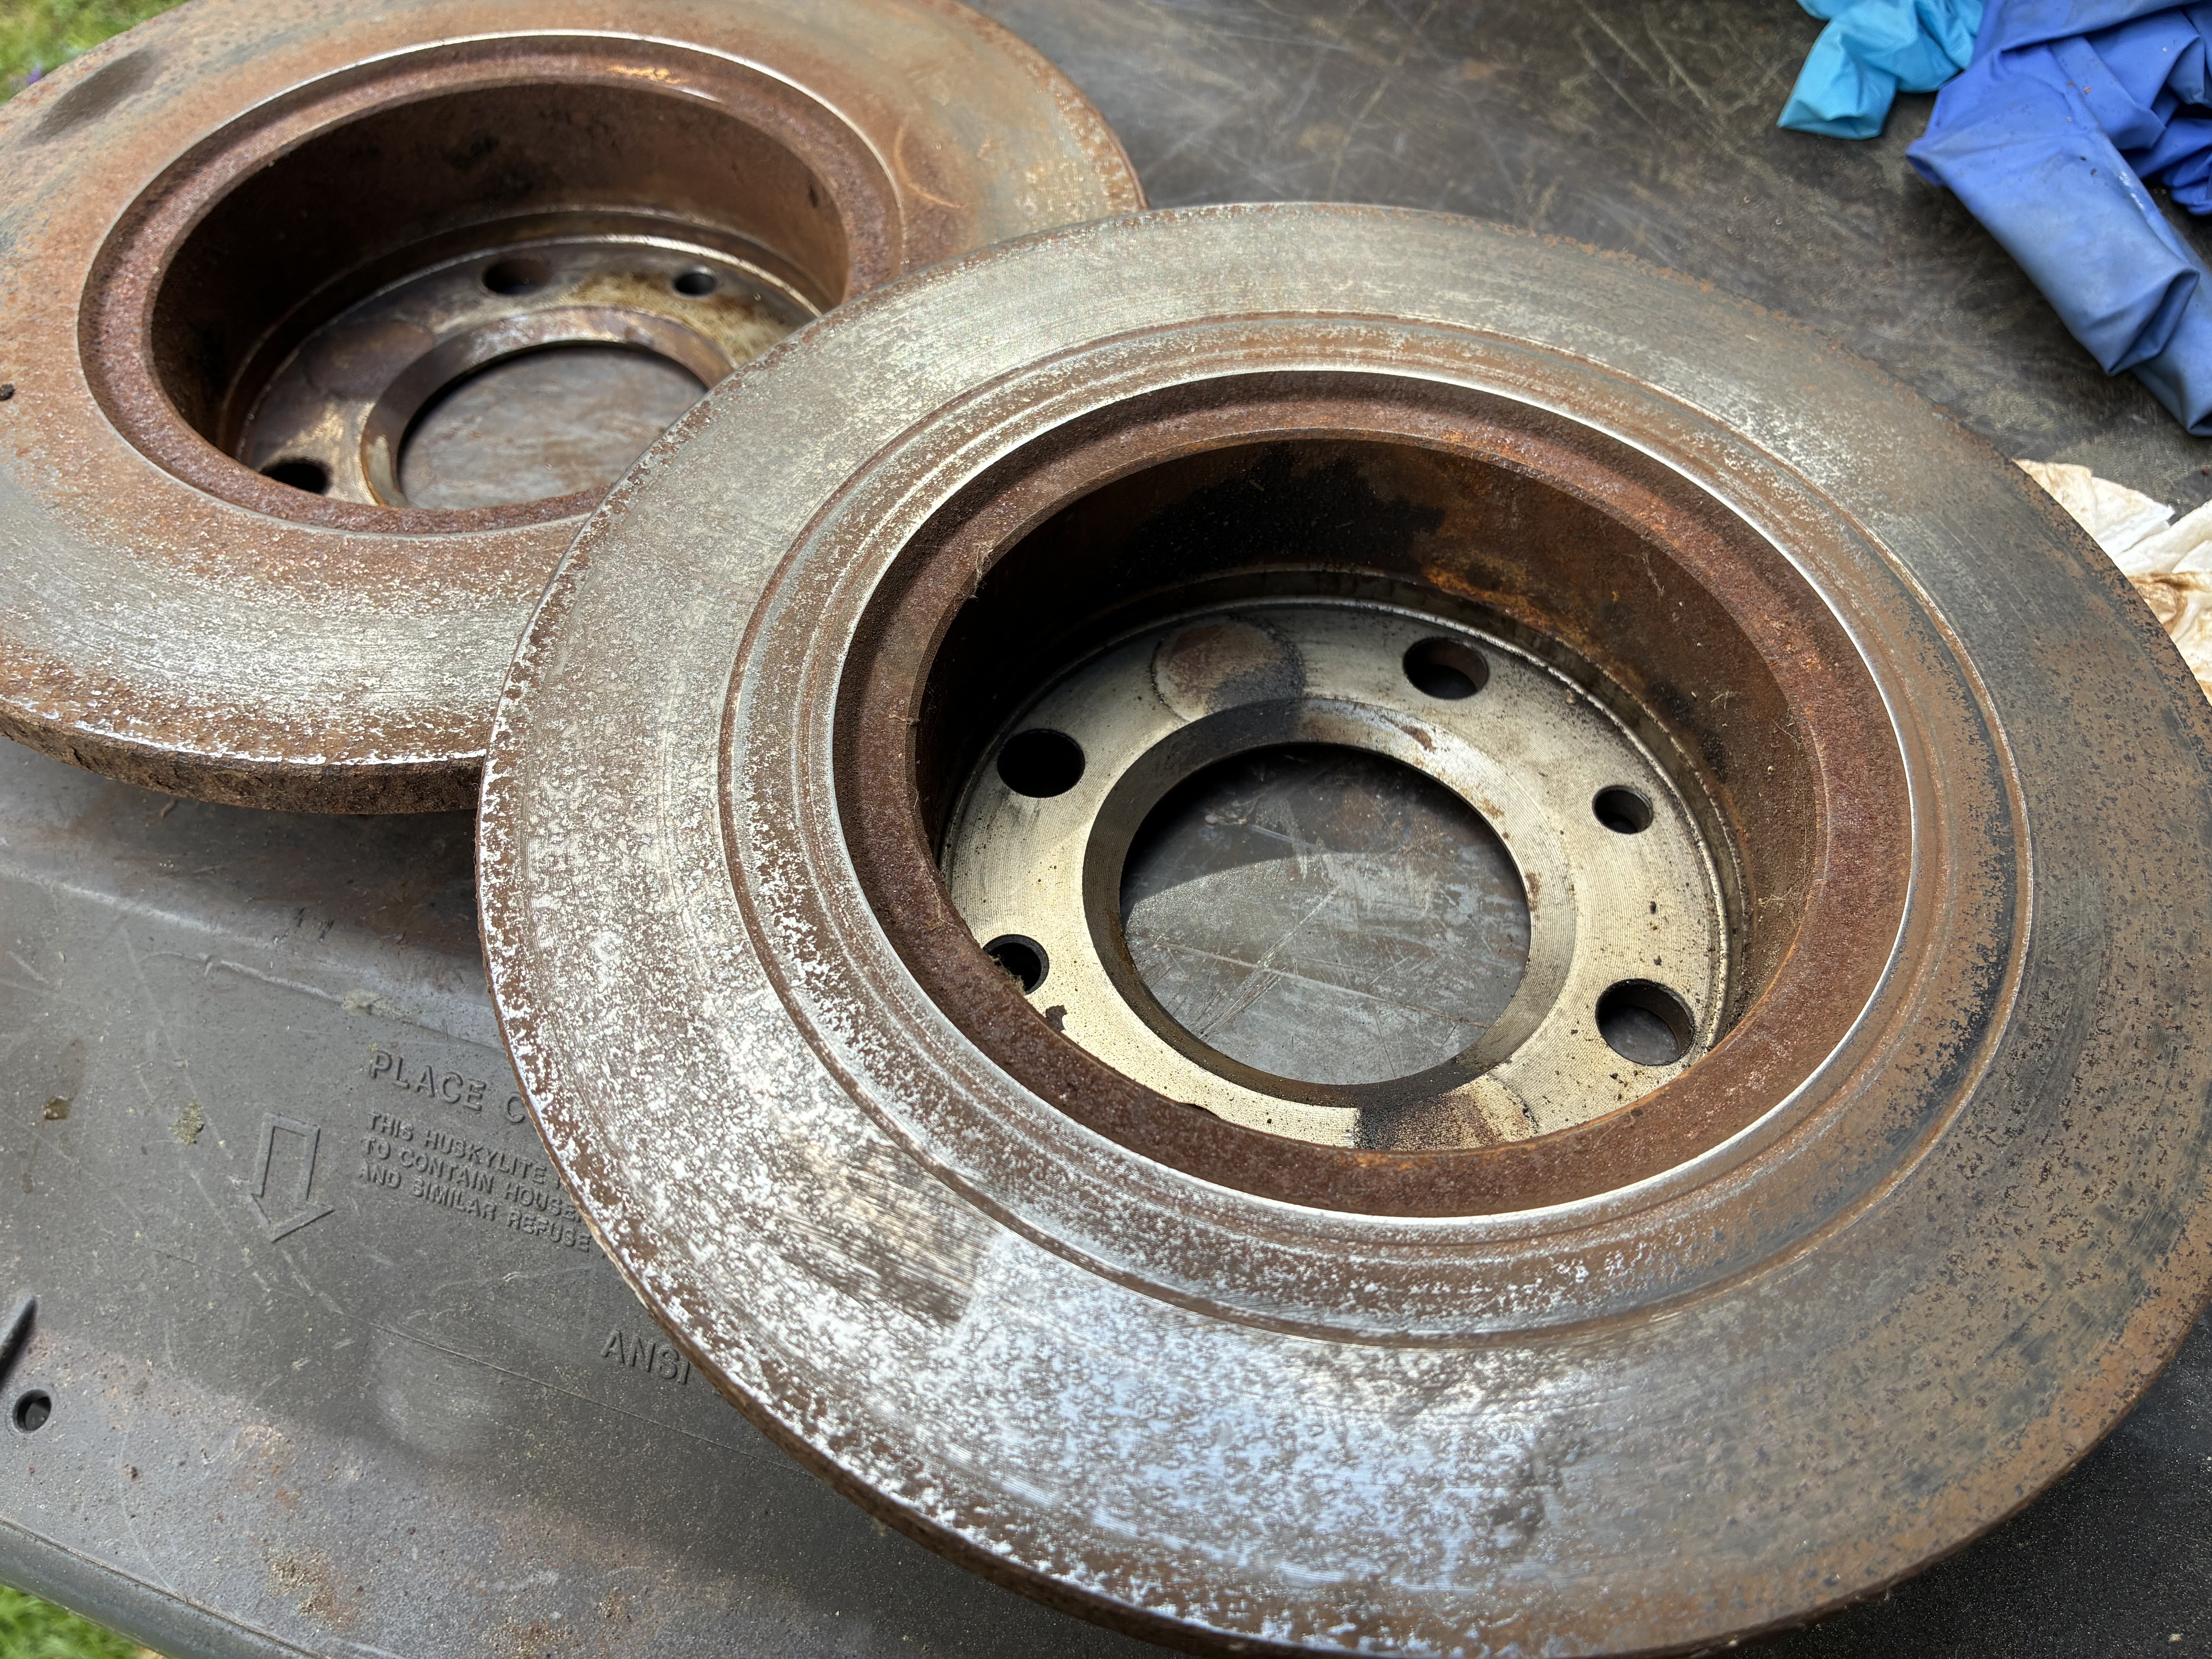
Might I suggest that while the engine is still out, you have great access to check the steering box and idler arm unit (if you haven't already done so).
View attachment 483772
The steering box oil can be checked via the small filler plug (8mm square iirc).
You could also see if any adjustment is needed on the st. box (screw on top of lid with locknut (22mm iirc) - the adjustment process should be covered in one of the shop manuals.
Doing this with the steering track rods disconnected makes it easier to check you've no binding after adjustment. I've found a small adjustment was beneficial on older cars that probably never had any previous attention (it's awkward to access with engine etc. in situ).
It might be possible to suction out some of the old oil via the filler/level plug but I wouldn't recommend removing the top cover (you'd need a new gasket) or indeed the steering box to empty the oil, not worth upsetting things.
Your idler box is the best one to have on a Fiat 124, being as it's hydraulically damped (many just have the rubber bush in torsion type).
The oil level can be checked via the centre plug on the cover/lid (13mm iirc). I usually renew the oil by removing the top cover (screws are 6mm allen key iirc and they're usually very tight), suction out old oil, flush, refit cover and top up with oil.
I'm certainly not suggesting you remove the idler box to 'service' it, doing a partial oil change in situ should be just fine and a lot better than just ignoring it as many people seem to do.
Afaik, normal gear oil SAE 80 or 90 should be suitable for both steering and idler boxes.
I agree brake disc/rotors look salvageable and once in regular use will clean up even more. Obviously new ones are best, but I doubt if efficiency will be much affected once bedded in again with new pads.Thanks, @124BC1 - I look forward to checking into the steering and appreciate the guidance.
As for update:
View attachment 483959
I *finally* got the new pivot bars and bushings installed. It was a jumble of methods - but I did find that an appropriately sized socket could rest on the outer flange of the bushings and with some counter support and Thor’s favorite pastime (hammering) everything came back together.
Another step closer..
Meanwhile: I decided to clean up the brake discs to see what was what. I’ve changed a fair number of brakes in my earthly time, but have not seen a disc so deeply, profoundly scored as the one below:
View attachment 483960
So… to the question of new rotors or not, I say NOT. Not for the moment. I have more primary concerns about, you know, will the damn thing run. I can always put new brakes on after I have everything else in working order…
Side note: there is effectively zero wear that I could discern on the rotors. I think they were not used very much, as the car did more leaf collecting than turn-making.
As regards removing the rivetted balljoints, all the 'shop manuals (I recall you have 2 types) say to centre pop the centre of each rivet head then drill to remove. I'd start with a 1/8" (3mm) drill and drill down deeper than the rivet head, then drill using a 5/16" (8mm) drill to the depth of the rivet head and no further, the rivet head just now pop off - don't drill into the suspension arm. When fitting the new balljoint be careful to fit it the correct way around in the arm.
----------------------------------
), although quite heavily rust-pitted, should be ok to use if cleaned up some more, paying particular attention to removing any hard scaly type rust in the inner circular area that is swept by the brake pad - hard rust here can prevent the new pad bedding in properly, may even cause tapered wear. (i.e. new pad material can't cut through the hard rust scale, so tilts as it wears).) before fitting new pads using medium emery cloth/tape, basically just taking the shine off the rotor surface, not removing metal or leaving big scratches. Powered wire brushes tend to remove surface rust then polish whatever rust is left and don't cut through any hard scale. I wouldn't recommend using a powered sanding disc or flap wheel (I've seen discs/rotors ruined by doing this).)
Poop! I shall refit them!! Thank you!View attachment 483977View attachment 483978
Sorry to be the bearer of bad news, but.....
Lower balljoint is fitted the wrong way around in the lower A arm,
top pic (arm is upside down) shows (arrowed) witness marks of where old balljoint was fitted,
bottom pic shows old balljoint still installed (arrows show it's mounted underneath the bottom A arm, arm is upside down in pic).
I did include a caution about fitting the balljoint the correct way around in the arm....
P.S.
If I was doing this job, I'd have used shorter bolts or else shortened the bolts (leaving approx. 2 threads remaining outside the nyloc/nylok nuts).
I prefer to shorten the bolts before fitting, this allows me to file a nice crown on the cut end of each bolt, and remove the 1st 1/2 thread to leave a nice lead-in so the nut will engage easily, then touch in the cut end with some silver paint to prevent corrosion.
I'd also paint those balljoint bodies and metal parts of the suspension bushes to prevent corrosion if you don't like black or silver, you could use a clear lacquer to prevent corrosion in future.
I'd also drill and tap those balljoints to accept a grease fitting (nipple or zerk), so that they can be lubed in future.
I bet you're glad you fitted the new balljoints using bolts (and not rivets as per original)...Poop! I shall refit them!! Thank you!
View attachment 483988
Thanks for the words of wisdom re: brakes.
Speaking of which: I discovered a few things.
1) the brake compensator valve boot retainer (looked like an aftermarket zip tie) had failed
2) the brake line connections were impossible to undo (even with heat - which threatened to set things afire - and penetrating oil )
3) after I cut the brake lines off and lowered the valve with bar, SAND (or something akin) poured out of the torn boot.
No. Not an April Fools joke.

Good day, sir..Well done,
Might I suggest that while the engine is still out, you have great access to check the steering box and idler arm unit (if you haven't already done so).
View attachment 483772
The steering box oil can be checked via the small filler plug (8mm square iirc).
You could also see if any adjustment is needed on the st. box (screw on top of lid with locknut (22mm iirc) - the adjustment process should be covered in one of the shop manuals.
Doing this with the steering track rods disconnected makes it easier to check you've no binding after adjustment. I've found a small adjustment was beneficial on older cars that probably never had any previous attention (it's awkward to access with engine etc. in situ).
It might be possible to suction out some of the old oil via the filler/level plug but I wouldn't recommend removing the top cover (you'd need a new gasket) or indeed the steering box to empty the oil, not worth upsetting things.
Your idler box is the best one to have on a Fiat 124, being as it's hydraulically damped (many just have the rubber bush in torsion type).
The oil level can be checked via the centre plug on the cover/lid (13mm iirc). I usually renew the oil by removing the top cover (screws are 6mm allen key iirc and they're usually very tight), suction out old oil, flush, refit cover and top up with oil.
I'm certainly not suggesting you remove the idler box to 'service' it, doing a partial oil change in situ should be just fine and a lot better than just ignoring it as many people seem to do.
Afaik, normal gear oil SAE 80 or 90 should be suitable for both steering and idler boxes.
Socket for filler plug on the steering box? Iirc, it's an 8mm square (8mm = 5/16 in.). I've never had an 8mm size square socket. Some alternatives:-Good day, sir..
I’ve just got around to checking the steering box and idler assembly. I need to procure the correct socket to check oil on the steering box… however I did remove the top of the idler box and to my surprise (?) it was all packed with bearing grease. I noted your comment about filling with gear oil so consulted Pininfarina and Haynes and both gave zero (!) info on maintaining the idler inner workings.
Should I just leave it be?
Grazie


