- Joined
- May 23, 2018
- Messages
- 33
- Points
- 64
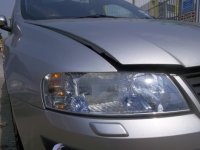
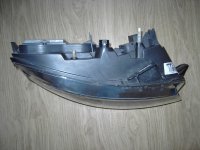
Is it possible to fit the headlight washers in a bumper with no factory headlight washers?


Is it possible to fit the headlight washers in a bumper with no factory headlight washers?

I dunno if the Stilo sprinkler has a lifting mechanism.
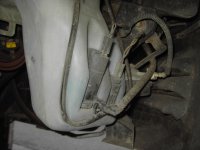
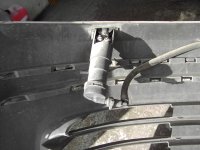
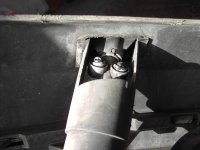
For some reason, the pipes to the headlamp sprinklers are huge. You could drain a lake with them in 5 minutes.
it has only 3.1l tank for windscreen washing fluid.
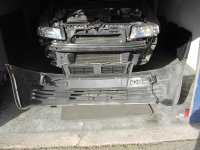
How long did it take you to remove the bumper, gotta do mine tomorrow so want a rough time frame (never done it before).
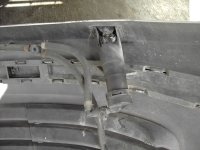
I was doing other stuff at the same time, but I'd guess about hour and a half to get the bumper off. (Wheels, wheel arch liners, under trays then bumper). Would also depend if the bolts below the bumper are seized or not. Mine were when I took the bumper off a few years ago, so I fitted new rive nuts and stainless bolts then, making it easier this time.
.
but it can only be a matter of time before it goes, not to mention any other bulbs. but drilling the old ones out is probably not going to be much fun. Maybe a job for Easter if the missus doesn't find some DIY for me, or fancies a day-trip to Tenby or something.. Do you *need* to take the bumper off to change the sidelight bulbsRalf S.
Do you *need* to take the bumper off to change the sidelight bulbs (assuming you have normal sized/shaped arms and no access to a trained bulb-fitting capuchin monkey or the young lad from next door)?
My rusted bottom bolts started to shear off when I tried to remove my bumper to look at the air-con condensor/radiator last autumn... so I decided to leave it until the weather's better... but since then one of the sidelight bulbs has packed up. There's two bulbs in each lamp and the second bulb got me through the MOT...
I have some rive nuts too, so you must be a genius like me..
Ralf S.
)