IMG_0864.jpeg

500 (Classic) Long time coming!

Introduction

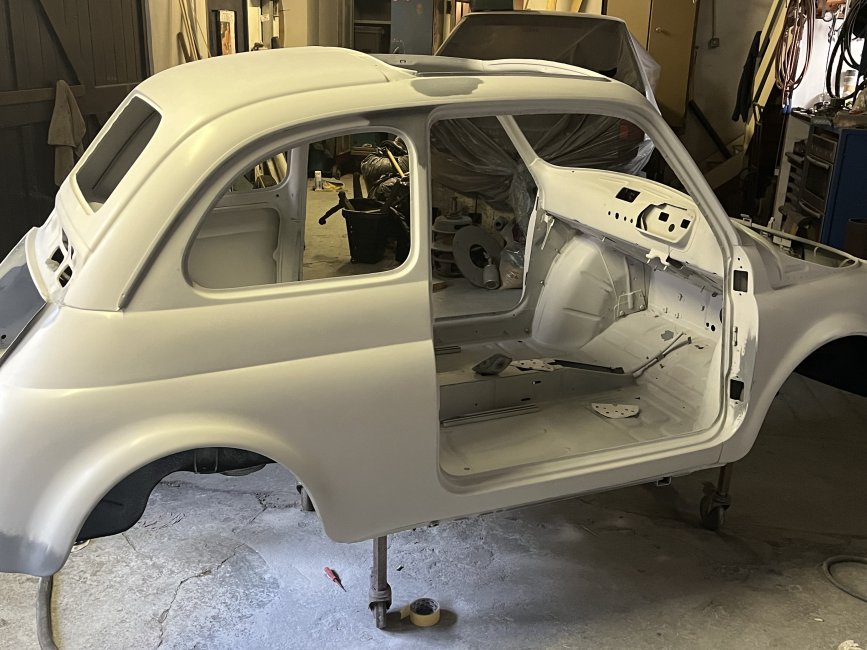
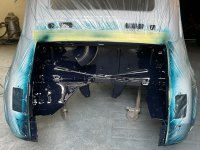
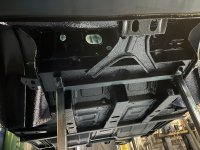
Having dug out my 500 recently after a very long time dormant (20 years since I did the panel work) I’m feeling motivated. I’ve painted the bolt on panels and today started applying some to the shell so am starting to get some thoughts towards building it up. There’s a couple of problems on this front, firstly the huge gap since I took it apart and the unfortunate fact that a lot of the parts were lost in a fire where they were stored some years ago. I’ve sourced some of the more crucial parts over the years and have spent a fair wedge recently on new stuff. I think I’m dialled in on what needs bought but its tricky knowing every small bit I'm might or might not be missing, I have tried sourcing a parts book but as yet had no luck, out of stock seems to be the theme. Does anyone know where I might buy one? or maybe an online link? I’d much prefer a paper copy.

IMG_0864.jpeg
IMG_0873.jpeg
IMG_0877.jpeg
IMG_1287.jpeg
IMG_1288.jpeg
IMG_1289.jpeg
IMG_1291.jpeg
Spare time for investigating the engine has been in short supply recently but at last today I had enough of a go to remove engine, strip of bolt on stuff and remove the head for a look. I’d be very grateful for any opinions, experience or guidance that the hive can offer.

Once the engine was out it could be seen it’s been spurting oil out of both breather bolts.

The head seemed sufficiently tight on all the studs, certainly the nuts all took a bit of cracking free.

The grooves in both the head and barrels were full of carbon, remnants can be seen on the HG pictures though I did hoover out the bores and combustion chamber area as lots fell off the HG when removed.

Unrelated I think but obviously an issue is the vertical scores on No2 cylinder, in two localised areas on the bore. Not deep but plainly visible. The bores are nice otherwise with no or next to no step at the top, just carbon buildup.

My thinking is that No2 piston has stuck ring(s).
Head gasket was gone (or I’m thinking it had never sealed as there’s no visible area of degrade and both breather grooves were chocks) before I even bought the engine, possibly why it was for sale!?

What would be a reasonable plan of action? I’d prefer to not spend a load on parts but if needs must. Would a set of rings with a bit of a hone, head studs and mating surface cleaning see it back together? Or am I better buying cylinders and pistons and visiting the engine shop for skimming heads? I’ll be decarbonising the head and pistons as I have a good solution to soak them in, depending on the valve seats on clean up I’ll be hoping a lapping will be ok for them. I’ll renew gaskets and seals, some again and some that didn’t get done when I first had a go at the engine.
IMG_1291.jpeg
IMG_1294.jpeg
 
I think you're on the right track.

Given the oil on the head gasket and the breather bolts, I'm surprised to see the underside of the combustion chamber and the piston tops looking as dry as they do. I put forward an idea that the oil was leaking from elsewhere, valve cover, down the head studs, etc, and just happenstance means it found its way to the head gasket join, and seeped its way round to dripping out of the breather bolts ? The head gasket itself might not have even been blown, or it could have been but as a separate issue to the oiling?

With stuck, or broken (one on my engines had some similar vertical scoring and it was a broken top ring), rings on cylinder 2 there would be a lot of combustion gas making its way into the crank case and that will force more oil that usual out of any minor leaks.

How much money you put into the rebuild is up to you. There will be people on all sides of the spectrum. To my mind you either go the quick and dirty route, see if a home hone cleans the bores, run a straight edge over the head and you can get away with just a gasket set and a set of rings, or now while its out is the time to do it properly, strip it all down, measure everything and start a proper engine build. If the no2 bore wont clean up with a home hone, or the ring lands on the piston are damaged, that might be your answer...

If the bores are not already at max oversize, you'll probably find that having a machine shop bore them for oversize pistons will be cheaper than buying new cylinders.
 
Is this a 499cc engine as the cylinder head is 594 or 650cc as is that gasket. You should not have a gas escape ring in cylinders and head.
 
Actually I may well be wrong, you have a 650 engine there and I just checked a 650 cylinder and a cylinder head and they both have the gas escape groove. 🤔
 
Thanks for checking Toshi, it’s better news than I thought it might be!

I’m just not sure on the direction I’m going to take. The scores on the cylinder are obviously a concern but they do appear to be very light and I suspect a hone would get them. I’ll tear it down a bit further and take a better look.

“Given the oil on the head gasket and the breather bolts, I'm surprised to see the underside of the combustion chamber and the piston tops looking as dry as they do. I put forward an idea that the oil was leaking from elsewhere, valve cover, down the head studs, etc, and just happenstance means it found its way to the head gasket join, and seeped its way round to dripping out of the breather bolts ? The head gasket itself might not have even been blown, or it could have been but as a separate issue to the oiling?”

Goldnrust, thank you for your thoughts, they confirm what I thought when the CC was seen to be so clean of oil. I was expecting there to be a fair old mess in there. I hadn’t thought about how oil from elsewhere might of contaminated the grooves. Prior to me cleaning the engine it was absolutely covered in oil and whilst washing it down with paraffin I might well of added to it.
 
I stripped the head down last night and found no oil seals on the exhaust valves, is this usually the case? The inlets had remnants of the seal though they had worked their way up to the keepers, ithis can’t be where they should be?

I don’t mind a bit of porting, bit of a glutton for punishment you know! Being as I thought the seat cuts are basic at best I’m thinking a nice set of three angles would be worthwhile BUT this might be an appropriate time to get some bigger inlet valves. Has this proven worthwhile for others? Is it likely to open up a can of worms when jetting the carb?
 
No opinions on the bigger valves and their potential effects?

I stripped the rest of the engine down and had a good eyeballing of the pistons and cylinders. The rings were as near perfect as I’ve seen on a used engine which surprised me. The vertical marks in the No2 cylinder are alloy deposits from the piston skirt, I think it might have been a bit too hot at some stage in its life before me. I’m going to chance it and have dropped the cylinders off at the engine machinist for a light hone and I’ve bought new rings and big end bearing. I’ve asked the machinist to cut some nice seats, it sounded like he might sub it out to a colleague who has a nice new Serdi machine and enjoys such tasks. So its just a good clean up of the parts I have until the other bits get back to me, I can feel my impatience welling up!
 
You will find varying opinions on valve seals, it seems to be a contentious topic on the forum!

Personally I'll believe in valve stem seals on all 4 valves, if you are using the original O ring style seal. They should be fitted (the contentious bit...) between the spring cap and the collets, as in the attached image. This creates an umbrella effect, where the only oil that reaches the valve stem is in the form of mist from inside the crank case, and oil that is coming directly from the rocker shaft should run down the outside of the valve spring.
ValveOringCutaWay.jpg

Big valves, some people speak of using a larger intake valve to increase air flow, but with a standard cam, intake and exhaust I dont think there will be be any gain.

It's only gut feel, and I could be very wrong, but I've looking into tuning for several different engines of this era and the traditional advice often included larger intake valves almost as a matter of course? Comparing the valve area against suggested valves in a couple of engine tuning books I bought a while back (2010s) it should suggest there's plenty of valve area in the standard Fiat set-up. I would suspect some carefully porting, and a nice 3 angle valve job, will make a much bigger difference than simply fitting bigger valves, but I'm more than happy to be proved wrong!
 
Thank you, thats very informative. I’ve only ever seen valve seals fitted to the top of the guide, the method you explain is new to me. I’ll go with it, as Fiat intended. Possibly thats why the guide sits so high out of the head, stops the guide being flooded with oil.

My thinking on valve size is the bigger the better on a maximum effort engine but for more humble efforts they (bigger valves) might well be a mistake. On more normal (when compared to a racing engine) engines performance at lower rpm matters and I’m inclined to believe airspeed might be impeded if a big valve was fitted.
 
My quest for more power in the engine department started when I tried to improve on a standard 499cc engine as I was using my 500L as a daily driver and it is very hilly around here so inclines were not conducive to making friends with the motorists behind you. I had read all about the basics, carb, cam, exhaust & cylinder head. I knew that nothing would be cheap and the hardest bit was to find someone who would take on cylinder head work especially in my area of the country.
Being a two cylinder air cooled engine I thought that a motorcycle specialist might be a good option. After a bit of research I found a contact near Biggleswade who was well established in the world of tuning old motorcycles for racing, particularly the Isle of Mann TT races. So armed with a spare 499cc cylinder head and a selection valves and bits I paid him a visit. It was a memorable meeting as I was blown away by the “lecture” I received on cylinder head technology for about an hour. He rejected the idea of using the largest valve set I had which included 36mm inlet valves as it would have meant overlapping valve seats. We settled on a plan for valves, seats and porting but decided against a skim at this stage and I left the bits with him.
To be continued 😀
 
While the cylinder head was away being worked on I thought it was a chance for an experiment on performance. I had rigged up a Rev counter on the car and went to a local stretch of open dual carriageway. On the level road I went flat out in top gear and achieved a reading of 5,700rpm. When I got there worked cylinder head back I fitted it and repeated the experiment. This time the engine peaked out at 6,200rpm, briefly because a “ping” noise and a dirty oil smell ended the experiment. Turned out the noise was the old fan letting go and completely disintegrating as it would have been doing over 9,000rpm at that time. On inspection some of the fan fins had pierced the surrounding steel tinware, pretty scary 😧
Good idea to check your fan if an engine may have covered a high mileage. The work on the head had improved performance and I continued to used it on subsequent builds opening up the inlet port to 30mm in line with the 126 so as to fit a 28IMB carb then later installing 650 pistons and cylinders in the original 499cc crankcase so on the outside the engine looks pretty standard. That was as far as I went with that engine but after that I had larger inlet valves fitted to a number of heads and had a go at porting myself.
 
The start of a long road of tuning twin cylinder Fiat engines by the sound of it, it’s a fun story to hear Toshi. I thought maybe a fan letting go might of made more than a “ping” but maybe I’m just thinking about the time a BMW diesel I owned chucked its chain off. That made a right clatter up, for some reason it didn’t lock up but maybe the momentum I had going down a slip road helped turn it into a metal mincer!
 
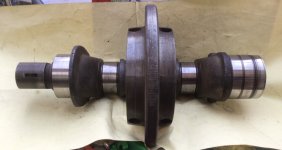
Yes I am still on that road and have been putting together the parts for my next engine build as I still have two 650 crankcases that need filling. I just got this bit to go at the heart of the engine.
IMG_6425.jpeg
Some may recognise exactly what it is.
That “ping” I referred to was the sound of the fan pieces hitting and in some cases piercing the steel tinware, all over in a millisecond.
The stale oil smell was the fragments disturbing all the oily crud that had built up inside the tinware over the years even though it had been rebuilt a few years earlier bay well known north London specialist, one job they did not do. Thoroughly cleaning out and painting the tinware transformed the air in the cabin when driving.
When a fan goes, unless it dies a slow rattling end, you get no warning as everything seems normal unlike when the fan belt goes and the ignition warning light will come on. However the engine will overheat very quickly and in my case I only made it about 3 miles back towards home when I finally lost sufficient power. The heat had expanded the studs holding the cylinders and head in place to the extent that all compression was lost also the rocker shaft pedestals expanded and stripped the retaining studs in the alloy head. All good fun and it turned out to be a relatively easy fix.
 
A BIS crank. What merits over a standard crank do they have?

From what I've read, they are the strongest of the factory cranks, as will surviving revving to approx 7,000RPM, where a standard crank is likely to snap if taken past 6,000rpm very often.

The shape/design of the counter weight is more similar to the aftermarket racing cranks, so that might be what makes them able to survive the revs/power.

Yes, I'd presume @Toshi 975 's crank will need grinding undersize with new rod bearings @StMarks. I spotted one on eBay a couple of months back and was happy to add that to my collection ready for when I get round to building a faster engine, when it arrived it was clear my crank will need the same treatment. That's a small price to pay though, when you can pick up a BIS crank for 1/10th the cost of an aftermarket crank.
 
It looks (to me anyway) like those big end journals are in poor shape ?
Fear not, those dark marks are little more than “rusty” finger prints, the journals are as smooth as. They will however undergo the usual checks for wear and any signs of ovality. Regrinding would not be a problem especially as I already have the oversize bearings. It made me think that I had my first crankshaft from my Mk 1 Cortina reground about 55 years ago by Green and Weatherly in Watford and the company are still going now trading as Cramers.
 
Back
Top