Making WHITE dials for your UNO
You will need:
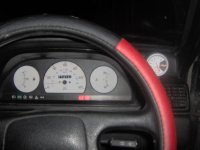
Open photo shop, click the “open file” button and open the photo of the dial (Speedo, petrol or temp.)

Zoom in on the image till it is big enough for you too see clearly, then using the “Magnetic Lasso Tool” begin to outline the dial (around the black area). Once this is done the dial will have a flashing black and white line around the area you have outlined.

With the dial outlined you can now make it white. Click “Layer” on the task bar, the “New Fill Layer”, “Solid Colour…”

The “New Layer” box will appear when you click “Solid Colour.” There is not really any need to change the name of the layer, on the drop down bar select “Exclusion” then click “OK”

The “colour Picker” appears on screen now, select your chosen colour. In this case being white. And then click “OK”

The dial has now changed to white. Print out onto white paper (should be to scale). And cut out using the necessary method. To mount the dial you will need spray glue and then jus simply mount them over the existing dials.
CAUTION: when mounting new dials make sure that they line up with the old dials. This can be done by turning the key (on temp/petrol dials) the needle rises, make note of where it is (as best you can) turn ignition off. Place on dial and turn key, needle rises, adjust till correct. With the speedo the same will need to be done with AS MUCH CARE AS POSSIBLE as you don’t want this dial to be inaccurate!!
If you wish to experiment with different colours “Undo” (CTRL + Z) the colour change and go to “Layer”, “New Fill Layer” and “Solid Colour”. “New Layer” box, drop down menu bar “Exclusion”, “OK”. “Colour Picker”, select the desired colour and “OK”. Dial changes to the colour you selected (to match/contrast/or ‘cause you liked the colour. The choice is yours!!! If you have more advanced skills add a design/picture of you choice.

My PS skills are only just developing, this is a rough guide of how mine were done! Have fun and enjoy your new dials!!
Charlie
*Thanks to LOUIE BEE for the photos of the original dials, to scale! They can be found in his photo gallery here on FF! Cheers buddy!") *
*
You will need:
- Pictures of old dial faces (to scale)
- Photoshop (or similar programme)
- PC/laptop (obviously duhh)
- Paper & printer
- Spray glue
- Scissors/Stanley knife/Scalpel
Open photo shop, click the “open file” button and open the photo of the dial (Speedo, petrol or temp.)
Zoom in on the image till it is big enough for you too see clearly, then using the “Magnetic Lasso Tool” begin to outline the dial (around the black area). Once this is done the dial will have a flashing black and white line around the area you have outlined.
With the dial outlined you can now make it white. Click “Layer” on the task bar, the “New Fill Layer”, “Solid Colour…”
The “New Layer” box will appear when you click “Solid Colour.” There is not really any need to change the name of the layer, on the drop down bar select “Exclusion” then click “OK”
The “colour Picker” appears on screen now, select your chosen colour. In this case being white. And then click “OK”
The dial has now changed to white. Print out onto white paper (should be to scale). And cut out using the necessary method. To mount the dial you will need spray glue and then jus simply mount them over the existing dials.
CAUTION: when mounting new dials make sure that they line up with the old dials. This can be done by turning the key (on temp/petrol dials) the needle rises, make note of where it is (as best you can) turn ignition off. Place on dial and turn key, needle rises, adjust till correct. With the speedo the same will need to be done with AS MUCH CARE AS POSSIBLE as you don’t want this dial to be inaccurate!!
If you wish to experiment with different colours “Undo” (CTRL + Z) the colour change and go to “Layer”, “New Fill Layer” and “Solid Colour”. “New Layer” box, drop down menu bar “Exclusion”, “OK”. “Colour Picker”, select the desired colour and “OK”. Dial changes to the colour you selected (to match/contrast/or ‘cause you liked the colour. The choice is yours!!! If you have more advanced skills add a design/picture of you choice.
My PS skills are only just developing, this is a rough guide of how mine were done! Have fun and enjoy your new dials!!
Charlie
*Thanks to LOUIE BEE for the photos of the original dials, to scale! They can be found in his photo gallery here on FF! Cheers buddy!
*