Technical Headlight "cover" crack repair?

Currently reading:
Technical Headlight "cover" crack repair?

Joined
Jan 26, 2022
Messages
157
Points
90
Location
Råå
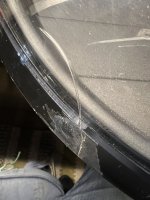
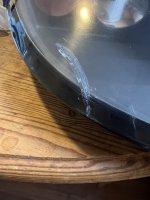
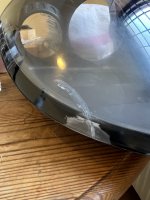
I would like to repair a crack in the plastic headlight cover on the b-95... Anyone done it, preferably with ease, and great success? If so, please do share :)

Assuming the material is polycarbonate(?), it is claimed:
best option methyl methacrylate - difficult to source
cyanoacrylate (superglue) - may cloud, bond not to be "submerge"-d
epoxy, slightly stronger than Superglue, but UV-sensitive will yellow
polyurethane, only semi-transparent

Source:

Enviously looking at the windshield repair kits (I know, they're not for plastics (actually e-mailed a supplier (in case they had forgotten to mention it(!))))...

Thanks,
tjr
 
Sorry no definite suggestions but a repaired crack stabilising the problem better than a crack. I suspect anything you use will be affected by heat and light and general road conditions. If you do find a solution you will bbe very popular. Trouble is repairing lamps is uncommon so products have not been marketed.
 
  • Like
Reactions: tjr
Interesting problem which got me thinking.

The trouble with line cracks as opposed to crazing is that they are generally clean cracks through the material and are themselves tight butt interfaces. This makes repairing with 'something' difficult because there may be no penetration of the repair material into the crack uniformly over the full length of the crack.

To be successful you may have to do what decorators do and turn the crack from a '|' into a 'V' to surface bond area and depth. The down side with clear materials is that you have made the crack line far more visible.

I used superglue to seal a water leak along the seam of one of our 'B' rear lights and whilst it sealed OK the glue ran everywhere, looked cloudy and even faded the edges of the red lens where it made contact with. Horrible stuff to work with.

I think you will need a hard setting clear perspex like adhesive that can withstand being polished with a headlight restoration kit.
 
Thank you both @The Panda Nut and @s130.
If you do find a solution you will bbe very popular.
Lacking sufficient knowledge, I'm afraid I'll at best add to the; what-not-to-do-list...

The trouble with line cracks as opposed to crazing is that they are generally clean cracks through the material and are themselves tight butt interfaces. This makes repairing with 'something' difficult because there may be no penetration of the repair material into the crack uniformly over the full length of the crack.
Yup, that's why I desperately want the windshield-stone-chip-solution for plastics. With the help of vacuum and pressure together with a low viscosity UV-activated glue, the result turns out pretty darn good, when performed by a professional. The professionals shied away from this project though (angels vs fools).

To be successful you may have to do what decorators do and turn the crack from a '|' into a 'V' to surface bond area and depth. The down side with clear materials is that you have made the crack line far more visible.
Yes, that's also what boaters do when working with high viscosity materials (epoxy etc).

I used superglue to seal a water leak along the seam of one of our 'B' rear lights and whilst it sealed OK the glue ran everywhere, looked cloudy and even faded the edges of the red lens where it made contact with. Horrible stuff to work with.
That was my first line of thought as well... Thanks for sharing! I was hoping the article above, was wrong.

What I've learnt from yesterday is that the black headlight rim is painted on the underside of the plastic, which will simplify things when improving the spotty color. I'll probably will be using a paintbrush and acrylic paint.

I read about and purchased a general UV-activated glue, also for hard plastics (can (also) be found locally; 4g for €10). I tested it, in a low visibility area, and it is low-ish viscosity, but not low enough, the capillary effect won't suck it into the whole crack unfortunately... What is good about it is that you can fiddle with it (endlessly) until you have it where you want it, and have wiped off (all) the other areas. Then you "blast" it with the included blue light for five seconds and it sets. I don't know anything about the longevity of the stuff, but the internets generally was positive (also for poly carbonate).
 
I read about and purchased a general UV-activated glue, also for hard plastics (can (also) be found locally; 4g for €10). I tested it, in a low visibility area, and it is low-ish viscosity, but not low enough, the capillary effect won't suck it into the whole crack unfortunately... What is good about it is that you can fiddle with it (endlessly) until you have it where you want it, and have wiped off (all) the other areas. Then you "blast" it with the included blue light for five seconds and it sets. I don't know anything about the longevity of the stuff, but the internets generally was positive (also for poly carbonate).
I'd go for it on the crack. Then sand and polish the headlight cover and then apply PPF film on top. I'm just preparing to do it on my Ducato headlights (luckily they are not cracked) and on my GF's rearside polycarbonate windows. I spoke to a detailer what to use, UV resistant clear paint, ceramic coating but he said the PPF film will be the one that lastst the longest. And apparently it has 'self-healing' capabilities.
 
  • Like
Reactions: tjr
Thanks for the words of encouragement @the green vanper!

So far everything I’ve tried has done nothing for the aesthetics. It still looks like a headlight with a crack… At least it’s a method that does not cloud the plastic and it seems it might stop moisture from entering, BUT the crack will still disturb the light cone (and look just as ugly).
Next will be cutting a V with a Dremel, almost all the way through 😱😱😱
@the green vanper did the retailer specify any special brand of PPF film or do they “all” work?
 
With a Volvo C70 I took the easy way out and used headlamp tape with notable success.
 
  • Like
Reactions: tjr
@the green vanper did the retailer specify any special brand of PPF film or do they “all” work?

He said 'good quality', so I assume 3M. He gave me a contact to his supplier and told to ask the same what he's buying :) I will probably buy it in April, as the weather is starting to get nicer and letting to do some works outside :)
 
  • Like
Reactions: tjr
Sorry to say; I was right, and here’s adding to what not to do:

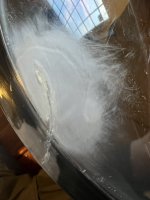
A few hours of grinding, glueing, polishing, waxing, and it looks… worse. 🤦‍♂️

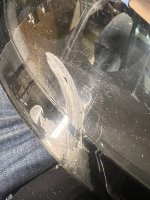
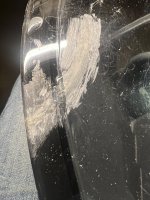
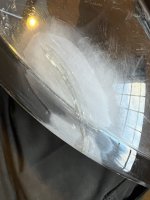
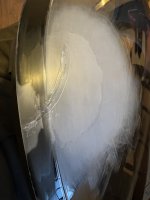
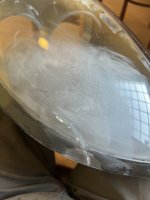
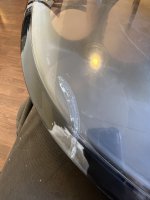
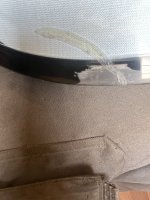
The UV-glue is excellent to work with, but in larger amounts turns a bit rubbery (after hardening) and has a slight yellow tint. See pictures.

If I had to do it again, I would 1) get a real windshield repair kit that, with the help of vacuum and pressure, can draw UV-glue (for plastic) into a hairline crack or 2) dremel/grind out more of a Y instead of a true V (even less fun to grind on the inside also) plus put more effort into cleaning the surfaces before adding glue and working out air bubbles before having it harden.

IMG_4644.jpeg
Hairline crack (don’t ask)

IMG_4645.jpeg
Dremel

IMG_4646.jpeg
Glue

IMG_4648.jpeg
Wet Grinding 400

IMG_4647.jpeg
Wet Grinding 800

IMG_4650.jpeg
Grinding 1200

IMG_4651.jpeg
Grinding 2000

IMG_4652.jpeg
Polish and wax

IMG_4665.jpeg
White background showing yellow tint

IMG_4667.jpeg
Sad “final” result and reason to return
 

Attachments

  • IMG_4657.jpeg
    IMG_4657.jpeg
    1.3 MB · Views: 14
Back
Top