I recently posted about a front caliper problem on my daughter-in-law's Jazz (caliper woes) which was cured by fitting a new N/S/F caliper. Then, of course, it had to be bled out to eliminate the air from the system. I would normally do this with the help of my Gunson Eezibleed but the kit doesn't include a cap which fits the master cylinder reservoir, so Mrs Jock assisted with the pedal pumping duties and we did it the "old fashioned" way. I am always worried about damage to the master cylinder seals on an old car like this when you bleed by this method (I put a wooden block under the pedal so it can't be pushed all the way to the floor). Luckily the bleeding seems to have been successful but the fluid looked a bit past it's best and I've got rear disks and pads still to do - O/S/F caliper is a little suspect so I'm going to pop the piston out and check it over at the same time. When it's all back together again it would be criminal not to do a complete fluid flush but there's the problem of the master cylinder.
I was going to just buy a universal cap. There are a number of universal master cylinder caps on the market. Indeed Gunson do one. I started reading the reviews and there are quite a number of instances of people finding it impossible to effect a seal due to these caps not being substantial enough to resist distorting when done up tightly enough and the last thing you need is a nicely atomized spray of brake fluid - which you probably won't know is happening (until it's way to late) because you are going to be down at a wheel actually doing the bleeding.
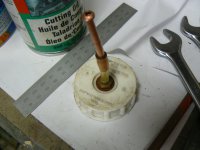
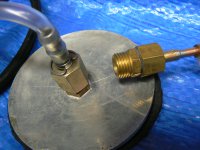
So, thought I'd have a go at making one. I've actually been thinking of doing this since I realized a nice dished aluminium "washer thingy", which had been part of the transport securing fittings on an old washing machine, would be a good starting point. I have a box of various fittings which I rifled through and between that and some brake stuff I came up with this:
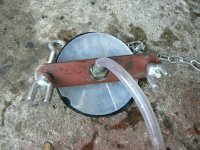
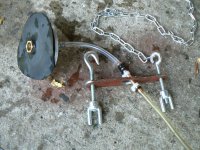
The hooks are actually a M6 turnbuckle cut in half and the big seal is a circle cut from an old inner tube. You have to remember that because it was a turnbuckle one of the screws tightens clockwise and the other anticlockwise - I can live with that. Talking about "life" I'm not too sure how well the rubber seal will fare. The brake fluid is going to attack it but I'm banking on it not giving in during a quick bleeding operation. If it proves to be problematic I've heard of a type of rubber sheeting used in roofing which will resist it - I've a friend who's a roofer!
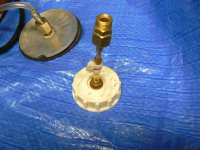
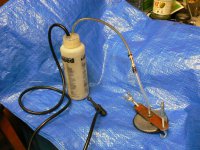
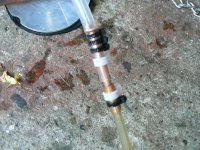
The proof of the "pudding" is always in the "eating" though isn't it? So having cobbled it all together it was time to pressure test it. I had to cut the original end off and join it to the pressure vessel:
It's all a bit Heath Robinson and I wouldn't have been surprised if it leaked all over the place, but I didn't want to spend much money in case it didn't work - I was particularly concerned over whether a seal could be achieved on to the master cylinder. So, how to pressure test it? Just by chance I had a curry mix jar in the glass recycling which had a neck size similar to the Honda's! So I coupled it all up and hauled Twinkle's spare tyre out to use in the time honoured fashion:
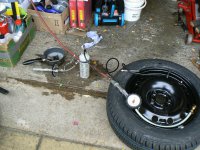
I started off at 5psi and worked up in 5psi increments to about 35psi checking with soapy water for leaks every time.
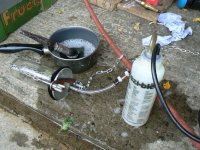
I was a little worried about the jar maybe blowing up so I kept it covered with an old sheet each time I made the new connection but it was fine. (wonder how much it could take?) Gunson recommend that you not exceed 20psi and I actually blew a reservoir off the master cylinder once by trying to force things! so I think if it can stand around 35psi it's going to work just fine.
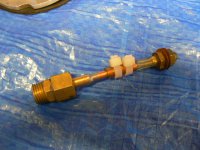
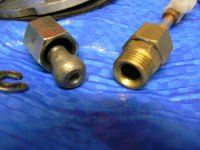
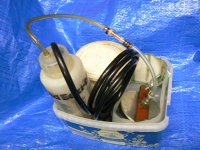
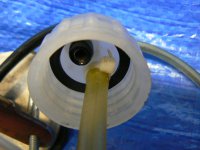
Now I have the problem of adapting the original caps, which came with the kit when I bought it many years ago, so I can use them when I don't, or can't, use the universal one. I've already sorted out some suitable bits and pieces but just ran out of steam to do anything much with them:
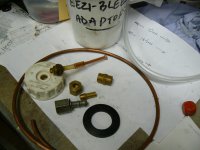
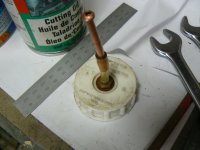
Maybe tomorrow? At least I'm now prepared when I get my hands on the Jazz again. Discs and Pads are waiting eagerly under my workbench. Just hope the calipers wind back nicely - but, on an 11 year old car, maybe I'm being too optimistic?
I was going to just buy a universal cap. There are a number of universal master cylinder caps on the market. Indeed Gunson do one. I started reading the reviews and there are quite a number of instances of people finding it impossible to effect a seal due to these caps not being substantial enough to resist distorting when done up tightly enough and the last thing you need is a nicely atomized spray of brake fluid - which you probably won't know is happening (until it's way to late) because you are going to be down at a wheel actually doing the bleeding.
So, thought I'd have a go at making one. I've actually been thinking of doing this since I realized a nice dished aluminium "washer thingy", which had been part of the transport securing fittings on an old washing machine, would be a good starting point. I have a box of various fittings which I rifled through and between that and some brake stuff I came up with this:


The hooks are actually a M6 turnbuckle cut in half and the big seal is a circle cut from an old inner tube. You have to remember that because it was a turnbuckle one of the screws tightens clockwise and the other anticlockwise - I can live with that. Talking about "life" I'm not too sure how well the rubber seal will fare. The brake fluid is going to attack it but I'm banking on it not giving in during a quick bleeding operation. If it proves to be problematic I've heard of a type of rubber sheeting used in roofing which will resist it - I've a friend who's a roofer!
The proof of the "pudding" is always in the "eating" though isn't it? So having cobbled it all together it was time to pressure test it. I had to cut the original end off and join it to the pressure vessel:

It's all a bit Heath Robinson and I wouldn't have been surprised if it leaked all over the place, but I didn't want to spend much money in case it didn't work - I was particularly concerned over whether a seal could be achieved on to the master cylinder. So, how to pressure test it? Just by chance I had a curry mix jar in the glass recycling which had a neck size similar to the Honda's! So I coupled it all up and hauled Twinkle's spare tyre out to use in the time honoured fashion:

I started off at 5psi and worked up in 5psi increments to about 35psi checking with soapy water for leaks every time.

I was a little worried about the jar maybe blowing up so I kept it covered with an old sheet each time I made the new connection but it was fine. (wonder how much it could take?) Gunson recommend that you not exceed 20psi and I actually blew a reservoir off the master cylinder once by trying to force things! so I think if it can stand around 35psi it's going to work just fine.
Now I have the problem of adapting the original caps, which came with the kit when I bought it many years ago, so I can use them when I don't, or can't, use the universal one. I've already sorted out some suitable bits and pieces but just ran out of steam to do anything much with them:


Maybe tomorrow? At least I'm now prepared when I get my hands on the Jazz again. Discs and Pads are waiting eagerly under my workbench. Just hope the calipers wind back nicely - but, on an 11 year old car, maybe I'm being too optimistic?


