removing ceiling/Installing insulation Marea weekend
I live in France, and in the summer, temperatures easily and regularly pass 35-40 celcius in the sun, and the interior of the car can even reach 50 celcius, i dont have a garage to park my car in, and so the internal temperature of the car can be stifling, often too hot to get into without running the AC for 10 minutes before a journey.
So, in an effort to reduce this problem, i have tinted the rear windows and found that the ceiling was still very hot, insulation alors!
Tools required, Insulation of choice, i used 5 ply stuff, 3 layers of silver plastic and 2 layers fluffly foam, cross-head screwdriver, small levering device of your choice. scissors/Stanley knife.
trimmings
the first step is to remove all the ceiling fittings, the sun visors, the handles above the doors, all the interior lights and the holding screws behind the rear interior lights (best to disconnect the fittings and tuck the wires into the holes, well out the way), certain trimmings around the outside. these include, the top half of the two trimmings either side of the windscreen, and all the door rubbers.


the boot
when the passenger section is free of trimmings, you move to the boot section. In order to free the ceiling enough to remove it, you will need to remove a few screws from the trimmings around the rear windows, remove the caps here and remove the screws,

move further back and do the same thing with the caps on the back pillars. afterwards the central piece of the rear trimming in between the boot hinges just pops off,

revealing two gold coloured screws (either side of the scotch tape, which meed to be removed, once these are out full gently on the trimming to reveal two push studs holding the ceiling in place . these should just pull out, but a fork like tool always helps.
 .
.
move further back and do the same thing with the caps on the back pillars. afterwards the central piece of the rear trimming in between the boot hinges just pops off,
revealing two gold coloured screws (either side of the scotch tape, which meed to be removed, once these are out full gently on the trimming to reveal two push studs holding the ceiling in place . these should just pull out, but a fork like tool always helps.
.the ceiling comes out
now you have removed all the fittings and trimmings which stop the ceiling from moving, you can start to slide the ceiling towards the front of the car,

being very careful not to force too much or do as i did, rip off the rear view mirror!!! OH CRAP it took some glass with it OOOOHHHH CRAAAAP!!!!!!!

luckily the window still has integrity and a bit of super glue put the mirror back in place, but from now on i will be constantly worried that a crack will appear from this one day.
once clear of all remaining objects, the ceiling will slide into the space between the dash and the windscreen, then you can pop it out of the rear trimmings and slide it out the boot. when doing this, be aware that the ceiling is actually glued to the roof, and frustration will hinder your efforts, gently prise the piece away rather than yanking.

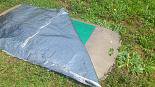
here i just placed the insulation on top of the ceiling and cut very roughly to size with scissors

i didn't use any glue, although this might be a step for the more exigent among you, but to be honest the way i did it is fine, you just tuck any overhangs into the void once it's back in place. with the insulation in place the ceiling goes back in (haynes style) the way it came out.


pop the end of the ceiling back into the trimming
 ,
, and pull towards the rear.
refit all the handles above the doors, the rubber seals, the trimmings etc, and re glue the rear view mirror back into place (optional)
")
enjoy getting into your cool(er) car :slayer: