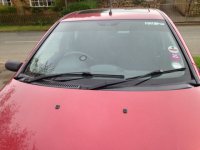
Ever since I've had my Punto, I've had various problems with my front wipers, and tried pretty much all the fixes on here (in the Guides, and on the Forum itself), including the Wipex reinforced linkages. 
But the problems have become so regular, now -- including completely locking up, in a rainstorm, on the M42... -- that I've decided to replace the complete motor assembly: especially as the arms have started to sit in different places, each time they're parked, and occasionally hit either the scuttle or the weather strip on the side of the windscreen.
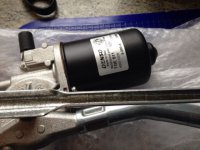
So, here's the new motor, ready to be installed -- and it arrived nicely greased, too!
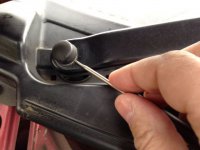
First step is to remove the wiper arms -- beginning with the wiper arm spindle nut cover (see Haynes chapter 12, section 17). If the blades are parked in the correct place -- and the Haynes manual suggests you "operate the wiper motor, then switch it off so that the wiper arm returns to the at-rest/parked position" -- you can either use a strip of masking tape on the glass to mark their position, or rely on the two little clear circles printed into the bottom of the screen surround....
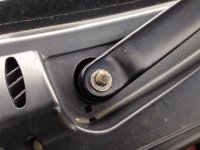
You then need to undo the 13 mm nuts, holding on the arms. Both of mine came off easily, because of all the prior maintenance -- but you might find soaking them in a penetrating oil (or even WD40) prior to removal helps loosen them.
Remove the wiper arms (the longer bladed one is for the driver's side; the shorter for the passenger side), and the washers. (If you wish: now is a good time to put some new blades on. I personally go for Bosch Aerotwin Retrofit Flat wipers: 22" and 18".)
Before attempting to remove the windscreen scuttle grille panel (Haynes chapter 11, section 22), open the bonnet -- which you will find you keep opening and closing, as you work through all this: so I won't keep going on about it... -- and remove the weather strip clips from each end:
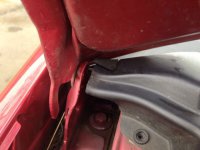
These are marked DX (right -- as you sit inside the car, looking forward) and SX (left): so you can't get them confused.
Unscrew the three screws that hold the panel in (one at each end; one in the centre); lift the panel up at the front; them pull it forward to disengage it from the locating clips at the back.
Getting the scuttle panel out itself is best done passenger side first (avoiding the pipe that feeds the nozzles); and you need not to be afraid of flexing it a little. You should then be able to pull it out, underneath the rear of the raised bonnet.
Once you've done all that, you're faced with the wiper motor itself:
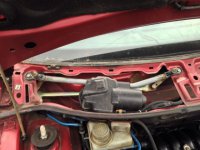
Lift off the wiper motor protective cover and disconnect the wiring connector:
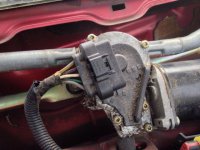
I then lowered the bonnet, before removing the two retaining 10 mm bolts and washers (one at each end):
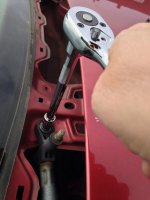
You can then left the old motor and linkages out (in one piece) -- again, passenger side first.
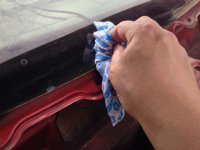
Now is a good time to give the scuttle and the bottom of the windscreen a jolly good clean. Don't forget the outside of the hinges; the two drains; and around the weather strips, on each side! (You can see one of the locating circles, in this picture: showing where the wiper blade should park.)
But the problems have become so regular, now -- including completely locking up, in a rainstorm, on the M42... -- that I've decided to replace the complete motor assembly: especially as the arms have started to sit in different places, each time they're parked, and occasionally hit either the scuttle or the weather strip on the side of the windscreen.

So, here's the new motor, ready to be installed -- and it arrived nicely greased, too!

First step is to remove the wiper arms -- beginning with the wiper arm spindle nut cover (see Haynes chapter 12, section 17). If the blades are parked in the correct place -- and the Haynes manual suggests you "operate the wiper motor, then switch it off so that the wiper arm returns to the at-rest/parked position" -- you can either use a strip of masking tape on the glass to mark their position, or rely on the two little clear circles printed into the bottom of the screen surround....

You then need to undo the 13 mm nuts, holding on the arms. Both of mine came off easily, because of all the prior maintenance -- but you might find soaking them in a penetrating oil (or even WD40) prior to removal helps loosen them.

Remove the wiper arms (the longer bladed one is for the driver's side; the shorter for the passenger side), and the washers. (If you wish: now is a good time to put some new blades on. I personally go for Bosch Aerotwin Retrofit Flat wipers: 22" and 18".)
Before attempting to remove the windscreen scuttle grille panel (Haynes chapter 11, section 22), open the bonnet -- which you will find you keep opening and closing, as you work through all this: so I won't keep going on about it... -- and remove the weather strip clips from each end:

These are marked DX (right -- as you sit inside the car, looking forward) and SX (left): so you can't get them confused.
Unscrew the three screws that hold the panel in (one at each end; one in the centre); lift the panel up at the front; them pull it forward to disengage it from the locating clips at the back.
Getting the scuttle panel out itself is best done passenger side first (avoiding the pipe that feeds the nozzles); and you need not to be afraid of flexing it a little. You should then be able to pull it out, underneath the rear of the raised bonnet.
Once you've done all that, you're faced with the wiper motor itself:

Lift off the wiper motor protective cover and disconnect the wiring connector:

I then lowered the bonnet, before removing the two retaining 10 mm bolts and washers (one at each end):

You can then left the old motor and linkages out (in one piece) -- again, passenger side first.
Now is a good time to give the scuttle and the bottom of the windscreen a jolly good clean. Don't forget the outside of the hinges; the two drains; and around the weather strips, on each side! (You can see one of the locating circles, in this picture: showing where the wiper blade should park.)

Fitting the replacement motor
When placing the new motor in position, make sure you put the driver side in first (as the linkage goes under the bracket); and that this bit...
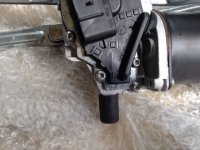
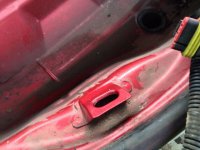
...slots into this, at the front of the scuttle:
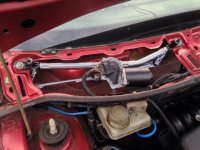
As the Haynes will tell you, "refitting is a reversal of removal": so bolt the motor in, using the two 10 mm bolts and washers; and reconnect the wiring connector:
This is a good time to check that your new motor works: so put the ignition on, and check that the spindles move with the wiper controls -- i.e. intermittent, speeds one and two, and the upwards single wipe! This will also ensure that the new assembly is sat in the at-rest/park position.
Now, turn the ignition off, and replace the wiper motor protective cover, and then the scuttle grille panel -- not forgetting the two weather strip clips (one at each end):
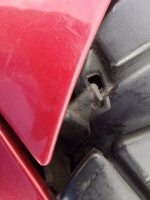
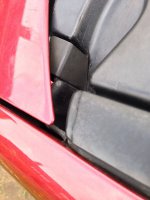
As you can see, the holes on the end of my weather strips are fairly knackered -- but the clips still do a good job of holding everything together: holding the rubber on to the top of the scuttle panel.
Ensure the scuttle panel is clipped nicely onto the bottom of the windscreen, with no gaps; that the weather strips down the side of the window are neatly overlapping the panel; and the wiper spindles are centred in the relevant holes; and replace the three screws which hold it on. It should now look like this...
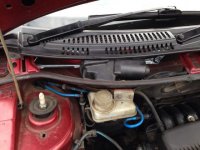
...except, of course, without the arms being refitted... -- but I forgot to take a photo. (Sorry).

...slots into this, at the front of the scuttle:

As the Haynes will tell you, "refitting is a reversal of removal": so bolt the motor in, using the two 10 mm bolts and washers; and reconnect the wiring connector:

This is a good time to check that your new motor works: so put the ignition on, and check that the spindles move with the wiper controls -- i.e. intermittent, speeds one and two, and the upwards single wipe! This will also ensure that the new assembly is sat in the at-rest/park position.
Now, turn the ignition off, and replace the wiper motor protective cover, and then the scuttle grille panel -- not forgetting the two weather strip clips (one at each end):


As you can see, the holes on the end of my weather strips are fairly knackered -- but the clips still do a good job of holding everything together: holding the rubber on to the top of the scuttle panel.
Ensure the scuttle panel is clipped nicely onto the bottom of the windscreen, with no gaps; that the weather strips down the side of the window are neatly overlapping the panel; and the wiper spindles are centred in the relevant holes; and replace the three screws which hold it on. It should now look like this...

...except, of course, without the arms being refitted... -- but I forgot to take a photo. (Sorry).
Refitting the wiper arms, and testing
When you refit the wiper arms, ensure that they are clean and dry; and then align either with your masking tape, or the circles, mentioned above. Make sure the arms are firmly on the spindles when getting the alignment correct. Refit the 13 mm nuts and washers, and hand tighten -- again ensuring the arms are firmly on the spindles.
Check that the arms and blades sweep the correct area of the screen -- don't hit either the scuttle or the weather strip at the side of the windscreen, or each other...
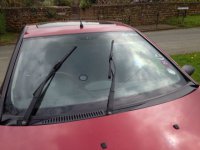
...and then tighten up the two nuts; and replace the nut covers.
This is how mine now looks:
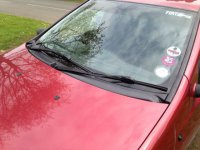
Job done!
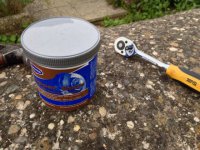
Two items -- apart from a good ratcheted screwdriver... -- you will find indispensable! The one on the left is for @Ziggy122! :worship:
Check that the arms and blades sweep the correct area of the screen -- don't hit either the scuttle or the weather strip at the side of the windscreen, or each other...

...and then tighten up the two nuts; and replace the nut covers.
This is how mine now looks:

Job done!
Two items -- apart from a good ratcheted screwdriver... -- you will find indispensable! The one on the left is for @Ziggy122! :worship:


