Fuel pump in the petrol engine should make 3,5 bar (little drop is acceptable, like 0,1-0,2 bar, no problem - it must be serious drop to cause problems, like a half or full 1 bar). Pressure on the rail in the engine bay, in theory. But you can check it also at the pump outlet (easy with pneumatic quick connector for example - diameter is 8 mm if I remember right - and suitable pressure gauge, manometer).
If your car is 10 years old or more, it's worth checking the pump (pressure and screen filter) and the tank visually (if there's any dirt inside). Mine was absolutely clean (inlet + tank), and the pump makes 3,4 bar.
Pump is under the rear seat and the plastic cover. To avoid contamination clean everything before undoing the electrical connector, fuel line, and the nut.
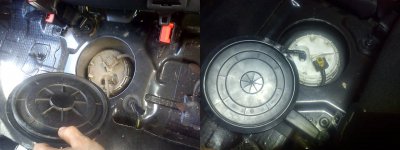
You can try old tricks like this (hitting with chisels, pouring hot water on the nut to soften/enlarge it etc.), but be prepared in case of failure. Example: Punto 1.
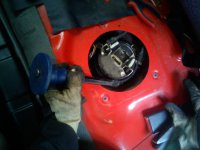
There are tools for undoing fuel pump nuts ("caps"). Like this...
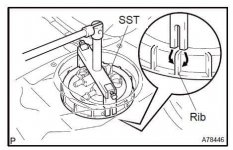
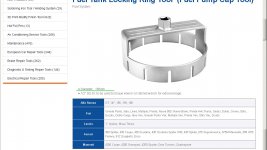
...or this style ("ring"). Example website: https://www.autotool.com.tw/products/detail/5462.html
Other "method" is to destroy the nut and buy a new one everytime. Nuts are available, seals too.
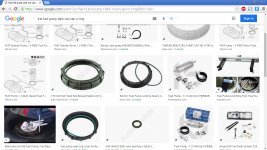
Technically speaking, seals are not an "O" rings (because cross-section is not round)...
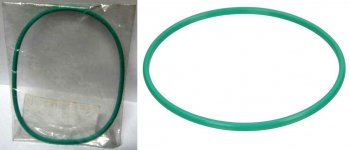
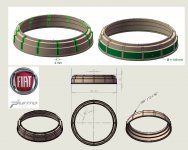
So the nut nominal size (OD) is about 150 mm. There are 12 equally spaced ribs (4 mm wide). That's enough info to make a DIY tool.
I've made my own tool, just because I can. Scrap metal + welder + angle grinder + file. Nut was very hard to undo (needed extension pipe on the T-handle + full body weight on the tool, to hold it steady on the nut)! That's the main lesson here, key point of the Guide. You may need a special tool, no way around it.
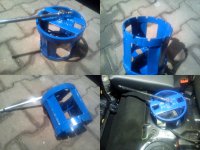
If you'll ever do such tool, you don't need all 12 ribs precisely engaging (hard to do), 3-4 touching is enough.
Fuel pump assembly can be removed from the tank (without detaching the level sensor arm), but it requires some serious maneuvering. Plus, there will be a lot of fuel in the housing. You can drain it by pressing the orange/brown rubber (one way valve). Otherwise you'll make a mess (fuel spill all over the place).
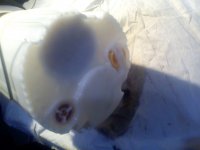
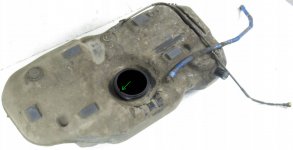
Pump removed. Inspect it visually. Plus tank (for any debris at the bottom - should be spotless).
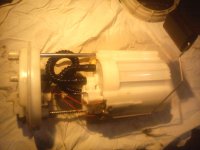
During removal, most fragile part is a level sensor and the floater arm. Don't break or bend it.
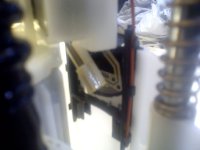
And the most important part is the inlet screen filter. Should be clean. If it is, we assume, that next filter (inside the screen is another one, paper filter - that's why Grande has no external filters) is OK too.
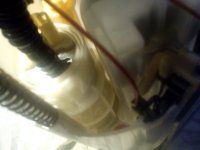
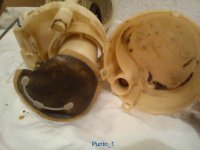
Comparing it to the generation 1. Dirt in the tank and on the screen = bad pump, worn out.
Mind the "clocking" (position) of the pump during installing it back in the tank. There's a "key" feature, cutout in the tank (and pump has a corresponding key).
If your car is 10 years old or more, it's worth checking the pump (pressure and screen filter) and the tank visually (if there's any dirt inside). Mine was absolutely clean (inlet + tank), and the pump makes 3,4 bar.
Pump is under the rear seat and the plastic cover. To avoid contamination clean everything before undoing the electrical connector, fuel line, and the nut.

You can try old tricks like this (hitting with chisels, pouring hot water on the nut to soften/enlarge it etc.), but be prepared in case of failure. Example: Punto 1.

There are tools for undoing fuel pump nuts ("caps"). Like this...

...or this style ("ring"). Example website: https://www.autotool.com.tw/products/detail/5462.html

Other "method" is to destroy the nut and buy a new one everytime. Nuts are available, seals too.

Technically speaking, seals are not an "O" rings (because cross-section is not round)...

So the nut nominal size (OD) is about 150 mm. There are 12 equally spaced ribs (4 mm wide). That's enough info to make a DIY tool.

I've made my own tool, just because I can. Scrap metal + welder + angle grinder + file. Nut was very hard to undo (needed extension pipe on the T-handle + full body weight on the tool, to hold it steady on the nut)! That's the main lesson here, key point of the Guide. You may need a special tool, no way around it.

If you'll ever do such tool, you don't need all 12 ribs precisely engaging (hard to do), 3-4 touching is enough.
Fuel pump assembly can be removed from the tank (without detaching the level sensor arm), but it requires some serious maneuvering. Plus, there will be a lot of fuel in the housing. You can drain it by pressing the orange/brown rubber (one way valve). Otherwise you'll make a mess (fuel spill all over the place).

Pump removed. Inspect it visually. Plus tank (for any debris at the bottom - should be spotless).

During removal, most fragile part is a level sensor and the floater arm. Don't break or bend it.

And the most important part is the inlet screen filter. Should be clean. If it is, we assume, that next filter (inside the screen is another one, paper filter - that's why Grande has no external filters) is OK too.

Comparing it to the generation 1. Dirt in the tank and on the screen = bad pump, worn out.

Mind the "clocking" (position) of the pump during installing it back in the tank. There's a "key" feature, cutout in the tank (and pump has a corresponding key).


