

You are using an out of date browser. It may not display this or other websites correctly.
You should upgrade or use an alternative browser.
You should upgrade or use an alternative browser.
500 (Classic) Giovanni - 1972 500R
- Added by Fatcatvera
- Create date
- Updated
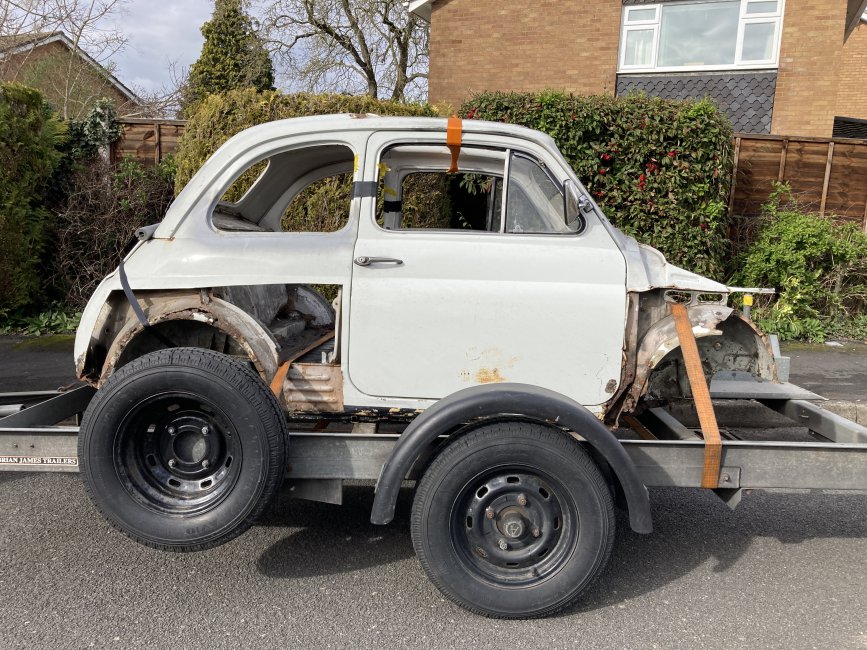
1972 500R in need of a pretty thorough restoration!
All the structural work and welding on the bodyshell is now complete.
Scuttle welded in position along with the front panel and wings. It wasn't a perfect fit where it meets the original parts of the A-post by the windscreen, but again a skim of filler will make it look right. Getting the whole lot to line up was a bit fiddly.

Once the front end was all welded in place I cut out the framework as there was now no risk that the body could deform.
I then welded in place teh repair panels I had previously made for the bottom of the B-posts. At the same time I made up two formers and made panels to repair the A-posts and then weld those in place.


As I've mentioned previously the LH gutter and roof had been damaged at some point in history. The gutter condition was not recoverable so I cut it off, folded up a new section of gutter and welded it in position.


There were a few little repairs required to the roof where the LH rear of the hood attaches. The other hole is also repaired, but I haven't got a picture of that to hand....

And that's it for all the welding. It's all done...at last.
Now on to preparation for making it look shiny and white again!


It's been a while since the last update of how the bodywork is progressing, but I've managed to get quite a lot done....
The LHS of the car is now back together from the a-post rearwards. I had to do a repair to the end of the gutter as the new rear quarter panel didn't align properly with the end of the existing gutter. I've used some M5 rivnuts for the fixings of the grille above the engine lid rather than using self-tappers as I've never liked using screws for that sort of thing.

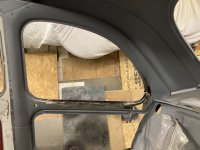
Some detail of the repair to the lower corner of the rear window aperture. This had been poorly repaired in the past so i cut that repair out and made a better job. It'll need a bit of filler to get the shape right.

I drew up some press tools in CAD and 3D printed them to make the inner surround part. I was happy that the tool worked and then welded the part in place. Again, a little bit of filler required to get it just right.


Next onto the rear right hand corner of the engine bay. The corner fillet panel had been used as a jacking point at some time and been crushed, then become rusty, so I cut it out before the shell was blasted. I made a panel and then installed it


Then onto the most expensive panel of the reconstruction - the dash. To cut the old one out and fit the new one only took a couple of hours....the new panel was a very good fit.


Now it's time to move to the front of the car. Scuttle next, then the wings/front panel/inner front panel.
Last edited:
Time to work on the shell has been a bit sporadic recently, but the floor panel has now been installed along with the rear inner cill panels:-


A bit of jiggery-pokery and the inner and outer cills have also been installed to the RHS:-

RHR wheel house outer eyebrow panel installed after checking positioning with dummy fitment of the rear wing panel:-

Before the rear wing panel could be fitted there was a repair required to the horizontal rail below teh rear side window. There was a very poor quality repair that had been made at some point in the past. So I made a jig to form the panel and then welded it in place:-


A coating of zinc primer on the hard to get to bits and the rear quarter is fitted in position ready for welding:-


Attachments
I managed to agree a day with the shotblaster to pop over with the bodyshell and wait while it was blasted so that I can take it back immediately get some zinc primer on it. I used Lankies Refurb in Redditch, UK. Mark is a great guy and easy to deal with, I'd absolutely recommend him if anyone needs some shotblasting/powder coating carried out.
To get the bodyshell there I squeezed it inside my SWB Renault Trafic - it was a tight squeeze indeed and I had to remove the front passenger seats to fit it in...
At Lankies, pre-blasting:-

And after blasting....with Mark Handley (Lankie himself!) in the background:-


Then back to base for a coat of zinc primer:-

Now just the small task of building the shell back up into what most people would recognise to be a 'car'!
Whilst waiting to get the shell off to eb blasted I've been making a few panels that I haven't bought, or it is not possible to buy.
Rear Inner Cill Panels.
I know it's possible to buy these, but I fancied having a go at making some....there's a bit of trimming to be done as they are installed.

Lower inner B-post panels
It's not possible to buy these. If anybody wants some let me know and I'll make some more. Again, some trimming required as they are installed.


So I've finally managed to the the bodyshell (almost) ready to head off to the shotblaster. There's just a small piece of floor panel to remove where it overlaps the bulkhead on LHF - another hour's work or so.


On stripping the roof I've noticed that unfortunately there quite a lot of (accident?) damage to the roof panel on the LHS above the gutter. Not a lot I can do to pull it out, so it'll just have to filled again like it was before...
Last edited: