17717052334_1044bd2216_b.jpg

900 Bluebell the 900e Amigo

Introduction

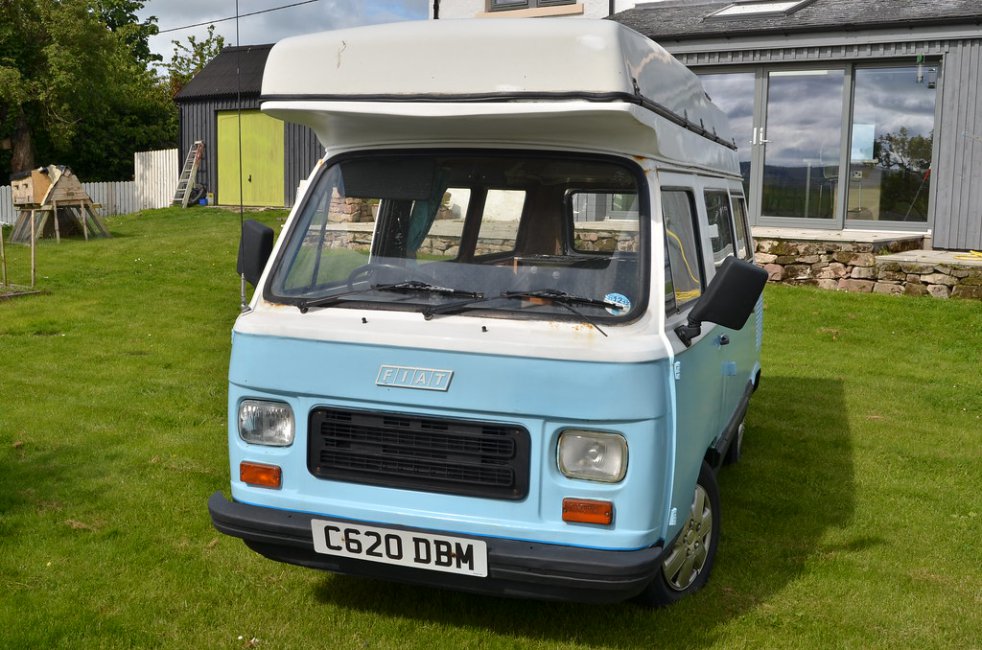
We have just taken on the ownership of this camper from Kelly and Karl and hope to have it on the road within the next six months.
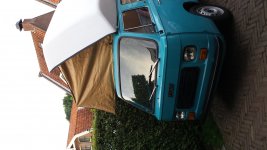
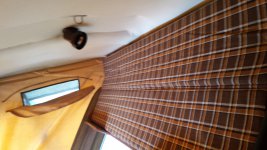
17717052334_1044bd2216_b.jpgDSC_6177 by Peter Thompson, on Flickr
Not only is it a really lovely vehicle, it was also a pleasure to buy it from such a genuine and really nice couple. There was a huge amount of interest in the sale and I am really appreciative that I was favoured to be the buyer ; so many thanks Karl.:)
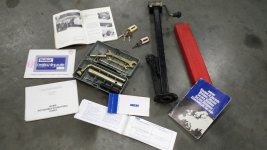
18335728502_1005bcd374_b.jpgDSC_6176 by Peter Thompson, on Flickr
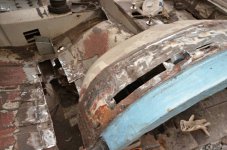
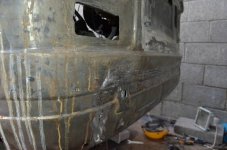
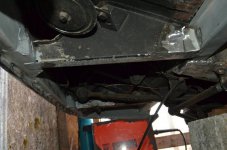
There is a certain amount of essential welding to do underneath, which will add to the welding that has been done in the past. It is currently pretty solid underneath but not as pretty as it could be. I hope to tidy as I go and then work around the bodywork. This has signs of a lot of filler and there is rust poking through in places, but it looks like we will be able to get using it soon.
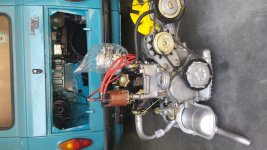
There are a number of mechanical issue but nothing too onerous and it starts and runs really well.
So a rolling restoration to usable standards.
I just need to get the roof open now!
Watch this space as I document my progress.
I just acquired an original 1981 brochure for the Amigo And Caravelle. My van is 1985. The brochure is fantastic and will really help fit the thing out.
An interesting point is that it says that the differences between the models included, on the Caravelle, front seats that swivelled over to face the rear, a fridge, upstairs "wardrobe", fewer seats and the beds all upstairs. This is exactly what I have. So I wonder under what name the " Sleeping Giant"was actually marketed and do earlier Amigos not have fridges from new?
 
Hi
Connie is 1978 vintage. The original layout was a front bench seat (of sorts) and then two rear benches with a table between. The back of the front seat (divider of the two bench seats) folded flat to make up the downstairs double. Definitely no room for a fridge.

I managed to get hold of one of the swivelling seat bases you refer to some years ago - its a mechanical work of art.

As part of the renovation I need to build a new interior - the only thing salvageable from the old one was the sink/cooker. I'm still working out the new layout, I need to accommodate seat belts in the rear (for little one) and make space for our Greyhound - wife insists.

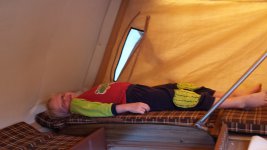
The roof accommodates a couple of hammocks, okay for teenagers but no good for adults. Looking at some of the other Amigos I may rework the top to accommodate a double at one end and a single at the other but need to think it through in more detail.

Must haves for the new layout are an electric hook up, heater & fridge - just got to figure out how to fit them all in.
 
I'll have to scan the brochure as it gives quite a good plan of the layout. I also need to make a new inside, but I will br sticking more or less to the original as this seems the best design possible.
Those reversing seats are clever but from my limited investigation, the way they work facing rearwards is a bit of a compromise.
 
I am making some progress with the support rail under the passenger footwell. It took a whole morning to remove the previous "repairs" which were exceptionally poor. There were blobbed on flaps of steel covering various corroded chassis ends which will need tidying up once the main rail is in.
The floor has also been previously welded over and I am finding there is more of the original still OK underneath than I expected.
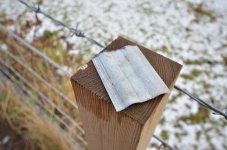
I also had a play with the beading tool to create a stiffening rail which is hidden behingn the front valance. The tool is very easy to use and works quickly. An offcut of my first effort is photographed. In retrospect, I really don't think I needed it, but it is useful for some things which would otherwise need a bit of lateral thinking in order to produce.
Another bottle of gas expired so a few days of preparation for welding is in order.
 

Attachments

  • PT1_5796.JPG
    PT1_5796.JPG
    316.4 KB · Views: 82
  • PT1_5798.JPG
    PT1_5798.JPG
    396.3 KB · Views: 84
  • PT1_5802.JPG
    PT1_5802.JPG
    275 KB · Views: 75
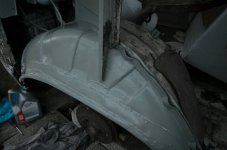
Another three hour grind resulted, among other things, in the removal of a horrible 150mm wide by 600mm long thin, rusty plate of steel which had been "welded" over a series of holes in the wheelarch. I will try to let in smaller patches as needed and do this in stages to keep the integrity of the structure. It looks like the hideously complex closing plate under the arch is in better condition than the other side which will speed things up.
You can see a small piece of chassis end which I made to be fitted once the main rail is in.place.
 

Attachments

  • 1453410841653.jpg
    1453410841653.jpg
    66.7 KB · Views: 82
I'm not sure if my seats are quite right because you seem to sit slightly awkwardly when in the reverse position.
Today, with temperatures well into double figures I cracked open the epoxy primer. It was mainly used on areas which will be hidden by outer panels. I put some over a few outer sections which have been welded to prevent surface rust from condensation. The process was: a final wipe with phosphoric, a water based degreasing, a wipe dry and then further cleaning with panel wipe.
It's all very time consuming, but I have road tested this paint on the 500 and I liken the result to galvanising.
Once done, you can put filler over the paint and with the right number of coats, the metal won't rust even if you don't topcoat for months.
 

Attachments

  • 1453659571700.jpg
    1453659571700.jpg
    38.4 KB · Views: 80
Nice work Peter. I did mine (fiat 900T Amigo XLS) last year. Not as bad, but same technical issues, lot of work. It's a rare car.
 

Attachments

  • 2015-07-18 21.21.33.jpg
    2015-07-18 21.21.33.jpg
    2.5 MB · Views: 60
  • FB_IMG_1436612139367.jpg
    FB_IMG_1436612139367.jpg
    3.3 MB · Views: 80
  • IMG_2483.jpg
    IMG_2483.jpg
    3.8 MB · Views: 63
  • IMG_2499.JPG
    IMG_2499.JPG
    6.2 MB · Views: 59
Hi Bart
I've seen photos of your Amigo on the Facebook page before - nice work.

Looking at these photos again and others I've just realised that the pop-top on yours is significantly higher than on Connie - probably a good 30cm or more. I suspect that this extra height provides the space to store the wider overhang and beds in the roof (only have small bunkbeds in Connie's roof and double bed in bottom).

I was going to re-work the top to put bigger beds in but need to have a rethink now.

By the way, it's just as well that I don't have the higher roof - I'd never fit it into my garage.
 
That's a beauty Bart; I'm very envious of the stage you're at and the quality of the workmanship.
Gary, you should see my roof...very top-heavy! Because it is a two part thing like one of those fibreglass roof lockers for a car.
 
I used to always run with a full water tank and try to keep the fuel tank topped up whenever possible just to keep the centre of gravity down on Connie. This helped stop some of the roll around corners but I suspect that the dampers were on the way out then as well - these will be replaced as part of the restoration.

I've quickly gone off the idea of re-working the roof as this will only add weight in the wrong places.

Anyone know of a good awning that doesn't look out of place on the Amigo?
 
There were two versions of the Amigo, the Spacemaker and the Super Spacemaker. I think mine is a Super Spacemaker. I have a lot of information and old photos but the layout changes with the wind... I have 2 small and one smaller bed in the roof
 

Attachments

  • 2015-07-21 18.52.49.jpg
    2015-07-21 18.52.49.jpg
    2.7 MB · Views: 49
  • 2015-07-21 18.53.07.jpg
    2015-07-21 18.53.07.jpg
    3.1 MB · Views: 46
I bought mine with the original portatent, but I don't tried it yet. There was also a Waterloo toilet.. A full flush toilet in its own little tent! You could store the portatent on the roof rack (max 50 kg), but I think you better couldn't.
 
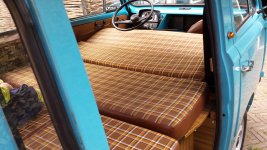
This is my double bed. Comfortable...:bang::bang:
 

Attachments

  • 2015-07-21 18.54.28.jpg
    2015-07-21 18.54.28.jpg
    4 MB · Views: 37
This is my double bed. Comfortable...:bang::bang:

:D:D:D but it is good that you can sleep but don't have to put up the roof.

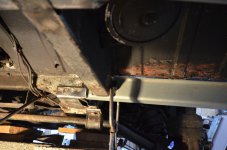
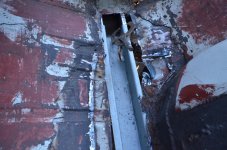
Today, on my van I welded on the pieces I made for under the floor. So that's a new cross member, the end of the rail that T's into it and several parts of the main chassis that carries the anti roll bar.
I have ground smooth where I can reach with the grinder, so now onto the relatively easy bit of the floor.
PT1_5944 by Peter Thompson, on Flickr
PT1_5945 by Peter Thompson, on Flickr
 
Hi
Connie's double bed was pretty much the same as Bart's layout (including brown check). Great fun getting foot caught under the steering wheel and quite a challenge to get in & out with the bed down if it was raining or windy outside.

I think the double bed in the roof looks a bit of challenge, especially if you are over 5 foot tall :) The one thing I can't figure out from the photos is how the overhang is supported to take the weight of someone sleeping up top?

The more that I'm thinking this through the more I think that I will just refit Connie with a table & kitchen - basically a picnic van and have a tent outside to sleep in. Less work to do and won't have to compromise on layout.
 
Gary...you MUSTN'T make Connie into a day van, she was made for sleeping with ;)
If you can get sleeping arrangements in the roof for two then the van itself can be pure picnic paradise. That's how mine will be.
The double is OK for me and I'm average height... ie less than a six footer. But It might be squeeze for two.
The roof has a clever sliding support and this extends over the cab. I don't fancy my chances on a windy night though.
Today I welded on the patched up and panel beaten valance. It doesn't look pretty in the raw but excellent welding, if I may say so.
The whole front now needs fully stripping of paint and then phosphoric and epoxy.
 

Attachments

  • 1454444200429.jpg
    1454444200429.jpg
    49.7 KB · Views: 67
  • 1454444336579.jpg
    1454444336579.jpg
    49.7 KB · Views: 74
Last edited:
Back
Top